

How to connect WiserNotify with G2
Updated Sep 10, 20261 min readConnection guide
On this page · 3 sections
Integrating wisernotify with the G2 review platform
Step 1: Create a G2 connection at wisernotify
– Go to WiserNotify >G2 Integration.
– Click on the Integrate button inside the Integration box.
- Copy your G2 profile review URL from G2.

- Paste the product URL here.

- Enter connection name.
- Now click on the create button.
- Copy the API key from pixel page
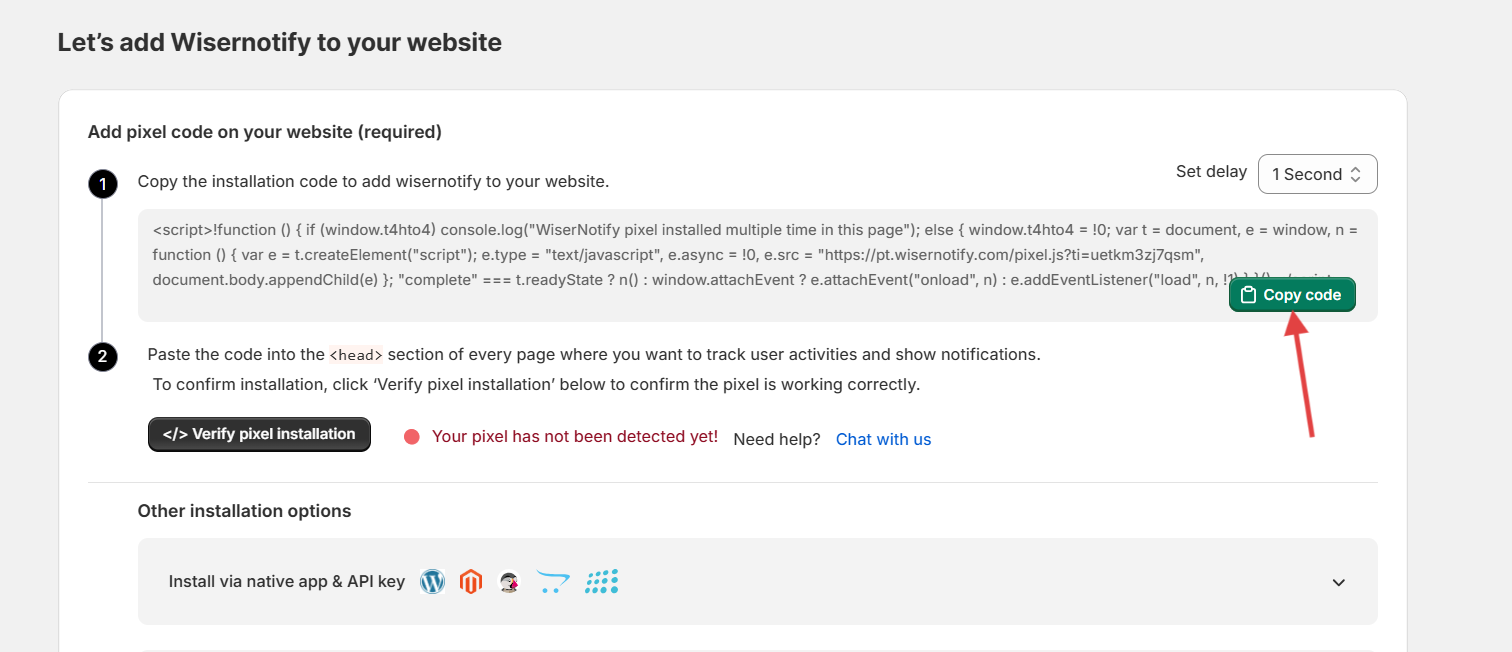
Step 2: Add Wisernotify chrome extension
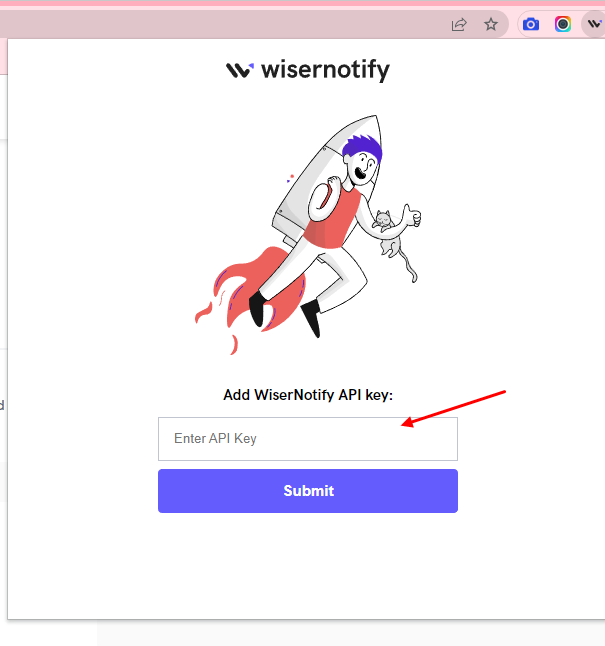
- Install this WiserNotify Chrome extension
- Then Enter the API key in the text box in the Chrome extension.
- Check your review integration list & click on button & sync the reviews.
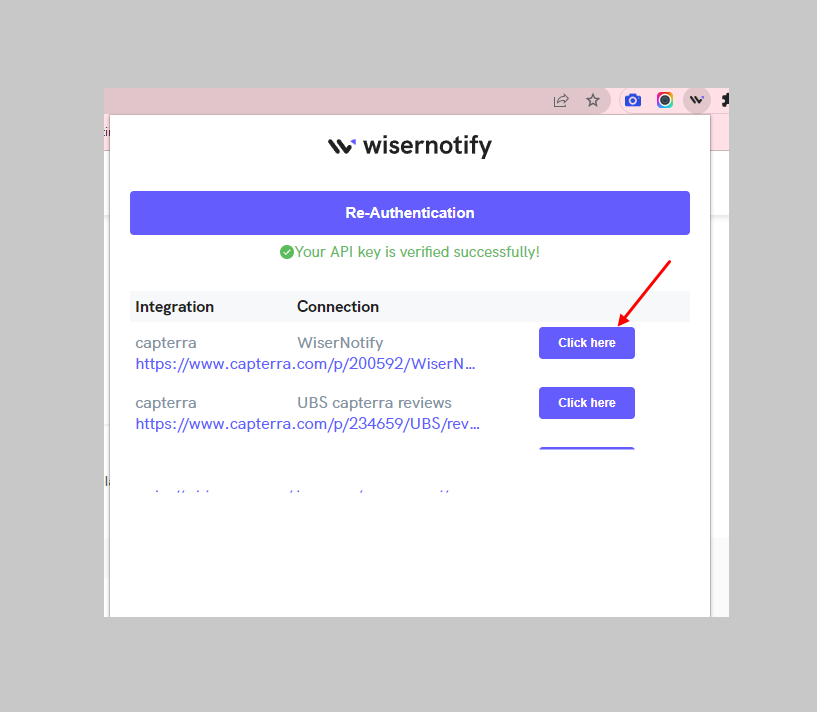
Wait for progress & then visit the WiserNotify- Dashboard Data page.
Here, You can see all the captured/ received data with its source name.
Watch this video on how to use chrome extension.
← PreviousHow to connect WiserNotify with Tiktok FollowerNext →How to connect WiserNotify with Kooneo
Related guides
How to connect WiserNotify with SpotifyHow to Connect WiserNotify with Instagram PostHow to Embed RSS Feed On Your Website
 Still stuck? We'll set it up with youLive chat or a free screen-share call, every day of the year.Chat with support




 Capterra