
Browse categories
How to Import reviews with CSV or add manually?
– Go to WiserNotify > Custom Reviews Integration.
– Click on the Integrate button inside the Integration box.
1. Enter Connection Name
2. Click on the Create button.
3. Click on the Add Reviews button.
Case 1: Add reviews manually
– Add reviews manually will be selected by default.
– Enter reviewers name, image, ratings and text and click on save.
– That’s it, your review has been added. You can add as many reviews as you like. You can check the added reviews using this optio.
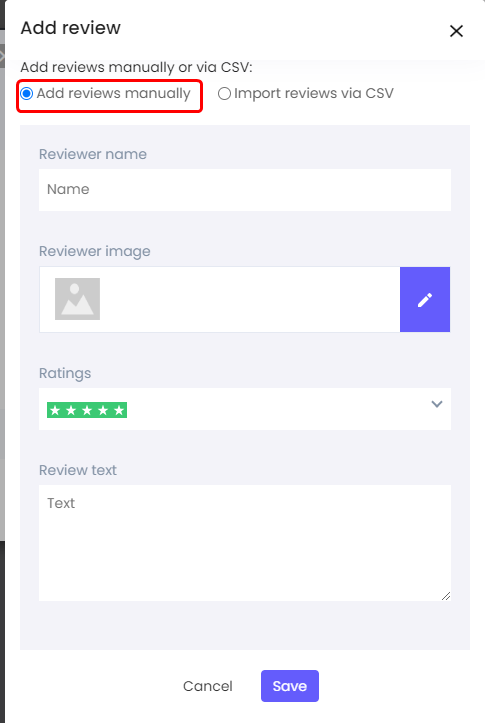
Case 2: Add reviews via CSV
– Now, click on add reviews and a slider will open.
– Now select Import reviews via CSV
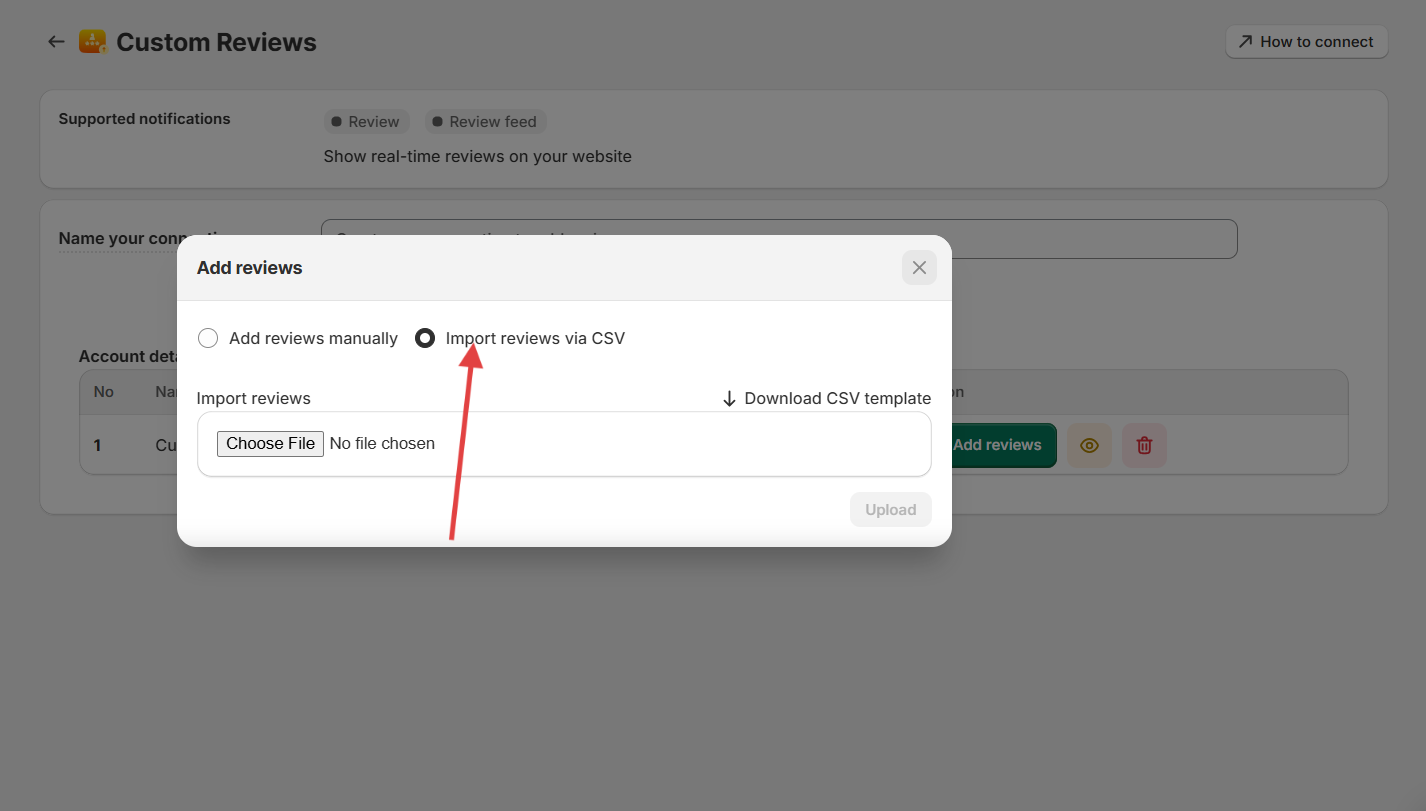
5. Now, you’ll have to fill in the data in the given CSV template. You can download the template from here. Download it and fill in the data.
NOTE: Date format must be MM-DD-YYYY
6. Once the data is filled, upload it and your reviews will be uploaded.
7. That’s it, your reviews has been imported. You can add as many review CSV’s as you want. You can check the added reviews using this option.
NOTE: If your reviews are in non-English languages (like French) then follow this steps.
– Right-click on your CSV file and open it with a normal notepad.
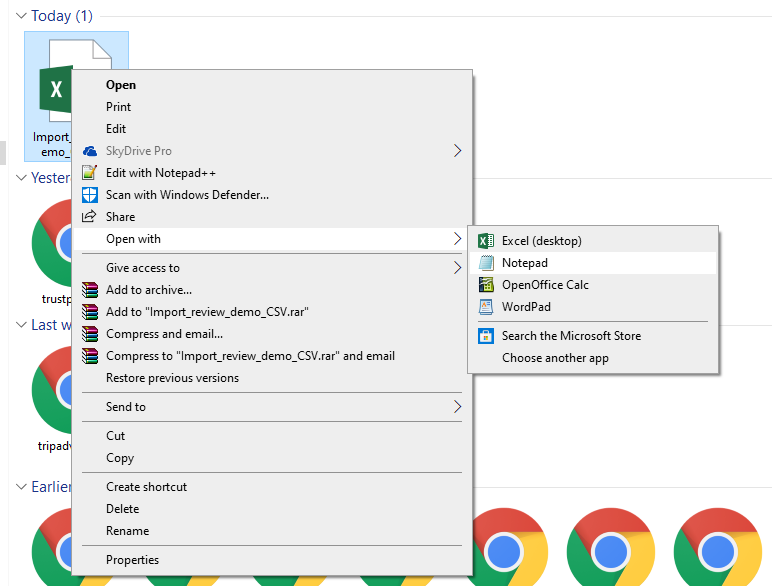
– Now SAVE AS the file and select the All Files option from Save as type.
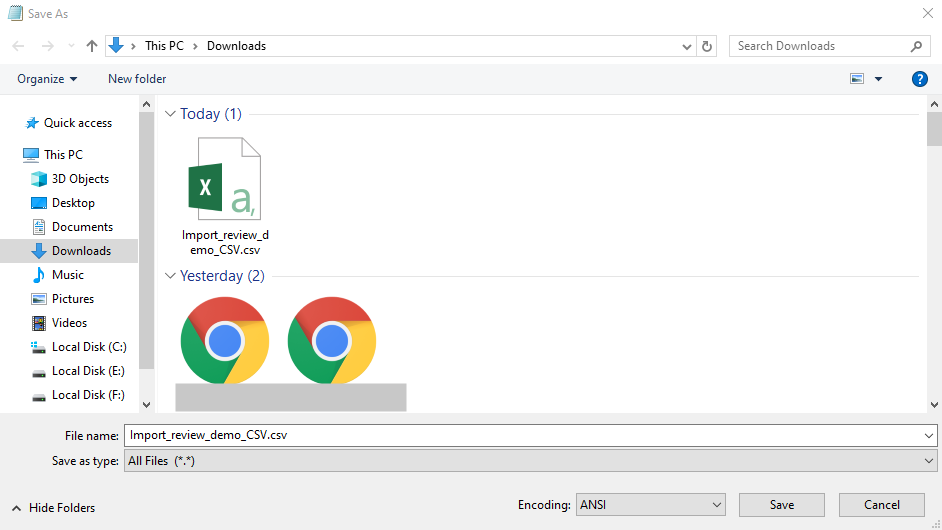
– Select UTF-8 from the Encoding drop-down.
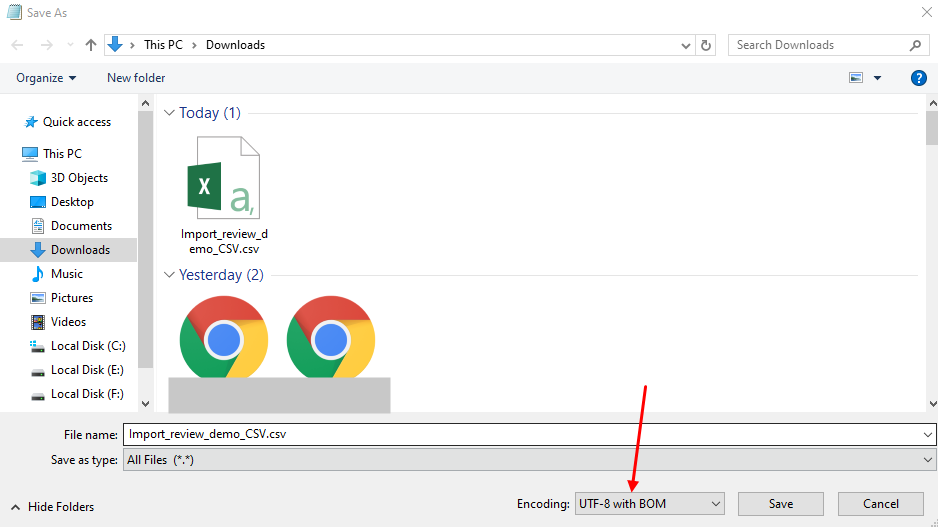
– Now save the file and use this file to import your review to WiserNotify.
Related integration guides
Setting up a different integration? These related WiserNotify integration guides walk through it:
- How to connect WiserNotify with ActiveCampaign? :Wisernotify Support Docs
- How to connect WiserNotify with Activechat? :Wisernotify Support Docs
- How to connect WiserNotify with Agile CRM? :Wisernotify Support Docs
- How to connect WiserNotify with Agiled? :Wisernotify Support Docs
- How to connect WiserNotify with AidaForm? :Wisernotify Support Docs
Still stuck? A human will do it with you
Live chat from your dashboard — real answers in minutes, every day of the year.




 Capterra