This guide will walk you through:
- Capturing Customer Engagement Activities: Connect ActiveChat with WiserNotify using a webhook to fetch real-time chat interactions, new leads, purchases, and other chatbot-triggered events.
Add Webhook Integration to Connect Activechat to pull the events Sales data
Step 1: Get the Webhook URL from WiserNotify
– Go to WiserNotify > Activechat Integration.
– Click on the Integrate button inside the Integration box.
1. Enter Connection Nam
2. Click on the Create button.
3. Click on the copy button.
Step 2: Configure Webhook in Activechat
Login with Activechat
1. Select your bot.

2. Click on the BOT builder button.
3. Click on Skills.

4. Hover on Integrations.
5. Just drag & drop the JSON.
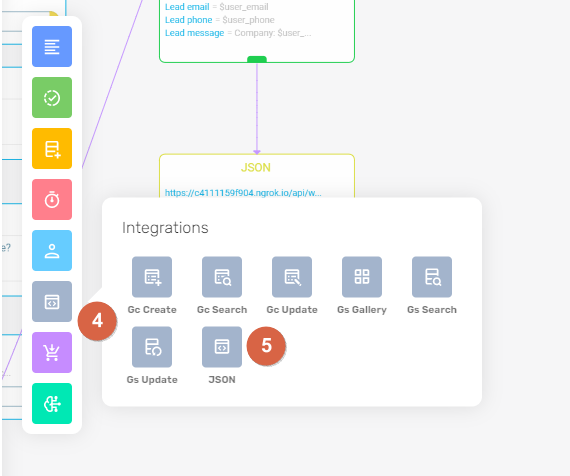
6. Click on the JSON block.
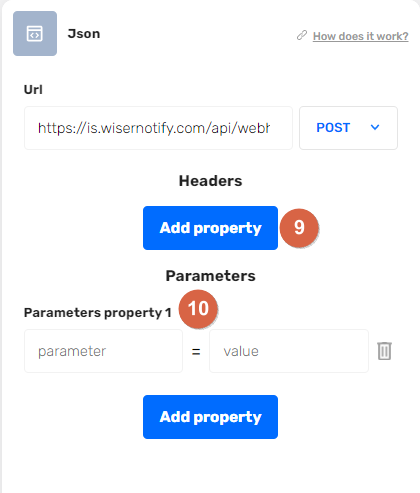
7. Paste your Endpoint in the URL box.
8. Select the POST method from the drop-down.

– Now you have to set the parameters
9. Click on the Add Property button.
10. You can add the parameter name and set its value.
– You can pass other data from there.
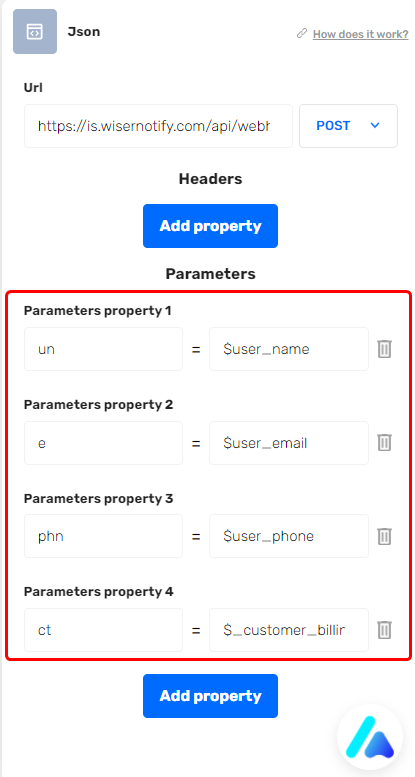
– here is the Example data that can be passed.
{ “un”:”john doe”,//User Name “fn”: “john”,//First Name “ln”: “doe”,//Last Name “e”: “[email protected]”, //Email “phn”: “8569885***”,//Phone Number “ct”: “Mumbai”, //City “st”: “Maharashtra”, //State “cn”: “India”, //Country }
– Done.
Please test by adding new data & visit the WiserNotify Dashboard – Data page. Here, You can see all the captured/ received data with its source name.