
Callback Widget: What It Is and How to Add One (2026)
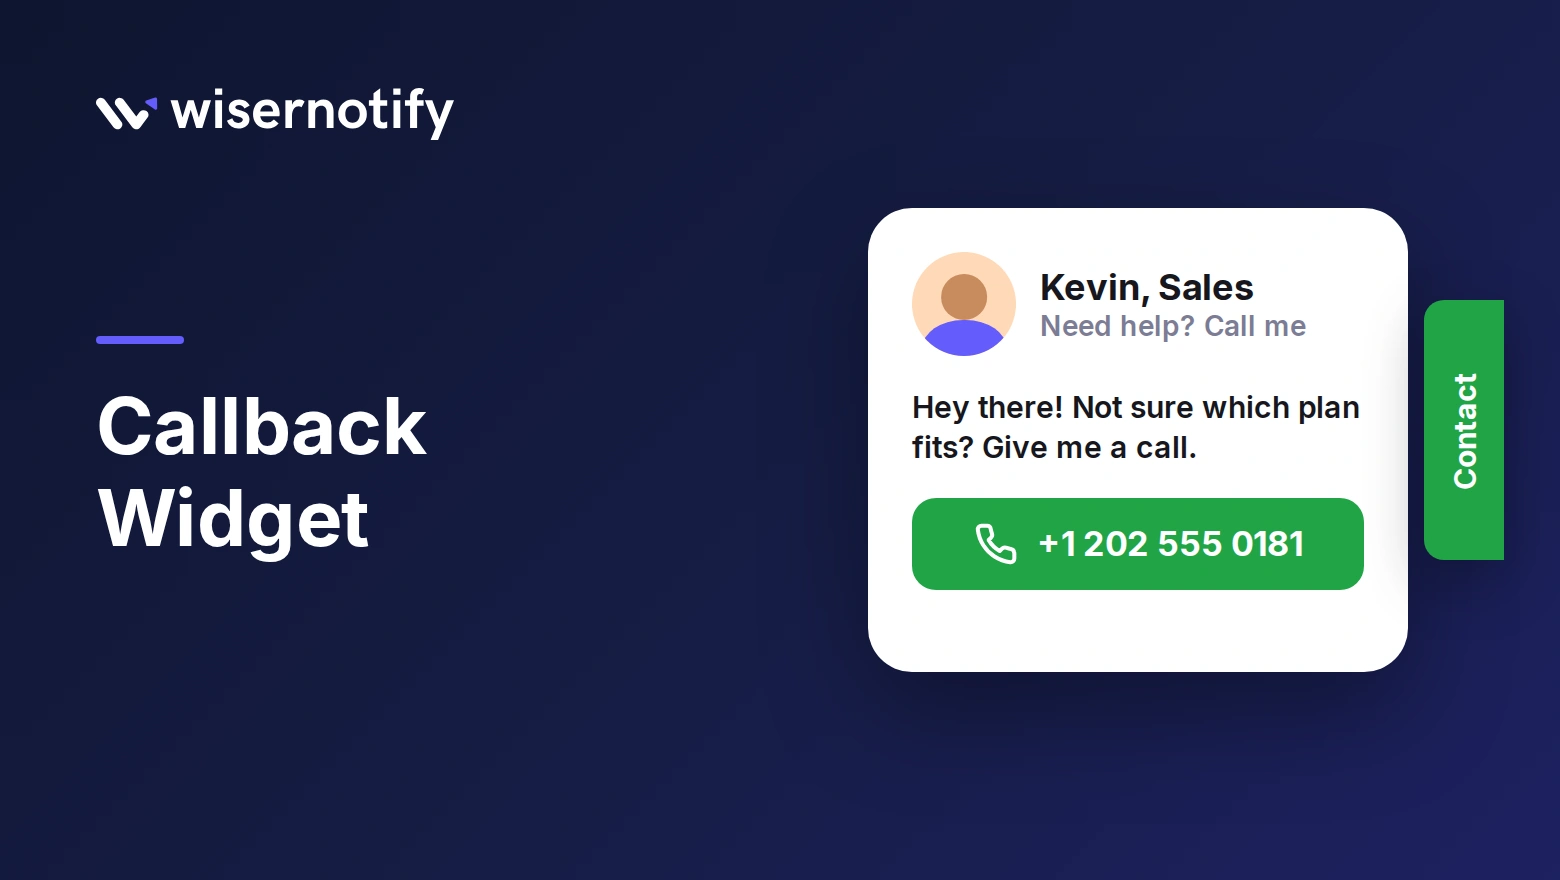
Some visitors would rather talk than type. A callback widget lets them reach a real person from the page they are on.
They tap a phone number, or leave theirs and wait for you to call them back.
It earns its place wherever a question stands between a visitor and a sale, such as services, higher-priced products, courses and B2B software.
This guide covers what a callback widget is, how the two main types differ, how to add one to WordPress, Shopify, Wix and 20 other platforms, and how to tell whether it brings in calls.
Build trust & FOMO
Highlight real-time activities like reviews, sales & sign-ups.


What Is a Callback Widget?

Think of it as a contact page that comes to the visitor. A tab or card on the page connects them with a named person on your team by phone, so nobody has to hunt for your number.
Most sit at the edge of the screen as a “Contact” or phone tab. Tapping it opens a card with a photo, a name, a short greeting and a button that dials your number or sends an email.
On a phone, that one tap opens the dialer with your number filled in. On a desktop, visitors see the number and the person they will speak to.
Click-to-Call or a Callback Request Form?
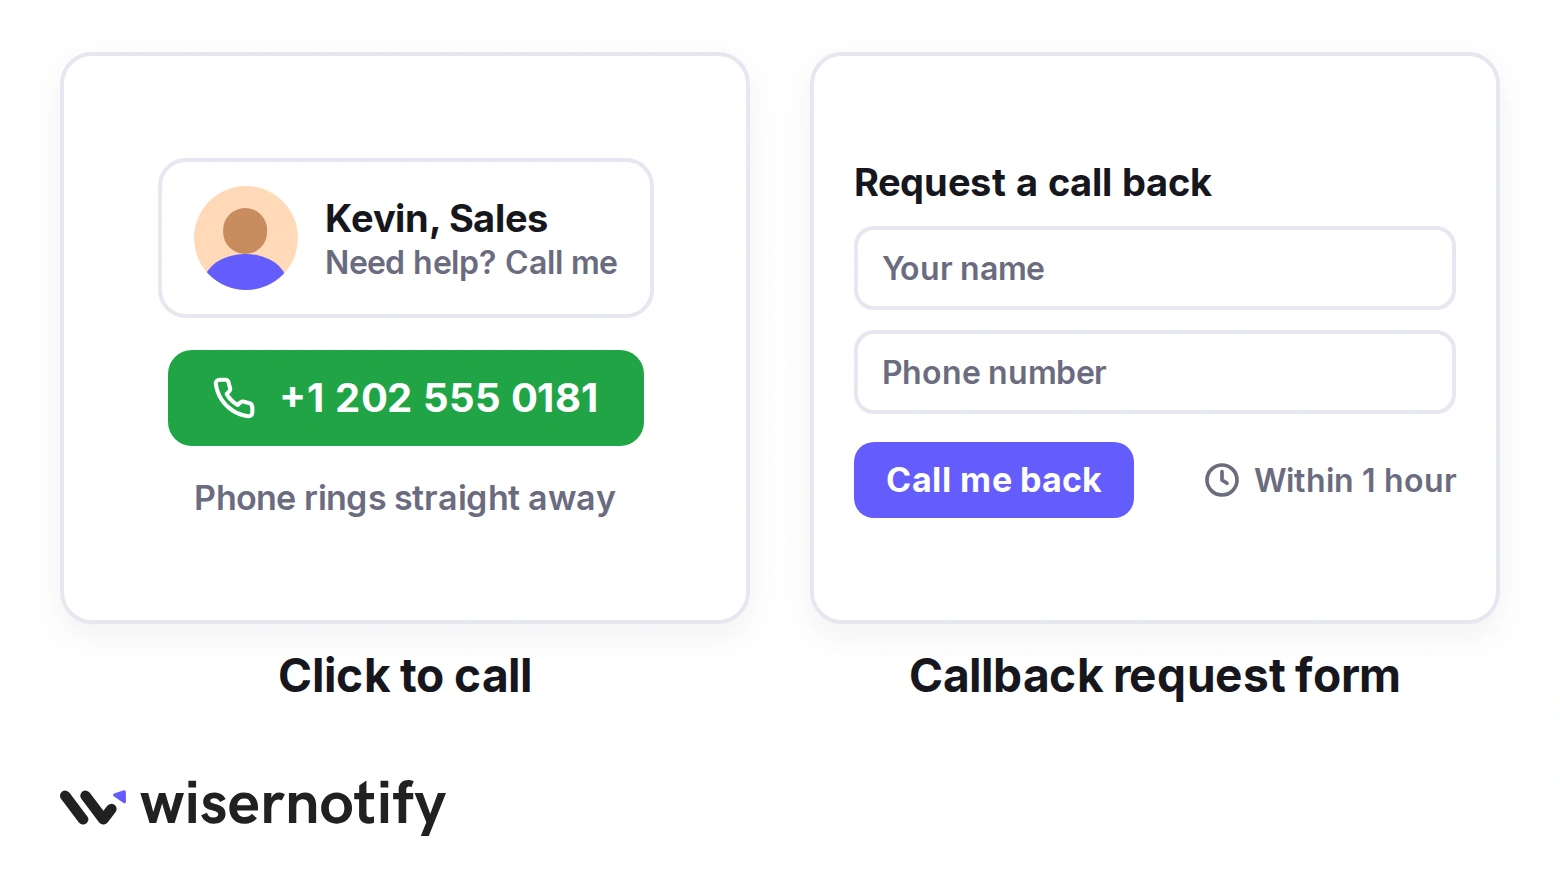
Callback widgets come in two forms, and the right one depends on whether someone can answer the phone when a visitor taps.
| Click to call | Callback request form | |
|---|---|---|
| What happens | The visitor taps and calls you now | The visitor leaves a number and you call later |
| Best when | Someone answers the phone during business hours | Calls come in after hours or across time zones |
| Visitor effort | One tap | Two fields and a wait |
| Your effort | Answer when it rings | Call back fast, ideally within the hour |
WiserNotify’s Call back widget works the click-to-call way, and it can also show an email address for questions that arrive after hours.
How to Add a Callback Widget to Your Website
The video walks through the full setup. The steps below match it, with a screenshot for each one.
Step 1: Create Your Account
- Sign up for WiserNotify.
- Confirm your email and open the dashboard.
Step 2: Copy Your Pixel

- Open the Install pixel page.
- Click Copy code.
- Paste it into your site’s head code. The platform table below shows exactly where on each platform.
Step 3: Verify the Pixel

- Open your site in a new tab and refresh it.
- Back in WiserNotify, click Verify pixel installation.
- Wait for the green message saying the pixel was detected.
Step 4: Add the Call Back Widget

- Go to Notifications › Widgets.
- Open the Call To Actions tab.
- Click Add on the Call back card.
- Name the widget, enter your domain and click Create & customize.
Step 5: Write the Contact Card
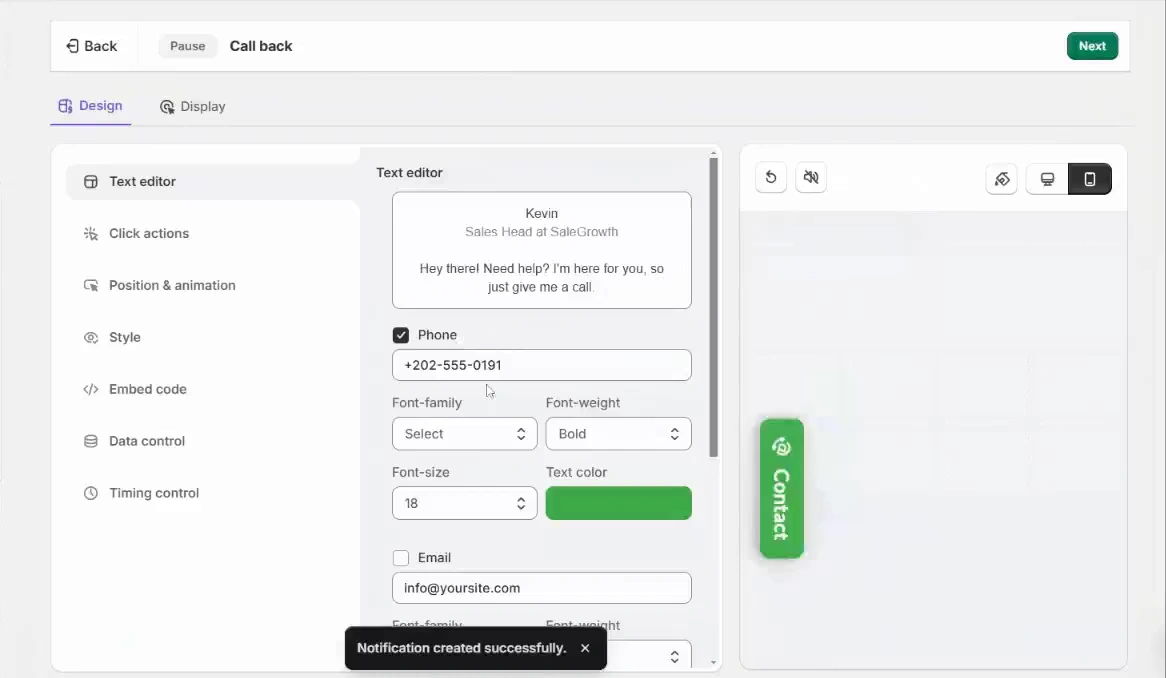
- Open Text editor and type the name, role and greeting of the person who will answer.
- Turn on Phone and add the full number, country code included.
- Turn on Email as well if calls can’t be answered around the clock.
Step 6: Set the Position
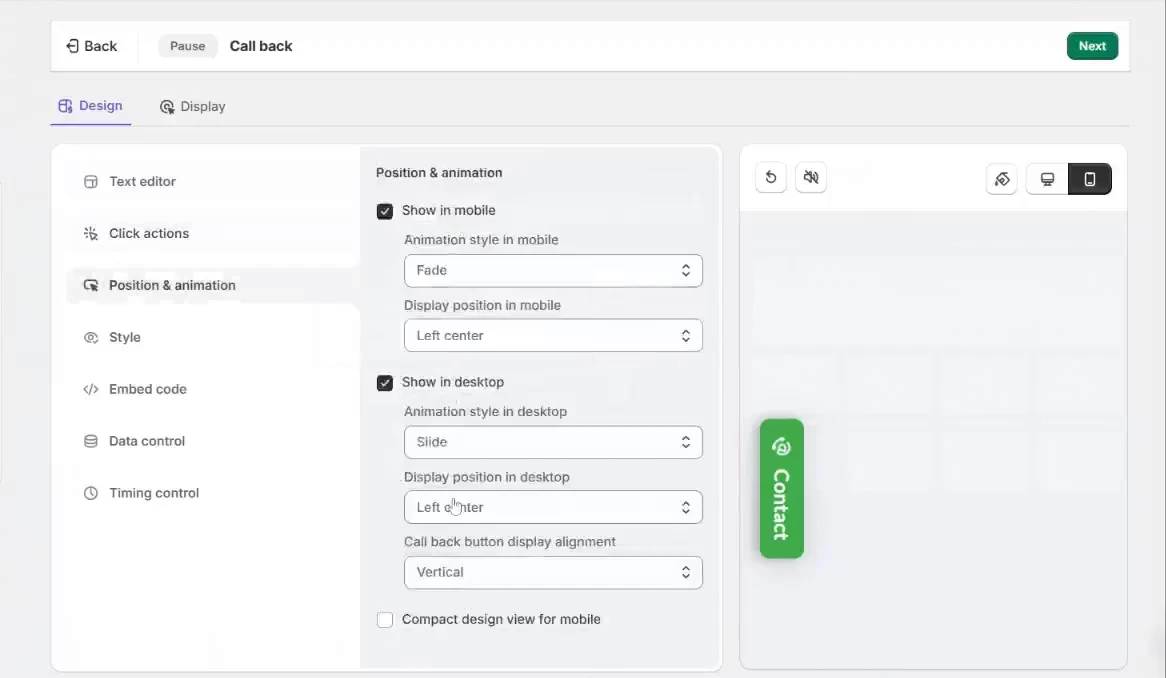
- Open Position & animation.
- Pick where the tab sits on mobile and on desktop.
- Choose a vertical or horizontal button and an animation.
Step 7: Choose When It Shows
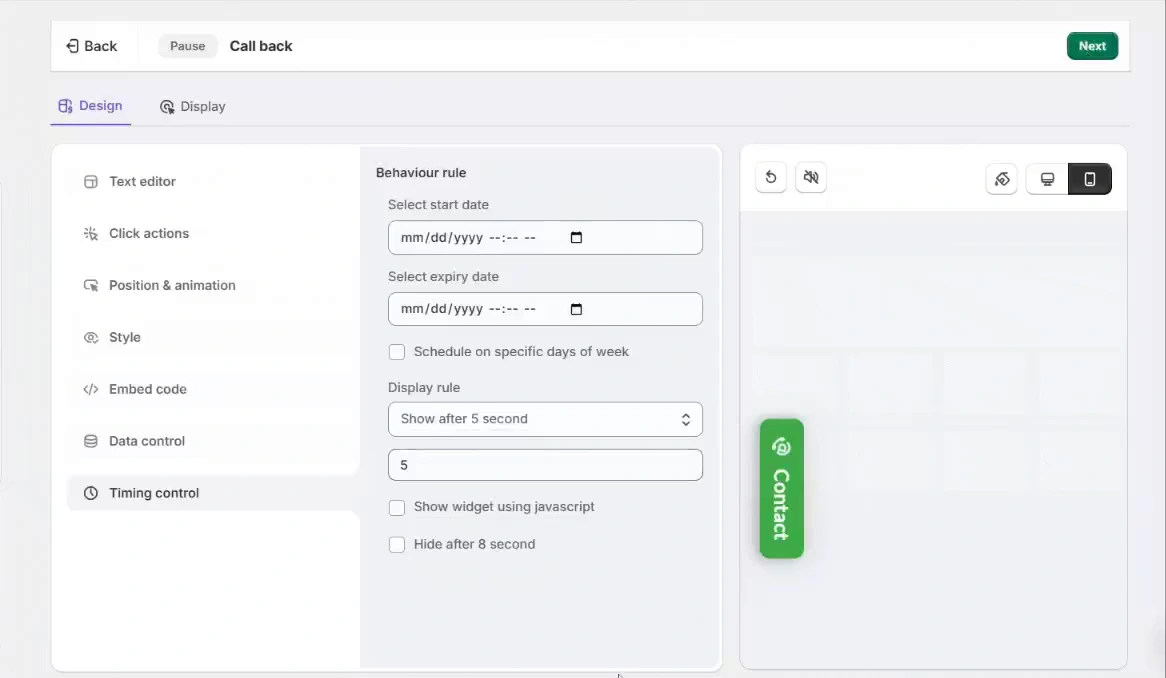
- Open Timing control.
- Set start and expiry dates, or pick specific days of the week.
- Choose a short delay before the tab appears.
Step 8: Pick Pages and Publish
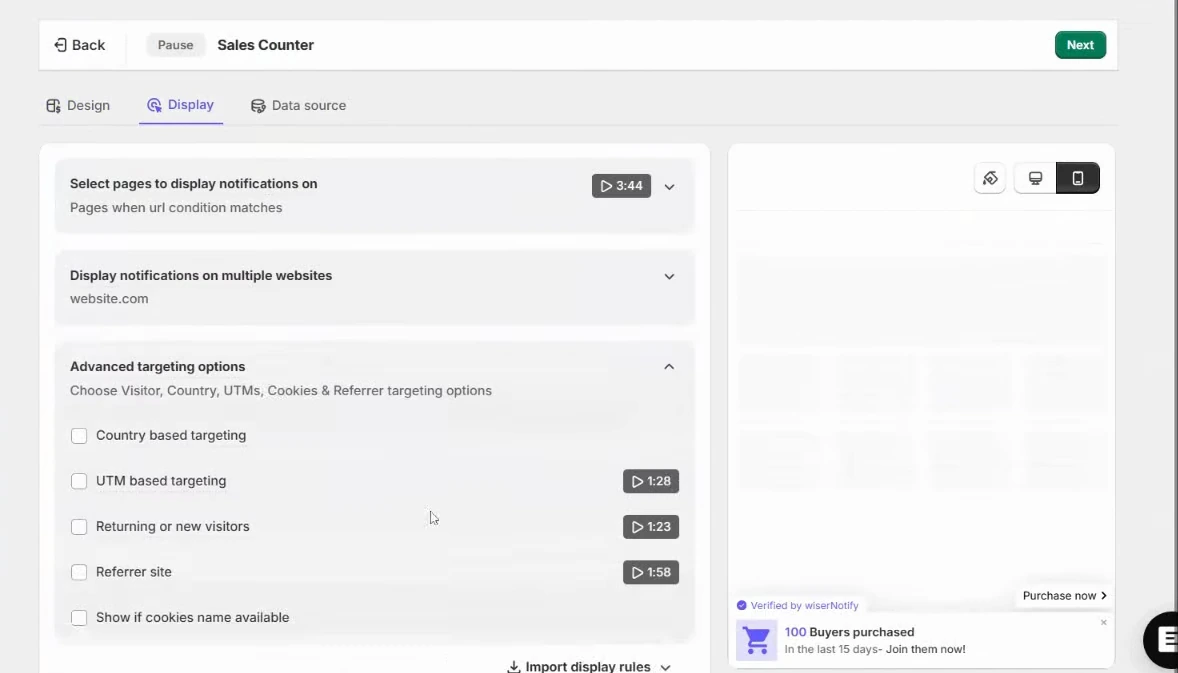
- Open the Display tab.
- Choose the pages where the widget should show, or keep all pages.
- Add targeting by country, UTM, new or returning visitors if you need it.
- Click Save, then Publish, and check the page in a private window.
Build trust & FOMO
Highlight real-time activities like reviews, sales & sign-ups.

Where to Add the Pixel on Your Platform
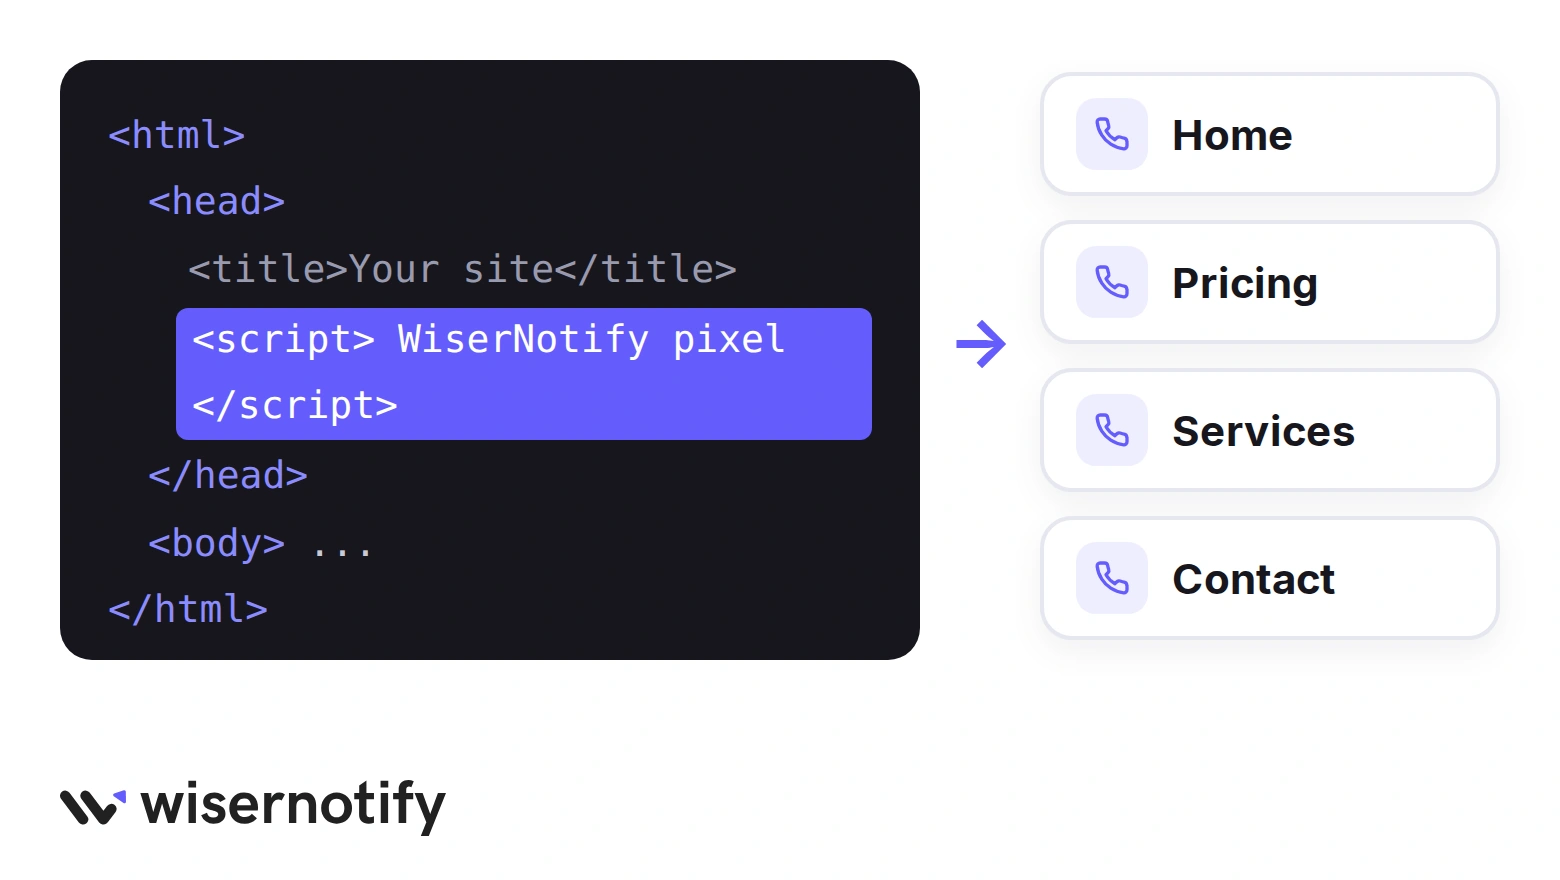
On most platforms the pixel goes in once, site-wide, and every widget you build after that appears without touching your site again. Page builders such as ClickFunnels, Instapage and Kartra take it per page or funnel. Here is where it goes on each platform.
| Platform | Where the pixel goes | Full guide |
|---|---|---|
| WordPress, WooCommerce, Elementor, Divi | Install the WiserNotify plugin, then paste your API key | Callback widget on WordPress |
| Shopify | Online Store › Themes › Edit code › theme.liquid, before the closing body tag | Shopify pixel guide |
| Wix | Settings › Custom code › Add code to the head | Callback widget on Wix |
| Squarespace | Settings › Advanced › Code injection | Callback widget on Squarespace |
| GoDaddy | Site settings, in the head code area | Callback widget on GoDaddy |
| Webflow | Site settings › Custom code › Head code | Webflow pixel guide |
| Weebly | Settings › SEO › Header code | Weebly pixel guide |
| Framer | Site settings › Code › Head | Framer pixel guide |
| ClickFunnels | Funnel Settings › Body tracking code | ClickFunnels pixel guide |
| Kajabi | Settings › Site details › Page scripts | Kajabi pixel guide |
| Kartra | My Pages › Edit › Settings › Tracking code, without the script tags | Callback widget on Kartra |
| Thinkific | Settings › Code & analytics › Site footer code | Thinkific pixel guide |
| Teachable | Admin › Site › Code snippets › Header code | Teachable pixel guide |
| Podia | Store settings › General › Website tracking code | Podia pixel guide |
| LearnWorlds | Site settings, in the head code area | Callback widget on LearnWorlds |
| Unbounce | Settings › Script Manager › Custom Script in the head | Unbounce pixel guide |
| Instapage | Page › Scripts & GDPR › Head | Instapage pixel guide |
| Systeme.io | Funnel step editor › Raw HTML element | Systeme.io pixel guide |
| HubSpot | Settings › Tools › Pages › Templates | HubSpot pixel guide |
| Ecwid | Sales channels › Website › SEO › Add code | Ecwid pixel guide |
| PrestaShop | WiserNotify module, then your API key | Callback widget on PrestaShop |
| Magento 2 | WiserNotify extension, then your API key | Magento 2 pixel guide |
| Any other site | Paste the pixel in the head, or add it as a Custom HTML tag in Google Tag Manager | Google Tag Manager guide |
Where to Show a Callback Widget
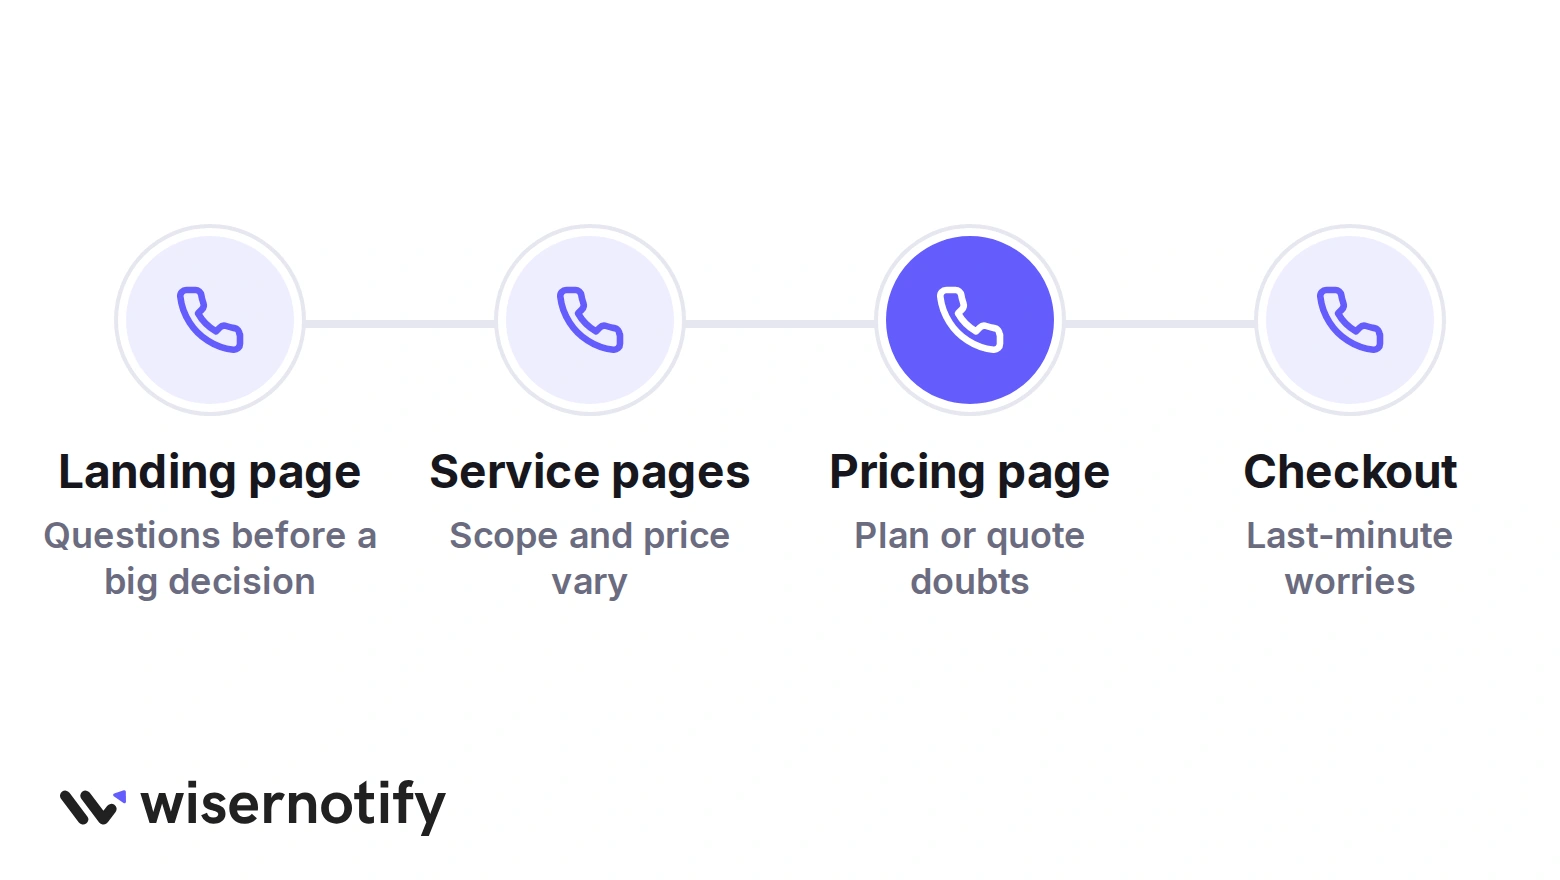
Show the widget where a question is the last thing between a visitor and a decision, not on every page by default.
- Pricing page: plan and quote doubts are the most common reason people want to talk before buying.
- Service pages: when scope and price vary, a two-minute call answers what the page can’t.
- Landing pages for paid traffic: visitors from ads arrive with specific questions and leave fast if they can’t ask.
- Checkout or booking pages: a quiet tab helps with last-minute worries about delivery, setup or fit.
Leave it off blog posts and help articles unless people call you from them already. There, a phone tab mostly adds noise.
Phone visitors respond to different prompts than desktop ones, and this guide to the mobile call to action covers the rest.
Callback Widget Not Showing?
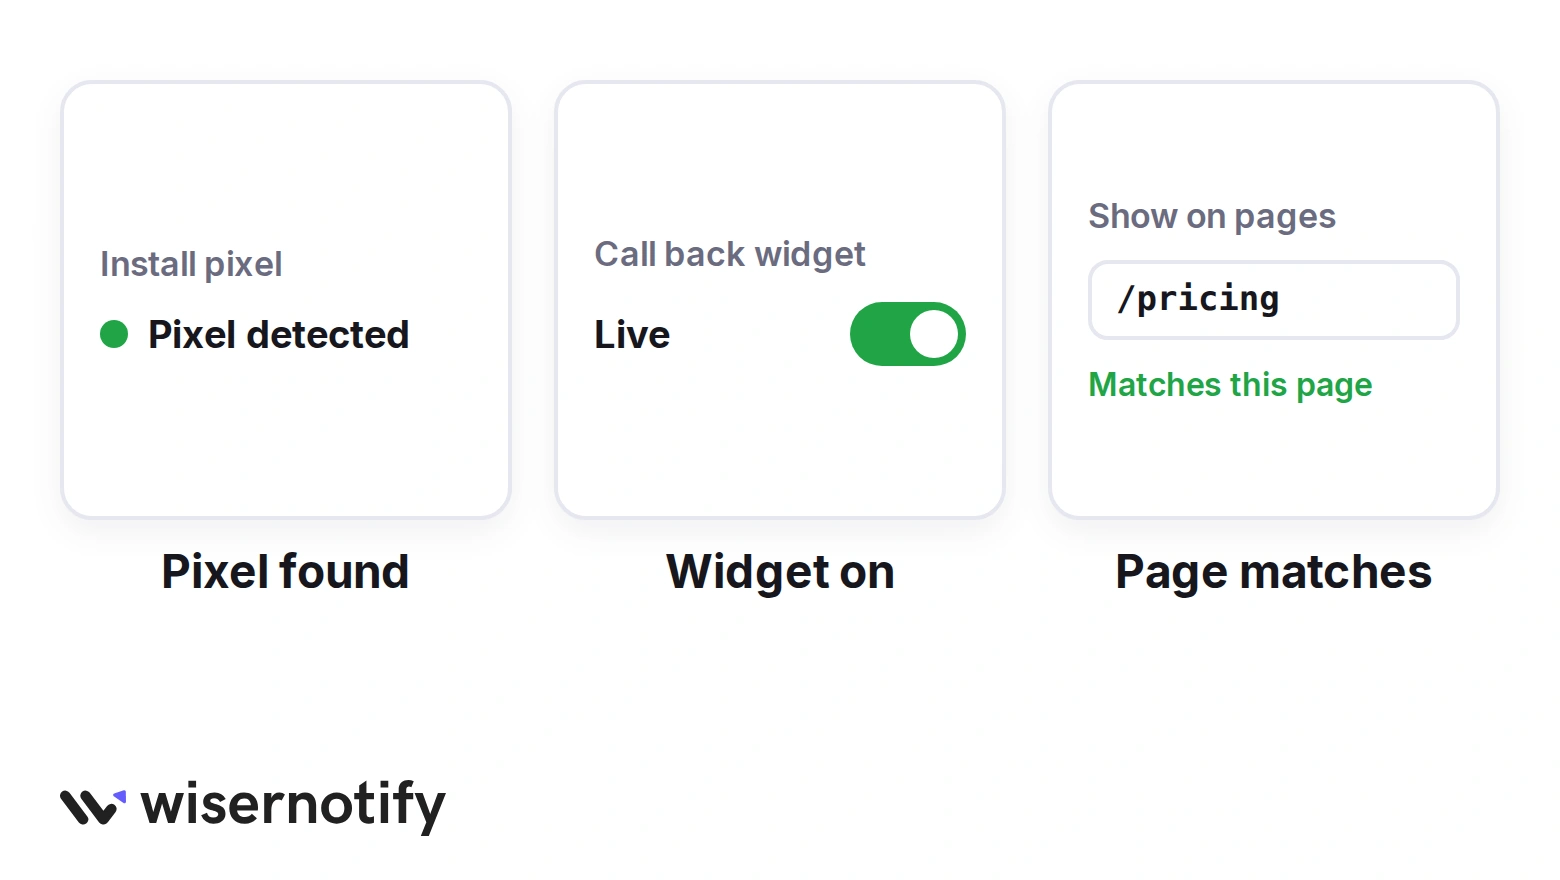
Almost every missing widget comes down to one of these.
- Pixel not detected: the code is missing, pasted into the wrong field, or blocked by a caching plugin. Clear the cache and verify again.
- Widget paused: a saved widget stays off until you click Publish.
- Page rule mismatch: a rule for /pricing won’t fire on /pricing/ or a translated URL. Test with “contains” rules.
- Timing rules: a future start date, a days-of-week filter or a long delay can hide it while you test.
- Old cached page: check in a private window, since your own browser may still show the version from before.
Callback Widget Mistakes to Avoid
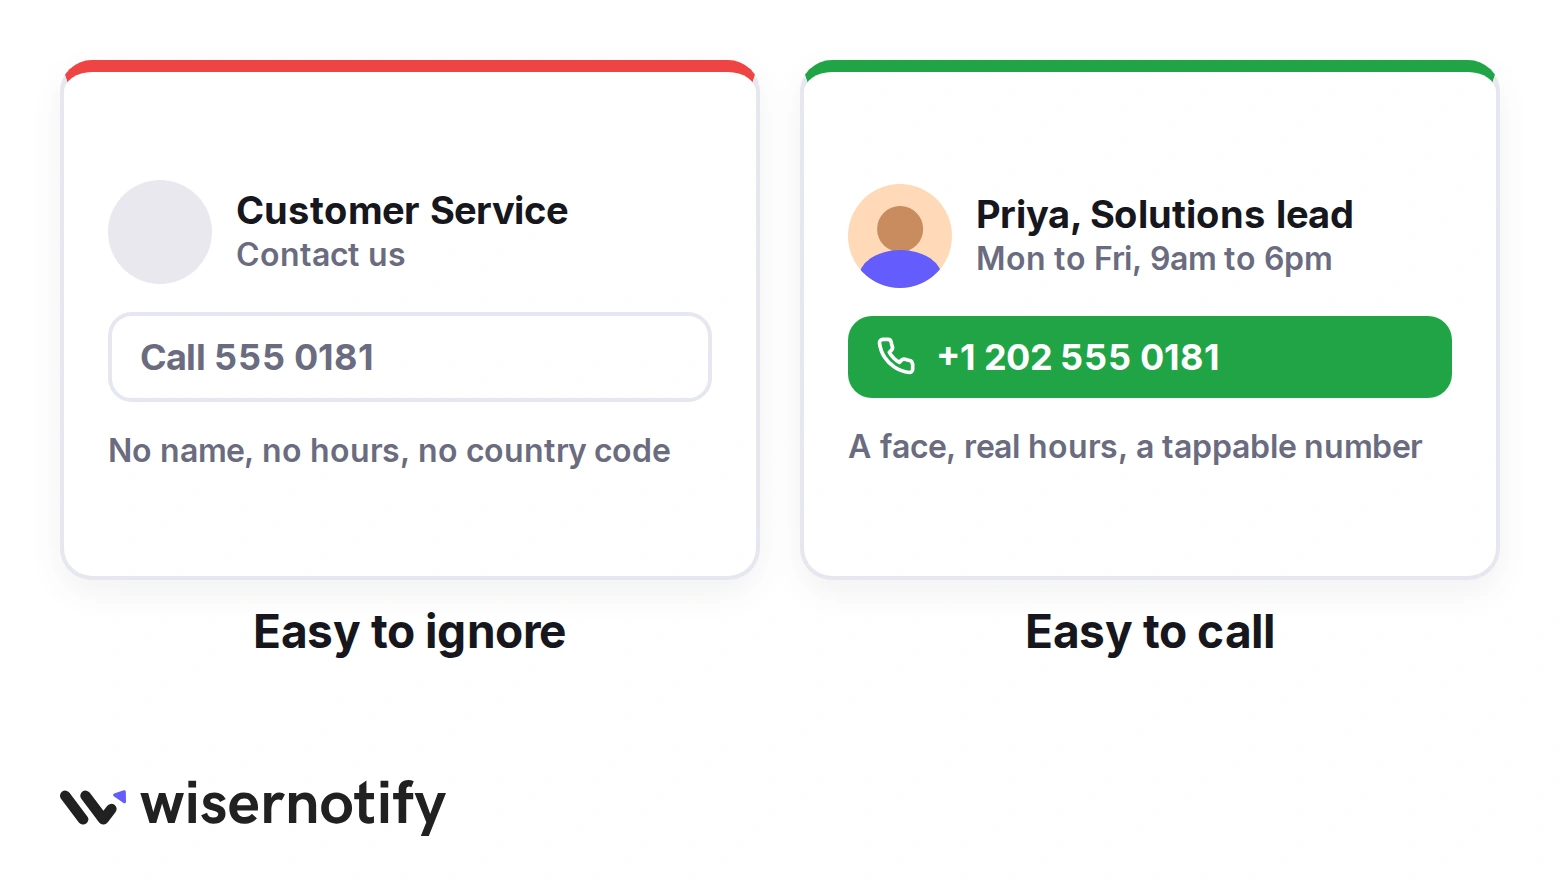
A callback widget only works if visitors trust that a real person will pick up.
- A faceless card: “Customer Service” with a stock icon gets ignored. A photo and a first name get tapped.
- No hours: if nobody answers at 9pm, say when you do, or switch to an email address after hours.
- A number without a country code: international visitors can’t dial it from a phone.
- Popping up too soon: a tab that slides out in the first second looks like an ad. Let visitors read first.
- Missed calls: one unanswered call teaches a visitor the button doesn’t work. Route the number to someone who picks up.
How to Measure Callback Widget Results
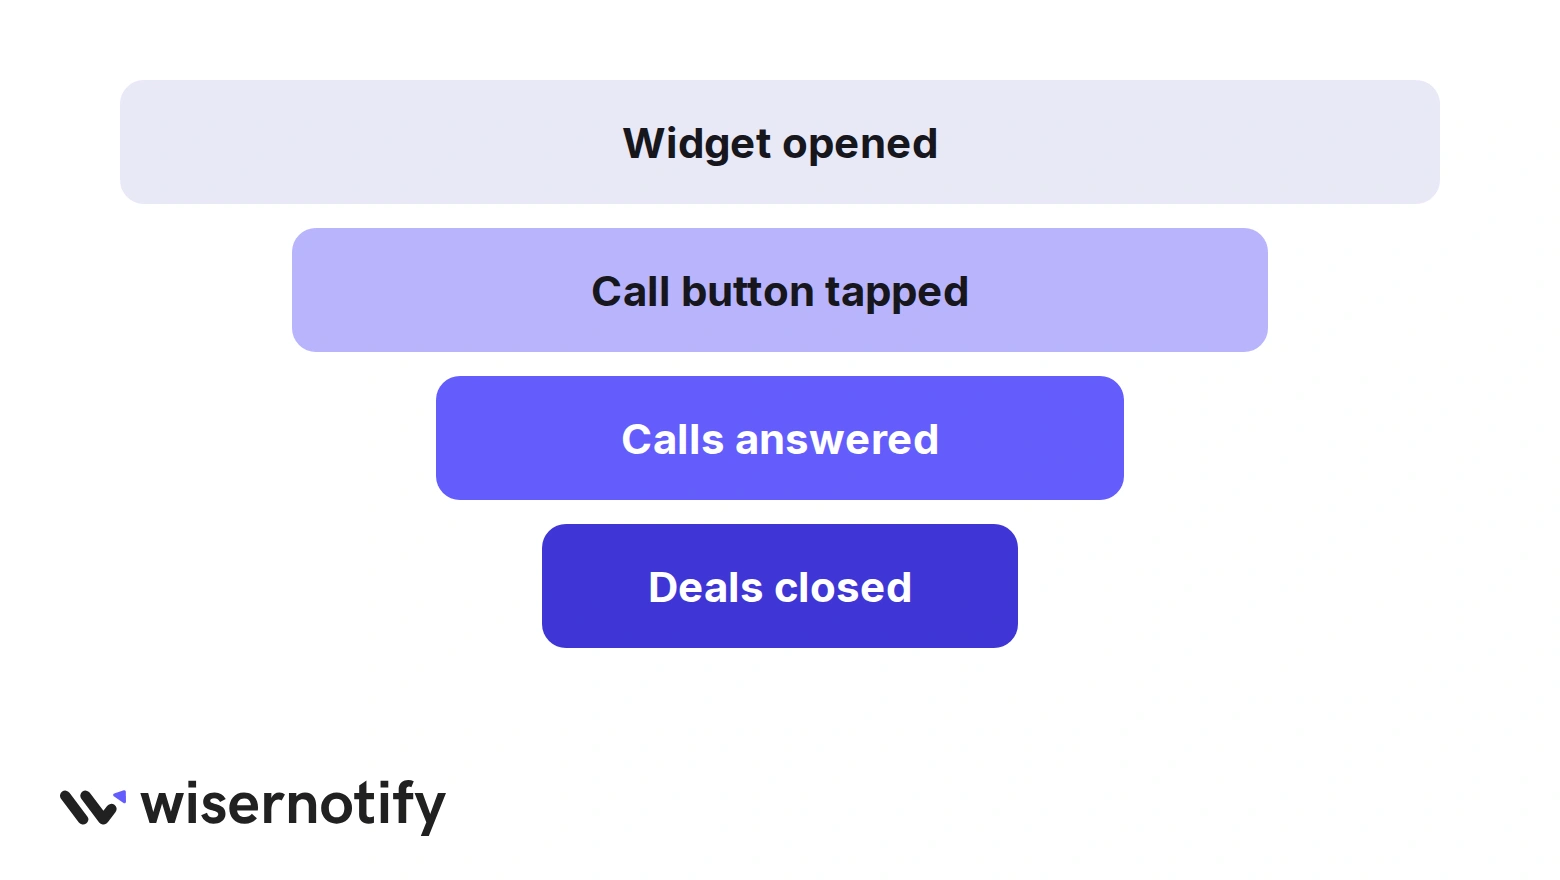
Track the widget from the first tap to the sale, not just the clicks.
- Taps: the widget’s analytics in WiserNotify show its views and clicks over time.
- Calls answered: use a dedicated number, or a tracking number, so website calls show up separately in your phone logs.
- Booked or closed: tag those calls in your CRM so you can see what they turn into.
- Page comparison: run it on one page for two weeks, then compare inquiries against the two weeks before.
If you mostly sell through forms, compare the callback widget’s results with your lead to sale rate from form inquiries.

Boost Conversion Instantly
Add Social Proof & Urgency to your website
Wrap Up
A callback widget gives hesitant visitors a person to talk to at the moment they are deciding. Put a real face and real hours on it, and place it where questions block a sale.
Start on your pricing or main service page, answer every call for two weeks, then decide where to add it next.
Related Posts:
Frequently Asked Questions
What is a callback widget?
A callback widget is a tab or card on a website that lets visitors call or contact a named person on your team in one tap.
What is the difference between click to call and a callback request?
Click to call dials your number straight away, while a callback request collects the visitor’s number so you can call them later.
Does a callback widget work on mobile?
Yes. On a phone, tapping the call button opens the dialer with your number filled in.
Which pages should have a callback widget?
Pricing pages, service pages, ad landing pages and checkout, where a quick answer often decides the sale.
Can I add a callback widget without coding?
Yes. You paste one pixel into your site’s settings once, then build and publish the widget from the WiserNotify dashboard.

Krunal Vaghasiya is a marketing tech expert who boosts e-commerce conversion rates with automated social proof and FOMO strategies. He loves to keep posting insightful posts on online marketing software, marketing automations, and improving conversion rates.




 Capterra