Browse categories
Instapage Integration with WiserNotify
This guide will walk you through:
- Displaying Notifications: Add the WiserNotify pixel code to your Instapage landing pages.
- Capturing Lead Activities: Connect Instapage with WiserNotify using a webhook to fetch real-time lead data.
Install WiserNotify Pixel Code to Instapage pages
Step 1: Get your wisernotify pixel code
- Log in to your WiserNotify account.
- Navigate to the Install Pixel page.
- Copy your Pixel Code.

Step 2: Add the Pixel Code to Instapage
Login with Instapage,
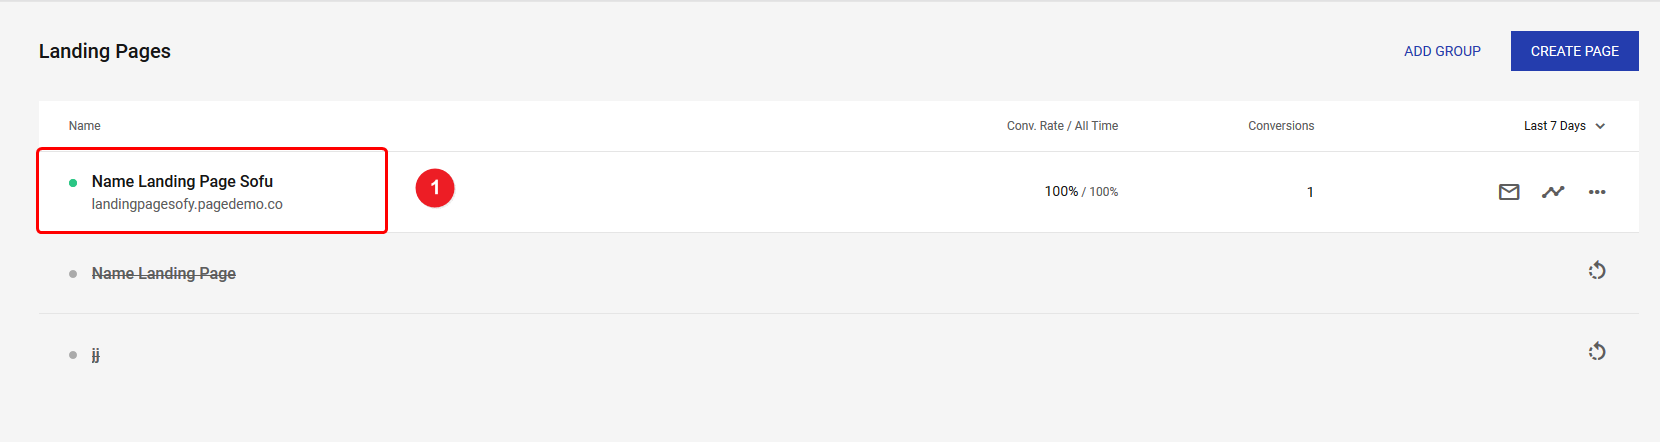
1. Click on your Landing Page Title.
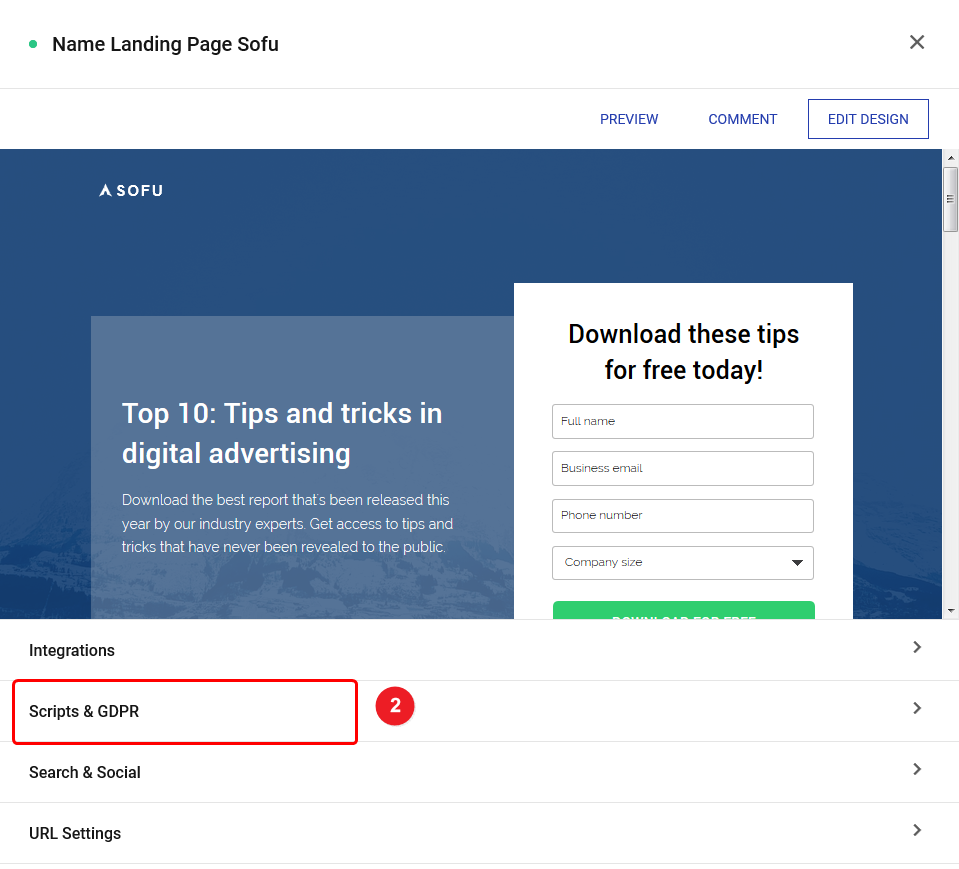
2. Click on Scripts & GDPR.
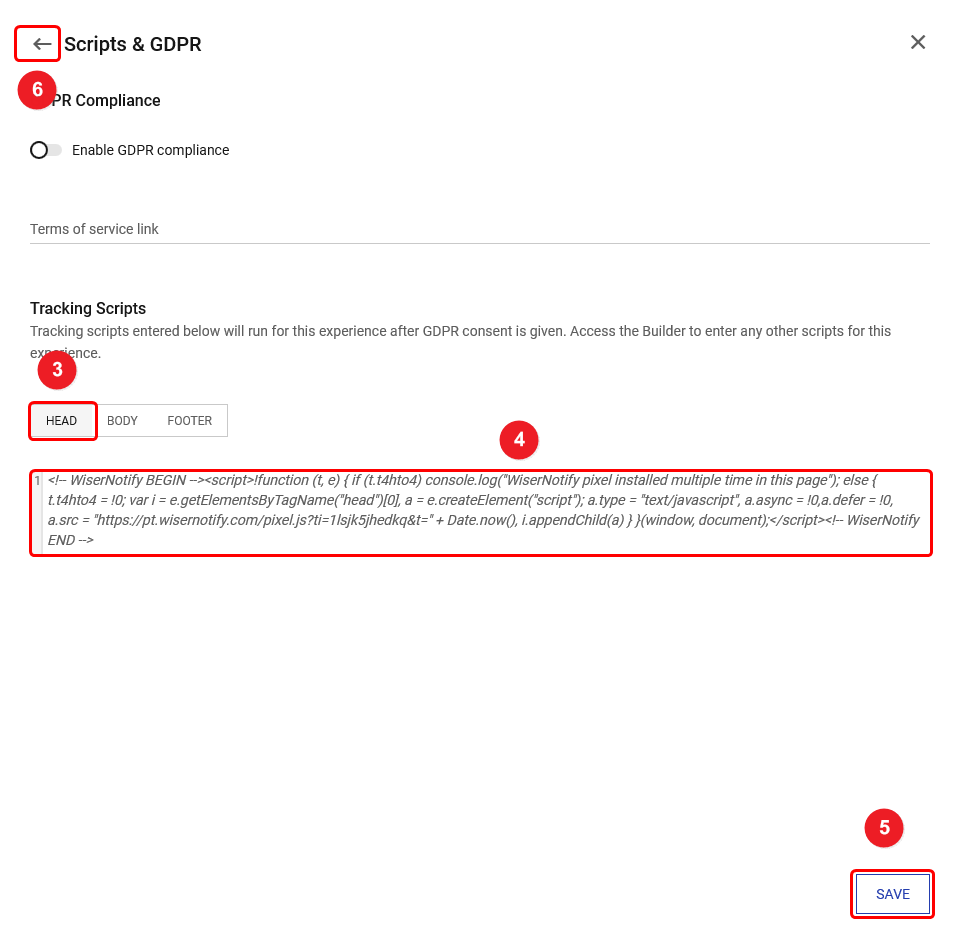
3. Click on the HEAD tab.
4. Paste the WiserNotify Pixel code into the HEAD box.
5. Click on the Save button.
6. Click on the back arrow icon.
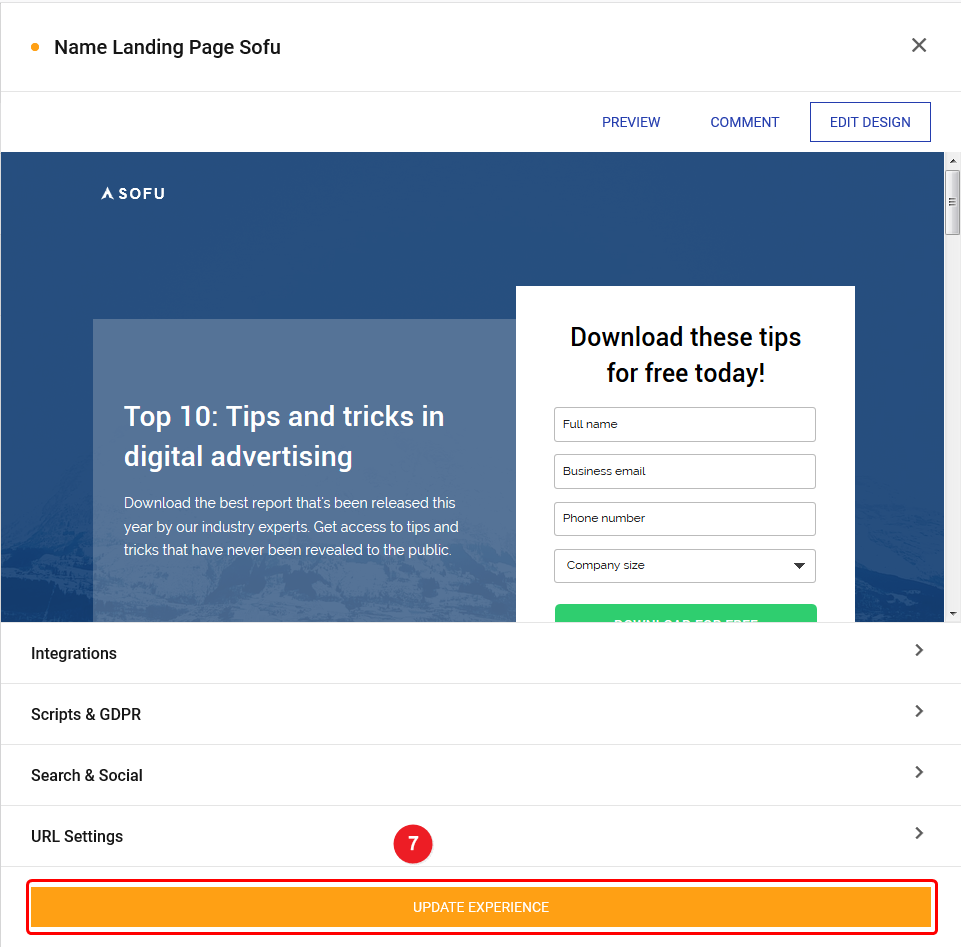
7. Click on UPDATE EXPERIENCE.
Step 3: Verify Installation
- Go back to your Wisernotify pixel page.
- Click on verify pixel installation to check if the pixel is active.
- If installed correctly, you will see a “Pixel Active” successfully message.

Note: This pixel script tag is required on every page wherever you want to track visitor activities, capture form submit events & display notifications.
Add API Key to Connect Instapage to pull the events lead data
1. Get the Webhook URL from WiserNotify
– Go to WiserNotify > Instapage Integration.
– Click on the Integrate button inside the Integration box.
1. Enter Connection Name
2. Click on the Create button.
3. Click on the copy button.
2. Configure Webhook in Instapage
Login with Instapage.
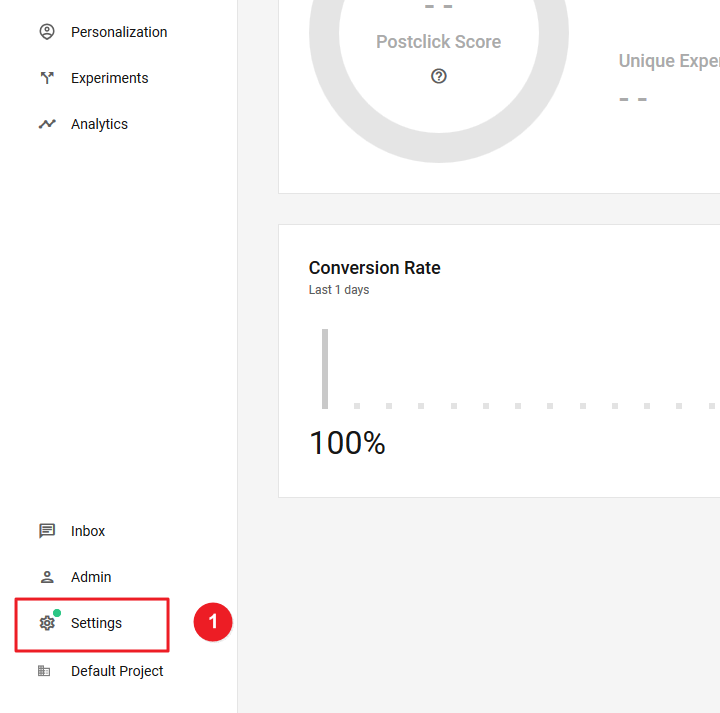
1. Click on Settings.
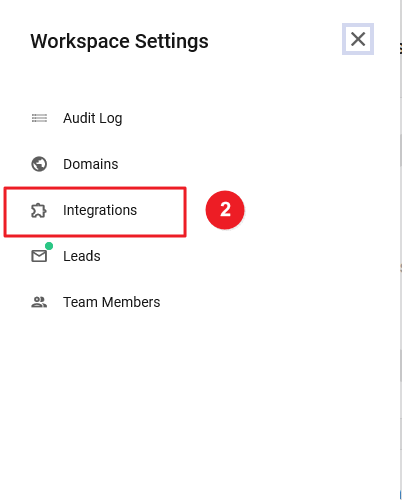
2. Click on Integrations.
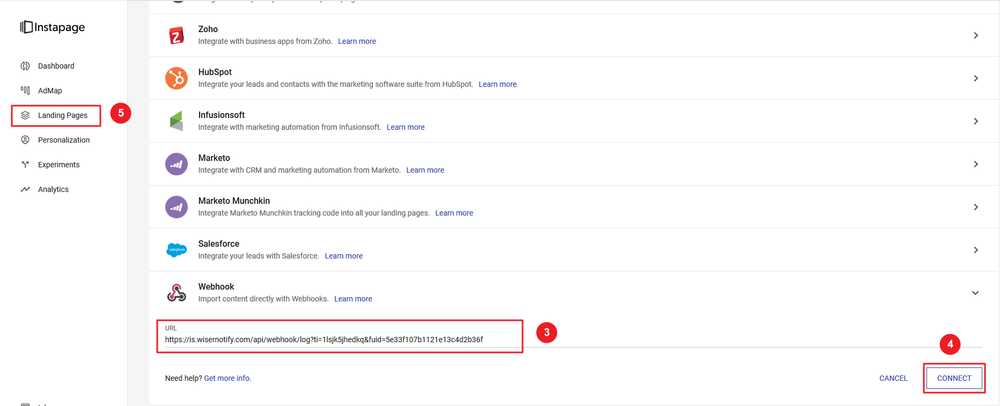
3. Paste the copied webhook URL.
4. Click on the CONNECT button.
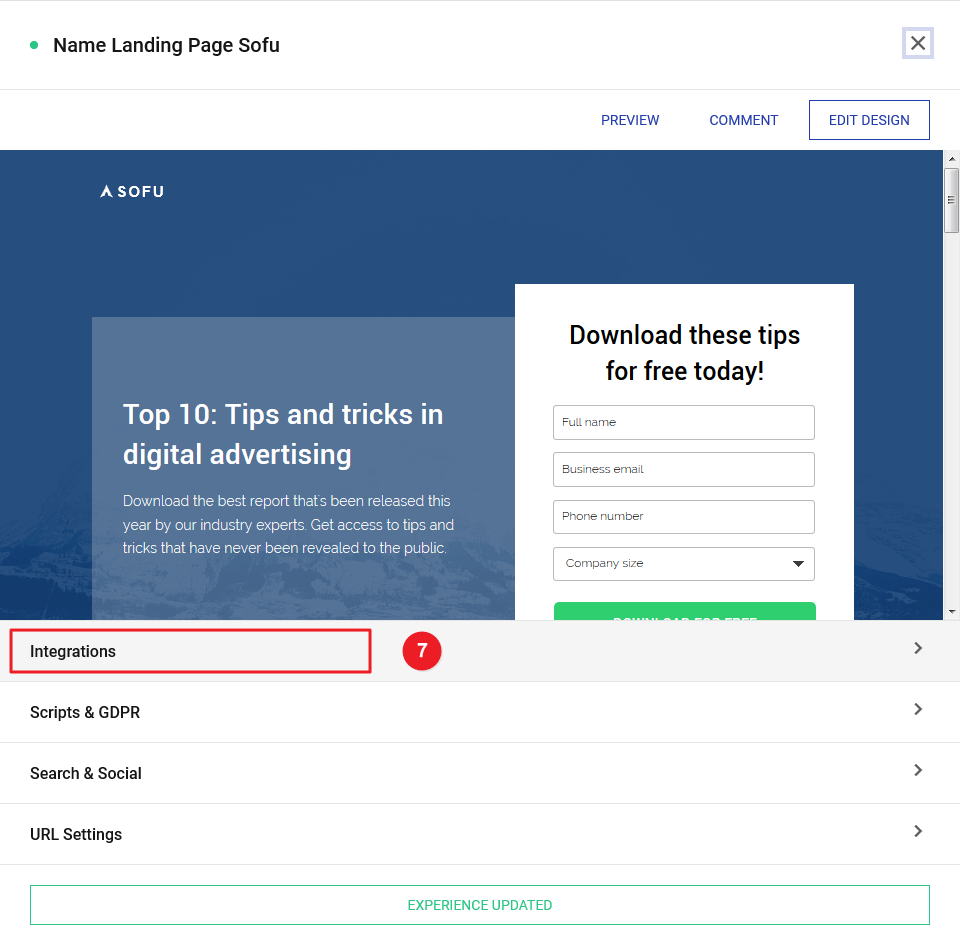
5. Go to Landing Pages.
6. Click on your Landing Page Title.

7. Click on Integrations.
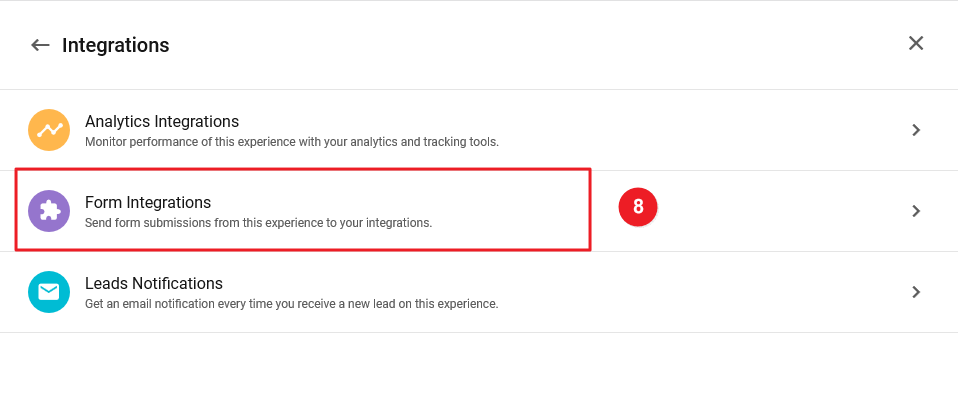
8. Click on Forms Integrations.
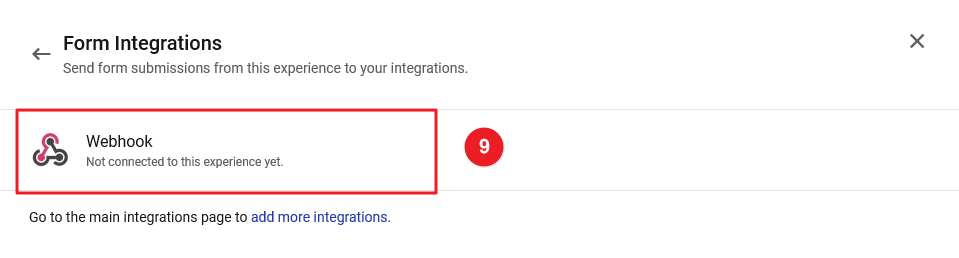
9. Click on the Webhook box.
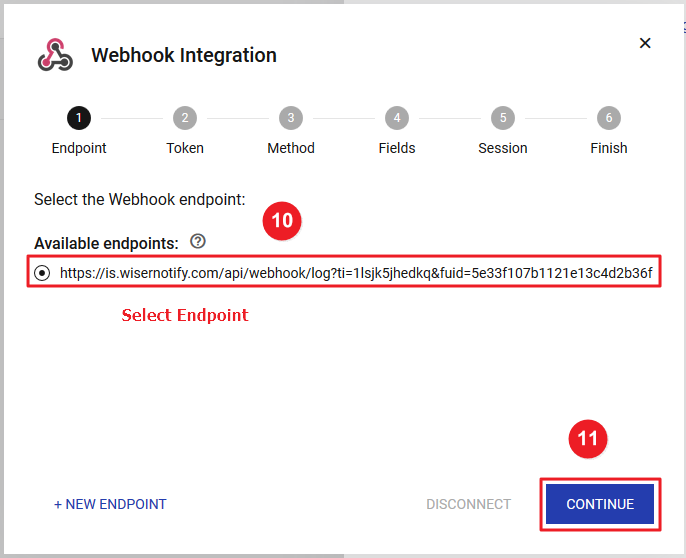
10. Select Endpoint.
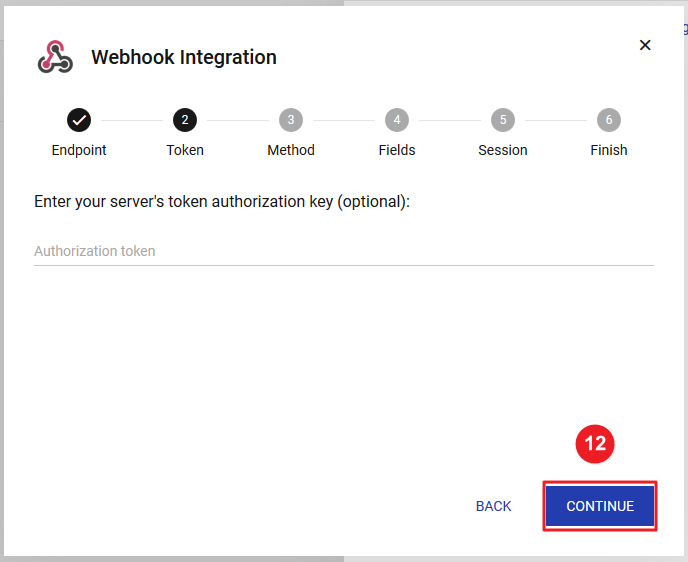
11. Click on the CONTINUE button.
12. Click on the CONTINUE button.
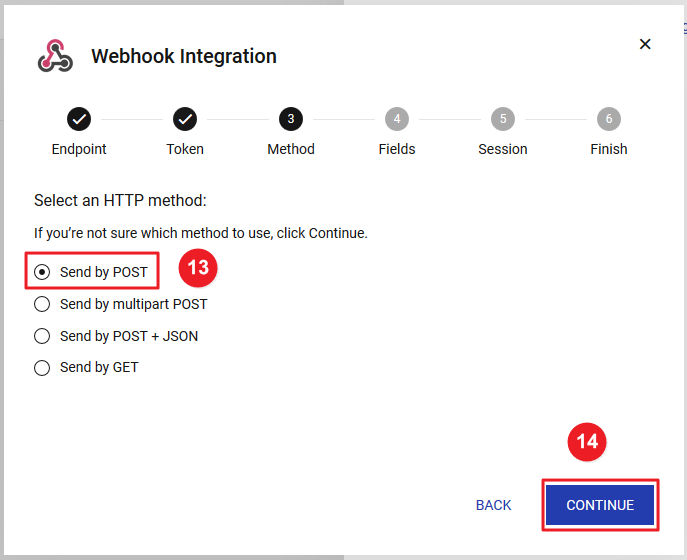
13. Select Send by POST Method.
14 Click on the CONTINUE button.
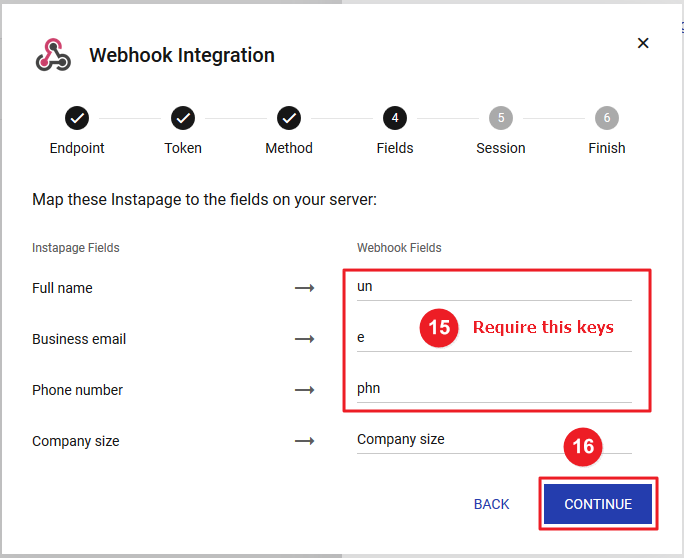
15. Enter the WiserNotify Keys Field.
{
“Full Name”: “un”,
“First Name”: “fn”,
“Last Name”: “ln”,
“Email”: “e”,
“Phone”: “phn”
}
16. Click on the CONTINUE button
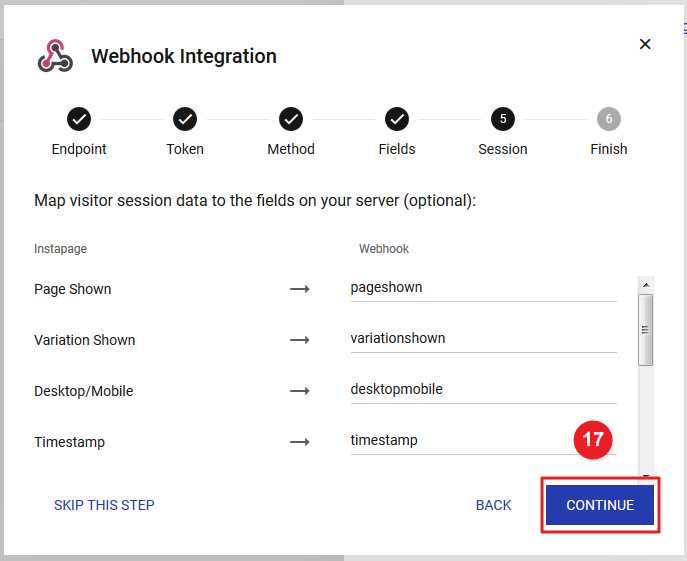
17. Click on the CONTINUE button.
18. Click on the FINISH button.
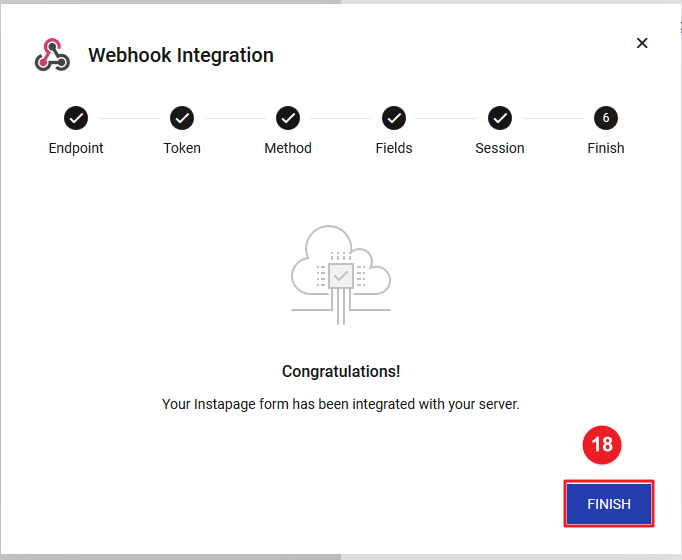
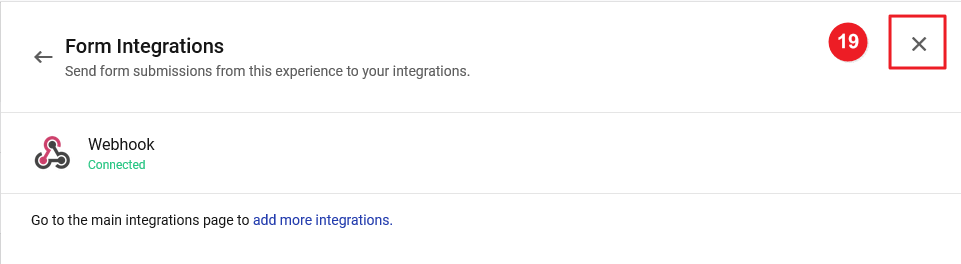
19. Your Webhook is connected after a click on the close icon.
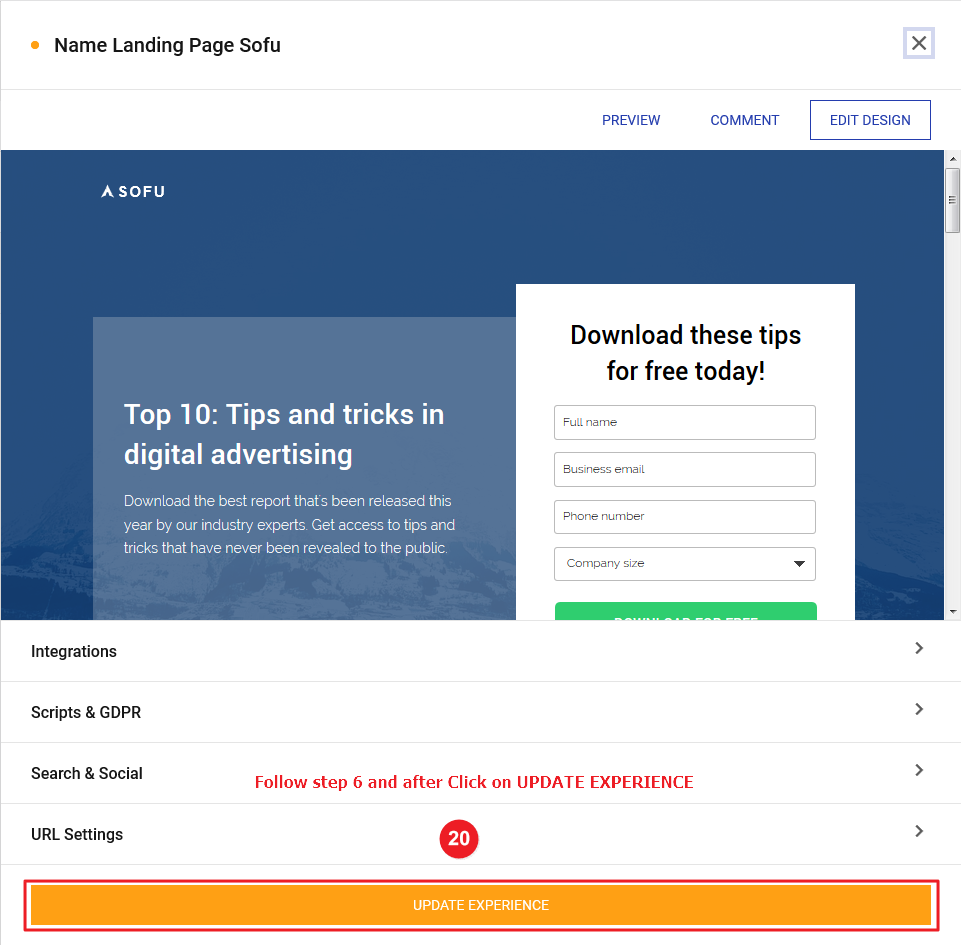
20. First, Follow Step 6, and after click on the UPDATE EXPERIENCE button.
Please test by adding new data & visit the WiserNotify- Dashboard Data page. Here, You can see all the captured/ received data with its source name.
Still stuck? A human will do it with you
Live chat from your dashboard — real answers in minutes, every day of the year.