Announcement Bar HTML Code: 5 Copy-Paste Examples
 Krunal Vaghasiya|Jan 10, 2025
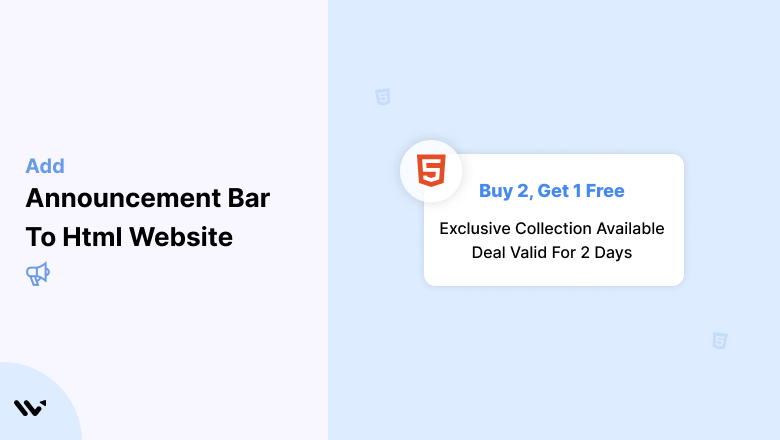
I’ve built announcement bars for client sites, side projects, and even a few personal portfolio pages. And every single time, I end up writing the same handful of code blocks from memory.
So I figured it was time to put them all in one place.
This post gives you clean, copy-paste HTML and CSS code for announcement bars. No frameworks required. No JavaScript dependencies. Just code that works in any browser, on any HTML page.
I’m including 5 different styles: a basic bar, a gradient bar with a CTA button, a dismissible bar, a scrolling/animated bar, and a countdown urgency bar.
Pick the one that fits your use case, drop it into your project, and customize from there.
Build urgency
Add floating offers with countdown timer & coupon code.


What Is an Announcement Bar (And When Should You Use One)?
An announcement bar is that thin strip you see at the very top of a website. It sits above the navigation, stays visible while scrolling (if you want it to), and delivers a short message.
Think of it as a billboard for your most important update.
I’ve seen them used for everything: flash sales, shipping cutoffs, product launches, policy changes, cookie consent notices. The list goes on.
But here’s what I’ve learned after building dozens of these: they work best when used sparingly.
If your announcement bar is always there with the same message, visitors start ignoring it. It becomes invisible.
Save it for moments that actually matter. A 48-hour sale. A major product update. A holiday shipping deadline. That’s when an announcement bar earns its space.
Also check: 9 announcement bar examples that actually convert
Basic Announcement Bar (HTML + CSS Only)
This is the simplest version. No JavaScript, no dependencies. A sticky bar at the top of the page with a short message and a link.
Copy this entire block and paste it into your HTML file, right after the opening <body> tag.
<!-- Basic Announcement Bar --> <div style=" background-color: #1a1a2e; color: #ffffff; text-align: center; padding: 12px 20px; font-family: -apple-system, BlinkMacSystemFont, 'Segoe UI', Roboto, sans-serif; font-size: 15px; position: sticky; top: 0; width: 100%; z-index: 9999; box-sizing: border-box; "> 🔥 Flash Sale: 30% off everything — <a href="/sale" style="color: #e94560; font-weight: 600; text-decoration: underline;">Shop Now</a> </div>
How it works: The position: sticky property keeps the bar locked to the top of the viewport as visitors scroll. It z-index: 9999 makes sure it sits above everything else on the page.
You can swap the background color, text, and link to match your brand. That’s it. No build step, no config files, no extra CSS sheets to manage.
Build trust & FOMO
Highlight real-time activities like reviews, sales & sign-ups.
When to use this version
Use the basic bar when you need something fast. A quick promo, a simple notice, a “we’re hiring” banner.
If the message is short and the page is simple, this gets the job done in under a minute.
Gradient Bar with CTA Button
This version is more polished. It uses a gradient background, a rounded CTA button, and a flexbox layout to keep everything centered and responsive.
<!-- Gradient Announcement Bar with CTA -->
<div style="
  background: linear-gradient(90deg, #667eea 0%, #764ba2 100%);
  color: #ffffff;
  display: flex;
  align-items: center;
  justify-content: center;
  gap: 16px;
  padding: 12px 20px;
  font-family: -apple-system, BlinkMacSystemFont, 'Segoe UI', Roboto, sans-serif;
  font-size: 15px;
  position: sticky;
  top: 0;
  width: 100%;
  z-index: 9999;
  box-sizing: border-box;
  flex-wrap: wrap;
">
  <span>✨ New: Our 2026 product lineup is here</span>
  <a href="/products" style="
    background: #ffffff;
    color: #764ba2;
    padding: 6px 18px;
    border-radius: 20px;
    text-decoration: none;
    font-weight: 600;
    font-size: 13px;
    white-space: nowrap;
  ">See What's New</a>
</div>
The flex-wrap: wrap Property is the key detail here. On smaller screens, the button drops below the text instead of getting squeezed. No media queries needed for basic responsiveness.
I prefer gradients over flat colors for announcement bars because they catch the eye without feeling aggressive.
That purple-to-blue combo works well for product launches and feature announcements.
Also check: How to add an announcement bar to your website
Dismissible Announcement Bar (With Close Button)
This is the one most people actually need. A bar that visitors can close when they’re done reading it.
It needs a tiny bit of JavaScript for the close functionality, but we’re talking 3 lines. Nothing heavy.
<!-- Dismissible Announcement Bar --> <div id="announce-bar" style=" background-color: #0f3460; color: #e0e0e0; text-align: center; padding: 12px 48px 12px 20px; font-family: -apple-system, BlinkMacSystemFont, 'Segoe UI', Roboto, sans-serif; font-size: 15px; position: sticky; top: 0; width: 100%; z-index: 9999; box-sizing: border-box; "> Free shipping on all orders over $50 — <a href="/shipping" style="color: #e94560; font-weight: 600;">Learn More</a> <button onclick="document.getElementById('announce-bar').style.display='none'" style=" position: absolute; right: 16px; top: 50%; transform: translateY(-50%); background: none; border: none; color: #e0e0e0; font-size: 20px; cursor: pointer; padding: 4px 8px; line-height: 1; ">×</button> </div>
The close button is used position: absolute with a transform: translateY(-50%) trick to stay perfectly centered vertically, regardless of the bar’s height.
I’ve seen a lot of tutorials skip this and just eyeball the top padding. That always breaks on mobile.
Build urgency
Add floating offers with countdown timer & coupon code.
Want to remember the dismissal?
If you want the bar to stay hidden after someone closes it (even on page refresh), add this small script below the bar:
<script>
(function() {
  if (localStorage.getItem('barDismissed') === 'true') {
    document.getElementById('announce-bar').style.display = 'none';
  }
  document.querySelector('#announce-bar button').addEventListener('click', function() {
    localStorage.setItem('barDismissed', 'true');
  });
})();
</script>
This stores a flag in localStorage so the bar doesn’t reappear until you clear it. Useful for cookie notices or one-time promotions.
Scrolling Text Announcement Bar (CSS Animation)
You’ve seen this on news sites and e-commerce stores. The text scrolls horizontally across the bar, ticker-style.
It’s great when you have multiple messages to rotate or a long promo string.
<!-- Scrolling Announcement Bar --> <div style=" background-color: #16213e; color: #e0e0e0; overflow: hidden; white-space: nowrap; padding: 12px 0; font-family: -apple-system, BlinkMacSystemFont, 'Segoe UI', Roboto, sans-serif; font-size: 15px; position: sticky; top: 0; width: 100%; z-index: 9999; box-sizing: border-box; "> <div style=" display: inline-block; animation: scroll-left 20s linear infinite; "> 🎉 Summer Sale: 40% off sitewide | 📦 Free returns on all orders | ⏰ Sale ends Friday at midnight </div> </div> <style> @keyframes scroll-left { 0% { transform: translateX(100%); } 100% { transform: translateX(-100%); } } </style>
Adjust the 20s value to control speed. Lower number = faster scroll. I usually go with 15-25 seconds, depending on the message length.
One tip: don’t use this for critical information. Some visitors will miss the beginning of the text, and it’s not accessible for screen readers in its basic form.
Use it for supplementary promos where missing a word or two doesn’t matter.
Also check: HTML countdown timer code (4 copy-paste examples)
Boost Conversion Instantly
Add Social Proof & Urgency to your website
Countdown Urgency Bar
This one combines an announcement bar with a live countdown timer.
I’ve used this exact pattern for flash sales, and it consistently outperforms static bars in click-through rate.
<!-- Countdown Announcement Bar -->
<div id="countdown-bar" style="
  background: linear-gradient(90deg, #e94560 0%, #c23152 100%);
  color: #ffffff;
  display: flex;
  align-items: center;
  justify-content: center;
  gap: 12px;
  padding: 12px 20px;
  font-family: -apple-system, BlinkMacSystemFont, 'Segoe UI', Roboto, sans-serif;
  font-size: 15px;
  position: sticky;
  top: 0;
  width: 100%;
  z-index: 9999;
  box-sizing: border-box;
  flex-wrap: wrap;
">
  <span>🔥 Sale ends in: <strong id="timer">00:00:00</strong></span>
  <a href="/sale" style="
    background: #ffffff;
    color: #e94560;
    padding: 6px 18px;
    border-radius: 20px;
    text-decoration: none;
    font-weight: 600;
    font-size: 13px;
    white-space: nowrap;
  ">Shop the Sale</a>
</div>

<script>
(function() {
  var deadline = new Date();
  deadline.setHours(deadline.getHours() + 24);

  function updateTimer() {
    var now = new Date().getTime();
    var remaining = deadline.getTime() - now;

    if (remaining <= 0) {
      document.getElementById('countdown-bar').style.display = 'none';
      return;
    }

    var hours = Math.floor(remaining / (1000 * 60 * 60));
    var mins = Math.floor((remaining % (1000 * 60 * 60)) / (1000 * 60));
    var secs = Math.floor((remaining % (1000 * 60)) / 1000);

    document.getElementById('timer').textContent =
      String(hours).padStart(2, '0') + ':' +
      String(mins).padStart(2, '0') + ':' +
      String(secs).padStart(2, '0');
  }

  updateTimer();
  setInterval(updateTimer, 1000);
})();
</script>
Change the deadline.setHours(deadline.getHours() + 24) line to set your countdown duration. Right now, it’s a 24-hour timer from when the page loads. For a fixed end date, replace it with something like var deadline = new Date('2026-04-01T23:59:59').
The bar automatically hides itself when the timer hits zero. Clean and professional.
If you want to get more creative with countdown timers, I wrote a whole guide on countdown timer widgets that covers both code-based and no-code options.
Making Your Announcement Bar Mobile-Friendly
Every code example above uses inline styles with box-sizing: border-box flexible layouts.
But if you want tighter control on small screens, add this CSS block to your page:
<style>
@media (max-width: 600px) {
  #announce-bar,
  #countdown-bar {
    font-size: 13px;
    padding: 10px 40px 10px 12px;
  }
}
</style>
Three things I always check on mobile:
Font size. 15px looks great on desktop but can feel big on a 375px-wide phone. Drop it to 13px.
Padding. Give extra right padding if there’s a close button, so the text doesn’t overlap it.
Tap targets. Make sure links and buttons are at least 44×44 pixels. Apple’s Human Interface Guidelines recommend this, and it genuinely makes a difference. Tiny close buttons frustrate people.
Accessibility Tips (Don’t Skip These)
Announcement bars sit at the top of every page. That means screen readers hit them first. If you don’t handle accessibility, you’re creating a bad experience for a portion of your visitors.
Here’s what to add:
ARIA role: Add role="banner" to your bar’s container. This tells assistive technology it’s a site-wide notice.
Dismiss labeling: Add aria-label="Close announcement" to your close button. A bare × symbol means nothing to a screen reader.
Color contrast: Your text needs a contrast ratio of at least 4.5:1 against the background. Use WebAIM’s contrast checker to verify. Every code example in this post passes that threshold.
Motion sensitivity: For the scrolling bar, wrap the animation in a prefers-reduced-motion media query:
@media (prefers-reduced-motion: reduce) {
  [style*="animation"] {
    animation: none !important;
  }
}
This stops the scroll animation for visitors who’ve told their OS they prefer less motion. Small detail, but it matters.
Build trust & FOMO
Highlight real-time activities like reviews, sales & sign-ups.

Best Practices I’ve Learned the Hard Way
After building announcement bars for dozens of sites, here’s what actually moves the needle:
One message at a time. I’ve seen sites try to stuff three different promotions into one bar. It never works. Pick your most important message and commit to it.
Match your site’s typography. In my examples uses the system font stack (-apple-system, BlinkMacSystemFont, 'Segoe UI', Roboto, sans-serif). Swap this for your site’s actual font so the bar looks native, not bolted on.
Rotate your messages. If the same bar sits there for 3 months, it becomes wallpaper. Swap your announcement at least every 2 weeks. Even changing the background color refreshes the visual impact.
Test your links. Sounds obvious, but I can’t tell you how many times I’ve seen announcement bars linking to expired sale pages or 404s. Check them monthly.
Use urgency sparingly. Countdown timers and phrases like “ends tonight” drive clicks. But if everything is “urgent” all the time, nothing is. Reserve urgency language for real deadlines.
Also check: 6 discount strategies that actually drive sales
Don’t Want to Code? Use a No-Code Tool Instead
Not every site owner wants to touch HTML. I get it.
If you’re running an HTML website and want announcement bars without writing code, WiserNotify lets you create and manage them visually. You paste a single tracking pixel into your site’s <head> tag, and then control everything (design, targeting, scheduling, A/B testing) from a dashboard.
It’s particularly useful if you want to show different bars to different audience segments or run multiple announcements on a schedule. That’s hard to do with pure HTML.
For platform-specific setups, I’ve also written guides on Shopify and WordPress announcement bars.
Common Mistakes That Kill Your Announcement Bar’s Impact
Too much text. If your message needs more than one line on a desktop, it’s too long. Trim it. An announcement bar is a headline, not a paragraph.
No call to action. A bar that says “New products available” without a link is a missed opportunity. Always include a link or button with clear next steps.
Wrong z-index. If your bar disappears behind a sticky header or modal, bump the z-index height. I use 9999 as a starting point, but some themes need 99999.
Forgetting the close button. Visitors who aren’t interested in your announcement will get annoyed if they can’t dismiss it. Always include a way to close the bar, especially on mobile, where screen space is limited.
Ignoring performance. Inline styles (like the examples above) load instantly because there’s nothing extra to fetch. But if you’re loading an external CSS file, a Google Font, and a JavaScript library just for your announcement bar, you’re adding unnecessary weight. Keep it lean.
Quick Reference: Which Bar Style Should You Use?
| Use Case | Recommended Style | Why |
|---|---|---|
| Simple notice or update | Basic bar | Fast to implement, no JS needed |
| Product launch or feature release | Gradient + CTA button | Eye-catching, drives clicks to a landing page |
| Ongoing promo or shipping notice | Dismissible bar | Respects visitor choice, reduces annoyance |
| Multiple messages at once | Scrolling ticker | Fits more info without taking more vertical space |
| Flash sale or limited-time offer | Countdown bar | Creates urgency, auto-hides when expired |
Wrapping Up
Every announcement bar in this guide works with plain HTML. No React, no jQuery, no Tailwind. Just code you can paste into any .html file and customize in minutes.
Start with the basic bar if you’re in a rush. Graduate to the dismissible or countdown versions when you need more functionality.
And if you’d rather skip the coding entirely, tools like website widgets and notification bar tools can handle the whole thing visually.
Boost Conversion Instantly
Add Social Proof & Urgency to your website
Krunal Vaghasiya is a marketing tech expert who boosts e-commerce conversion rates with automated social proof and FOMO strategies. He loves to keep posting insightful posts on online marketing software, marketing automations, and improving conversion rates.