
How to Add an Announcement Bar to WordPress (2 Simple Ways)

Running a sale, launching a new product, or sharing an important update? A WordPress announcement bar helps you show important messages at the top of your website where visitors can see them immediately.
You can add an announcement bar using your WordPress theme settings, a plugin, or a tool like WiserNotify if you need features like targeting, scheduling, countdown timers, and tracking.
In this guide, we’ll show you the easiest ways to add an announcement bar to your WordPress website.
Types of Announcement Bars
Announcement bars are versatile tools for communicating key information on websites or digital platforms.
They can serve various purposes depending on the target audience, content, and goals.
Promotional Announcement Bars
These bars highlight promotions, discounts, or special offers to drive sales and user engagement.
Purpose: Attract customers to take advantage of deals.
Example Messages:
- “Get 20% off your first order! Use code: WELCOME20.”
- “Limited-time offer: Free shipping on orders over $50!”
New Product or Feature Announcements
Used to inform users about new offerings, updates, or features.
Purpose: Showcase innovation or improvements and encourage exploration.
Example Messages:
- “Introducing our new AI-powered writing assistant!”
- “Check out our latest collection, which is now available online!”
Event-Specific Announcements
These bars promote upcoming events, webinars, or key dates.
Purpose: Increase attendance or awareness.
Example Messages:
- “Join us for our Annual Sale starting January 15th!”
- “Webinar: Learn the secrets to success—Register now!”
Urgency or Countdown Bars
Designed to create a sense of urgency by including time-sensitive offers or deadlines.
Purpose: Drive immediate action.
Example Messages:
- “Hurry! Sale ends in 2 days!”
- “Only 3 hours left to grab this deal!”
Seasonal or Holiday Announcements
Bars are tailored for specific holidays or seasons to align with festive themes.
Purpose: Create relevance and capitalize on the holiday spirit.
Example Messages:
- “Happy Holidays! Enjoy special discounts this season.”
- “Celebrate Earth Day with 15% off sustainable products!”
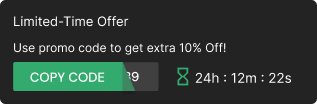
Build urgency
Add floating offers with countdown timer & coupon code.

Method 1: Add an announcement bar using a WordPress theme
Many WordPress themes include a built-in announcement bar or top bar option.
The exact steps depend on the theme you use, but the process is usually similar.
Step 1: Open your WordPress customizer
Log in to your WordPress dashboard.
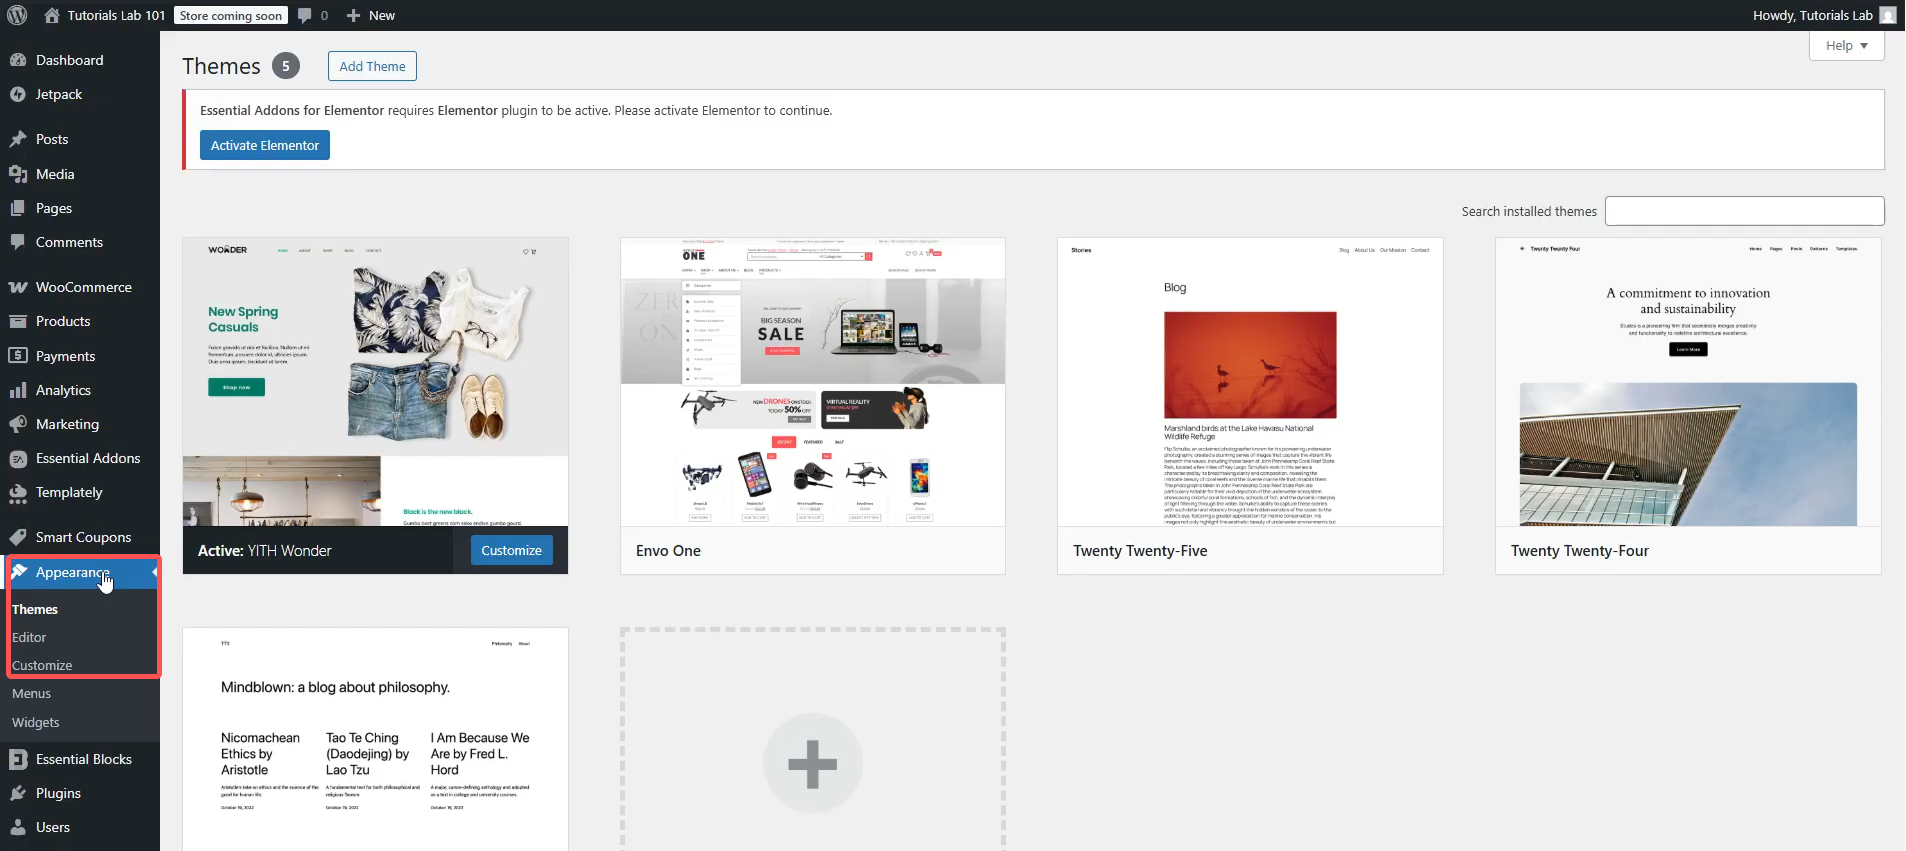
Go to:
- Appearance > Customize
Look for options such as:
- Header
- Top Bar
- Announcement Bar
- Notification Bar
The name may change depending on your theme.
Step 2: Add your announcement message

Enter the message you want visitors to see.
Keep your message short and clear. Visitors should understand the offer or update within a few seconds.
You can add a link or button if your theme supports it.
Step 3: Customize the design
Adjust the colors, text size, spacing, and alignment to match your website.
Make sure the text is easy to read on both desktop and mobile devices.
Step 4: Publish your changes
Preview the announcement bar and check how it looks across different devices.
Once everything looks correct, click Publish to make it live.
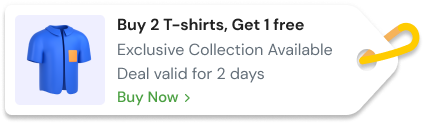
Build trust & FOMO
Highlight real-time activities like reviews, sales & sign-ups.
Method 2: Add a WordPress announcement bar with WiserNotify
If you need more control over your announcement bar, WiserNotify helps you create and manage announcement bars without editing your website code.
You can create different messages, set display rules, schedule campaigns, add countdown timers, and track performance.
Step 1: Connect your WordPress website with WiserNotify
Log in to your WiserNotify account.
Add your WordPress website and copy the pixel code provided.
Then add the WiserNotify plugin from your WordPress dashboard.
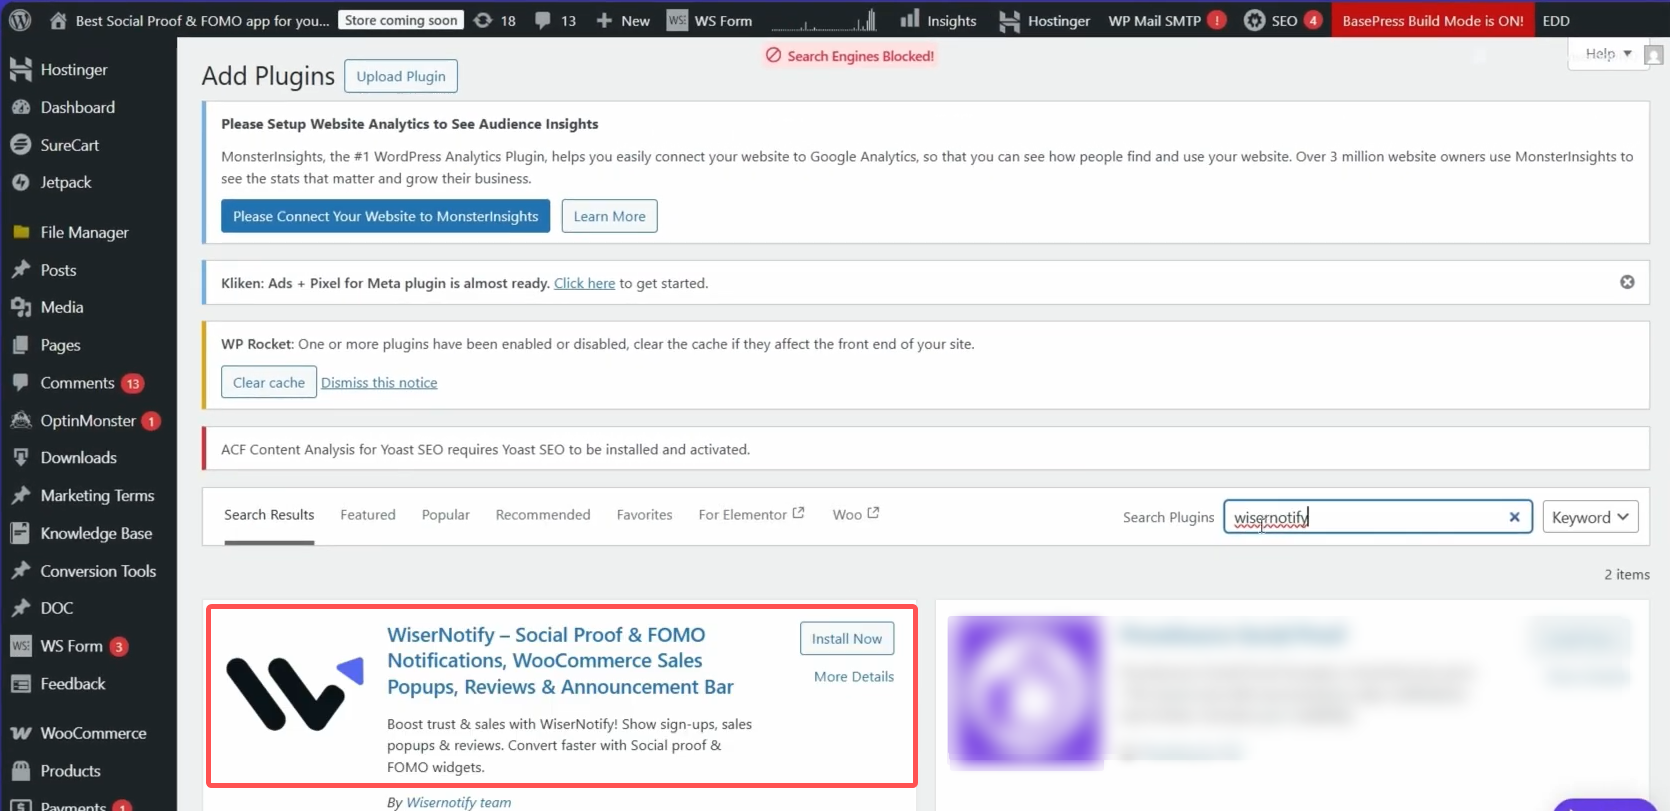
Go to:
Plugins > Add New
Search for WiserNotify, install the plugin, and activate it.
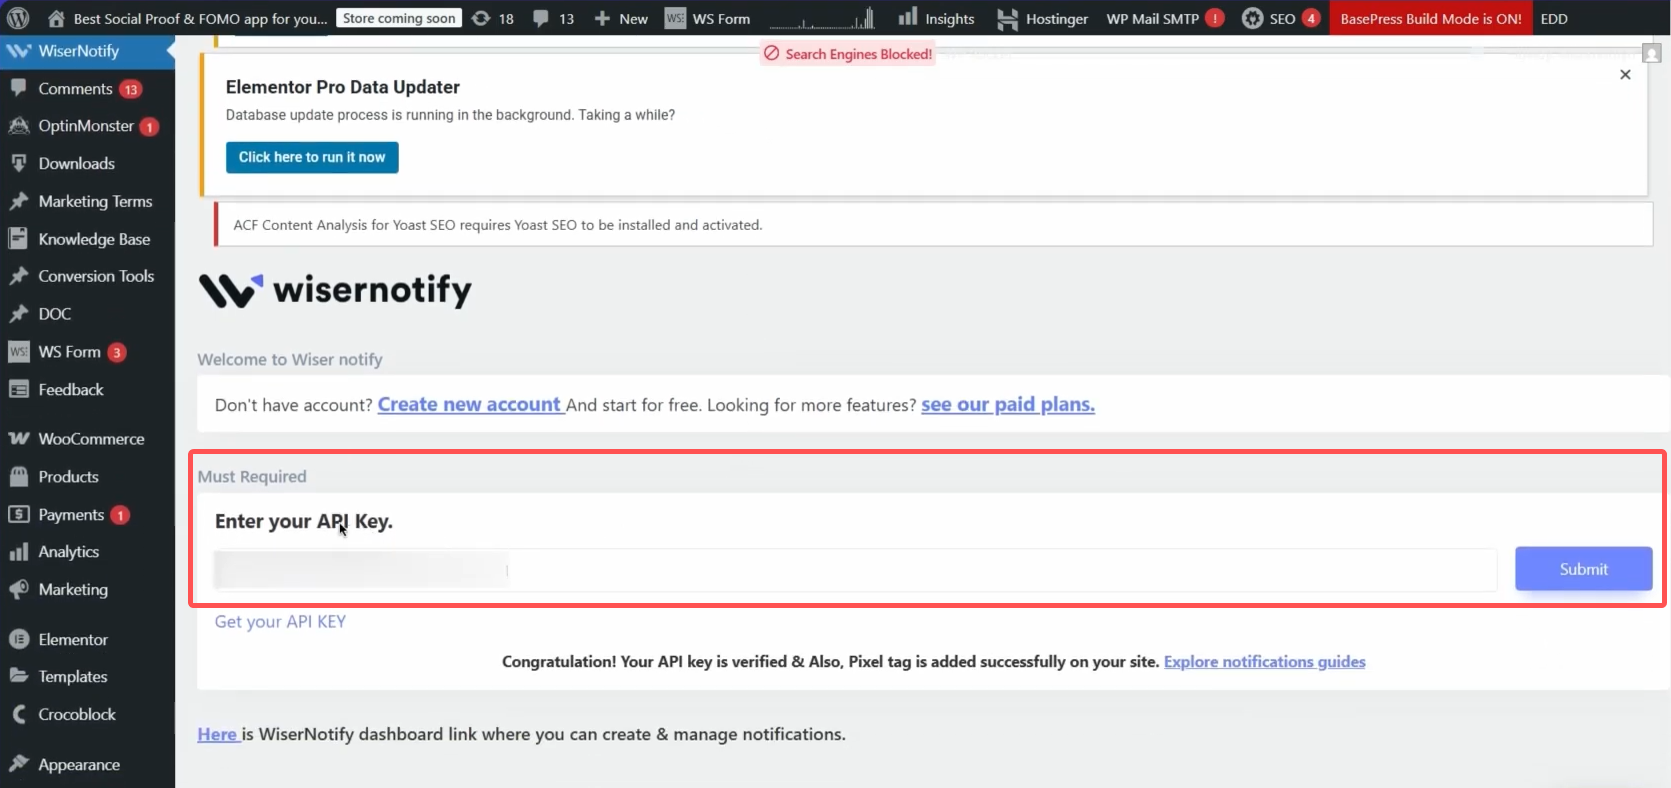
Paste your WiserNotify pixel code into the plugin settings to complete the connection.
For more details, check our guide: How to install pixel code on your WordPress site.
Step 2: Create your announcement bar
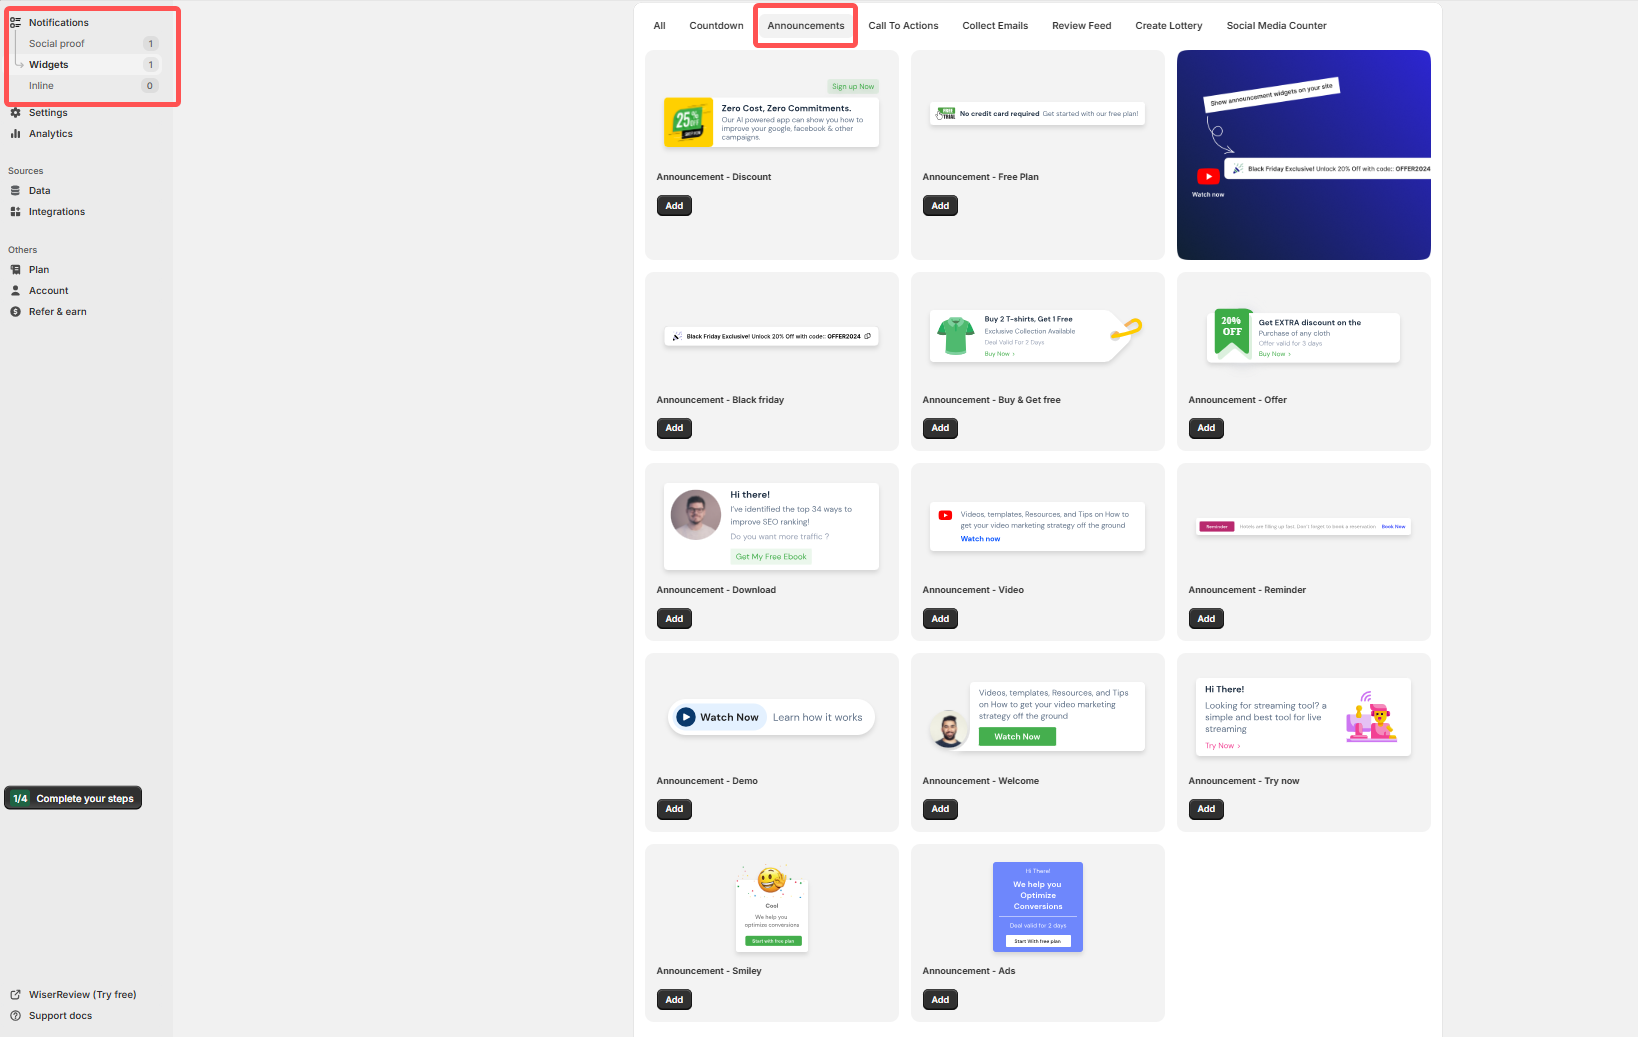
Open your WiserNotify dashboard.
Go to Create Notification and select Announcement Bar.
Choose a template or create one from scratch.
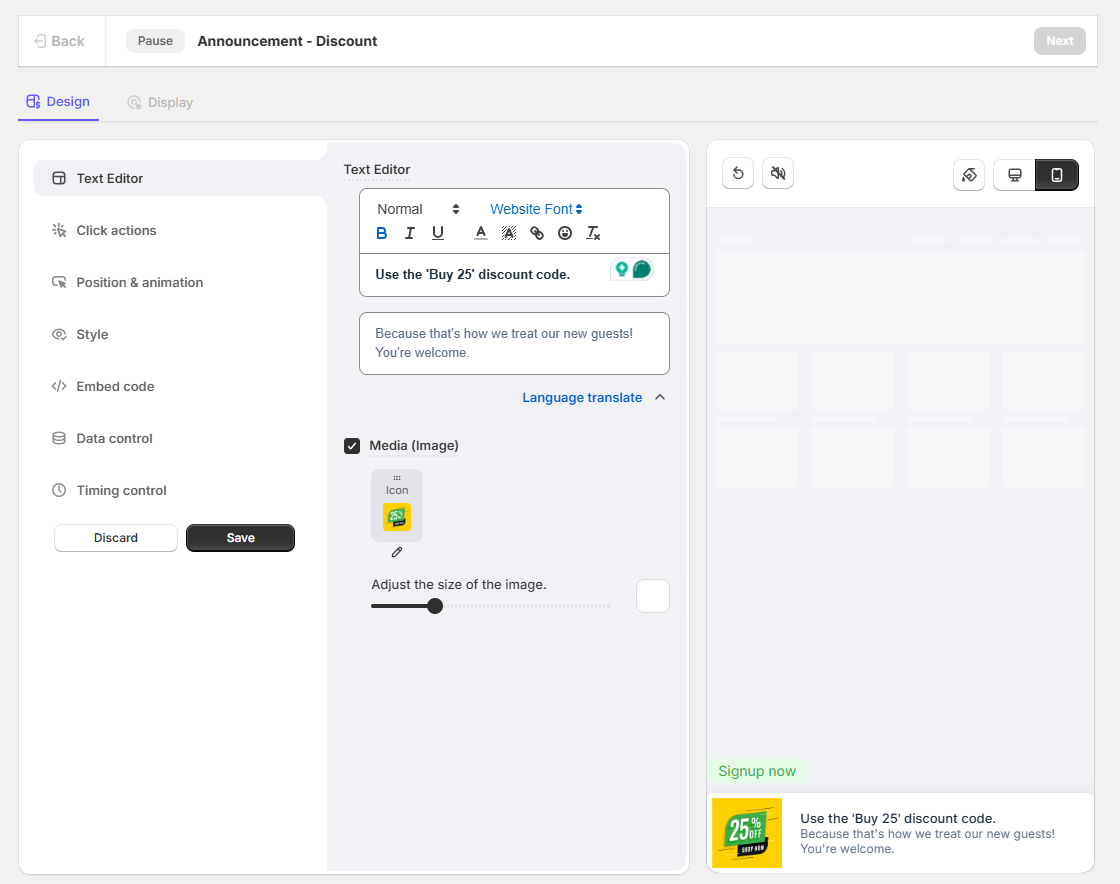
Add your message, customize the design, and add a button if needed.
Step 3: Set display rules
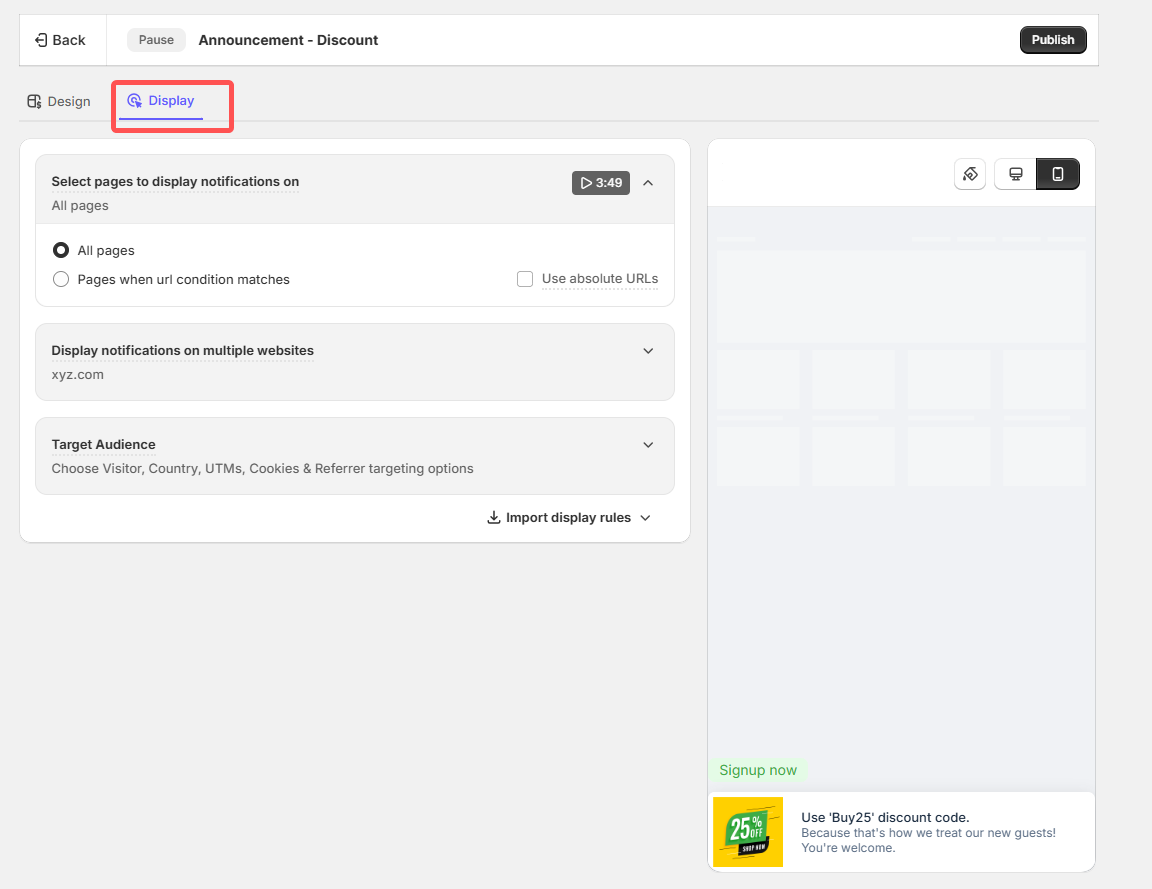
Choose where and when your announcement bar should appear.
You can control settings such as:
- specific pages
- visitor location
- device type
- campaign schedule
This helps you show the right message to the right visitors.
Step 4: Preview and publish
Check your announcement bar on desktop and mobile.
Make sure the message, design, and links work correctly.
Once everything is ready, publish the announcement bar on your WordPress website.
Best Places to Display Announcement Bars on WordPress
The placement of your announcement bar affects how many visitors notice your message. Choose the location based on the purpose of your announcement and what visitors need to see at that moment.
Homepage
The homepage is a good place for website-wide announcements because it is usually the first page visitors see.
Use it for major updates, seasonal promotions, new product launches, sales, or important business announcements.
Product Pages
Product pages are useful for messages that support purchase decisions.
Use the announcement bar to share product discounts, free shipping offers, limited-time deals, or information that helps visitors complete their purchase.
Blog Pages
Blog pages can help you reach visitors who are reading your content.
Use the announcement bar to promote newsletters, new resources, upcoming events, or related offers without distracting readers from the article.
Landing Pages
Landing pages work well for campaign-specific messages.
If visitors arrive from ads, emails, or social media, keep the announcement related to that campaign so the message feels relevant.
Checkout Pages
For ecommerce websites, checkout pages are a useful place to show reminders before visitors complete their order.
You can use the announcement bar to highlight shipping offers, discount reminders, or important order information.

Boost Conversion Instantly
Add Social Proof & Urgency to your website
Avoid Common Mistakes
Outdated messages, such as expired discounts or events, can confuse visitors and damage your credibility. Regularly update or remove announcements as needed.
Ensure your announcement bar is optimized for mobile devices. A poorly designed bar can obstruct navigation and frustrate users on smaller screens.
Keep your message short and focused. Too much text can overwhelm visitors and dilute the impact of your call-to-action.
Avoid flashy or clashing colors that detract from the website’s design. Stick to brand-consistent themes for a professional look.
Limit the number of active announcement bars to avoid overwhelming your audience and detracting from your main message.
Final thoughts
Adding an announcement bar to WordPress is a simple way to share important messages with visitors.
For basic needs, your WordPress theme may already have the option you need. If you want more control over targeting, scheduling, countdown timers, and tracking, WiserNotify can help you create announcement bars without editing code.
Keep your message short, make the offer clear, and show it at the right time to get better results.
Frequently Asked Questions
Can I add multiple announcement bars on WordPress?
Yes, but ensure each bar has a distinct purpose and doesn’t clutter your site.
How often should I update my announcement bar?
Update it regularly to reflect new promotions, updates, or events.
Do I need coding knowledge to add an announcement bar?
No, tools like WiserNotify and plugins make it easy to add and customize bars without coding. Adding an announcement bar to your WordPress site is a straightforward way to boost engagement, communicate effectively, and drive conversions.

Krunal Vaghasiya is a marketing tech expert who boosts e-commerce conversion rates with automated social proof and FOMO strategies. He loves to keep posting insightful posts on online marketing software, marketing automations, and improving conversion rates.




 Capterra