How to Add an Announcement Bar to Your Website
 Krunal Vaghasiya|May 20, 2025
A website announcement bar is the best option for conveying important messages, such as notifying visitors, promoting time-sensitive deals, or sharing important updates, without interrupting their browsing experience.
Most notification bars out there either scream too loudly or whisper too softly.
The sweet spot? A sticky bar that grabs attention without hijacking the whole screen.
We’ll explain what types of announcement bars exist, how to use them correctly, what to avoid, and how to make them work for your website.
Let’s start with the basics.
Types of Announcement Bars

There isn’t one “best” notification bar for every case. It depends on what you’re trying to say and to whom you’re saying it. Here are the main types:
1. Promotional Announcement Bars
These are perfect for limited-time offers, product launches, or flash sales.
They usually include a countdown timer, a clear CTA button, and a punchy message that says, “Act now.”
Stat: Websites using promotional announcement banners during campaigns saw up to a 35% lift in conversions.
These features can also effectively drive signups by capturing leads and enhancing customer conversion.
2. Lead Capture Bars
Want emails? Give customers a reason to care. These floating sticky bars appear at the top or bottom and offer something in exchange for an email, a discount code, or a free download.
3. Informational Bars
Use these to convey essential messages like shipping delays, holiday closures, or new return policies. They are often simple, text-only bars, but don’t mistake simple for boring.
4. Feature Update Bars
Dropped new features on your app or tool? Let your users know right there on the web page they’re using. Highlight the update and link to learn more.
5. Alert or Warning Banners
This is for urgent issues like service outages, login problems, or policy changes. These should appear in your color scheme (yellow or red), and visitors will instantly be notified.
Build urgency
Add floating offers with countdown timer & coupon code.


How to Add an Announcement Bar to a Website
- Anncoment Bar Widgets

- Recent Activity Notifications
- Reviews and Ratings Widgets
- Countdown Timer Widgets
- Form Submission Notifications
- Inline Widgets
- Exit-Intent Pop-Ups
- Live Visitor Count Widgets

- Log in to the WiserNotify dashboard.
- Navigate to the Create Notification section and select the Announcement Bar template.

- Customize the design by:
- Adding a compelling message such as “Exclusive Discount! Limited Time Only.”
- Choosing the appropriate font, colors, and background to align with your branding.
- Including a clear Call-to-Action (CTA) button like “Shop Now” or “Learn More.”
- Preview the design to ensure it matches your preferences.
- Save the widget design and press Next.

- Configure display settings, such as showing the bar on specific pages or targeting users based on location or behavior.
- Schedule the announcement bar for a particular timeframe if needed.
Here’s a real-life example of how an announcement bar will look on a website.

Other Ways to Add an Announcement Bar
If you’re already using WiserNotify, you’re golden. But if you’re not, depending on how your site is built, there are other ways to display a website announcement bar.
You can manually code a sticky header or footer bar for basic HTML websites using CSS and JavaScript. This lets you control style and timing but requires some web dev know-how.
If you’re using a CMS like WordPress, some themes come with built-in notification bar options, or you can add one using a custom code snippet. Ensure it’s responsive and doesn’t clash with your site’s design.
For Shopify or similar platforms, you might need to insert a small block of custom code into your theme files (usually header, liquid, or footer) to create a floating sticky bar.
Regardless of your route, your goal is to show a clean and clear announcement banner that helps visitors without getting in the way.
Here are different types of placement and trigger options you can use:
Build trust & FOMO
Highlight real-time activities like reviews, sales & sign-ups.

1. Entry-Triggered Sticky Bars
These appear as soon as a website visitor lands on a page. They’re helpful for essential announcements or first-time visit offers.
Add a scroll delay if you don’t want to seem too pushy.
2. Exit-Intent Notification Bars
Not all floating bars need to appear immediately.
Exit-intent notification bars appear when users move their mouse toward the browser window’s close button.
Great time to drop a “Wait! Get 10% off!” message.
3. Scroll-Activated Bars
Trigger these bars when users scroll down a certain percentage of the webpage.
This signals that they’re interested, which is the perfect time to offer discounts, capture leads, or mention a new feature.
4. Geo-Targeted Announcement Banners
Custom bars based on location. Selling in the US and EU?
Show different important updates depending on where the visitor is browsing from.
Announcement Bar Example
Let’s examine real examples of website announcement bars that were done right.
You’ll see precisely how clever placement, copy, and design combine to boost engagement, increase sales, and keep visitors informed.
1. Wise Ape Tea Co.
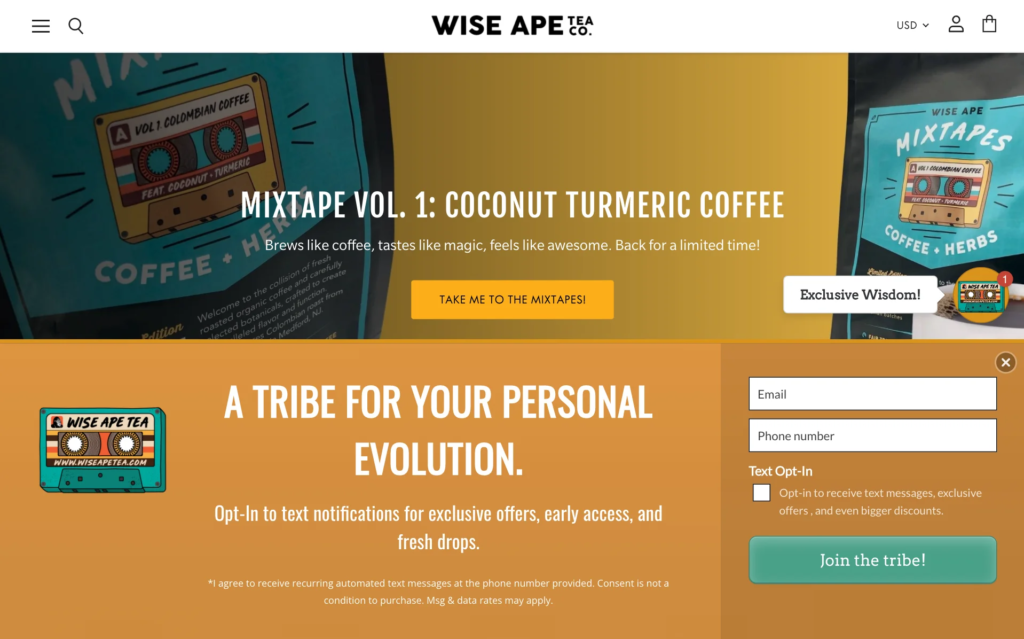
Their bar promotes a limited-time product drop — “Mixtape Vol. 1: Coconut Turmeric Coffee.”
It uses a clear headline, fun copy, and a bold CTA: “Take Me to the Mixtapes.”
A floating sticky badge labeled “Exclusive Wisdom!” also sticks with you during the scroll.
Perfect for product promotions and limited-time offers with strong visual energy.
2. Shopify
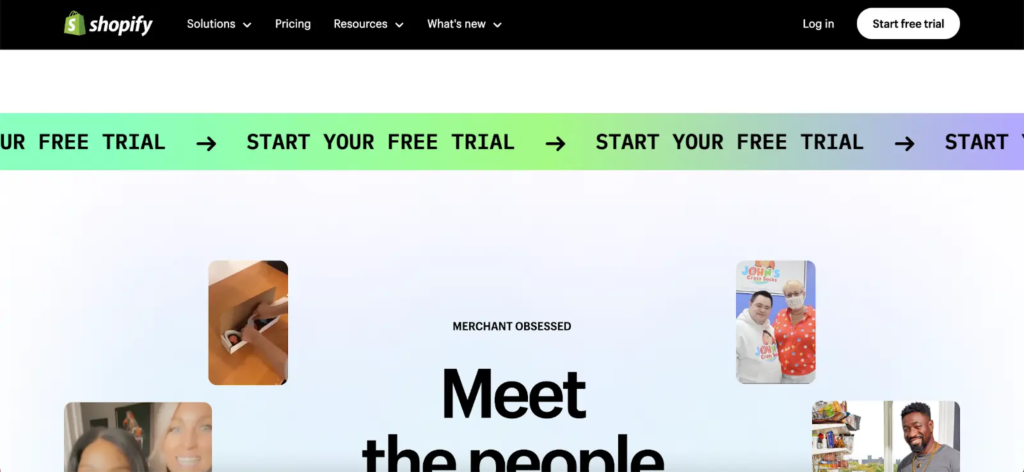
A persistent, animated announcement bar promotes a free trial with repetitive scrolling text: “START YOUR FREE TRIAL.”
The gradient color animation draws the eye without being intrusive.
Excellent use of movement to capture attention for high-value CTAs.
Works well when the primary goal is lead generation or driving signups.
Also see: 9 Killer announcement bar examples + how to make one
3. Crown & Paw
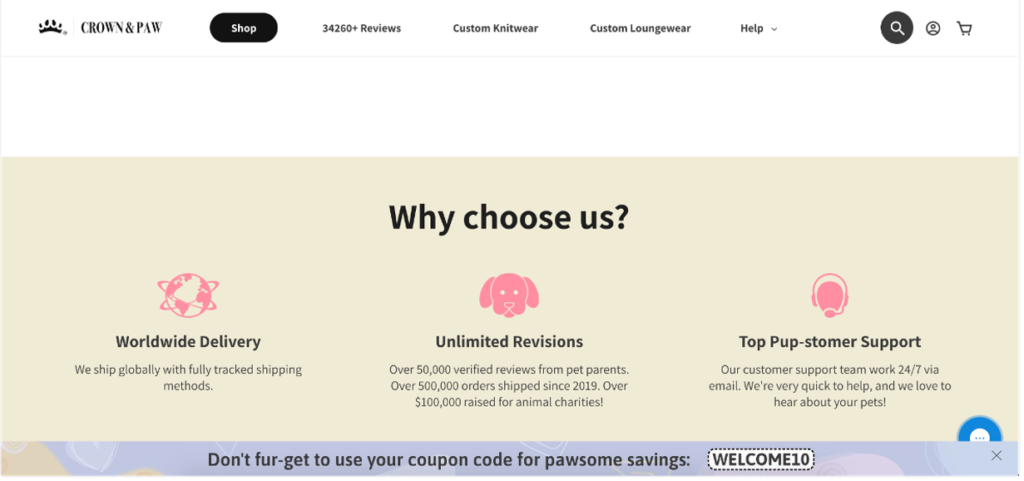
This bottom-floating sticky bar offers a custom message with a discount code in a playful way: “Don’t forget to use your coupon code for awesome savings: WELCOME10.”
Strong use of brand tone and personality.
Placement is subtle but effective and doesn’t compete with the main content.
A great example of using humor and copy to convey essential messages without breaking flow.
Boost Conversion Instantly
Add Social Proof & Urgency to your website
Best Practices for Announcement Bars
There’s a difference between just showing a bar and getting actual clicks.
In this section, you’ll find tested, precise tactics for turning your website announcement bar into a high-performing asset rather than just a decoration.
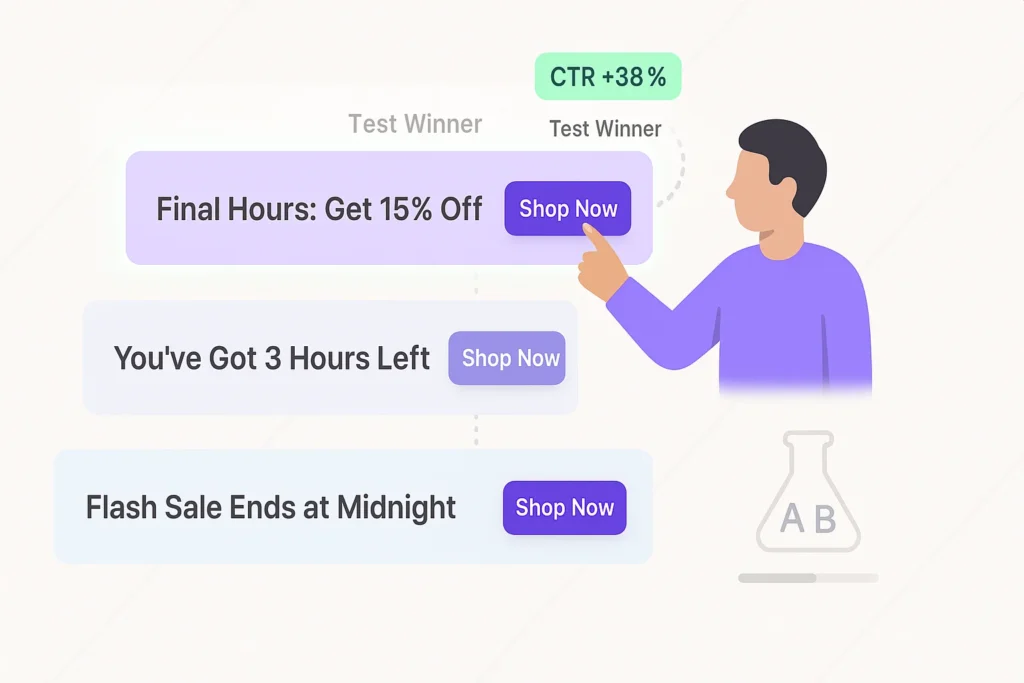
1. Start With Micro-Copy Testing
Customize your announcement bar by A/B testing 3–5 versions of your copy using a tool like VWO. Test power verbs, urgency triggers, and exact discount numbers to find the highest CTR copy.
Example Test Variations:
- “Final Hours: Get 15% Off”
- “You’ve Got 3 Hours Left”
- “Flash Sale Ends at Midnight”
2. Embed UTM Tags in Every CTA
Always use UTMs to track the exact effectiveness of the CTA button in your notification bar.
Example: ?utm_source=announcement_bar&utm_medium=web&utm_campaign=may_flash_sale.
This way, you’ll see direct traffic + conversions from that bar inside Google Analytics. You can make all the changes necessary to customize the design of your widget by accessing the ‘Style’ tab and saving your alterations.
3. Control Bar Visibility With Scroll Depth
Increase engagement by setting your floating sticky bar to trigger only after users scroll past 30% of your web page. This prevents bounce and ensures the bar is shown to engaged visitors.
Use a scroll-depth listener in JavaScript like this:
if (window.scrollY / document.body.scrollHeight > 0.3) {
// show bar
}
4. Use Session-Based Targeting
Show your website notification bar to notify visitors, whether they are first-time visitors or returning users with specific behaviors.
Example: Show a “10% off” code to users who haven’t purchased in the last 14 days.
You can store and check session data using localStorage or sessionStorage.
5. Align Countdown Timers With Real Inventory or Campaigns
Instead of generic timers, sync your countdown timer with the actual end times of campaigns and special deals.
If you’re running inventory-based urgency, use the remaining quantity (e.g., “Only 12 items left”) and update it dynamically with JavaScript on page load.
Bonus: If the deal expires, auto-hide the announcement banner to keep it fresh and trustworthy.
These tweaks may seem small, but they distinguish between ignored website announcement bars and ones that actually convert.
Platform-Specific Integration Guides
Create a WooCommerce Announcement Bar Without Code
How to Create an Announcement Bar with HTML and CSS
Sticky Shopify Announcement Bar That Grabs Attention
Squarespace Announcement Bar That Gets Noticed
How to Create an Announcement Bar in Elementor
Add a Sticky Divi Announcement Bar to Any Page
How to add an announcement bar in WordPress
Common Mistakes to Avoid

Even minor errors in your website announcement bar setup can quietly kill conversions. Below are specific technical and strategic mistakes you’ll want to avoid and how to fix them.
1. Displaying the Bar on Every Page Without Relevance
Showing the same announcement bar across every web page dilutes its impact and creates banner blindness.
For example, a “Free Shipping This Weekend” message on the contact page doesn’t make sense.
Fix: Set conditional logic so the notification bar appears only on product, checkout, or relevant landing pages.
2. Failing to Hide the Bar After Conversion
If a user submits their email through your lead capture sticky bar, don’t keep showing it. That’s a missed opportunity and frustrates returning users.
Fix: Use localStorage or sessionStorage to suppress the bar after conversion:
if (!localStorage.getItem(“email_submitted”)) {
// show bar
}
Set localStorage.setItem(“email_submitted”, true) when the user submits.
3. Using Generic Countdown Timers That Reset
If your countdown timer resets on every visit, users will notice. This damages trust and destroys urgency.
Fix: Sync the timer with an absolute deadline stored in a global config or your CMS. If it expires, remove or update the announcement banner.
4. Overlapping the Bar With Navigation or CTAs
You’re losing conversions if your floating sticky bar covers your main nav menu or important CTAs on mobile.
Fix: Set high z-index with spacing buffers. Use CSS media queries to reduce the height of the notification bar on smaller screens.
5. Forgetting to Track the Bar’s Performance
You can’t improve what you don’t measure. Many bars are launched with no tracking or goals.
Fix: Attach unique UTMs to every CTA and track bar clicks and resulting conversions in Google Analytics or your CRM.
Wrap up
An announcement bar might look small, but it can do big things for your website, like keeping visitors informed, increasing engagement, and driving signups in a non-disruptive way.
Stick to clear messages, real offers, and well-timed triggers. Avoid the over-the-top stuff, keep your bar examples aligned with your brand, and always think about what your website visitors need to know.
And hey, if you’re ready to build one without the mess or guesswork, WiserNotify has you covered.
You’ve got this. Now build a bar that works.
Krunal Vaghasiya is a marketing tech expert who boosts e-commerce conversion rates with automated social proof and FOMO strategies. He loves to keep posting insightful posts on online marketing software, marketing automations, and improving conversion rates.