
An announcement bar is a powerful feature for WooCommerce stores that highlights promotions, shares news, or provides important updates.
By displaying a non-intrusive message at the top of your website, you can capture visitors’ attention and drive desired actions, such as making a purchase or signing up for an event.
In this guide, we’ll explore the types of announcement bars you can create, how to add one to your WooCommerce site, and best practices for maximizing its impact on your audience.
Types of Announcement Bars
WooCommerce allows you to use announcement bars creatively for various purposes:
Promotional Bars
Highlight discounts and offers to boost sales.
Example: “Save 15% on all orders today—Use Code: SAVE15.”
Urgency Bars
Encourage immediate action with countdowns or limited-time deals.
Example: “Flash Sale: Ends in 2 hours!”
Shipping Announcements
Inform customers about free shipping thresholds.
Example: “Free shipping on orders over $50!”
Event Notifications
Announce webinars, launches, or other events.
Example: “Join us for a free webinar this Friday—Sign up now!”
Policy Updates
Share critical updates, such as holiday hours or policy changes.
Example: “Extended holiday returns available until January 31st.”
Add Announcement Bar to WooCommerce
Adding an announcement bar to your WooCommerce website is incredibly easy and requires no coding knowledge.
Many platforms offer plugins and tools with simple drag-and-drop interfaces to create and customize announcement bars effortlessly. WiserNotify makes it easy to create announcement bars.
Using WiserNotify, you can quickly add an announcement bar to your WooCommerce website to grab visitors’ attention and share essential updates, promotions, or calls to action.
With advanced features like A/B testing and analytics, WiserNotify allows you to create visually engaging and highly targeted announcement bars that boost user engagement and drive conversions. Key features include:
- Anncoment Bar Widgets

- Recent Activity Notifications
- Reviews and Ratings Widgets
- Countdown Timer Widgets
- Form Submission Notifications
- Inline Widgets
- Exit-Intent Pop-Ups
- Live Visitor Count Widgets

- Log in to the WiserNotify dashboard.
- Navigate to the Create Notification section and select the Announcement Bar template.

- Customize the design by:
- Adding a compelling message such as “Exclusive Discount! Limited Time Only.”
- Choosing the appropriate font, colors, and background to align with your branding.
- Including a clear Call-to-Action (CTA) button like “Shop Now” or “Learn More.”
- Preview the design to ensure it matches your preferences.
- Save the widget design and press Next.
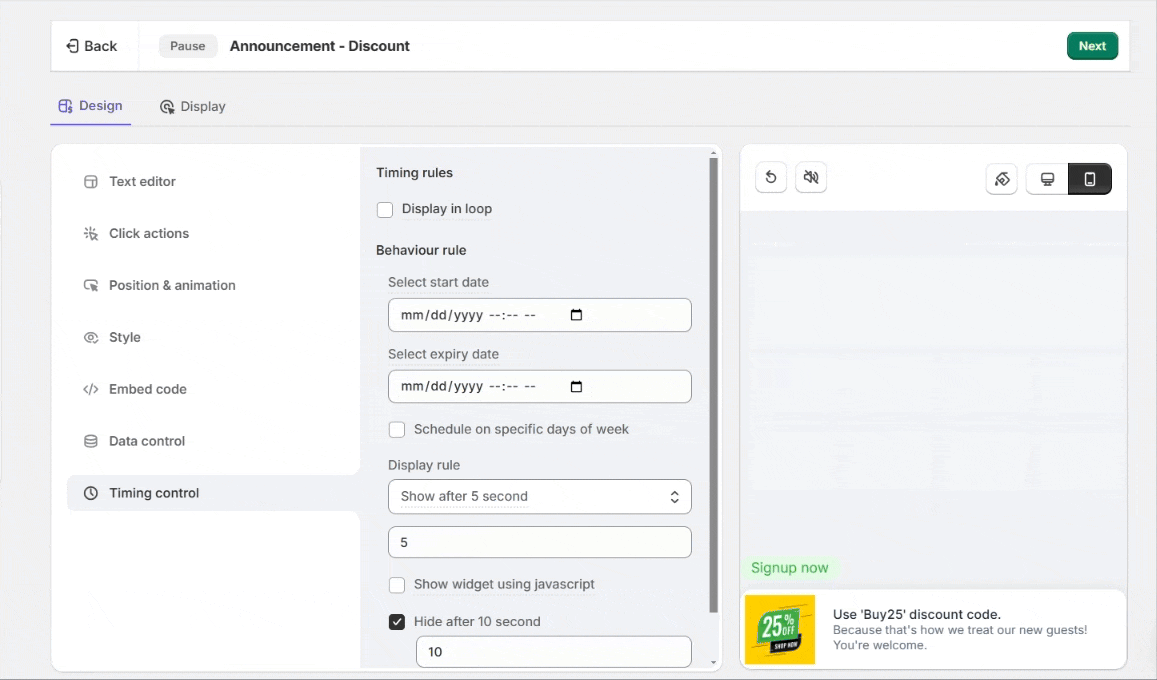
- Configure display settings, such as showing the bar on specific pages or targeting users based on location or behavior.
- Schedule the announcement bar for a particular timeframe if needed.
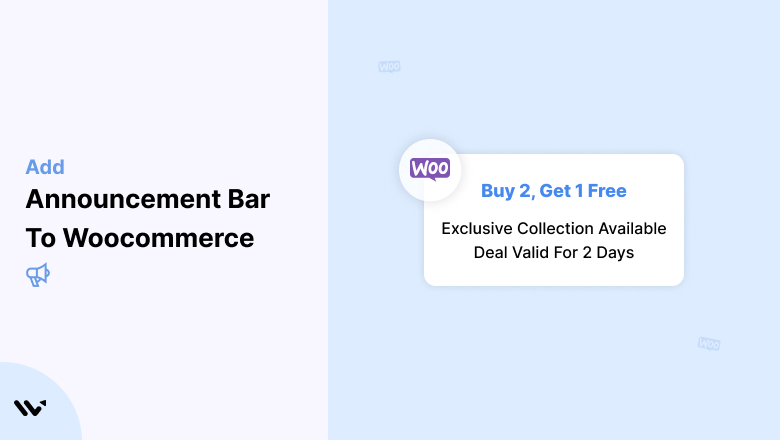
Here’s a real-life example of how an announcement bar will look on a website.

Steps to Install WiserNotify on WooCommerce
- Log in to your WiserNotify dashboard. Start with the free plan to explore the platform’s features.
- Add your WooCommerce site, and copy the unique pixel code provided.
- Log in to your WooCommerce admin panel.
- Navigate to Plugins > Add New and search for “WiserNotify.”
- Install and activate the plugin.
- Paste the copied pixel code into the WiserNotify plugin settings.
Using WiserNotify, you can easily create and manage announcement bars on your WooCommerce website.
This ensures that your key messages reach your audience effectively and drive the desired actions.
Best Places to Display an Announcement Bar
Top of the Homepage
- Capture visitors’ attention immediately upon landing.
Product Pages
- Highlight deals specific to certain products or categories.
Cart and Checkout Pages
- Reinforce urgency or discounts to reduce cart abandonment.
Mobile View
- Ensure the bar is visible and responsive on mobile devices.
Landing Pages
- Use targeted announcement bars for campaigns or promotions.
Also see: 9 Killer announcement bar examples
Common Mistakes to Avoid
Keep your announcement concise and easy to read.
Ensure the bar displays correctly on all devices.
Avoid running multiple announcement bars simultaneously, which can overwhelm users.
Use fonts and colors that match your WooCommerce store’s theme.
Regularly update or remove expired announcements to maintain credibility.
Conclusion
Adding an announcement bar to your WooCommerce store is a simple yet effective way to boost engagement, drive sales, and communicate essential information to your customers.
Whether you use plugins, page builders, or custom code, WooCommerce provides ample flexibility to create an announcement bar that fits your branding and business needs.
Follow the steps in this guide to get started and watch your conversions soar.
