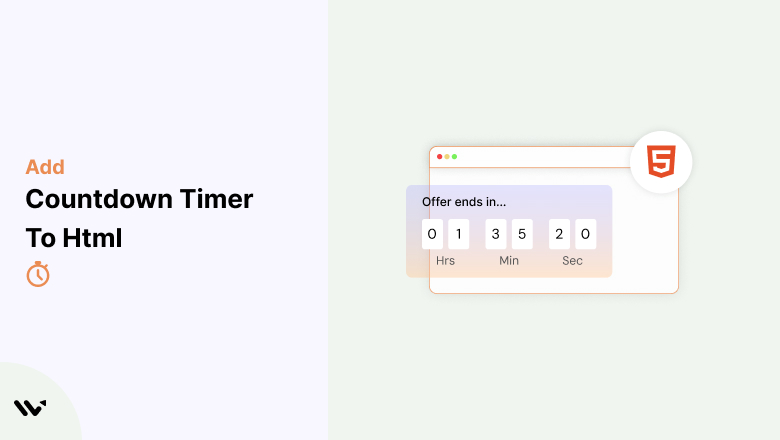

Here are 4 countdown timer code blocks you can copy and paste into any HTML page.
Basic, dark-themed, evergreen, and compact banner.
Pick the one you need, change the date, and you’ll be live in 30 seconds.
Complete Countdown Timer Code (Copy and Paste)
Here’s a fully working countdown timer you can copy and paste into any HTML page right now.
Just change the target date on line 3 of the JavaScript section, and you’re done.
<!-- COUNTDOWN TIMER - Copy this entire block -->
<div id="countdown-wrap" style="display:flex;gap:16px;justify-content:center;font-family:Arial,sans-serif;padding:24px">
  <div style="text-align:center">
    <span id="cd-days" style="font-size:48px;font-weight:bold;color:#333">00</span>
    <p style="font-size:12px;color:#888;margin:4px 0 0">Days</p>
  </div>
  <div style="text-align:center">
    <span id="cd-hours" style="font-size:48px;font-weight:bold;color:#333">00</span>
    <p style="font-size:12px;color:#888;margin:4px 0 0">Hours</p>
  </div>
  <div style="text-align:center">
    <span id="cd-mins" style="font-size:48px;font-weight:bold;color:#333">00</span>
    <p style="font-size:12px;color:#888;margin:4px 0 0">Minutes</p>
  </div>
  <div style="text-align:center">
    <span id="cd-secs" style="font-size:48px;font-weight:bold;color:#333">00</span>
    <p style="font-size:12px;color:#888;margin:4px 0 0">Seconds</p>
  </div>
</div>

<script>
// CHANGE THIS DATE to your target date
const targetDate = new Date("2026-12-31T23:59:59").getTime();

function updateTimer() {
  const now = new Date().getTime();
  const diff = targetDate - now;

  if (diff <= 0) {
    document.getElementById("countdown-wrap").innerHTML = "<p>Time's up!</p>";
    return;
  }

  const days = Math.floor(diff / (1000 * 60 * 60 * 24));
  const hours = Math.floor((diff % (1000 * 60 * 60 * 24)) / (1000 * 60 * 60));
  const mins = Math.floor((diff % (1000 * 60 * 60)) / (1000 * 60));
  const secs = Math.floor((diff % (1000 * 60)) / 1000);

  document.getElementById("cd-days").textContent = days;
  document.getElementById("cd-hours").textContent = String(hours).padStart(2, "0");
  document.getElementById("cd-mins").textContent = String(mins).padStart(2, "0");
  document.getElementById("cd-secs").textContent = String(secs).padStart(2, "0");
}

updateTimer();
setInterval(updateTimer, 1000);
</script>
That’s it. Paste this into the head <body> of any HTML page, change the date, and you’ve got a working countdown timer. No external files, no dependencies, no frameworks.
I’ve built dozens of these for WiserNotify customers over the years. This basic version works 99% of the time. But if you want something that looks more polished, keep reading.
Also check: How to Add a Countdown Timer Widget to Any Website
Build urgency
Add floating offers with countdown timer & coupon code.


How the Code Works (Line by Line)
If you’re new to JavaScript, here’s what each part does. Understanding this will help you customize the timer to fit your needs.
The HTML structure: Four <div> elements, each containing a <span> for the number and a <p> for the label (Days, Hours, Minutes, Seconds). All the styling is inline, so you don’t need a separate CSS file.
The target date: new Date("2026-12-31T23:59:59") sets the countdown endpoint. Use the format YYYY-MM-DDTHH:MM:SS for the date. It T separates the date from the time.
The math: Every second, the script calculates the difference between now and the target date in milliseconds, then converts that into days, hours, minutes, and seconds using division and modulo operators.
The update loop: setInterval(updateTimer, 1000) runs the function every 1,000 milliseconds (one second). We also call updateTimer() once immediately, so there’s no one-second delay on page load.
The expiry check: When diff hits zero or goes negative, the timer replaces itself with a “Time’s up!” message. You can swap this for a redirect using window.location.href = "your-url".
Boost Conversion Instantly
Add Social Proof & Urgency to your website
Styled Countdown Timer (Dark Theme)
The basic timer works fine, but if you want something that actually looks good on a landing page or sales page, here’s a styled version with a dark background, rounded cards, and a bit of visual flair.
<div id="timer-styled" style="display:flex;gap:12px;justify-content:center;padding:32px;background:#1a1a2e;border-radius:12px;max-width:500px;margin:0 auto">
  <div style="background:#16213e;border-radius:8px;padding:16px 20px;text-align:center;min-width:70px">
    <span id="st-days" style="font-size:36px;font-weight:800;color:#e94560;display:block">00</span>
    <span style="font-size:11px;color:#a0a0b0;text-transform:uppercase;letter-spacing:1px">Days</span>
  </div>
  <div style="background:#16213e;border-radius:8px;padding:16px 20px;text-align:center;min-width:70px">
    <span id="st-hours" style="font-size:36px;font-weight:800;color:#e94560;display:block">00</span>
    <span style="font-size:11px;color:#a0a0b0;text-transform:uppercase;letter-spacing:1px">Hours</span>
  </div>
  <div style="background:#16213e;border-radius:8px;padding:16px 20px;text-align:center;min-width:70px">
    <span id="st-mins" style="font-size:36px;font-weight:800;color:#e94560;display:block">00</span>
    <span style="font-size:11px;color:#a0a0b0;text-transform:uppercase;letter-spacing:1px">Minutes</span>
  </div>
  <div style="background:#16213e;border-radius:8px;padding:16px 20px;text-align:center;min-width:70px">
    <span id="st-secs" style="font-size:36px;font-weight:800;color:#e94560;display:block">00</span>
    <span style="font-size:11px;color:#a0a0b0;text-transform:uppercase;letter-spacing:1px">Seconds</span>
  </div>
</div>

<script>
const stTarget = new Date("2026-12-31T23:59:59").getTime();
function stUpdate() {
  const diff = stTarget - Date.now();
  if (diff <= 0) { document.getElementById("timer-styled").innerHTML = "<p style='color:#e94560;font-size:24px;text-align:center'>Offer Expired</p>"; return; }
  document.getElementById("st-days").textContent = Math.floor(diff / 86400000);
  document.getElementById("st-hours").textContent = String(Math.floor((diff % 86400000) / 3600000)).padStart(2,"0");
  document.getElementById("st-mins").textContent = String(Math.floor((diff % 3600000) / 60000)).padStart(2,"0");
  document.getElementById("st-secs").textContent = String(Math.floor((diff % 60000) / 1000)).padStart(2,"0");
}
stUpdate(); setInterval(stUpdate, 1000);
</script>
This version uses a navy blue background (#1a1a2e) with red accent numbers (#e94560). Swap those hex values to match your brand.
The rounded card design works great on product pages, checkout pages, and high-converting landing pages.
Evergreen Countdown Timer (Resets Per Visitor)
Here’s a version that’s huge for marketers. An evergreen timer doesn’t count down to a fixed date.
Instead, it starts fresh for each visitor and counts down from a set duration (such as 24 hours or 30 minutes).
This is what most ecommerce stores use for those “offer expires in 15:00” banners.
The timer uses localStorage to remember when each visitor first saw the page, so refreshing doesn’t reset it.
<div id="eg-timer" style="text-align:center;padding:16px;background:#fff3cd;border-radius:8px;font-family:Arial,sans-serif;max-width:400px;margin:0 auto">
  <p style="margin:0 0 8px;font-size:14px;color:#856404;font-weight:600">This offer expires in:</p>
  <span id="eg-display" style="font-size:32px;font-weight:800;color:#856404">00:00:00</span>
</div>

<script>
(function() {
  const DURATION = 24 * 60 * 60 * 1000; // 24 hours in ms
  const KEY = "eg_timer_start";
  let start = localStorage.getItem(KEY);
  if (!start) { start = Date.now(); localStorage.setItem(KEY, start); }
  start = parseInt(start);

  function tick() {
    const elapsed = Date.now() - start;
    const remaining = DURATION - elapsed;
    if (remaining <= 0) {
      document.getElementById("eg-display").textContent = "EXPIRED";
      localStorage.removeItem(KEY);
      return;
    }
    const h = String(Math.floor(remaining / 3600000)).padStart(2, "0");
    const m = String(Math.floor((remaining % 3600000) / 60000)).padStart(2, "0");
    const s = String(Math.floor((remaining % 60000) / 1000)).padStart(2, "0");
    document.getElementById("eg-display").textContent = h + ":" + m + ":" + s;
  }
  tick(); setInterval(tick, 1000);
})();
</script>
How to adjust: Change the DURATION value. For 30 minutes, use 30 * 60 * 1000. For 48 hours, use 48 * 60 * 60 * 1000. The localStorage Key persists across page refreshes but clears when the user clears their browser data.
Word of caution: Evergreen timers work, but don’t fake scarcity. If your “limited offer” resets every time someone opens an incognito window, savvy shoppers will notice. Use them for genuine time-bound promotions.
Also check: 21 Countdown Timer Examples That Actually Work
Build urgency
Add floating offers with countdown timer & coupon code.
Compact Inline Timer (For Banners and Headers)
Sometimes you don’t need a big full-width timer. You just need a small countdown that fits inside a header bar or announcement banner.
Here’s a compact version:
<div style="background:#ef4444;color:#fff;text-align:center;padding:10px;font-family:Arial,sans-serif;font-size:14px">
  Flash Sale ends in <strong id="inline-cd">00:00:00</strong> | <a href="#" style="color:#fff;text-decoration:underline">Shop Now</a>
</div>

<script>
const inTarget = new Date("2026-12-31T23:59:59").getTime();
function inUpdate() {
  const d = inTarget - Date.now();
  if (d <= 0) { document.getElementById("inline-cd").textContent = "ENDED"; return; }
  const h = String(Math.floor(d / 3600000)).padStart(2,"0");
  const m = String(Math.floor((d % 3600000) / 60000)).padStart(2,"0");
  const s = String(Math.floor((d % 60000) / 1000)).padStart(2,"0");
  document.getElementById("inline-cd").textContent = h+":"+m+":"+s;
}
inUpdate(); setInterval(inUpdate, 1000);
</script>
Paste this at the very top of your <body> tag and it creates a red banner across the full width of your page.
I’ve used this style on WiserNotify customer sites during Black Friday campaigns. Simple, impossible to miss, and it gets clicks.
How to Customize Any of These Timers
All four timers above use the same JavaScript logic. Here’s how to tweak them for your specific needs:
Change the target date: Find the line with new Date("2026-12-31T23:59:59") and replace it with your date. Use YYYY-MM-DDTHH:MM:SS format.
Change colors: Swap the hex color codes in the inline styles. The dark theme is used #e94560 for numbers and #1a1a2e for the background. The banner uses #ef4444 (red).
Change what happens on expiry: Replace the expiry message with a redirect:
window.location.href = "https://yoursite.com/offer-ended";Hide specific units: If your countdown is under 24 hours, remove the “Days” div entirely. For countdowns under 1 hour, keep only minutes and seconds. Showing “0 Days 0 Hours” looks awkward.
Add leading zeros to days: Use String(days).padStart(2, "0") if you want days to show as “05” instead of “5”.
Make it responsive: The inline flex layout handles most screen sizes. For very small phones, add flex-wrap:wrap to the container’s style attribute.
When and Where to Use Countdown Timers
Countdown timers aren’t just pretty widgets. Placed strategically, they’re conversion machines.
Here’s where I’ve seen them work best:
Flash sales and limited offers. This is the classic use case. “Sale Ends in 3 Hours!” next to a buy button creates genuine urgency. Pair it with a discount code for maximum impact.
Product launch pages. “Launching in 5 Days!” builds anticipation and gives people a reason to come back. I’ve seen launch pages with countdown timers get 3x as many pre-registrations as those without.
Event and webinar registration. “Registration closes in 48 hours” pushes fence-sitters to sign up. Works especially well when combined with a “limited seats” message.
Cart and checkout pages. “Complete your purchase in 10 minutes to secure this price!” reduces cart abandonment. Shopify stores running Black Friday promotions with countdown timer widgets have seen up to 2x more revenue per visitor.
Seasonal campaigns. Black Friday, Cyber Monday, Christmas, and New Year’s. Every holiday sale benefits from a visible countdown.
Email campaigns. Yes, you can use countdown timers in emails too. Services like Sendtric generate animated GIF timers that work in most email clients. These HTML code versions won’t work in email (email clients block JavaScript), but they’re perfect for any web page.
Also check: I Tested 10 WordPress Countdown Timer Plugins (2026)
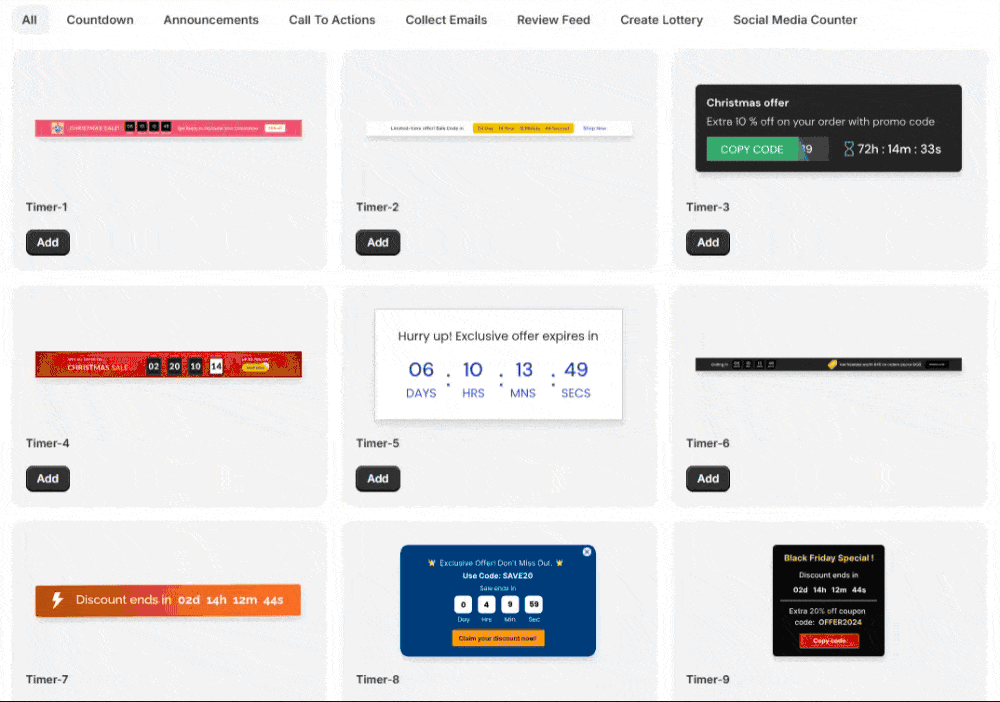
Skip the Code: Add a Countdown Timer Without Coding
If you don’t want to touch code at all, there’s a faster way.
WiserNotify lets you add countdown timers to any website in about 10 minutes, with zero coding. You pick a design, set your date, choose which pages show the timer, and you’re live.
Here’s the quick process:
Create a WiserNotify account, then go to your dashboard. Click on Notifications, then Widget, then Add Notification.

Next, go to the Countdown section. You’ll see several timer styles to choose from.

Pick the one you like, click Add, and enter a name and the website URL where you want it to appear.
What makes this approach different from raw HTML code is that you get built-in A/B testing and analytics (see exactly how many people viewed and clicked), and you can change the timer design or the date without editing any code.
It works on any platform (Shopify, WordPress, Wix, ClickFunnels, Squarespace, and 250+ more).
Other urgency widgets you can add alongside the timer:
Social proof widgets that pair well with countdowns:

Combining a countdown timer with social proof notifications (like “Sarah just purchased this item”) creates both urgency AND trust simultaneously. That’s a powerful combo.
Common Mistakes to Avoid
I’ve reviewed hundreds of countdown timer implementations. These are the mistakes that keep showing up:
Showing an expired timer. Nothing kills credibility faster than a timer stuck at 00:00:00 that’s been sitting there for weeks. Always add expiry logic that either hides the timer or shows a message.
Not testing across time zones. JavaScript’s The The Date object uses the visitor’s local time zone. If your sale ends at midnight EST, but a visitor is in Pacific time, they’ll see 3 extra hours. Use UTC dates to keep it consistent, or use a tool like WiserNotify that handles time zones automatically.
Forgetting mobile responsiveness. Test your timer on a phone. If the numbers wrap awkwardly or overflow the screen, add flex-wrap:wrap and reduce font sizes. All the code examples above use flexbox, which handles most screen sizes, but always double-check.
Using fake or misleading countdowns. If your “limited time offer” has been running for 6 months with the same evergreen timer, customers will figure it out. Use countdowns for real deadlines. Your credibility is worth more than a few extra clicks.
Not linking the JavaScript file properly. If you’re using separate files (HTML, CSS, JS), make sure the <script src="script.js"> path is correct. The easiest way to avoid this? Use the single-file code blocks above. Everything in one place.
Overcomplicating things. You don’t need React, Vue, or an npm package for a countdown timer. The plain JavaScript examples in this post work on every browser from IE11 to the latest Chrome. Keep it simple.
Boost Conversion Instantly
Add Social Proof & Urgency to your website
Conclusion
You now have four countdown timer code blocks you can copy, paste, and customize for any situation: a basic timer, a styled dark theme timer, an evergreen visitor-specific timer, and a compact banner timer.
The code is intentionally simple. No dependencies, no build tools, no external libraries. Just HTML, CSS, and vanilla JavaScript that works everywhere.
If you’d rather skip the code and add a timer with a visual builder (plus get analytics, A/B testing, and multi-page support), WiserNotify offers a free trial so you can test it on your site with zero risk.
Pick whichever approach fits your workflow, set your target date, and let the countdown do its job.
