
Countdown Timer Widget for Any Website: How to Add One (2026)
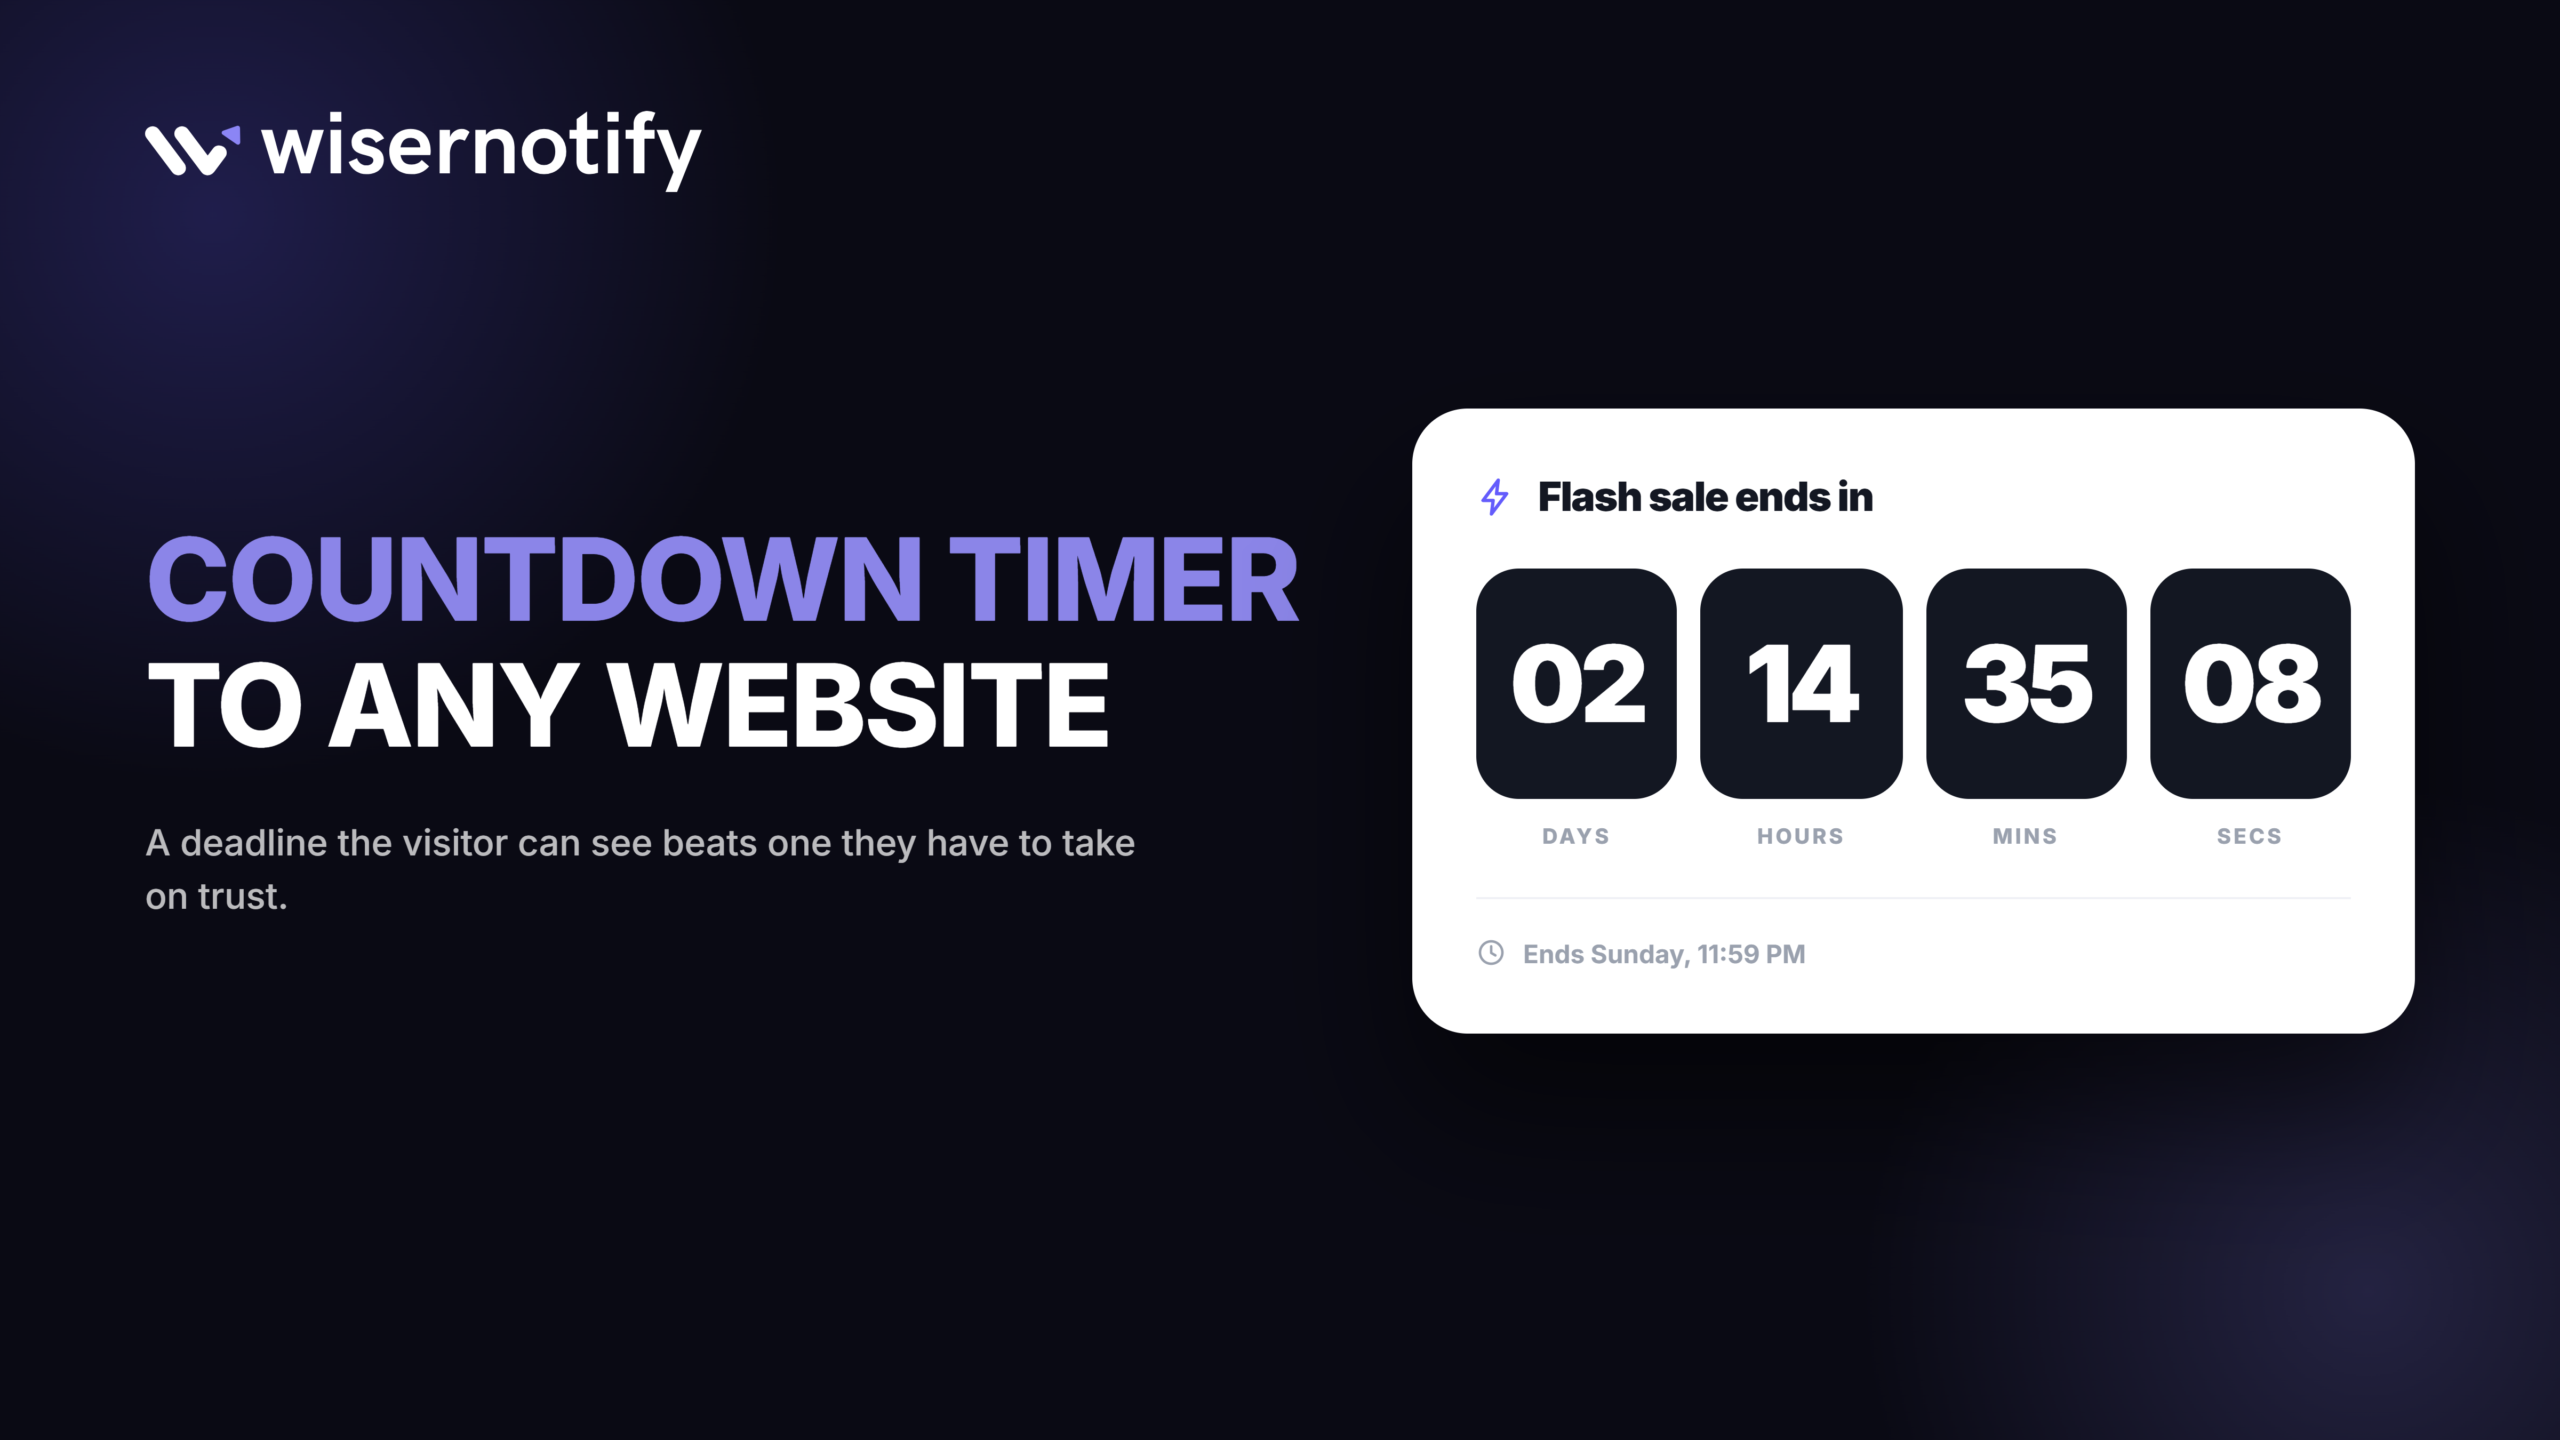
A countdown timer widget is one of the easiest ways to get visitors to buy sooner.
It puts a real, ticking deadline on the page, so people act now instead of “later.”
The good ones don’t just look nice. They work because the deadline is right there and specific.
This is the complete guide to countdown timer widgets.
It covers the types, why they lift conversions, how to add one without code, the best practices and mistakes, and step-by-step guides for every major platform.
What Is a Countdown Timer Widget?
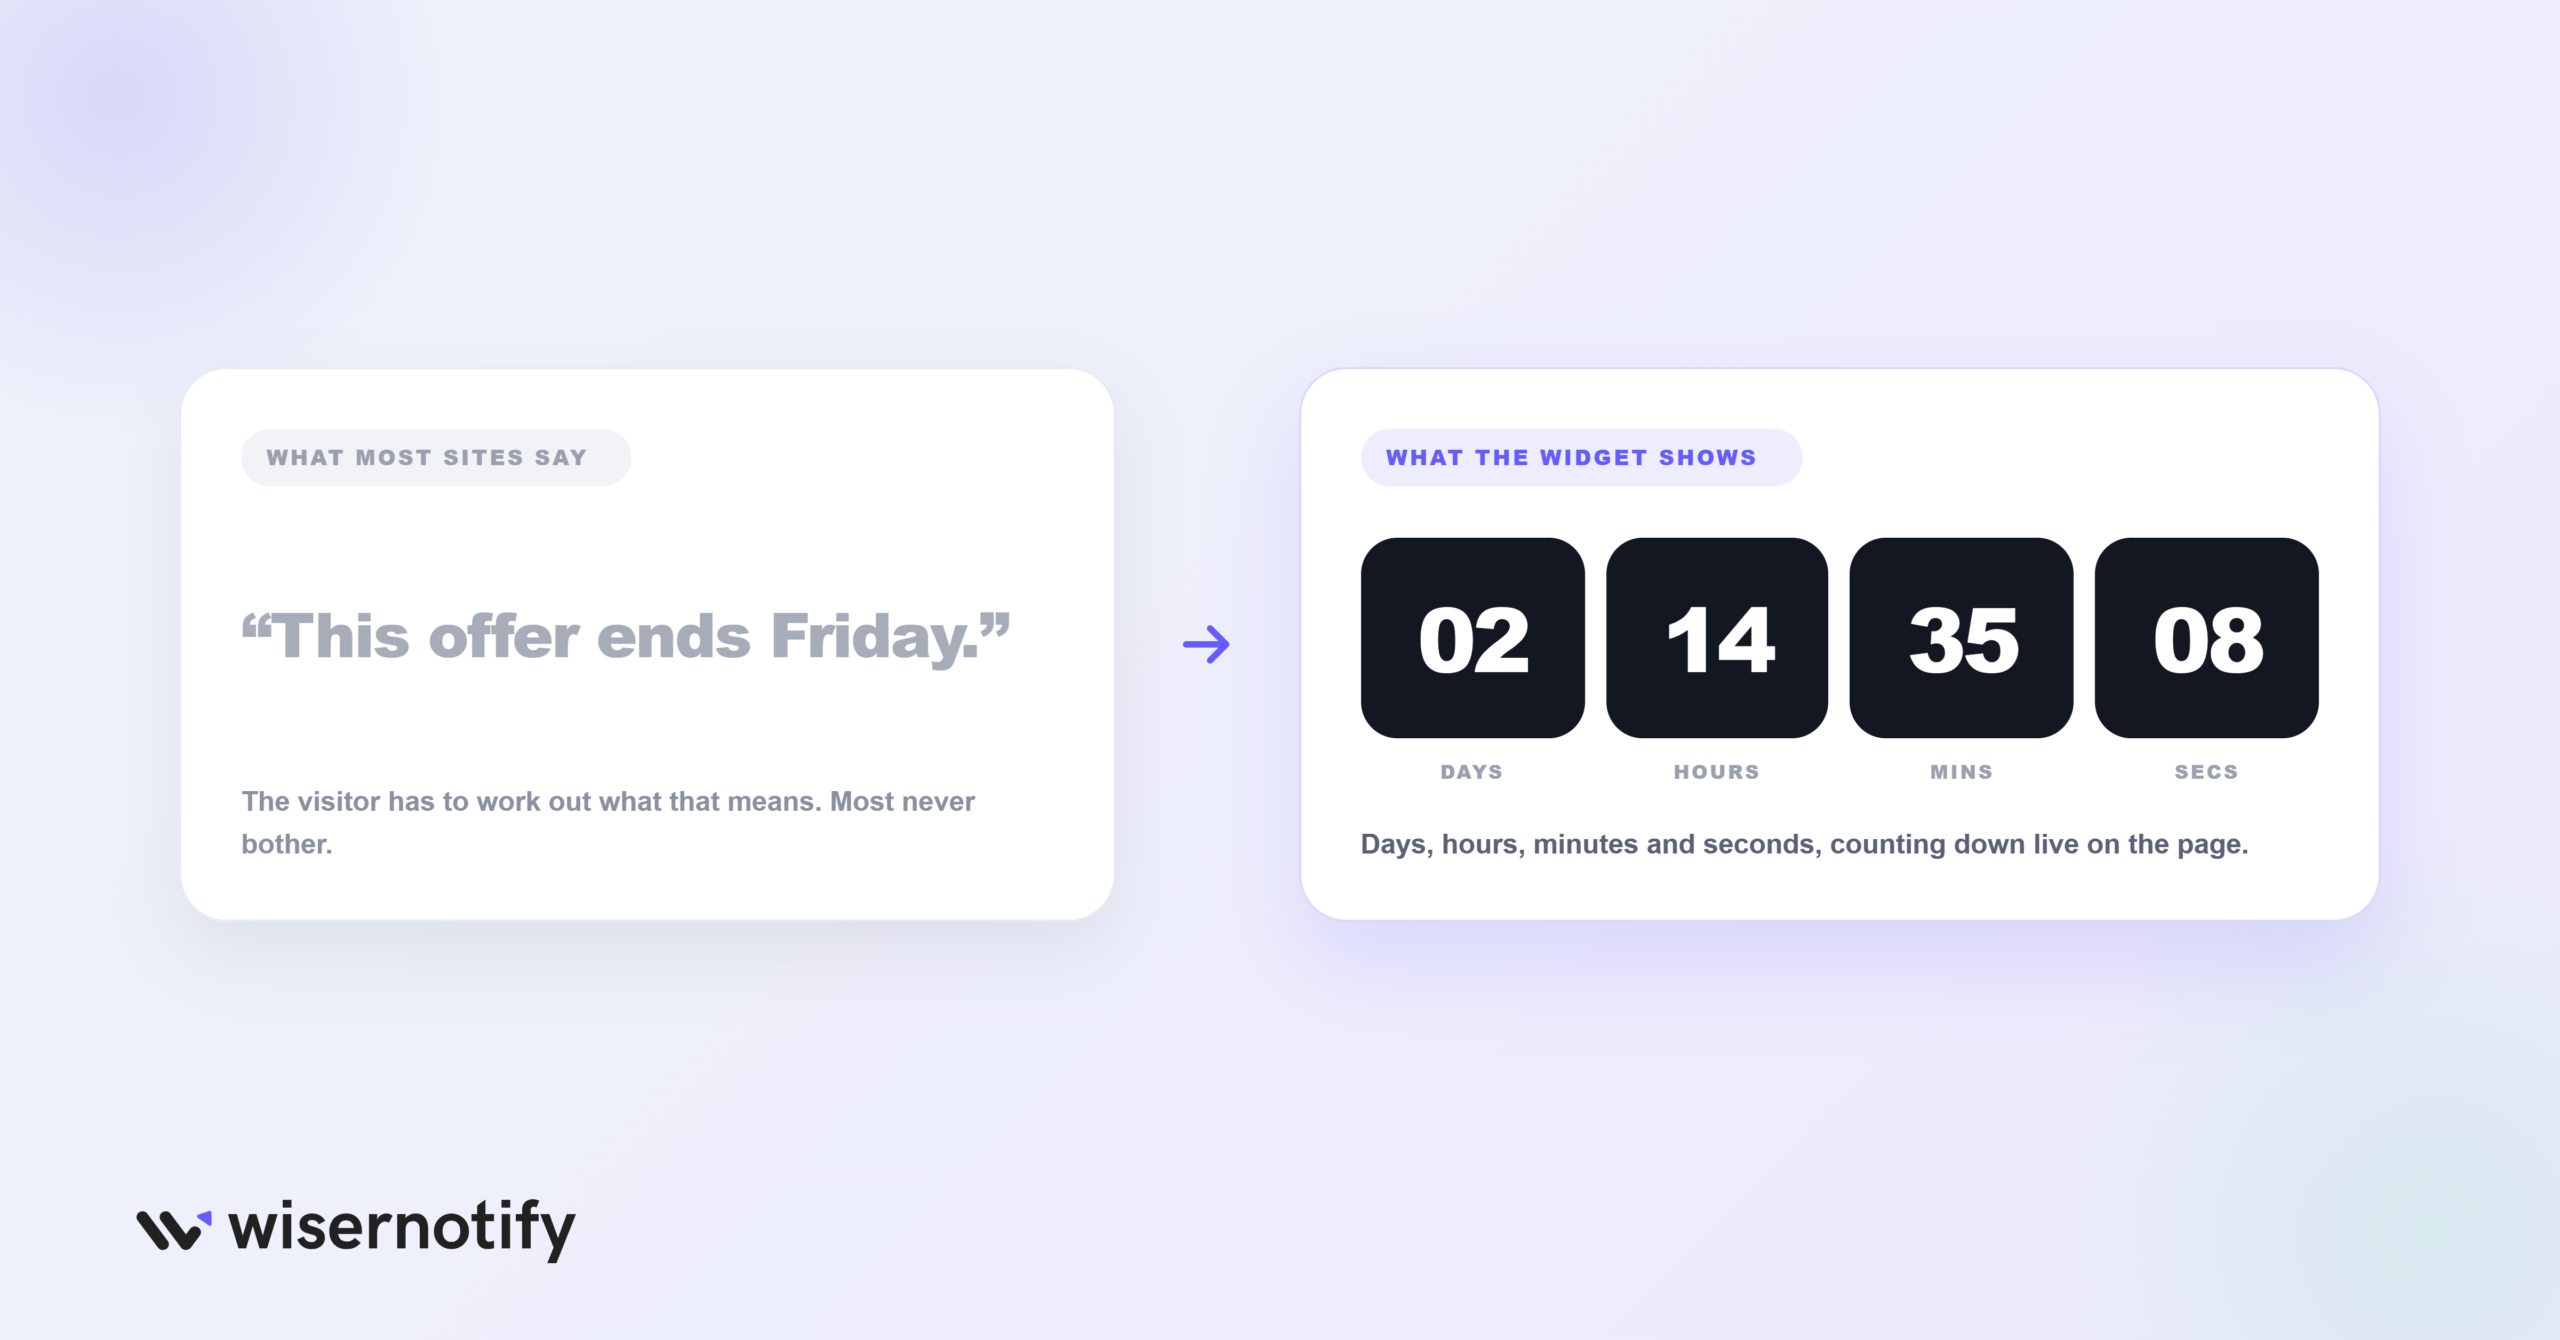
A countdown timer widget counts down to a specific date or event in real time, displaying days, hours, minutes, and seconds on your website.
Instead of telling visitors “this offer ends Friday,” the widget shows them exactly how much time they have left.
Seeing the time tick down instead of reading “ends Friday” makes people act sooner.
You’ll find these on flash sale pages, product launches, webinar registrations, and Black Friday promotions.
The setup takes under 10 minutes with most no-code tools.

Boost Conversion Instantly
Add Social Proof & Urgency to your website
Types of Countdown Timer Widgets
Not all countdown timers work the same way.
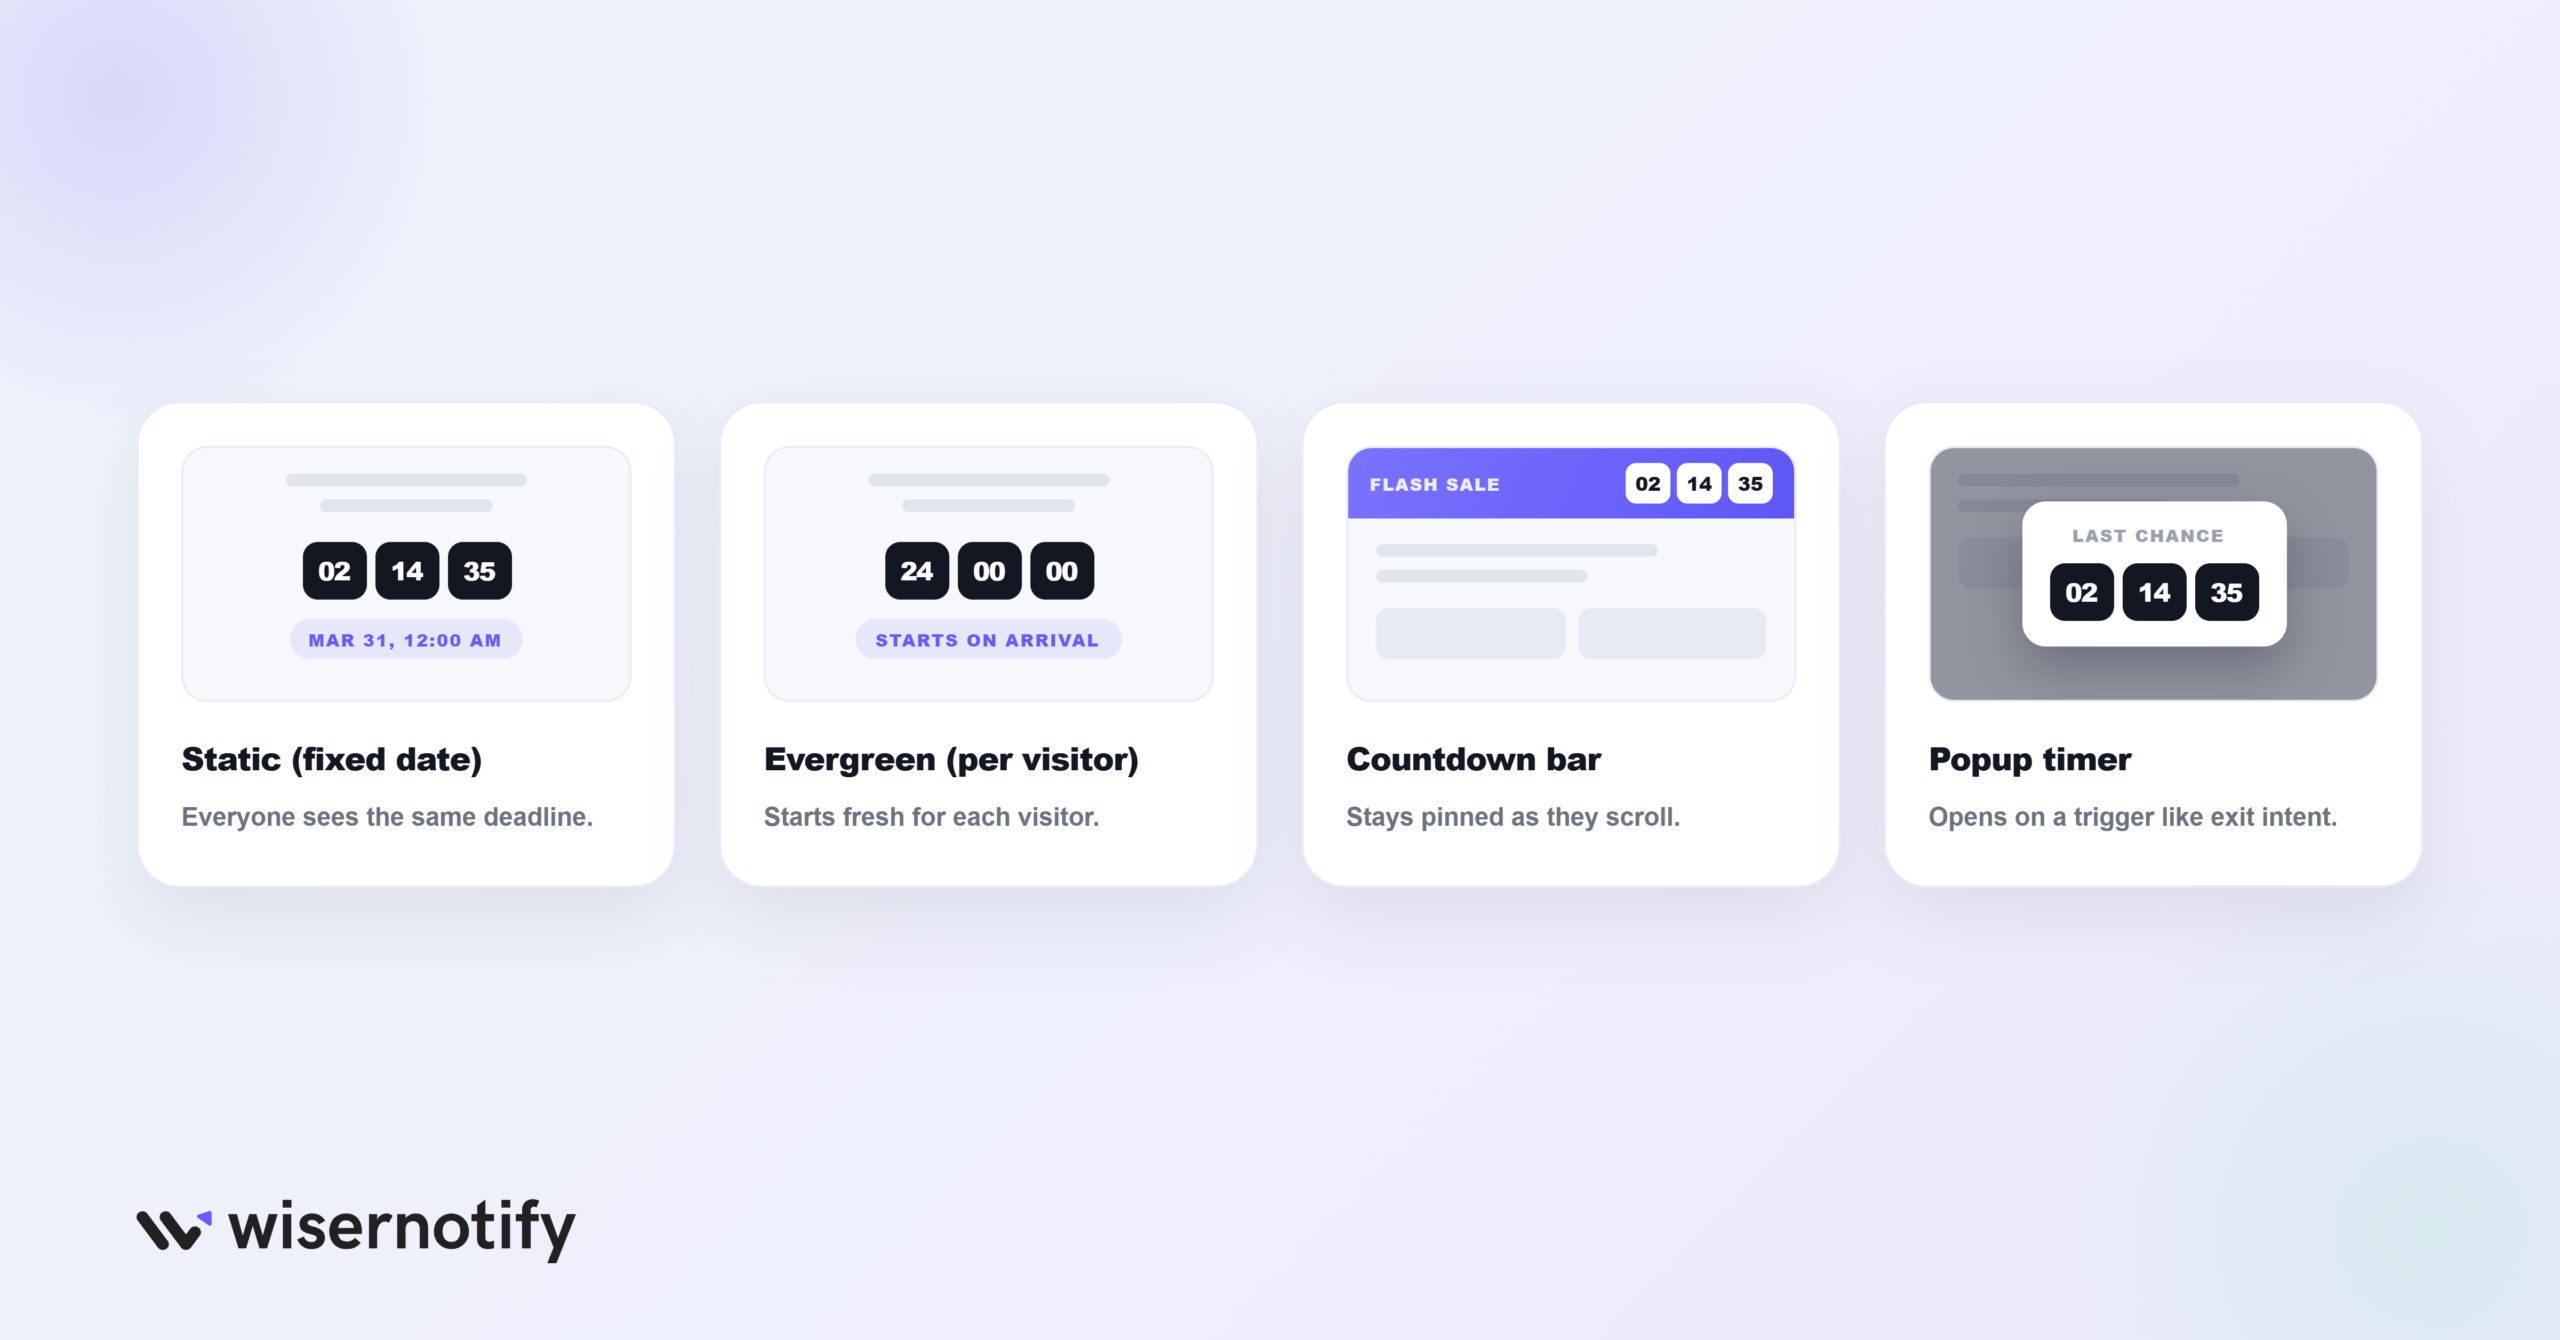
Which one you pick depends on what you’re promoting. Here are the four you’ll use most.
Static (Fixed-Date) Timers
Static countdowns expire at the same moment for everyone, ticking down to a set date and time like “Sale ends March 31 at midnight EST.”
Every visitor sees the same deadline. Use them for Black Friday, webinar start times, product launches, and any event with a real calendar date.
Evergreen (Per-Visitor) Timers
Evergreen countdowns start fresh for each visitor. Their personal timer begins the moment they land, so a 24-hour timer gives everyone 24 hours from their first visit.
These fit lead magnets, post-signup offers, and sales pages with no fixed deadline. They’re cookie-based, so they don’t reset on reload.
Countdown Bars (Sticky Headers)
Countdown bars sit at the top or bottom of the page and follow the visitor as they scroll.
They’re less intrusive than a full-page section but stay visible the whole time, which makes them great for site-wide sales or announcements.
Popup Timers
Popup countdowns appear in a lightbox or slide-in after a trigger, such as time on page, scroll depth, or exit intent.
They’re more aggressive, but they work well for last-chance offers.
Which Type Should You Use?
Match the timer to the deadline. If the offer ends on a set calendar date, use a static timer. For a per-visitor deadline, use an evergreen one.
For a promotion that runs across the whole site, a sticky bar keeps it visible. Save a popup for a final nudge before someone leaves.
Why Countdown Timers Increase Conversions
Countdown timers add urgency and get people to act sooner. It’s a simple way to use FOMO marketing on a page.
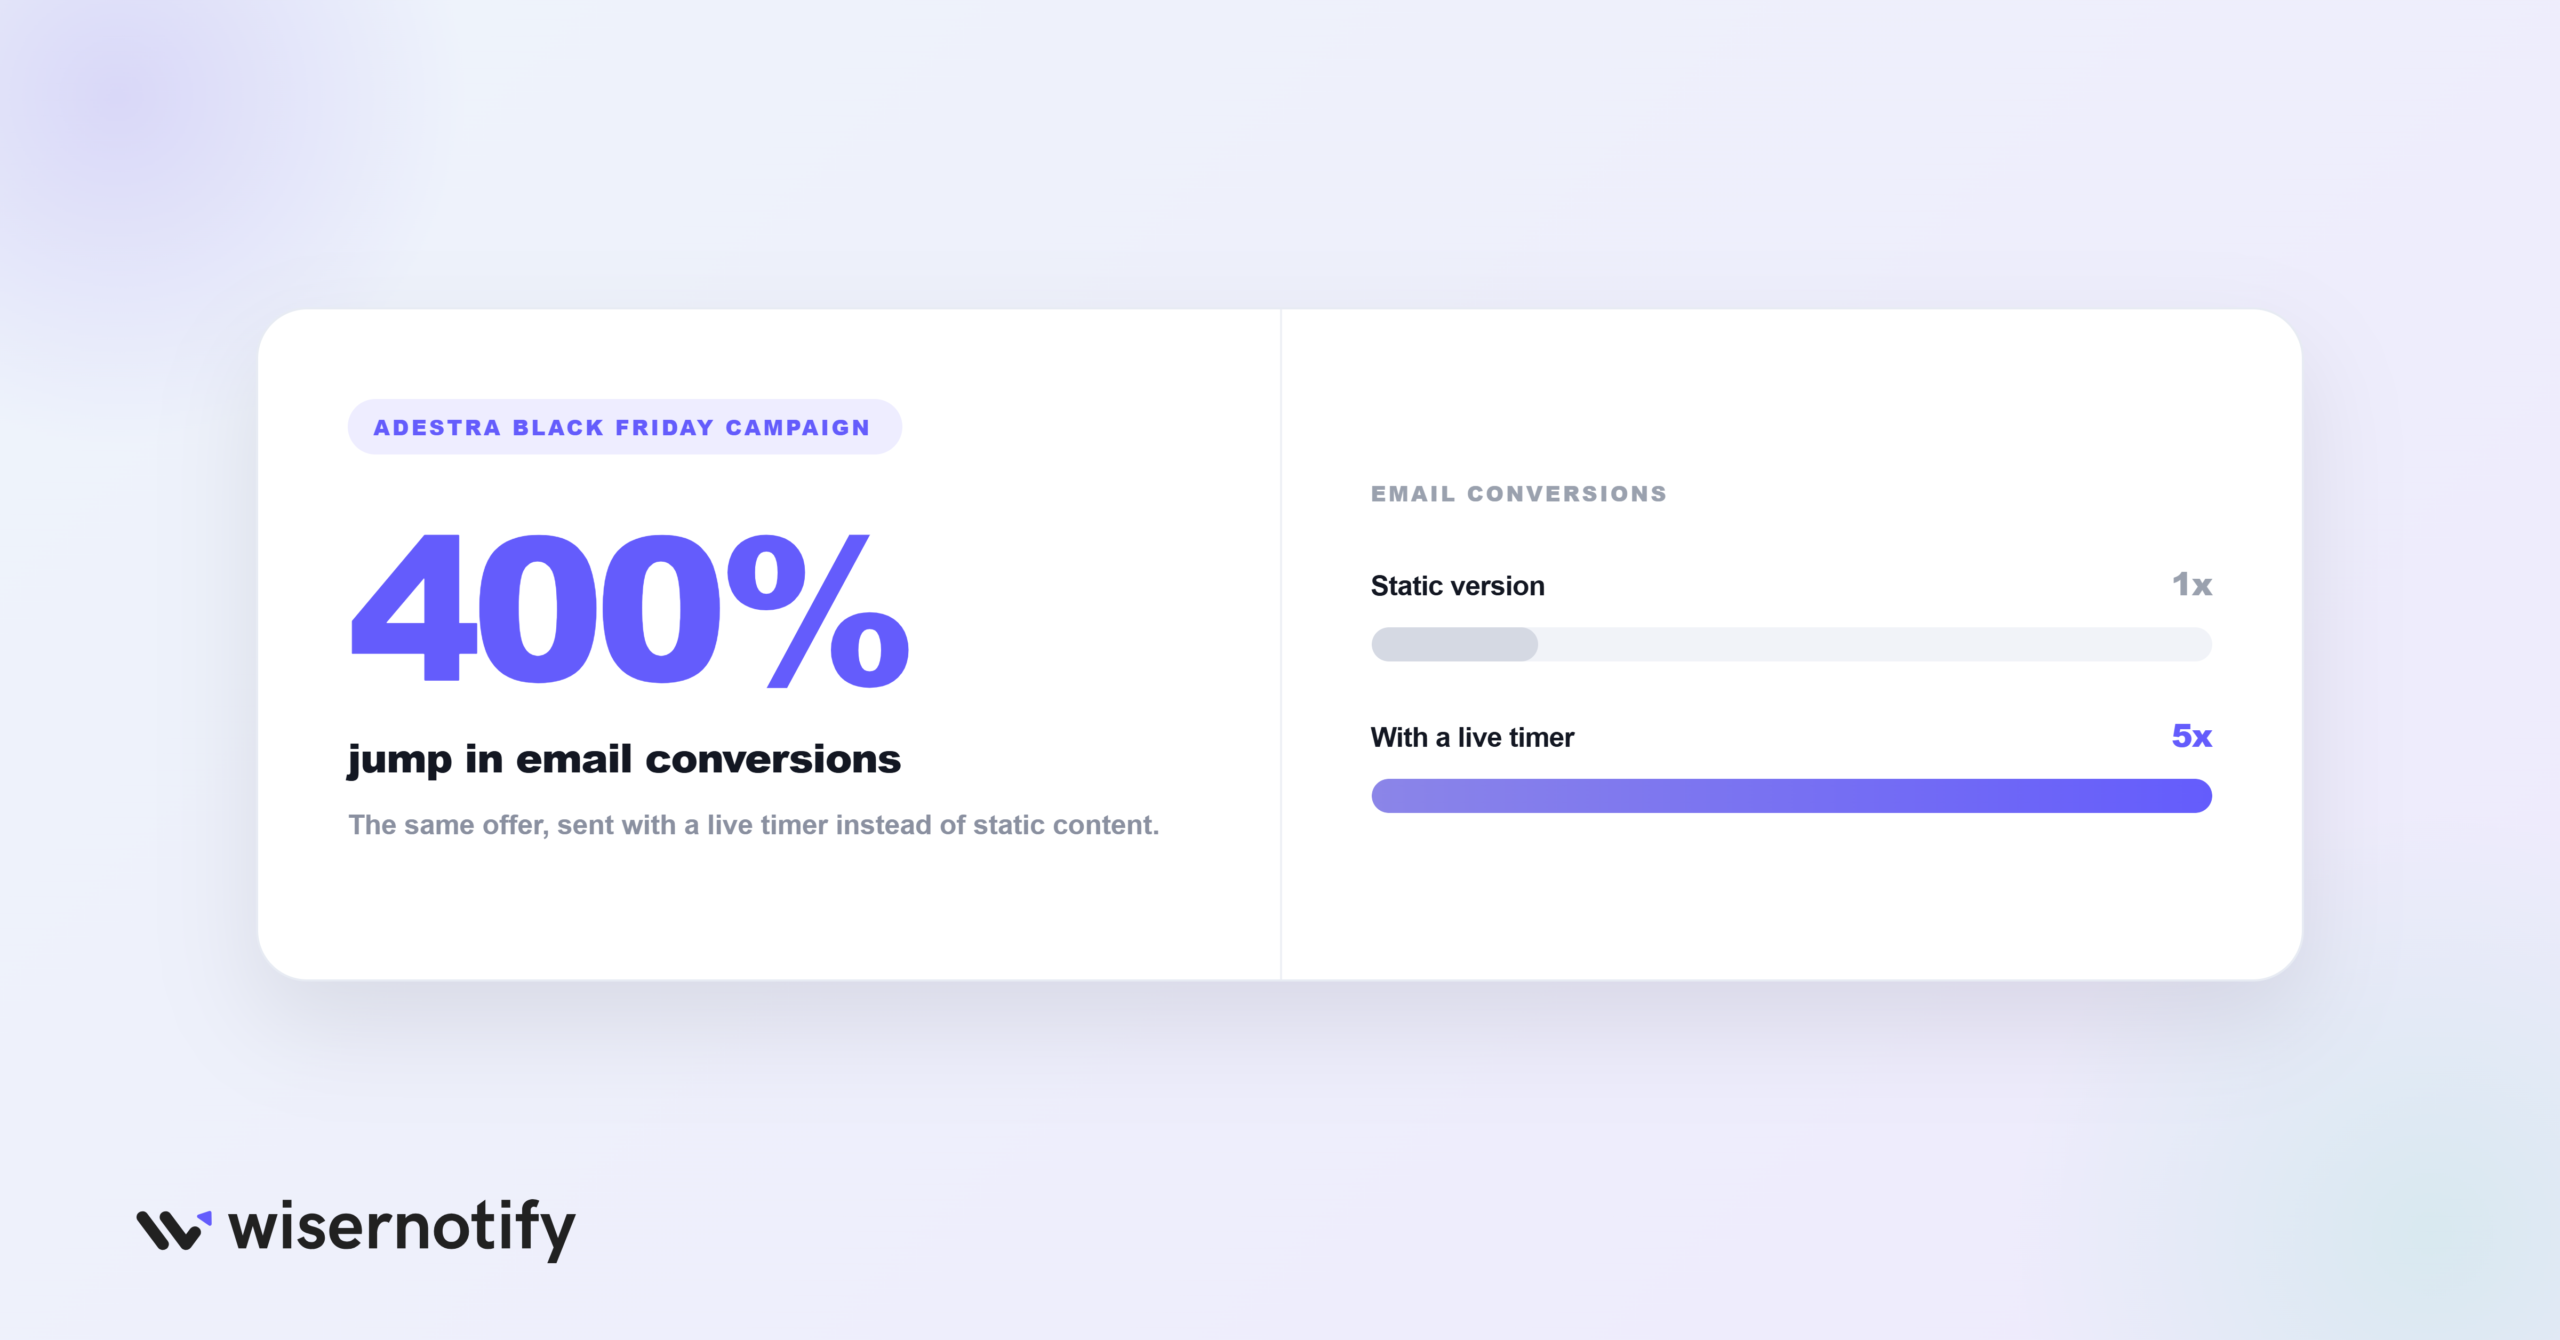
In one Adestra Black Friday campaign, time-based dynamic content drove a 400% jump in email conversions over a static version of the same offer.
Timers make the deadline clear. “2 hours left” feels real, while “limited time” feels vague.
They also grab attention with moving numbers and keep reminding people that time is running out.
This works for ecommerce, SaaS, services, and courses. When people can see time running out, they decide faster.
7 Best Use Cases for Countdown Widgets
A countdown works best wherever there’s a real deadline. Here are seven places it pays off.
Flash sales and limited-time discounts. This is the most common use case, and the one with the most data behind it. A countdown on the product page or banner shows exactly when the discount disappears. Pairing a timer with a percentage-off badge is one of the highest-converting combinations in ecommerce. I’ve seen stores double their flash sale revenue just by adding a visible timer above the fold.
Product launches and pre-orders. Build anticipation by counting down to the new product’s availability. Visitors can sign up for notifications and watch the clock tick toward launch day. It’s the same psychology that makes movie release countdowns work. People don’t want to be the last to know.
Webinar and event registrations. Show time remaining until registration closes or until the event starts. This works especially well for live events where replays aren’t available. Adding a countdown to webinar registration pages often lifts sign-up rates by 10-20%, though it varies by audience.
Course enrollment deadlines. Online course creators use countdown timers during open enrollment periods. “Enrollment closes in 3 days” works as text, but a visible countdown makes it hit harder. The ticking numbers make the deadline feel real.
Seasonal promotions. Black Friday, Cyber Monday, New Year sales, back-to-school, holiday shopping. A countdown makes the seasonal deadline feel real, which is why it belongs in any Black Friday marketing plan. Without one, “Black Friday Sale” is just a label. With a countdown, it’s a deadline that helps with creating genuine urgency.
Free shipping thresholds with a deadline. “Free shipping on orders over $50, ends in [countdown].” Combining a value incentive with a time constraint doubles the motivation to complete checkout. This isn’t something to run permanently, but it works well during promotional windows.
Cart abandonment recovery. Show an evergreen countdown on the cart page or in abandonment emails. “Your items are reserved for the next [countdown]” adds both scarcity and urgency, and it’s a practical way to reduce cart abandonment.
Build trust & FOMO
Highlight real-time activities like reviews, sales & sign-ups.


How to Add a Countdown Timer to Your Website
The fastest way to add a countdown timer to any website is with a no-code tool like WiserNotify.
You connect your site once with a small pixel, then build and manage the timer from the dashboard. The video below walks through building the widget, and the full steps are written out under it.
Step 1: Sign Up and Copy Your Pixel Code
Create a free WiserNotify account and start the 7-day trial. Open the Install Pixel page in your dashboard and click Copy Code to grab your tracking script.

Step 2: Install the Pixel
Paste the pixel into your site’s header, just before the closing </head> tag, so it loads on every page.
Most platforms have a spot for this, a site header or custom-code field. There’s a platform-by-platform guide further down. Save and publish once it’s in.
On WordPress you can skip the code. The WiserNotify plugin adds the pixel for you, as shown in this WordPress countdown timer setup.
Step 3: Verify the Pixel
Open any page on your site so the pixel loads, then return to the WiserNotify pixel page and click Verify pixel installation.
A “Pixel Active” message confirms your site is connected.

Step 4: Create Your Timer Widget
From your dashboard, open Notifications > Widgets and click Add notification in the top right.

Open the Countdown tab. You’ll see several timer styles: bars, popups, inline widgets, and floating banners.
Pick the one you want, click Add, name it, and enter the page URL where it should appear.

Step 5: Design the Timer
In the design editor, shape the timer to fit your page and campaign using the tabs on the left:
- Text Editor: write the message, like “Offer ends in” or “Sale closes soon.”
- Click Actions: turn on a button such as “Buy Now” and point it at your offer or checkout page.
- Position and Animation: place the timer and choose how it slides or fades in on desktop and mobile.
- Style: match the colors, shape, and size to your site’s design.
- Set Countdown Timer: pick a fixed end date for a real event, or an evergreen clock that resets per visitor, then set the time.
- Timing Control: set a delay before it shows and how long it stays on screen.
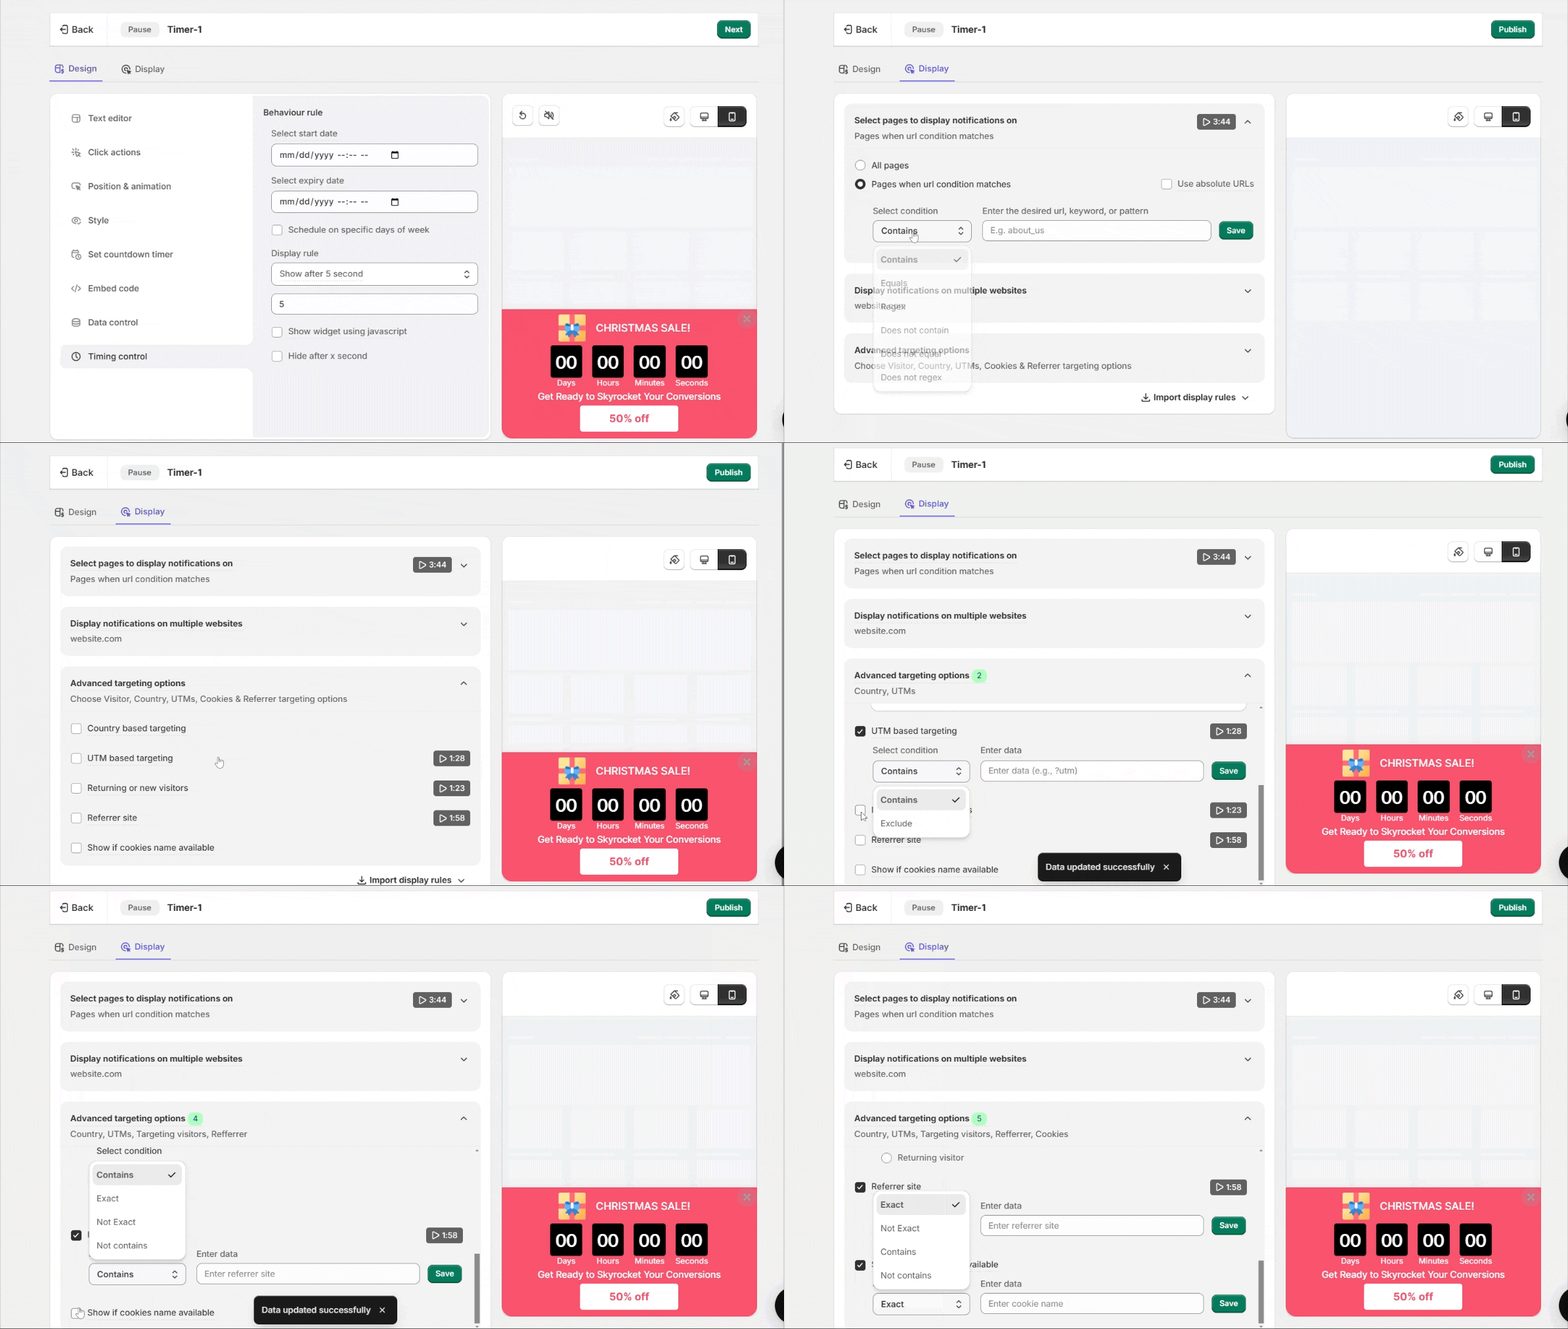
Step 6: Target and Publish
Switch to the Display tab to choose where the timer runs, your whole site or specific pages. Add targeting by location, UTM, or referrer if a campaign needs it.
Then click Publish and check the page in an incognito window so an old cache doesn’t hide it.
The pixel is already on every page, so the timer goes live the moment you publish, on Shopify, WordPress, Wix, Squarespace, or any site that supports a script tag.
Swipe Pages (Native Widget)
Swipe Pages ships its own drag-and-drop Countdown Timer widget, so you don’t need the pixel for this one:
- In the page editor, find the Countdown Timer widget in the left-hand menu and drag it onto the section you want.
- Choose the timer type: a Fixed Timer counts down to one calendar date for every visitor, an Evergreen Timer resets on a per-visitor basis.
- Set the end date or duration, then adjust colors, fonts, and labels (“Days,” “Hours,” “Minutes,” “Seconds”) to match your page.
- Preview and publish.
Pair Your Timer With Other Widgets
WiserNotify isn’t only a countdown tool. It also gives you urgency widgets, social proof notifications, and A/B testing to measure what’s working.
Other urgency widgets available:

Social proof widgets:

You can combine countdown timers with social proof notifications, such as “Sarah from London just purchased” or “47 people are viewing this page.”
Urgency plus social proof marketing is one of the best combinations for lifting conversions.
Build trust & FOMO
Highlight real-time activities like reviews, sales & sign-ups.

5 Best Practices for Countdown Timers
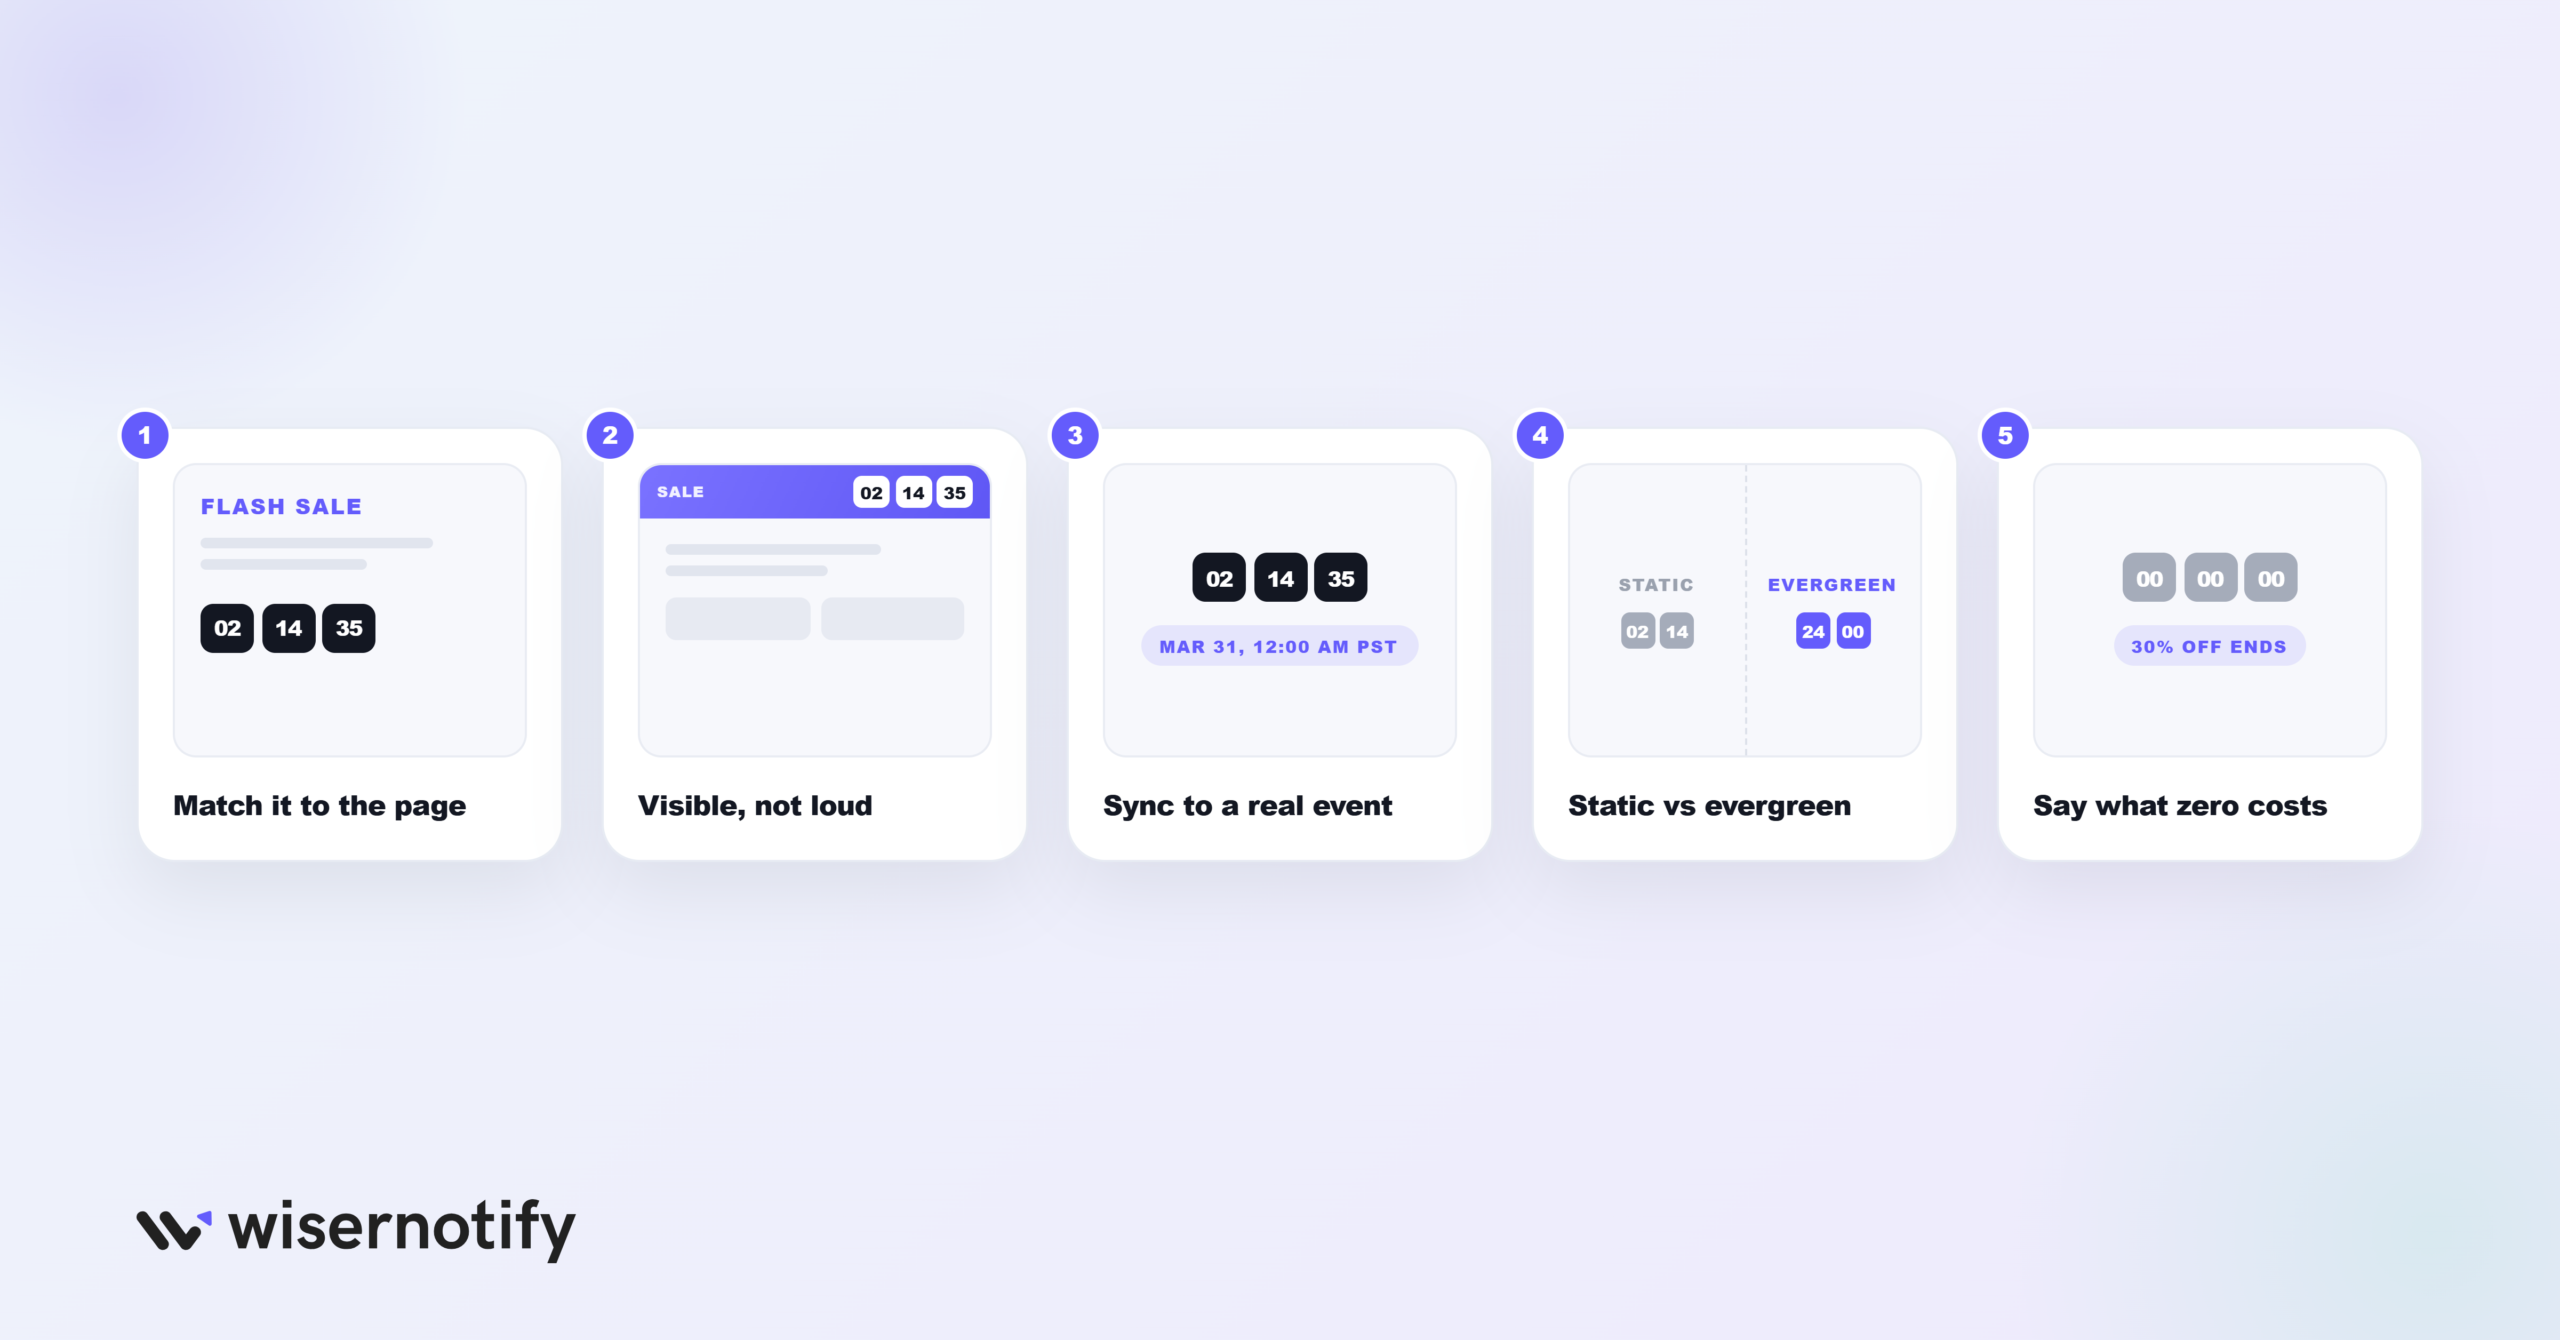
1. Match the Timer to the Page
If your countdown says “Sale ends in 3 hours,” but the page doesn’t mention a sale anywhere, that’s a disconnect.
The timer and the offer need to work together.
On a product page: “Limited Time Offer, Ends in: [countdown].” On a signup page: “Join before [date] to get early access.”
On a webinar page: “Starts in: [countdown].” If there’s no real reason for the timer, don’t show one.
2. Visible, Not Distracting
Your countdown should get noticed without taking over the page.
Use a clean design that matches your site’s style. Make it mobile-friendly and easy to read.
Skip flashing animations or huge fonts that look desperate.
A subtle sticky bar at the top of the page is often more effective than a massive countdown section in the middle of your content.
3. Sync to a Real Event
If your sale ends at midnight PST, the timer must hit zero at that exact moment, regardless of the visitor’s timezone.
If the timer resets every time the page reloads, people stop trusting it.
Use tools that let you set a specific date, time, and timezone. WiserNotify handles timezone sync automatically.
4. Test Static vs. Evergreen
Static timers work best for real events (Black Friday, webinars, launches).
Evergreen timers work best for personalized offers (post-signup discounts, lead magnet deadlines).
Test both on the same page and compare conversion rates.
I’ve seen cases where switching from static to evergreen doubled opt-in rates, and the reverse too.
5. Say What Happens at Zero
Don’t assume visitors know what the countdown means.
Tell them plainly: “30% off disappears when this timer hits zero.” Or: “Registration closes when the countdown ends. No replays.”
A timer without context is just ticking numbers.
A timer with a clear consequence is a conversion tool.
Common Mistakes That Kill Countdown Effectiveness
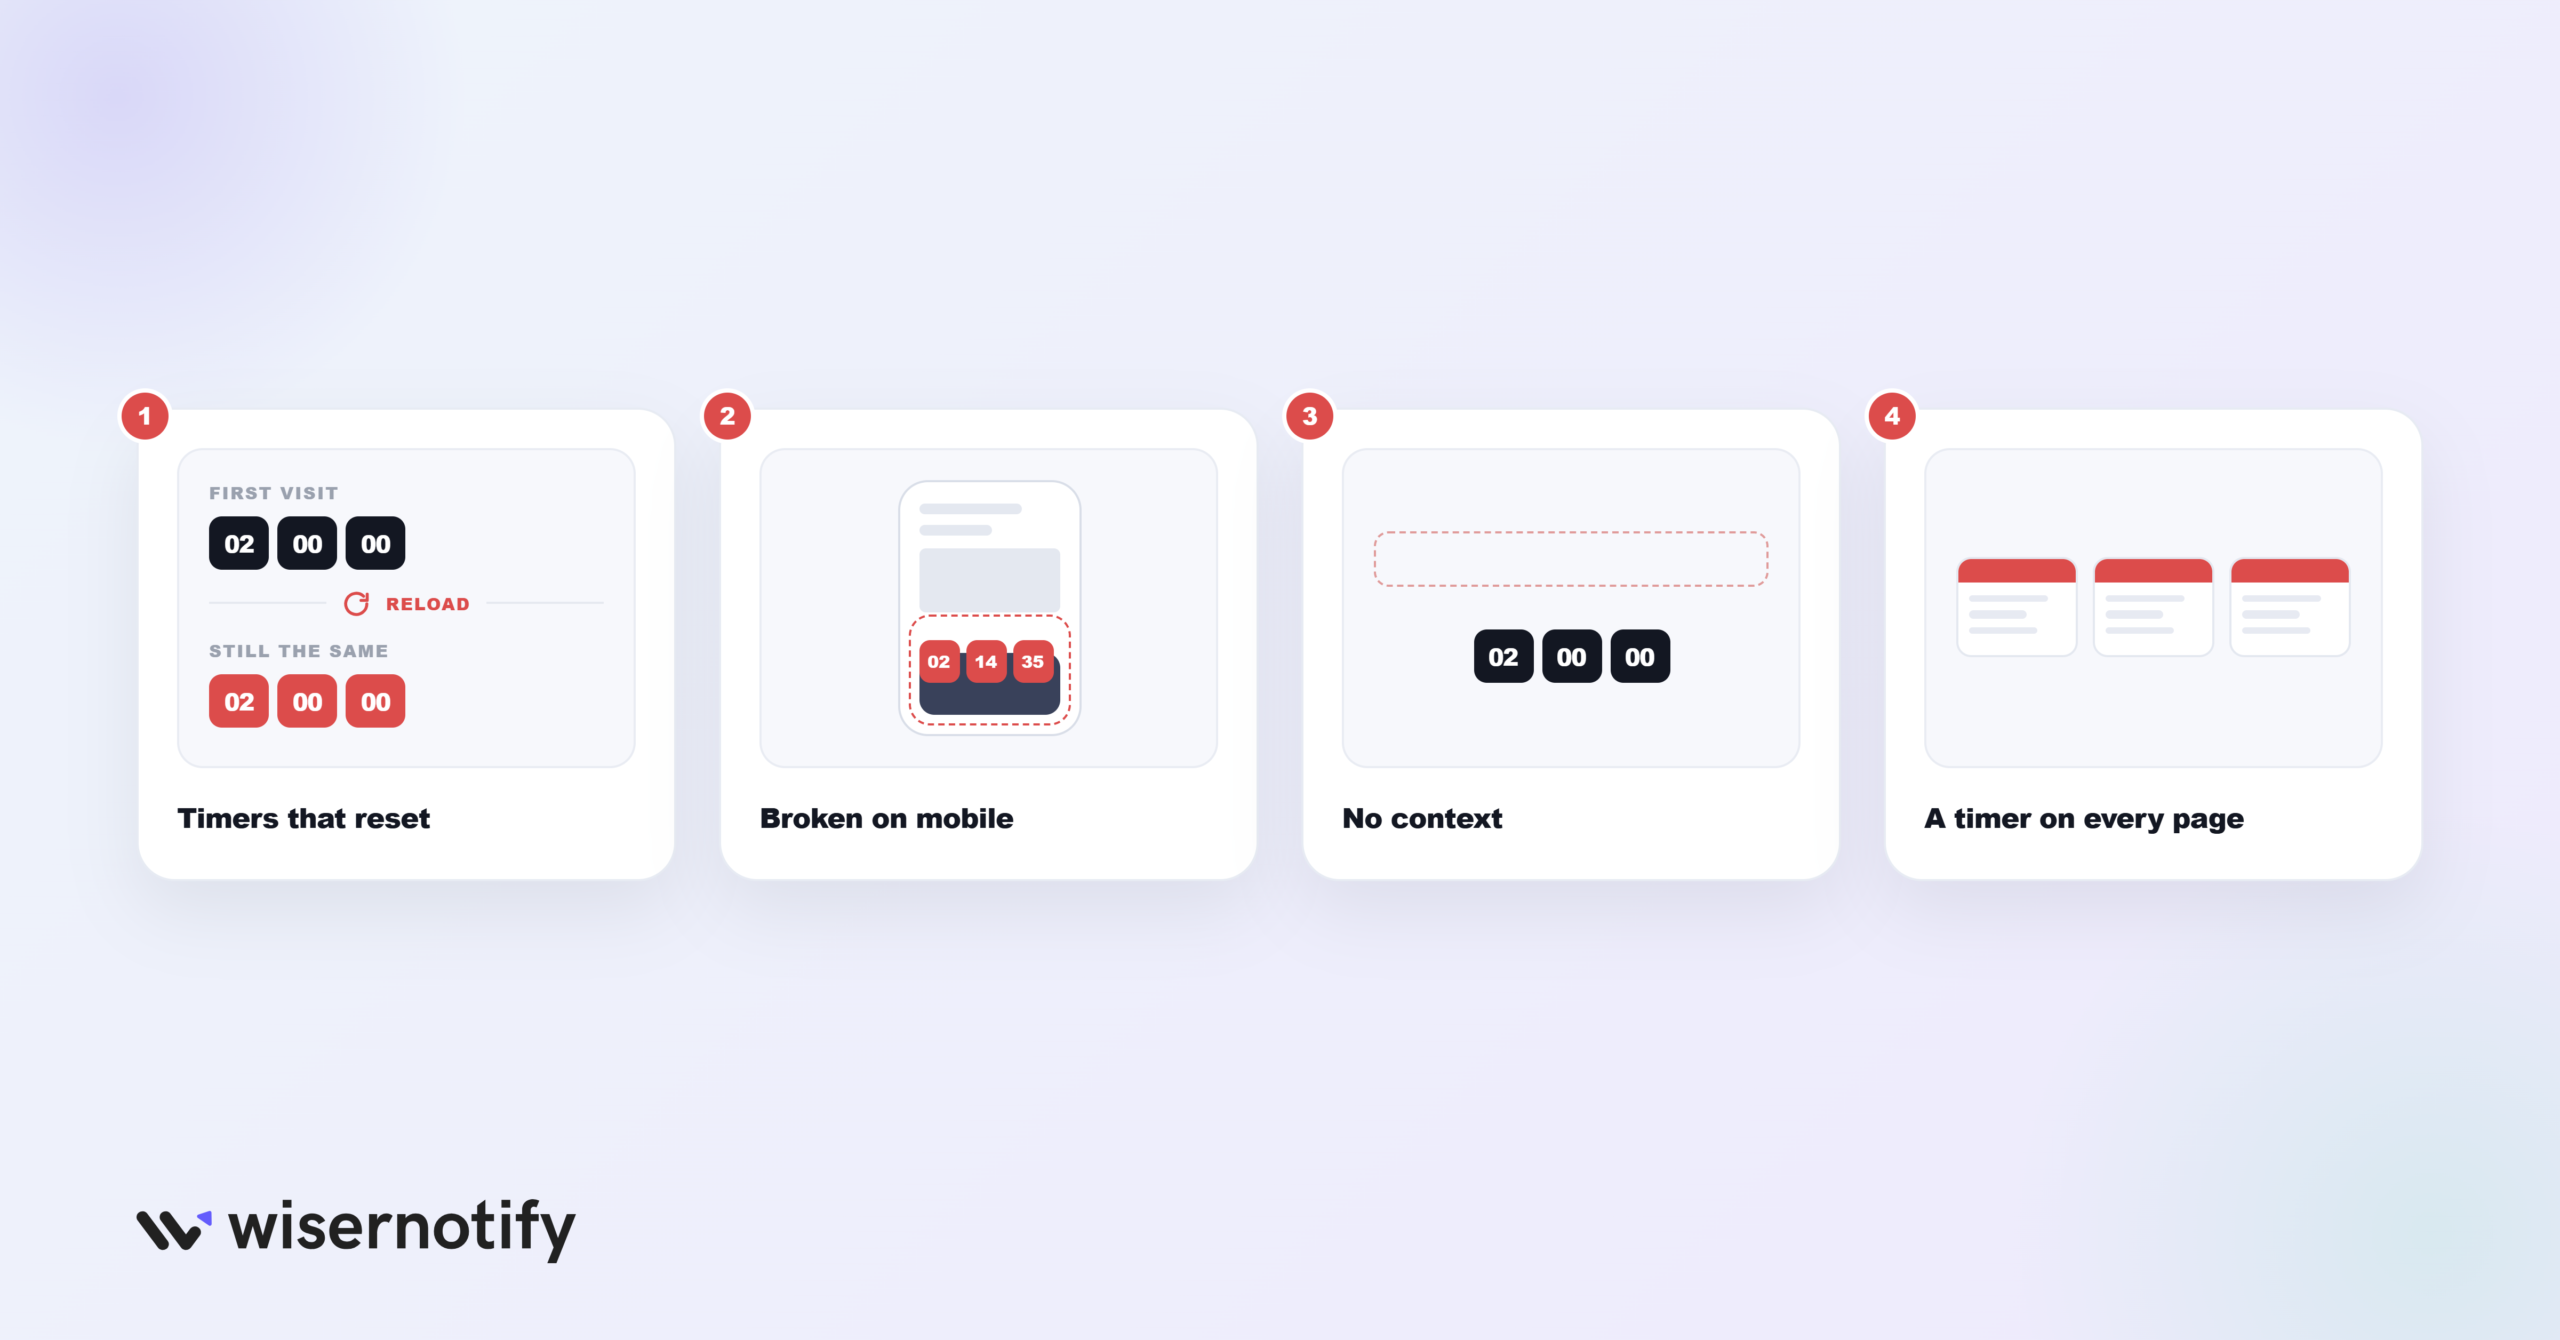
1. Fake or Resetting Timers
If the timer resets every time someone visits the page, they’ll notice.
And they’ll stop trusting your whole site, not just the timer.
Evergreen timers should be cookie-based so they don’t reset on refresh.
Static timers should expire for real. If the deal is over, it’s over.
2. Ignoring Mobile
Over 70% of ecommerce traffic is mobile.
A countdown that looks great on desktop but cuts off or overlaps on mobile is worse than no countdown at all.
Test on actual phones before publishing.
Make sure the text is readable, the numbers don’t wrap awkwardly, and the timer doesn’t cover your CTA button.
3. No Context
A nice-looking countdown with no explanation is just decoration.
Visitors need to know what the timer is counting down to and what they lose when it hits zero.
Pair every timer with a clear headline: “Only 2 Hours Left to Claim 30% Off” or “Registration Closes In: [countdown], No Replays.”
4. Timers on Every Page
If every page on your site has a countdown, none of them feel urgent.
Save timers for moments where there’s a real deadline, a real scarcity element, or a real event.
Overusing timers is the fastest way to get people to tune them out.
Platform-Specific Integration Guides
The steps for adding a countdown timer vary slightly depending on your website platform. I’ve written detailed guides for each one.
Boost Conversion Instantly
Add Social Proof & Urgency to your website
Conclusion
A countdown timer widget is one of the simplest conversion tools you can add to your website.
It takes about 10 minutes to set up, needs no coding, and directly affects how quickly visitors decide.
Start with one timer on your highest-traffic page or your next campaign, measure the conversion rate before and after, then expand once you have your first result.
WiserNotify’s countdown timer offers static, evergreen, bar, and pop-up options, with built-in analytics and A/B testing. You can pair it with social proof on the same page.
The stores that convert best don’t just say “act now.” They show people exactly how much time is left.
Frequently Asked Questions
Is there a free countdown timer widget for websites?
Yes. WiserNotify offers a free 7-day trial, and many builders like Elementor include a basic timer. For a timer that works on any site, syncs timezones, and tracks conversions, a dedicated widget is the more reliable choice.
Do I need to know how to code to add a countdown timer?
No. A no-code tool like WiserNotify adds a countdown timer with a single pixel or script tag, and you build and style everything from the dashboard. No developer needed.
Can I add a countdown timer to any website?
Yes. The WiserNotify widget works on Shopify, WordPress, Wix, Squarespace, and any site that supports a script tag. There are platform-specific guides on this page for the exact steps on each one.
What's the difference between a static and an evergreen timer?
A static timer counts down to one fixed date for everyone, which suits launches and live events. An evergreen timer starts fresh for each visitor and is cookie-based, which suits ongoing offers and lead magnets.
Do countdown timers really increase conversions?
When they’re tied to a real deadline, yes. Visible time pressure moves people to decide faster. The key is honesty: the timer has to reflect an offer that has a real end, or it loses its effect.

Krunal Vaghasiya is a marketing tech expert who boosts e-commerce conversion rates with automated social proof and FOMO strategies. He loves to keep posting insightful posts on online marketing software, marketing automations, and improving conversion rates.




 Capterra