How to Easily Add Facebook Reviews on Your Website
 Krunal Vaghasiya|May 14, 2025
People who visit your website want to know if others trust you. One of the easiest ways to show that is by adding Facebook reviews.
Adding Facebook reviews to your site helps new visitors see what others say about your business. It shows that you’re active, trusted, and have happy customers.
Whether you run a small shop, a salon, a coaching service, or any other business, this can help people feel more confident about choosing you.
In this guide, I’ll show you how to display your Facebook reviews on your website with the Wisernotify tool without any technical skills.
It’s quick to set up, and once done, your visitors will see real proof that others had a good experience with you.
Let’s get started!
Boost Conversion Instantly
Add Social Proof & Urgency to your website
Why Add Facebook Reviews to Your Website?
When people land on your website, they usually have one big question in mind—Can I trust this business? Adding Facebook reviews helps answer that right away.
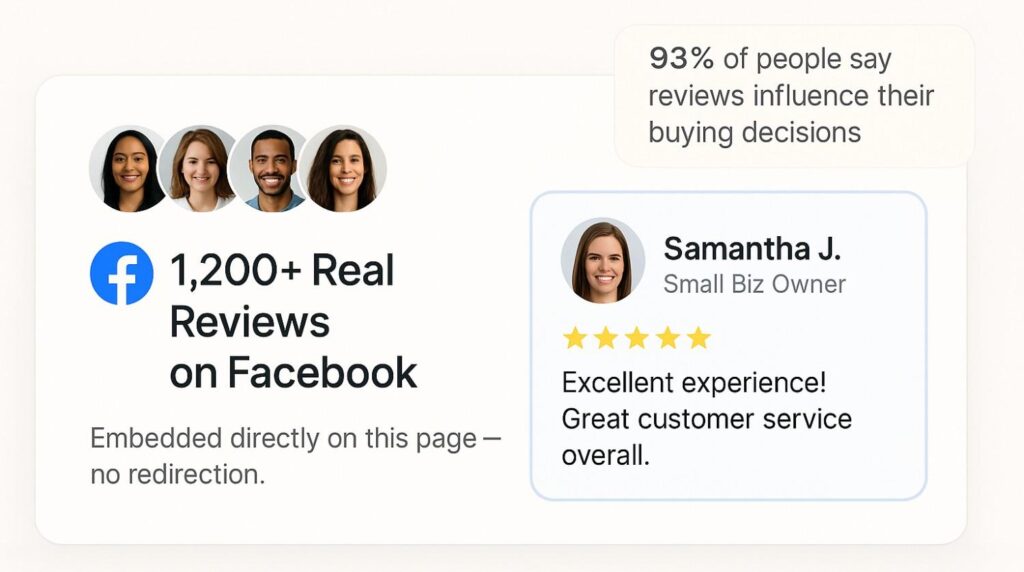
These reviews come from real people, with real names and faces. That makes them feel more genuine than plain text testimonials.
According to 93% of people, online reviews influence their buying decisions.
Here’s why:
Build instant trust: Real reviews from Facebook show you’re active and trusted by real people.
Boost conversions: Visitors are more likely to contact or buy when they see good reviews from others.
Improve credibility: It shows you have a strong online presence outside your website, too.
Keep users on your site: Instead of clicking out to Facebook, they can read the reviews without leaving your page.
How to Add Facebook Reviews to Your Website
Let’s dive into the essentials of adding Facebook reviews to your website or platform.With WiserNotify, this process is straightforward and user-friendly.
Here’s a step-by-step guide to help you seamlessly display Facebook reviews on your platform.
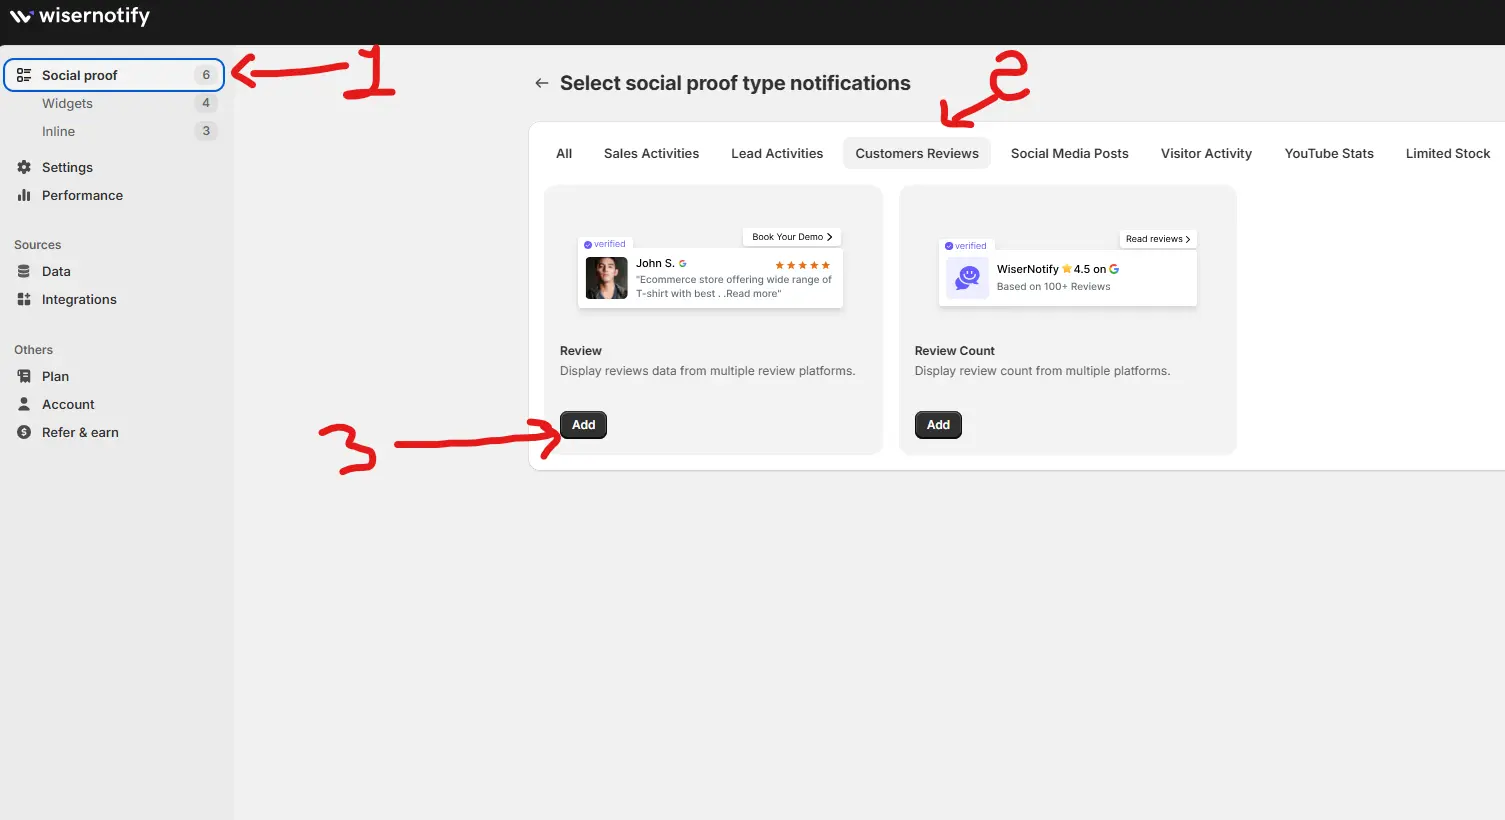
Step 1: Log Into Your WiserNotify Dashboard
Ensure you’ve installed the social proof pixels. You’ll find an “Add Notification” button on the dashboard. Clicking this will allow you to select “Customer Review.” From there, you can add notifications by entering your website name.
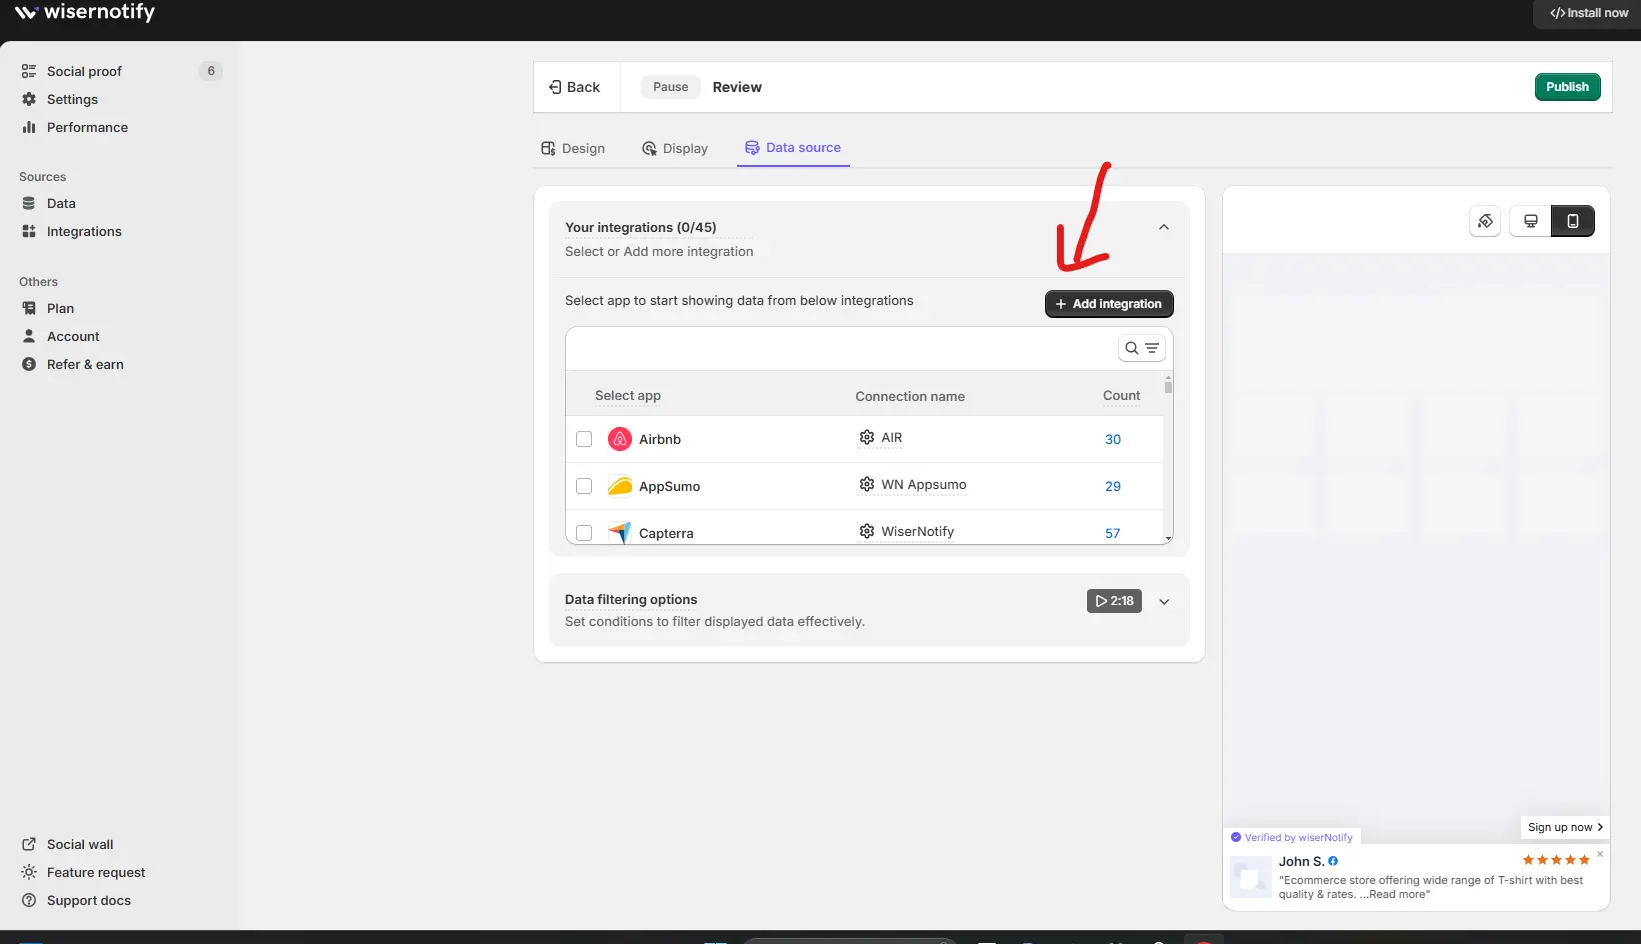
Step 2: Customize Your Notifications
Navigate to the customization dashboard and select “Data Source” to add Facebook reviews. WiserNotify efficiently pulls data directly from Facebook, ensuring your reviews are up-to-date and authentic.
Step 3: Watch the Customization Tutorial
For detailed customization to align with your brand style, watch our full tutorial video here:
Expanding Your Options: Facebook Social Wall
In addition to individual reviews, WiserNotify offers a “Social Wall” feature, which you can access from the dashboard.
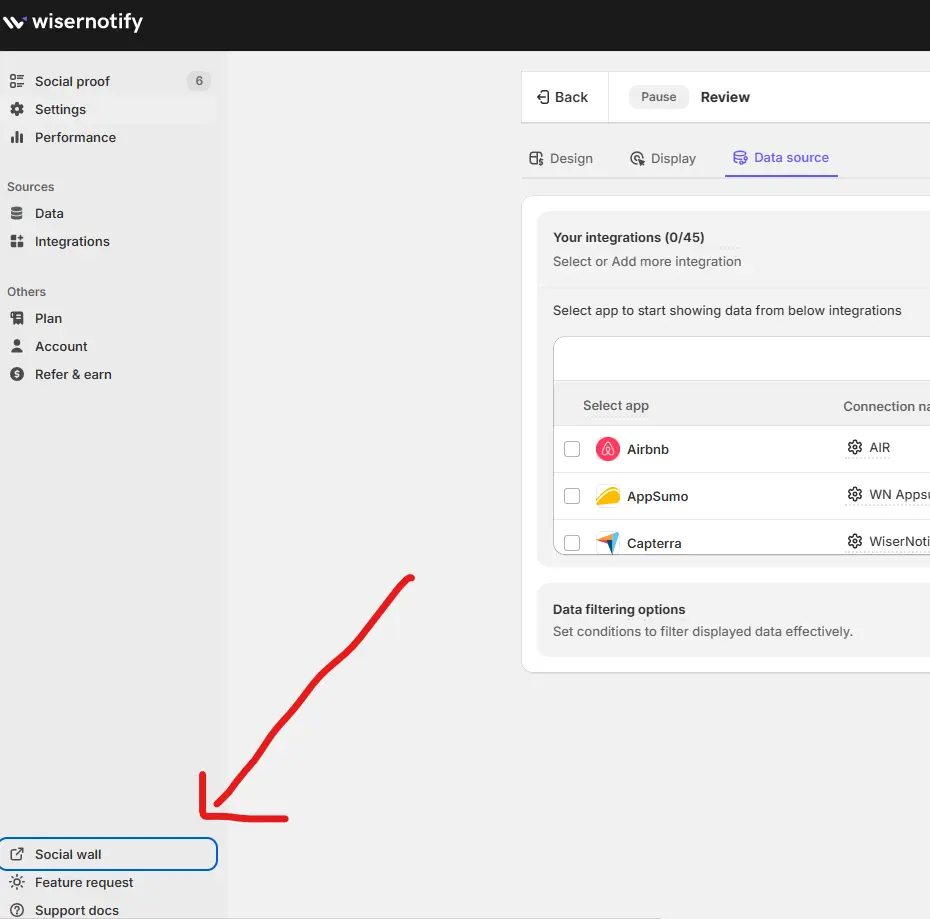
This feature provides two options: a Social Wall and a Review Wall, allowing you to tailor the content to meet your specific needs.
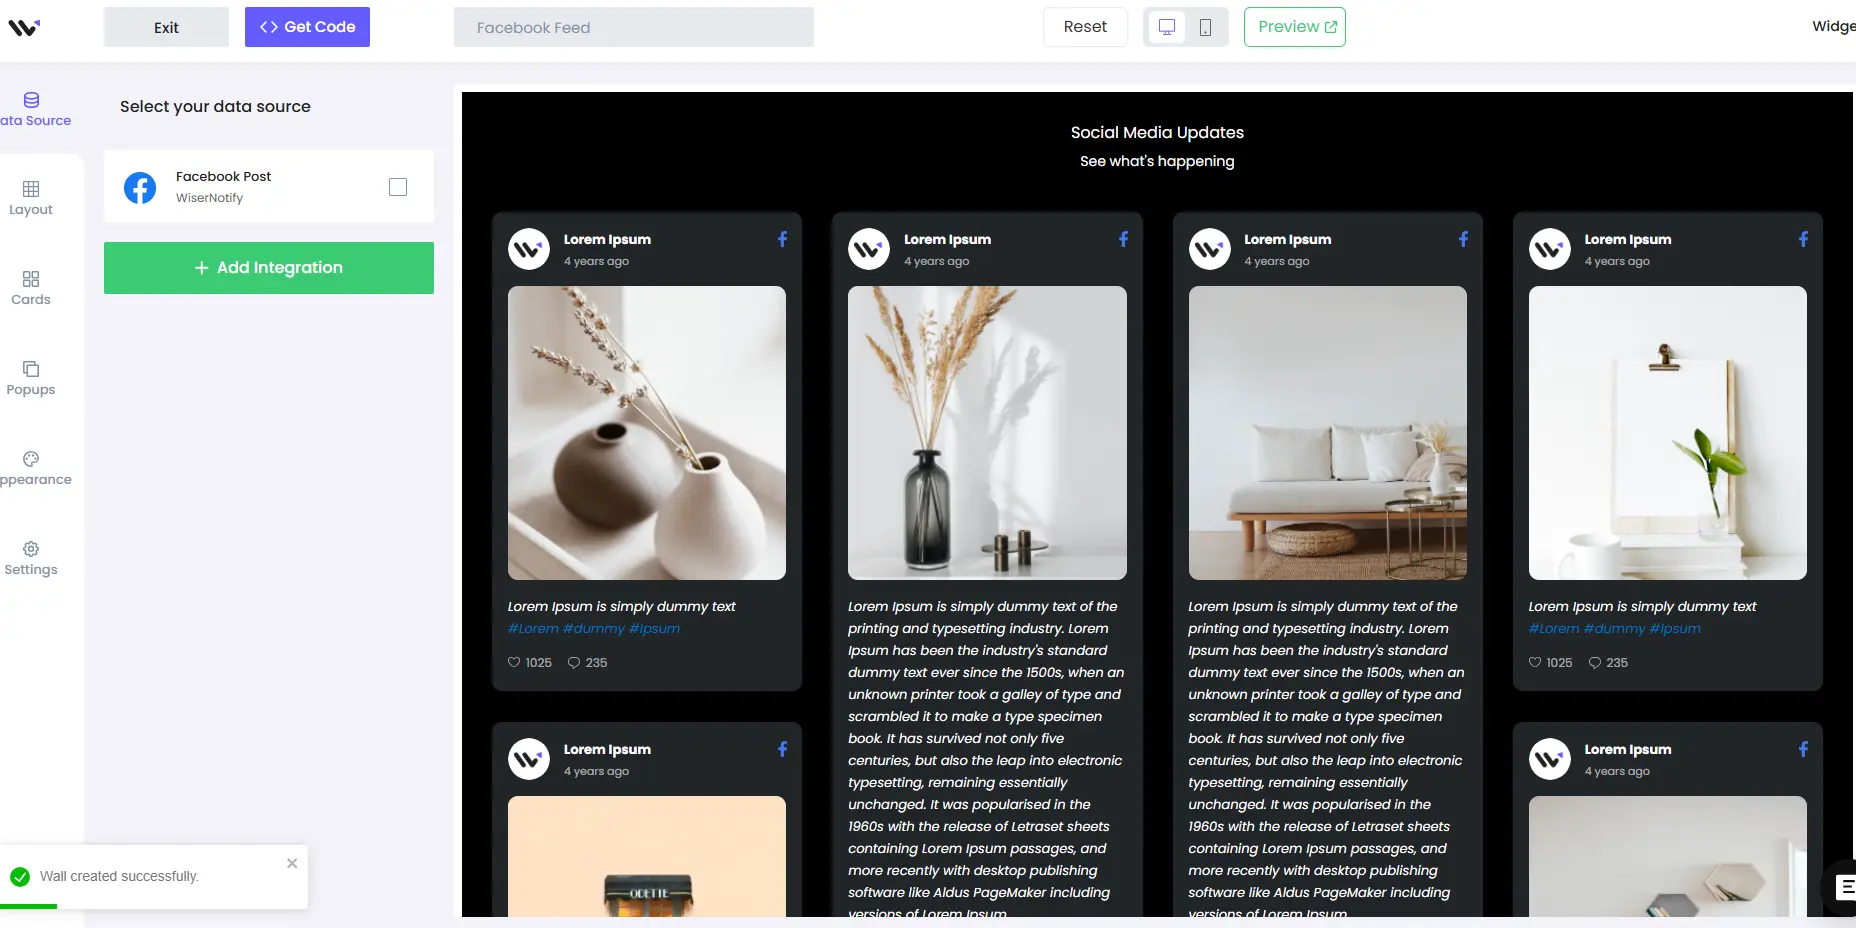
Visual Guide
Here’s what your Facebook Review Wall and Feed Wall could look like once set up.
Facebook review wall:

Facebook social feed wall:
Remember, the integration of Facebook reviews is just the beginning. WiserNotify offers a range of social proof and FOMO notifications to build your website’s trust and credibility. Explore these options to find the perfect match for your online presence.
Best Practices for Showing Facebook Reviews

Showing Facebook reviews the right way can build trust fast and help visitors feel more confident. Here are three simple but powerful ways to do it:
1. Highlight the Most Helpful Reviews
Don’t just show every review—pick the ones that actually help new visitors understand why people like your service.
A helpful review is usually one that talks about real experiences, not just “Great!” or “Awesome!”
Choose reviews that:
- Share what the person liked most
- Mention a problem you helped solve
- Talk about your team, the service, or something unique
- Feel honest and relatable
Show these reviews first so people quickly see what makes you worth choosing. It helps build trust right away.
2. Keep It Fresh and Updated
Don’t just add your Facebook reviews once and forget them. Visitors trust recent experiences more than old ones. If they only see reviews from two years ago, it can raise doubts.
To keep your reviews fresh:
- Highlight recent ones first — Sort by most recent so new feedback shows up on top.
- Set a system to auto-update — Use tools like Wisernotify that pull the latest Facebook reviews automatically, so you don’t have to do it manually.
- Replace outdated reviews — Swap out older ones that mention past products or services you no longer offer.
3. Place Reviews Where Visitors Look First
Add Facebook reviews near the most-viewed parts of your site—like the homepage, product pages, or just below your main heading. These are the spots visitors scan first to decide if they can trust you.
A well-placed review here helps build quick trust and keeps people interested in exploring more. Avoid hiding reviews in the footer or a separate tab. Keep them where they matter most.
Build trust & FOMO
Highlight real-time activities like reviews, sales & sign-ups.


Other Ways to Add Facebook Reviews to Your Website

Here are some other easy ways to show Facebook reviews on your site:
1. Show Reviews in a Carousel
A review carousel is a sliding box that shows one review at a time. It moves automatically or lets people swipe through. This keeps your site neat while showing more reviews in less space.
It works well on your homepage or near your product or service sections. Visitors can quickly read what others are saying without getting overwhelmed.
Why it’s useful:
- It makes your page look clean
- People can read more reviews without scrolling too much
- It helps build trust without taking up a lot of space
Example: Many websites using review carousels say people stay longer and are more likely to click buttons like “Buy Now” or “Book Today.”
Showing a few real reviews in a simple sliding format helps new visitors feel more confident. Keep each review short and clear, and show the reviewer’s name or photo if possible.
2. Add a Screenshot of Reviews
If you’re short on time or don’t want to deal with code, taking a screenshot of your Facebook reviews is the easiest way to add them to your website. It’s quick, requires no tools or integration, and still builds trust.
Here’s how you can do it:
- Open your Facebook page and scroll to the Reviews section.
- Take a clear screenshot of one or more helpful reviews.
- Crop out unnecessary parts and keep the reviewer’s name and photo visible (this adds credibility).
- Upload the image to your website using your site builder’s image block, section, or gallery.

Place the screenshot near your call-to-action or product details to boost trust when visitors decide.
3. Create a Dedicated Reviews Page
You can make a separate page on your website just for reviews. This gives visitors one easy place to see what others are saying about your business. It builds trust and shows you’re open and honest.
Here’s what you can add:
- A few Facebook reviews that highlight happy customer experiences
- Star ratings and names (if available) to make it feel real
- Photos shared by customers (if you have any)
- A link to your full review page on Facebook
- A simple note asking new customers to leave a review
You can name the page something like “Customer Reviews” or “What People Say.” Add it to your main menu or footer so it’s easy to find.
4. Add a Floating Review Tab on Every Page
A floating review tab is a small button that sticks to the side or bottom of your website. It stays in place as people scroll, so it’s always there if they want to read what others have said.
When someone clicks it, a small box opens showing your latest Facebook reviews. This helps visitors see real feedback without leaving the page.
Why it’s a good idea:
- It doesn’t get in the way, but is easy to notice.
- Works on every page—home, product, contact, or service.
- Builds trust while people are still deciding.
5. Create a Smart Pop-up After Scroll or Click
A pop-up can work well when it shows up at the right moment. Don’t show it right away. Let it appear after someone scrolls down the page or clicks a button like “Read Reviews” or “What Others Say.”
This feels more natural and doesn’t interrupt the visitor.
Here’s how you can do it:
- Set it to show after someone scrolls halfway down the page or clicks something.
- Add one or two real Facebook reviews with names and stars.
- Add the Facebook logo so people know the reviews are real.
- Include a button like “See All Reviews” or “Shop Now.”
3 Common Mistakes When Adding Facebook Reviews

1. Hiding Reviews in the Wrong Place
Placing reviews in areas where visitors don’t naturally look can make them useless.
If your Facebook reviews are hidden in the footer, in a separate tab, or only visible after a user scrolls a lot, they’ll likely go unnoticed.
Instead, show them where they matter most—near your product, service, or signup sections. Add a few to the homepage, display them on landing pages, and highlight them near your call to action.
This way, they help build trust when someone thinks about taking action.
2. Overloading the Page With Too Many Reviews
Adding too many reviews on a single page can overwhelm your visitors. When people see a long wall of text, they often skip it instead of reading. This also slows down the page load, especially if you’re using review widgets or plugins.
Instead, pick a few strong reviews that highlight different benefits—like fast shipping, quality, or service.
Rotate them with a slider or show different ones on different sections of your site. Keep it clean, scannable, and easy to read.
3. Not Matching Design with Your Site
One of the biggest mistakes is adding Facebook reviews that look out of place. If the font, colors, or layout clash with your website, it can make your site feel unprofessional or untrustworthy.
Make sure the reviews match your brand style. Use similar fonts, align the spacing, and follow your color scheme.
Whether you’re embedding a review widget or pasting reviews manually, keep the design clean and consistent. This helps the reviews feel like a natural part of your site, not something added just for show.
Platform-Specific Integration Guides
Easily add Facebook reviews to your website with our platform-based guides.
Whether you’re using WordPress, Shopify, Wix, Webflow, or any other tool, we show you the exact steps needed.
No coding required. Just follow the instructions and start showing real reviews that build trust and increase conversions.
The Easiest Way to Add Facebook Reviews to Shopify
How to Add Facebook Reviews to WordPress
How to Embed Facebook Reviews to WooCommerce
The Easiest Way to Add Facebook Reviews to Unbounce
How to Add Facebook Reviews to Wix
The Easiest Way to Add Facebook Reviews to Podia
How to Add Facebook Reviews to Elementor
How to Embed Facebook Reviews to GoHighLevel
Conclusion
That’s it—adding Facebook reviews to your website is one of the simplest ways to build trust with new visitors using the Wisernotify tool. It shows that real people have used your service and had a good experience.
By embedding these reviews, you’re not just adding content — you’re showing proof that your business delivers.
Keep the reviews fresh, display them where they matter most, and make sure they look clean and easy to read. It’s a small step that can make a big difference in how people see your brand.
Boost Conversion Instantly
Add Social Proof & Urgency to your website
Krunal Vaghasiya is a marketing tech expert who boosts e-commerce conversion rates with automated social proof and FOMO strategies. He loves to keep posting insightful posts on online marketing software, marketing automations, and improving conversion rates.