
How to add testimonials on Squarespace in under 5 minutes

Adding testimonials on your Squarespace site is one of the easiest ways to build trust with visitors.
If you’ve got happy customers, it makes sense to show their feedback right on your site. It doesn’t take much time, and you don’t need to know any coding to use a tool like Wisernotify.
Whether it’s a short quote or a detailed review, placing it in the right spot can help new visitors feel more confident.
This guide will walk you through the steps simply and quickly. In less than five minutes, you’ll be able to display real customer testimonials that actually make a difference.
Let’s get started.
Why Add Testimonials to Squarespace?

Your website might have great photos, nice colors, and clear descriptions—but that’s not always enough to convince someone to take the next step.
Most people want proof. They want to see that others have already tried your product or service and had a good experience. That’s what testimonials do.
Think of testimonials as friendly advice from someone who’s already been in your customer’s shoes. When a visitor reads a short quote like:
“I booked an appointment last week, and everything went smoothly from start to finish.”
…it helps them feel more confident. It answers their silent doubts—without you saying a word.
Even one or two short quotes can make a big difference. Here’s why:
-
They build trust — People trust other people more than ads or sales pages.
-
They help with decision-making — Testimonials remove hesitation and show that others are happy with what you offer.
-
They make your site feel real — A human voice stands out more than a polished slogan.
According to a report by Wisernotify, 95% of people read reviews before buying, and 45% won’t move forward if there are no reviews at all. That’s a big deal, especially for small businesses.
Build trust & FOMO
Highlight real-time activities like reviews, sales & sign-ups.


How to Add Testimonials to Squarespace


Embedding Testimonials with Wisernotify
Adding testimonials to your Squarespace site with WiserNotify is quick and simple. Here’s how to do it step by step:
1. Sign in to WiserNotify
- First, sign up and create a free account or log in to your WiserNotify dashboard.
2. Add Your Website
- Go to the Websites section and add your Squarespace domain.
3. Install the Pixel
- Copy the WiserNotify pixel code.
- In Squarespace, go to Settings → Advanced → Code Injection, and paste the pixel code in the Header section.
4. Create a Testimonial Notification
- Go to the Notifications section → click Add Notification → choose Review or Testimonial Widget.
- Pick a design you like, add your testimonial content, and customize the look.
5. Set Display Rules and Publish
- Choose where and when to show the testimonial widget on your site.
- Once done, click Publish. Your testimonials will now show live on your Squarespace website.
3 Testimonial Optimization Tips for Squarespace

Here are the best 3 Testimonial Optimization Tips for Squarespace:
1. First, Keep Testimonials Short and Specific
Avoid long paragraphs or vague praise. Instead, focus on short quotes that show what changed for the customer after using your product or service.
For example, instead of “Great service,” a better version would be “We saw a 35% increase in bookings after switching to [your product].”
You can ask guiding questions when collecting testimonials, such as:
- What problem did you face before using our service?
- What result did you get after using it?
- Would you recommend us and why?
2. Add Photos, Names, and Context for Trust
A plain text testimonial feels less credible. Wherever possible, add the customer’s photo, full name, company, or location. If privacy is a concern, even showing initials and a city works better than no details at all.
Bonus tip: If you’re targeting different audience types, group testimonials based on segments (e.g., small business owners, designers, freelancers) and label them accordingly. This helps new visitors find relatable stories quickly.
3. Place Testimonials Where They Influence Decisions
Instead of dumping all testimonials in one long page, place them in key spots:
- On your homepage, create a good first impression
- Place pricing tables or call-to-action buttons to reduce hesitation
- On product or service pages to back up claims
- Inside popups or slide-ins to catch attention while browsing
Best Places to Show Testimonials on Squarespace
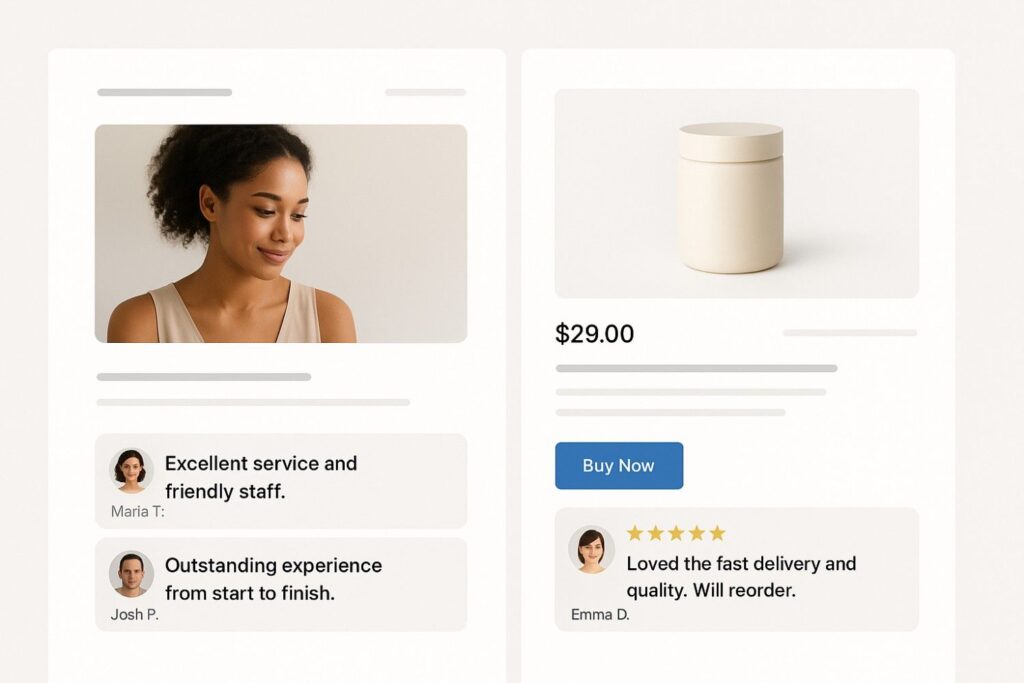
Showing testimonials in the right spots on your Squarespace site helps build trust and increase conversions. Here are the best places to add them:
1. Homepage
Your homepage is usually where people land first. It’s your chance to make a good impression. Showing a few short testimonials here helps visitors trust you right away.
What to do:
- Add 1 to 3 short quotes just below your main message or headline.
- Pick the ones that sound real and positive.
- If possible, include a name or photo to make it feel more personal.
- You can also use a small slider if you have more than 3.
Why it helps:
It gives new visitors quick proof that others are happy with your service or product. That can make them stick around longer.
2. Product or Service Pages
These are the pages where people decide if they want to buy or sign up. Adding a few honest reviews here can make a big difference.
What to do:
- Use reviews that talk about what people liked about the product or service.
- Put them near the “Buy Now” or “Book Now” button.
- Keep them short and clear.
- If a review mentions a specific feature or benefit, that’s even better.
Why it helps:
When someone sees that others had a good experience, they feel more sure about buying.
3. About Page
This page tells your story—who you are and why you do what you do. It’s a good spot to include kind words from people who liked working with you.
What to do:
- Share reviews that talk about your support, how easy it was to work with you, or how you care about your customers.
- Keep it personal and genuine.
- Don’t add too many—just one or two is enough.
Why it helps:
People visit this page to learn about you. Seeing real feedback builds trust and makes your story feel real.
4. Testimonial Page
If you have lots of reviews, it’s a good idea to create a page just for them. That way, people who want to read more can find them easily.
What to do:
- List your best reviews all in one place.
- You can group them by service, product, or customer type.
- Mix text reviews with star ratings or pictures if you have them.
- Link this page in your top menu or footer.
Why it helps:
Some visitors want to read more before deciding. A full page of honest reviews can help them feel sure about choosing you.
5. Checkout or Contact Page
This is where someone is about to make a decision. A few calming words from happy customers can make them feel more confident.
What to do:
- Add one or two short quotes near the form or checkout button.
- Pick reviews that talk about fast service, great support, or how smooth everything went.
- Keep it simple so it doesn’t distract.
Why it helps:
People often hesitate at the last step. A quick message from a happy customer can give them the final push.
Other Ways to Add Testimonials to Squarespace

Squarespace makes it easy to add testimonials, but if you want more control, automation, or creative formats, here are other easy ways to add testimonials to your Squarespace site:
1. Add a Testimonial Slider Using a Carousel Block
Squarespace lets you build image or content carousels using slideshow blocks. You can add each testimonial as a separate slide, with text and images. This keeps the section clean and lets visitors view one review at a time.
You can use this on your homepage, product pages, or landing pages to make your website more interactive without clutter.
2. Embed Video Testimonials
Video reviews feel more personal and convincing. Ask happy customers to share a short video talking about their experience. Upload these videos to YouTube or Vimeo and use the Video Block in Squarespace to show them.
You can include a title or small intro before each video, like “Watch why Sarah loves our product.” These work well on homepages, sales pages, and booking pages.
3. Show Graphic Testimonials
If you have reviews shared on social media or received screenshots from WhatsApp or emails, you can crop those images and upload them using Image Blocks.
Add a small caption if needed. This works well if you want to show real, unedited feedback. You can also design quote graphics using tools like Canva, upload them as images, and use them across your site.
4. Display Testimonials Using Blog Posts
If you like writing, you can turn client stories into blog posts. Then, use a Summary Block on another page to show these posts in grid or list format.
You can filter by tags like “feedback” or “success story.” This adds more depth and helps visitors who want to read longer reviews or customer journeys.
5. Show Short Quotes
To keep trust visible across your site, you can place short one-line reviews in the footer or sidebar of your template.
For example, “Rated 5-stars by 1,200+ customers” or “John: ‘The best service I’ve ever used!’” This keeps testimonials in front of users without needing a dedicated section.
3 Testimonial Mistakes to Avoid on Squarespace

1. Using Fake or Generic Testimonials
Avoid using fake or made-up testimonials at all costs. Visitors can often sense when something feels off. Generic lines like “Great service!” without a real name, photo, or context don’t build trust. They can even hurt your brand’s credibility.
Instead, use real feedback from actual customers. Even short, honest reviews with names and specific details (like what they bought or how it helped them) work much better to earn trust.
2. Hiding Testimonials
Don’t make the mistake of hiding your Testimonials. Most people won’t see if they’re placed on a separate page or somewhere at the bottom.
Show testimonials where they can help the most—like near product details, pricing, or sign-up buttons. Let visitors read what others are saying while they’re thinking about buying.
3. Using Old or Outdated Testimonials
Outdated testimonials can make your business look inactive or unreliable. If your most recent review is from two years ago, visitors might wonder if you’re still in business.
Keep your testimonials fresh by regularly collecting new ones. Highlight recent customer experiences that reflect your current product or service quality. This helps build trust and shows you’re still delivering value.
Wrap-Up
That’s it — you’ve seen how quick and simple it is to add testimonials to your Squarespace site. It doesn’t take a fancy setup or hours of design work.
Just a few real words from happy customers can go a long way in building trust and showing new visitors they’re in good hands.
Don’t stop at just one or two reviews. Make it a habit to collect feedback from your customers regularly. The fresher, more honest stories you show, the more confident people will feel about choosing you.
You can also switch up how you show them—sliders, grids, or inline quotes on product or service pages.
And if you’re using a plugin or a tool like Wisernotify to automate the process, make sure it keeps your testimonials updated and easy to manage.
That way, your reviews will keep working in the background to boost your credibility even as your business grows.
Related Posts:
How to embed testimonials on wordpress
How to embed testimonials on Webflow
How to embed testimonials on Shopify
Frequently Asked Questions
How can I add testimonials to my Squarespace site?
You can add testimonials to your Squarespace site using the built-in testimonial blocks or by embedding a third-party testimonial widget. You can also use a carousel, grid, or list layout to display testimonials effectively on your pages.
Can I customize the appearance of testimonials on Squarespace?
Yes, Squarespace allows you to customize testimonial blocks to match your site’s design. You can adjust font styles, colors, layouts, and even use custom CSS for advanced styling.
Are there any third-party tools to add testimonials to Squarespace?
Yes, you can integrate third-party tools like WiserNotify, Trustpilot, or Google Reviews to display testimonials dynamically. These tools often provide widgets or scripts that can be embedded directly into your Squarespace site.
Where should I place testimonials on my Squarespace website?
Testimonials work best on pages where trust-building is essential, such as the homepage, product or service pages, and checkout pages. You can also dedicate a specific page for all testimonials or include them in a rotating carousel on multiple pages.
Can I include video testimonials on Squarespace?
Yes, Squarespace supports video testimonials. You can embed videos from platforms like YouTube or Vimeo, or upload video files directly to your site to showcase customer testimonials in a more engaging format.

Krunal Vaghasiya is a marketing tech expert who boosts e-commerce conversion rates with automated social proof and FOMO strategies. He loves to keep posting insightful posts on online marketing software, marketing automations, and improving conversion rates.




 Capterra