Optimizing images in your WordPress site can help ensure faster page load times, improve search engine rankings, and provide a better user experience.
By compressing your images, resizing them appropriately, and using the correct file format, you can significantly reduce their size without compromising their quality.
Optimizing images for a WordPress website is essential for creating an enjoyable, responsive user experience.
Whether you’re an experienced webmaster or just getting started building websites, ensuring your images are correctly optimized will help you get the most out of your site.
With the proper techniques and tools, you can significantly reduce page loading times, improve SEO performance, and make sure visitors have a great time while they browse your website.
In this article, we’ll dive into 13+ easy image optimization tactics for a WordPress website.
Let’s get started!
Why is Image Optimization Essential?
Image optimizations are essential to help improve website performance, improve customer experience and increase conversion rate.
Image optimization is crucial for WordPress websites because it can significantly improve performance and user experience.
Optimized images load faster, reducing website load times and improving website SEO.
By reducing the size of images without compromising their quality, website owners can reduce the storage space needed for their website, ultimately leading to lower hosting costs.
Optimized images can be easily shared on social media, increasing website traffic and engagement.
Benefits of Optimizing Images in WordPress
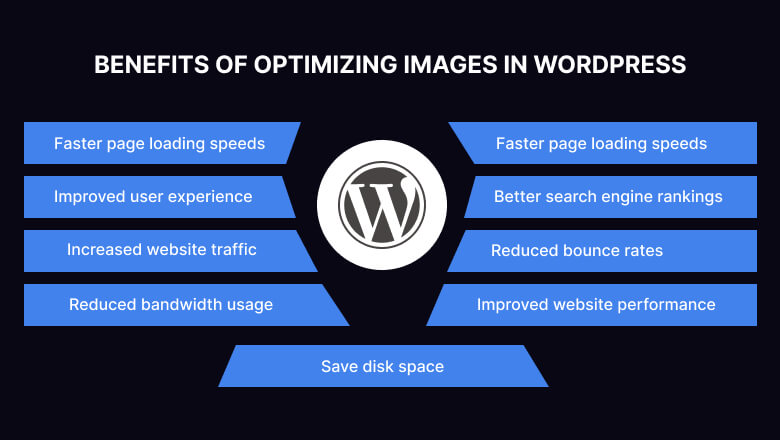
Here are some of the benefits of optimizing images on WordPress sites
- Faster page loading speeds: Optimized images reduce the size of image files, allowing your website to load more quickly.
- Improved user experience: A faster-loading website will keep visitors engaged and happy.
- Better search engine rankings: Google and other search engines consider page speed a ranking factor, so optimizing images can improve your SEO.
- Increased website traffic: Improved page speed and SEO can increase traffic and more visitors to your site.
- Reduced bounce rates: Faster loading times can reduce bounce rates, keeping visitors on your site longer.
- Improved website performance: Overall, optimizing images can improve the performance and functionality of your WordPress site.
- Reduced bandwidth usage: Smaller image files mean less bandwidth usage, saving you money on hosting costs.
- Save disk space: Image optimization can help you save space by occupying less space and providing extra space for other elements and features on your website.
Optimize Your Images Before Use Them in WordPress
Here are some quick ways to optimize new and existing images on your WordPress sites –
1. Image Size
Reducing image size or using Resize images is the easiest way to optimize your WordPress website images.
Resizing your WordPress image size can help you optimize your website by reducing page load times and improving overall site performance.
For example, if you add images to your website’s product page and the theme displays images at 600 X 600, but you upload the image with a resolution of 1024 X 1024, all those extra pixels will increase your disk space and loading speed.
By resizing your images, you can decrease the file size, which helps to improve loading speed and reduce disk space on your WordPress site.
Here are the default sizes for every website on WordPress:
- Thumbnail: 150px square
- Medium: Max width and height of 300px
- Large: Max width and height of 1024px
- Full Size: The original size of your image
2. Compress Images
Compress images can help you reduce the file size for your WordPress images.
A compressed image will load faster and improve website speed. And one of the easiest ways to compress images is using an image compression plugin.
Image optimization plugins do more than compress your images; they optimize large images.
Additionally, you can compress images manually using third-party software.
Furthermore, WordPress has in-build image compression that resizes and compresses the images you upload from the media library by 82%.
While automatic compression is great, using an image optimization WordPress plugin can help you achieve the perfect image quality.
Remember, WordPress image optimization plugins can help you reduce the size, which will help you load faster and easier.
3. Featured Image
In WordPress, the featured image is used throughout your theme, appearing as a thumbnail next to the post’s title or in the header of a particular post.
Using featured images is essential, as most themes and widgets rely on them.
They allow for greater customization, such as displaying unique custom header images for specific posts or setting thumbnails for particular features of your theme.
Once you’ve chosen your featured image, the size remains constant for all future images.
However, the ideal size may vary depending on your WordPress theme and post layout. Typically, featured images are wider than high, with widths ranging from 500 to 900 pixels.
Additionally, it’s vital to choose high-resolution images and avoid pixelated ones.
4. Use Proper Image File Formats
Using the proper file format can help optimize your images. The image formats you use decide your image’s file size and quality.
For example, JPEG is best for photographs, and PNG images are best for transparent graphics.
Using the correct format can reduce file size and improve website loading times.
The correct image file format can help-
- Website Speed: Choosing the correct image format can significantly improve your website’s loading speed, which is crucial for user experience and search engine optimization.
- Image Quality: Different image formats have different compression levels, and choosing the right one can help maintain image quality while keeping the file size small.
- User Experience: Large image size increases loading speed, and customers won’t like to wait long.
By default, WordPress accepts popular image formats, including JPG, PNG, GIF, and ICO. Remember, the right image file format depends on how you use your images.
5. When to Use JPEGs and PNGs
When discussing image format, every format plays a different role and has different file sizes and quality.
JPG formats are used to store digital photographs and are the most common format website owners use.
It best showcases realistic photographs and complex graphics on a high-resolution background.
The best part is they can be highly compressed without losing quality.
On the other hand, PNG files are used to share images online, such as logos and icons.
They work best with a few colors and support transparency. The image quality remains intact after compression.
Remember, JPG is usually the best option if you’re working with photographs or images with a lot of detail.
This format uses a compression algorithm to reduce the file size while maintaining excellent detail and color accuracy.
On the other hand, if you’re working with simple graphics or images with large areas of solid color, PNG is often a better choice.
This format supports transparency, so you can easily create images with transparent backgrounds for web design or other applications.
6. Lossy vs. Lossless Compression
There are two different types of compression: lossy and lossless compression.
- Lossy compression: Lossy compression is a method of data compression that reduces the size of a file by permanently eliminating some data. It is commonly used for compressing multimedia files such as images, audio, and video.
- Lossless compression: Lossless compression is a type of data compression where the original data can be perfectly reconstructed from the compressed data. Some examples of lossless compression algorithms include ZIP, RAR, and PNG.
Optimize Your Images After Use them in WordPress
7. Enable Images Caching
A cache is a collection of temporary files your browser collects to showcase a complete website.
The browser requests the server, and then the elements are collected temporarily to make it look as it is.
Caching solves this issue by processing the frequently requested information and storing it in temporary memory.
The same thing is used in image caching when a website visitor visits your website; caching reduces the load on the WordPress server and makes your website run faster.
Several website plugins can help boost your WordPress site performance, loading speed, and customer experience.
8. Use Lazy Loading for Images
Lazy loading is a technique for optimizing images by loading them only when needed. This improves website performance by reducing the initial page load time.
The lazy-loaded images are shown only when visitors scroll to that particular section, so other content can be displayed faster.
You can implement lazy loading using JavaScript libraries such as Lazy Load or Intersection Observer API.
By using lazy loading, images will only load when they enter the user’s viewport, which helps to reduce the amount of data that needs to be downloaded by the user’s browser.
Lazy load plugins can help improve website page performance, increase website speed, keep visitors longer on your site, and reduce the load on your server.
9. Stop doing Image URL Redirects
One factor that can significantly decrease your page speed is image-related redirects.
If your images are linking to other pages, this can cause a delay in loading your website.
To prevent this, it’s best to avoid embedding pictures from external sources on your site.
Instead, upload each image or piece of media directly to your site if possible.
Additionally, ensure that your images do not link to anything, such as a separate media page. This can help ensure that your website loads quickly and smoothly.
10. Use Image optimization plugins
There are different ways to optimize your images, like using image editing software or an image editing program, but not everyone is comfortable with the software.
Using WordPress image optimization plugins can help improve your website’s performance and load time by reducing the file size of your images without sacrificing quality.
This can lead to a better user experience and higher search engine rankings.
When an image is uploaded on a WordPress site, the plugin automatically compresses the image file size without compromising quality.
WordPress image optimizer plugin offers image optimization and compression; it ensures your website loads quickly and provides a more user-friendly experience.
Some popular image optimization plugins include Smush, EWWW Image Optimizer, and ShortPixel.
These plugins help to optimize unlimited images, image resizing, and previously uploaded images, compress JPEGs, PNGs, and other formats, and automatically optimize new images.
They also have a free version to optimize images on your web page and WordPress media library.
Optimize your Images for Search Engines Ranking

Images are essential elements of your website that help attract visitors with visual components.
Unoptimized images affect the user experience, the site’s visibility, and the search page ranking.
Optimizing WordPress images can help you influence people’s decisions, create positive experiences, and ensure search engine bots can read them easily. Here are 4 ways to optimize your site’s images for SEO-
11. Title Tags
Title tags are essential to an image’s name and provide additional information about it. Though title tags are unnecessary for search engine crawlers, they help improve user experience.
You might have added some images to your site, and users might get confused about why some pictures appear there; the title tags can answer their queries.
When the visitor hovers over the image, the description of the image pops up.
Remember, make sure your title tags describe the image with short words but in a catchy way.
12. Alt Text
The alt text describes an image using HTML codes that help search crawlers understand what the image is about.
Alt text can help you to improve search engine ranking and describe the context of an image using codes.
Writing alt text is much easier; it needs to be SEO-friendly. Here are some best practices to make your Alt-text SEO-friendly:
- Include relevant keywords,
- Describe the image using 125 characters,
- Add the context of the image,
- Be specific with your descriptions,
- Never start alt text with “image of” or “picture of.”
The image Alt text helps search crawlers and visitors know about the image, even if it isn’t displayed fully.
Screen readers also use it to help blind people understand the image. In addition, using relevant keywords can show your image in Google Images and boost traffic on your website.
13. Use Proper Image Placement and Captions
Proper image placement and captioning can significantly enhance an image’s effectiveness.
When placing an image, try to align it with the relevant text and avoid placing it too close to the margins.
As for the caption, ensure it accurately describes the image and provides additional context or information that may not be immediately apparent.
This can help readers better understand and engage with the content.
Additionally, consider using relevant keywords within your captions, but don’t overuse them. Make sure the captions are on point.
14. Create Sitemaps for Image
Google suggests adding images to your existing sitemaps or creating separate sitemaps for just images on your WordPress sites that help search engines discover all the images.
An image sitemap is an XML sitemap that helps Google crawl images.
Unlike other sitemaps, image sitemaps do not need links to specific pages and rely on HTML tags.
Some tools are available to create image sitemaps, or if you are a developer, craft them manually.
After creating the sitemap, you need to submit the link to Google through Google Search Console, or you can find other available ways.
Remember, Image sitemaps are crucial if you have many images on your website, as they make search crawlers crawl them easily.
Conclusion
Optimizing images on a WordPress website is crucial for improving website performance and user experience.
By compressing images, reducing their size, and using appropriate formats, website owners can improve website loading speed, reduce bandwidth usage, and enhance SEO.
Implementing image optimization strategies can lead to faster loading times, better user engagement for website visitors, and increased website traffic and conversions.
Furthermore, you can use WordPress image compression plugins to optimize large images and image optimization plugins to optimize full-sized images for your website.
By implementing these strategies, website owners can ensure their images are visually appealing and optimized for performance and user experience.
