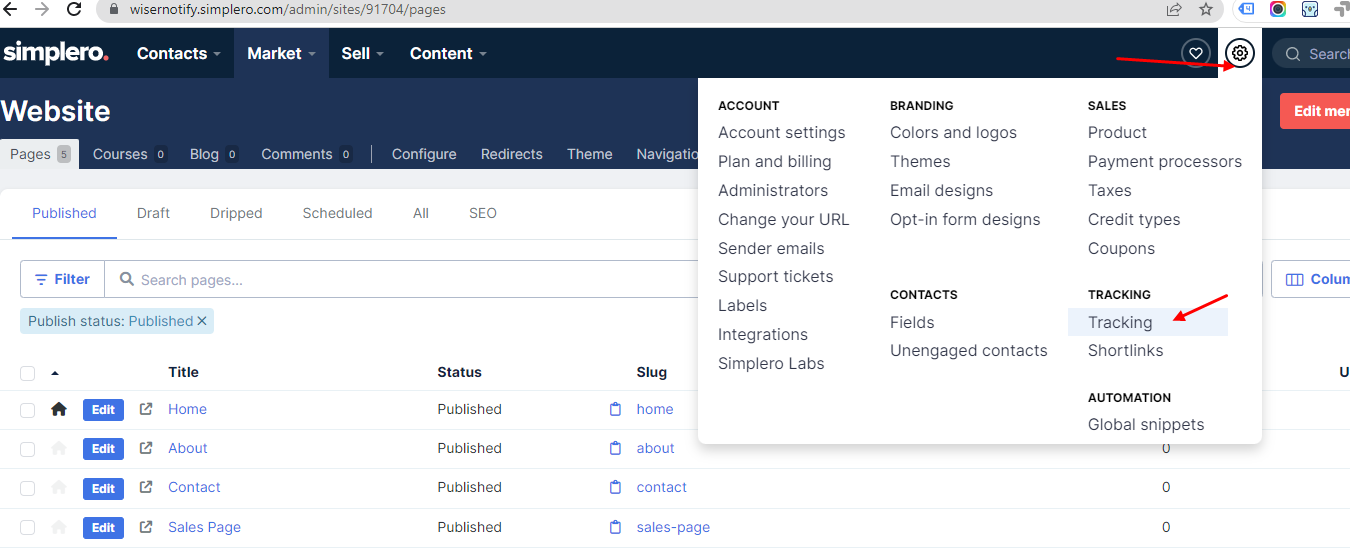
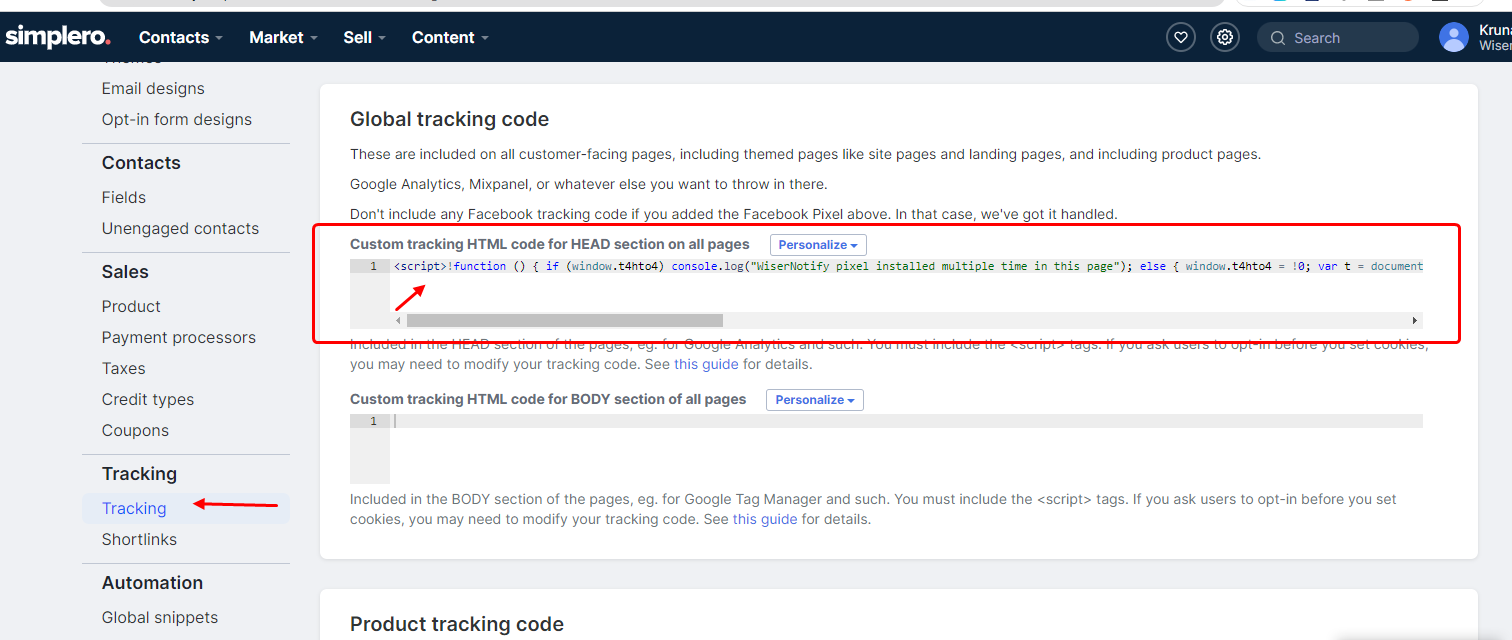
Paste the Copied WiserNotify Pixel code into the Global tracking code.
Click on the Save button.
Step 3: Verify Installation
Go back to your Wisernotify pixel page.
Click on verify pixel installation to check if the pixel is active.
If installed correctly, you will see a “Pixel Active” successfully message.
Note: This pixel script tag is required on every page wherever you want to track visitor activities, capture form submit events & display notifications.
Add Webhook Integration to Connect Simplero to pull the events lead data
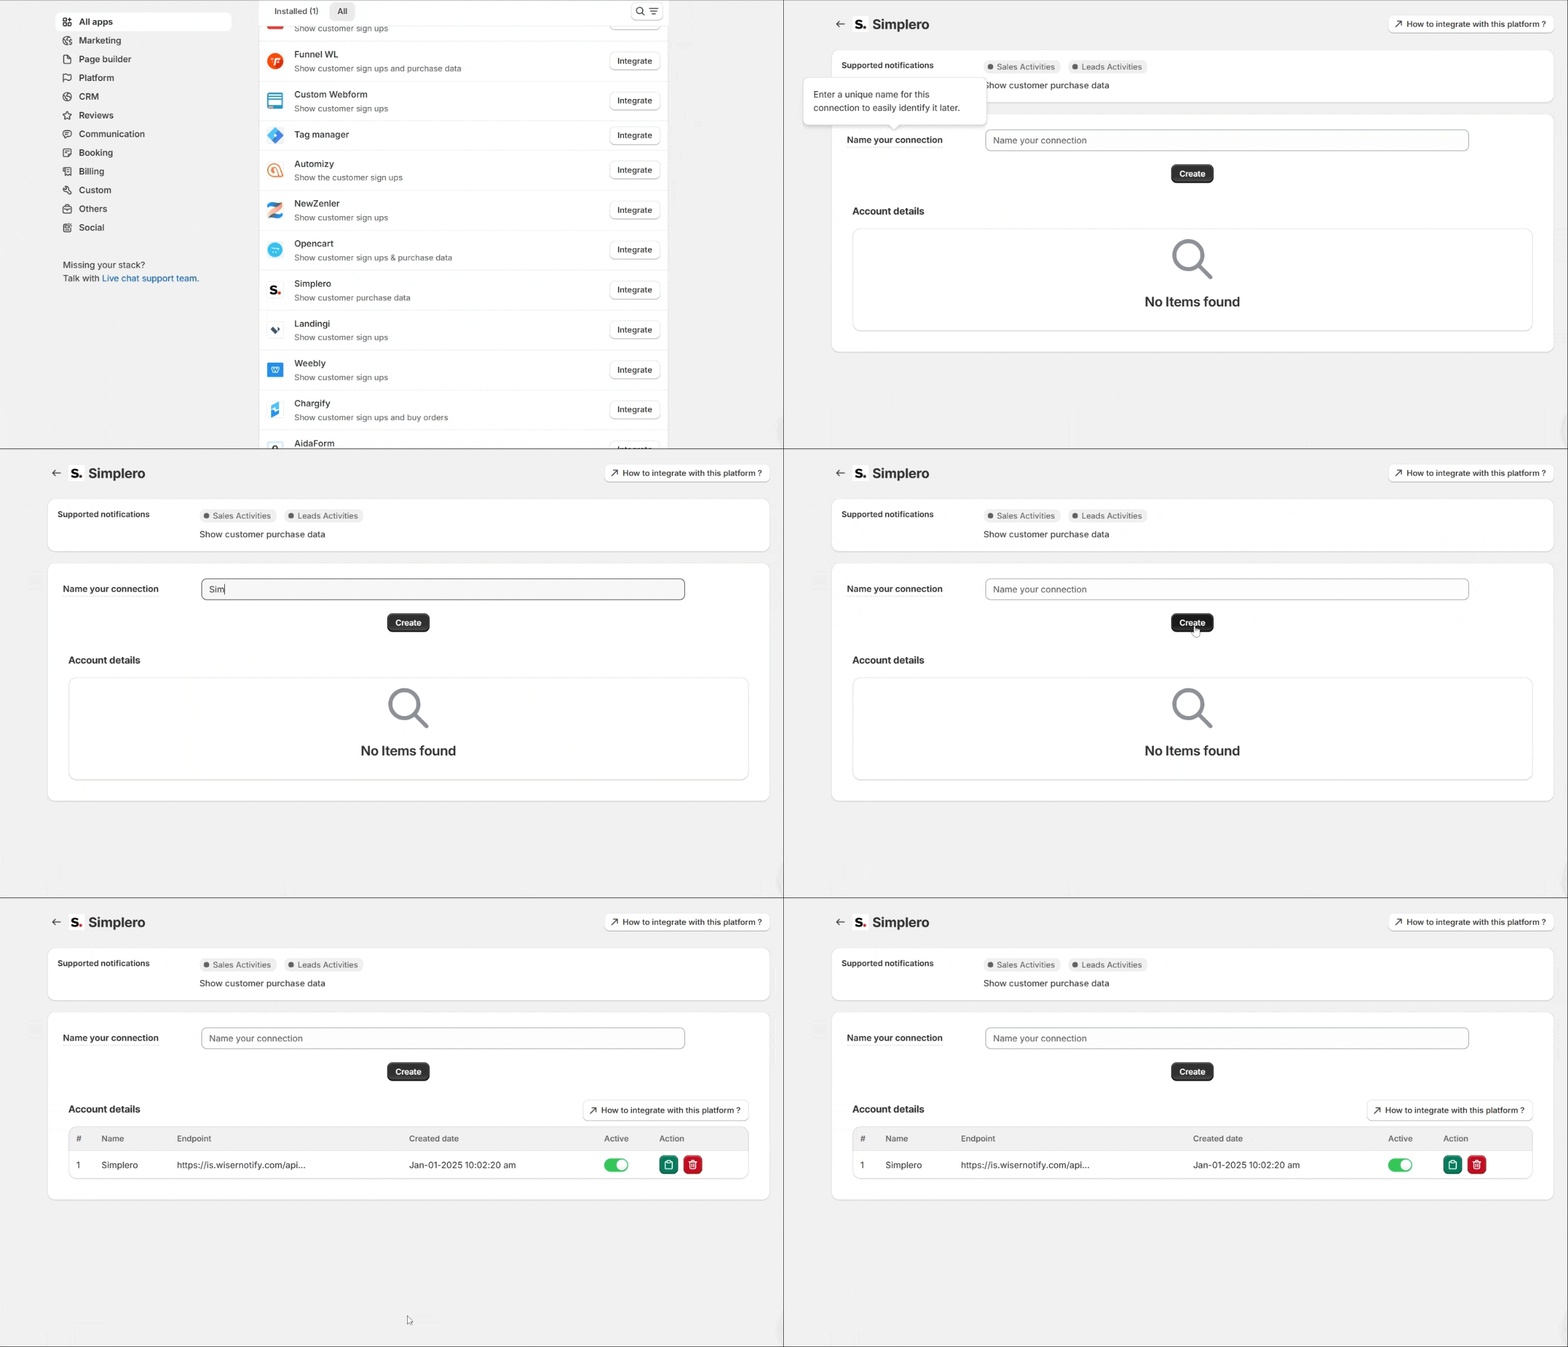
– Click on the Integrate button inside the Integrationbox.
1. Enter Connection Name
2. Click on the Create button.
3. Click on the copy button.
Step 2: Configure Webhook in Simplero
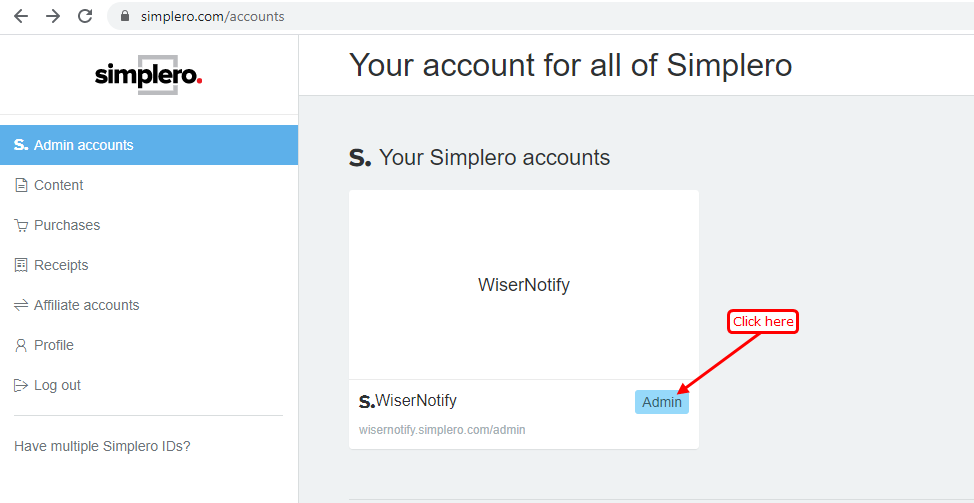
Login with Simplero
1. Login in admin account in Simplero.
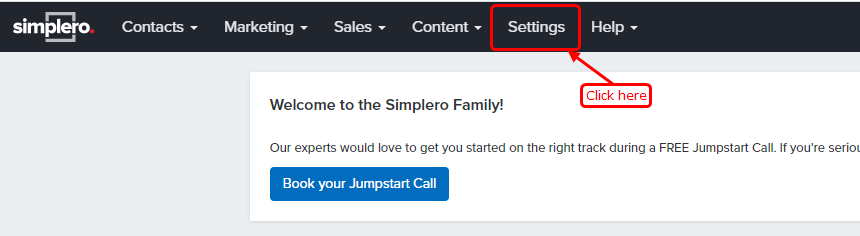
2. Click on the settings tab.
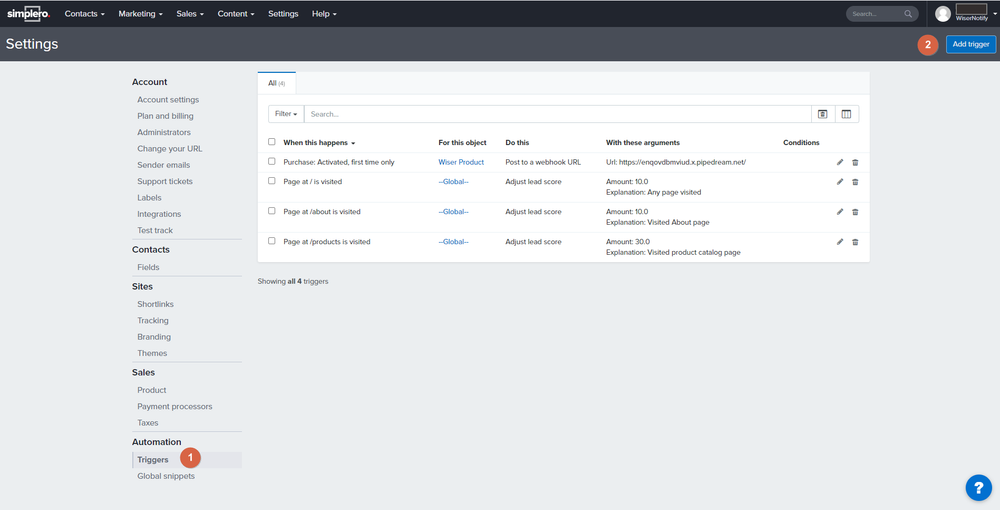
1. Click on Triggers.
2. Click on the Add trigger button.
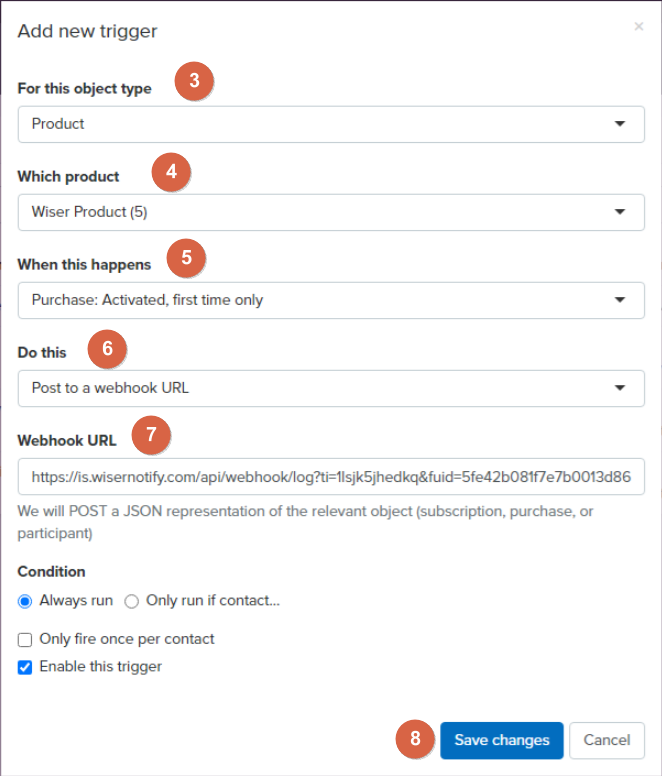
3. Select Product in this object type option.
4. Select your product using the Which product option.
5. Select Purchase: Activated, first time only, or Purchase: Activated/Renewed in When this happens option.
6. Select Post to a webhook URL in the Do this option.
7. Paste your Webhook URL copied from WiserNotify in the Webhook URL option.
8. Click on the Save Changes button.
Please do the test by adding new data & visit the WiserNotify- Dashboard Datapage. Here, You can see all the captured/ received data with its source name.
Note: Make sure you select this integration as data-source for the notification (Customize notification > Data-source > Select this integration)
Important: After making changes, check your notification in a private browser to avoid cache issues.
Need Help? Explore our Troubleshooting Guide or contact our live chat support from your WiserNotify account. We’re here to assist you promptly.
Related integration guides
Setting up a different integration? These related WiserNotify integration guides walk through it:







 Capterra