
Adding a visitor counter to your Webflow website is a simple yet impactful way to display real-time activity, build trust, and drive conversions. By showing how many visitors are currently on your website or specific pages, you provide social proof that reassures customers and encourages them to take action.
This guide explains the benefits of a visitor counter, steps to implement it in Webflow, and best practices to maximize its effectiveness.
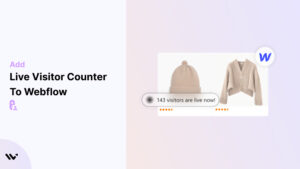
Key Benefits of Adding a Visitor Counter to Webflow
1. Builds Trust
- A visible visitor counter highlights the popularity of your website, reassuring visitors about its credibility.
2. Tracks Engagement
- Monitor real-time visitor activity to identify popular pages or products and refine your marketing strategy.
3. Creates Social Proof
- Display visitor counts to show demand for your products or services, encouraging hesitant buyers to act.
4. Encourages Conversions
- Leverage FOMO (Fear of Missing Out) by showcasing live visitor data to prompt faster purchasing decisions.
5. Customizable for Branding
- Tailor the counter’s design to match your Webflow site’s style, ensuring a seamless and professional look.
Add Visitor Counter to Webflow
First, Add the WiserNotify App On Webflow
- Go to WiserNotify and log in to your account.
- Once logged in, you’ll be redirected to the Dashboard.


Best Practices for Using a Visitor Counter on Webflow
➲ Use Accurate Data
Ensure the visitor counter reflects real-time statistics to build trust and avoid misleading your audience.
➲ Place Counters Strategically
Position counters on high-impact pages like product detail pages, landing pages, or the homepage for maximum visibility.
➲ Highlight Popular Pages or Products
Use counters to showcase trending items or high-traffic pages to increase their perceived value.
➲ Keep the Design Clean
Ensure the counter integrates seamlessly with your Webflow site’s layout and doesn’t disrupt the user experience.
➲ Include Dynamic Messaging
Use engaging text like “Hurry! 10 people are viewing this product now!” to create urgency.
➲ Combine with Other Features
Pair the visitor counter with countdown timers, promotional banners, or discount offers for added impact.
➲ Optimize for Mobile Devices
Ensure the visitor counter is responsive and displays correctly on all devices, especially mobile.
➲ Monitor Performance Metrics
Track impressions, clicks, and conversions to evaluate the counter’s effectiveness. Adjust placement and messaging based on insights.
➲ Avoid Overuse
Focus on key pages or products to avoid cluttering your site with too many counters.
Conclusion
Adding a visitor counter to your Webflow website is a powerful way to build trust, track engagement, and boost conversions. With Wisernotify, you can integrate a customizable and dynamic counter that aligns with your branding and highlights real-time activity on your site.
By following the steps and best practices outlined in this guide, you can create a compelling shopping experience that motivates visitors to take action and improves your website’s performance.
Related Posts:
