
Add Testimonials to an Unbounce Landing Page (2026)
Unbounce gives you text boxes and images for testimonials, but nothing that collects them or keeps them current. Most teams paste a testimonial widget into the Classic Builder instead, then place it beside the main button.
That takes seven steps, and most of the work is picking what the testimonial should say and where it should sit.
If you want star ratings rather than written quotes, see how to add reviews to an Unbounce page.
Why Add Testimonials to Unbounce Pages?
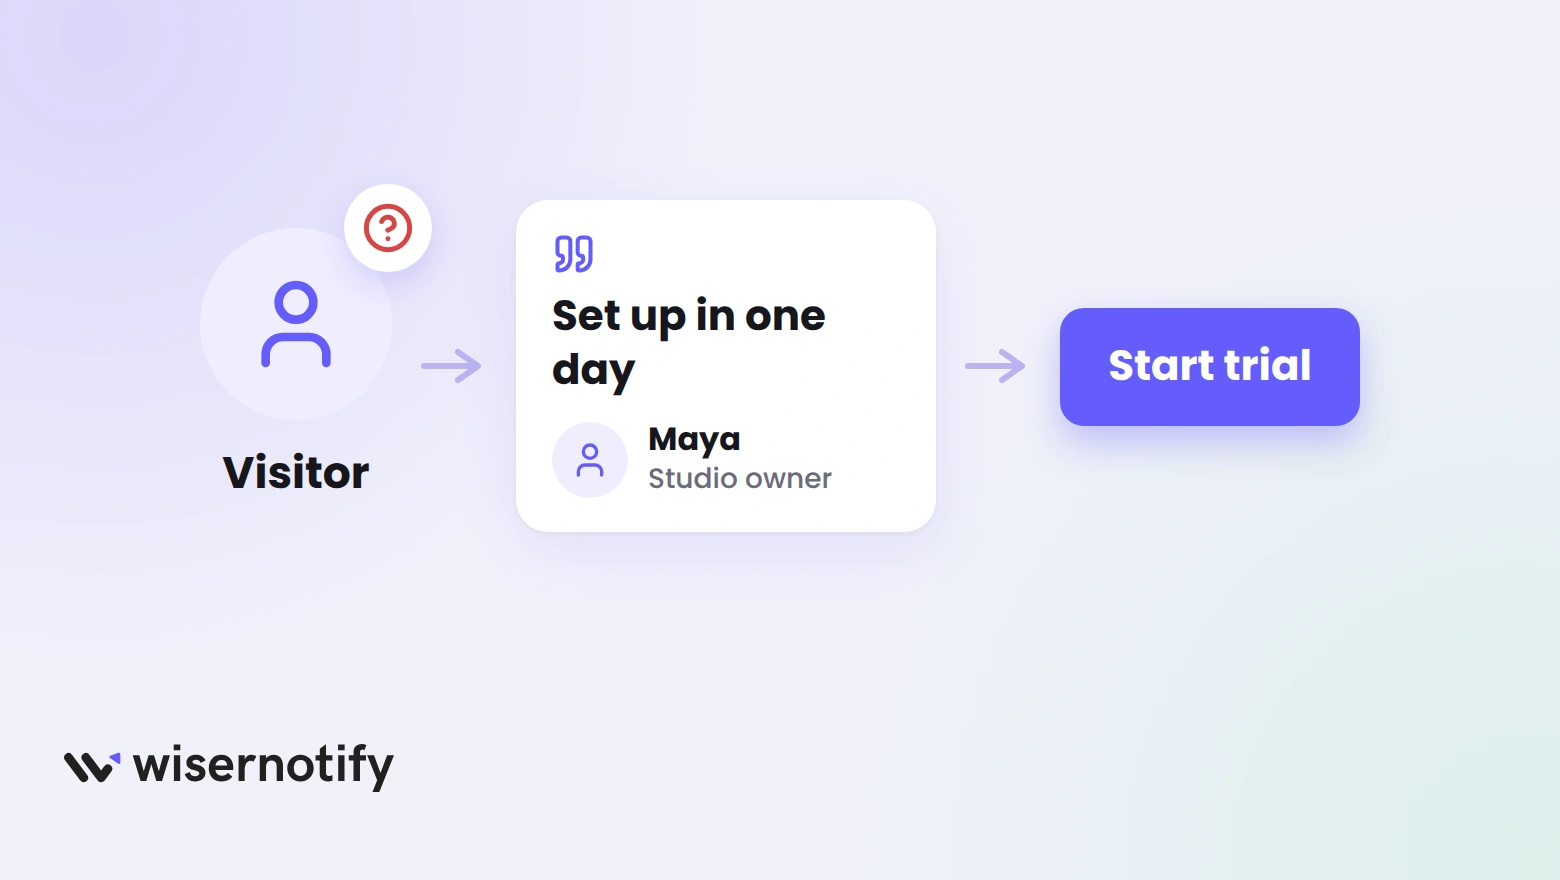
A landing page asks a stranger to act after a few seconds. A testimonial answers the doubt that stops them.
- It answers the doubt: visitors wonder if the offer works for someone like them, and a customer can say so.
- It lowers the risk: a named person with a result is easier to believe than a claim on the page.
- It stays in view: next to the button, it meets the visitor at the moment they decide.
How to Add Testimonials to Unbounce
You will work in two places. WiserReview collects and styles the testimonials and gives you an embed code. Unbounce holds that code in a Custom HTML element.
WiserReview is free on the Shopify and Wix app stores and starts at $6.75 a month billed yearly everywhere else, after a 7-day free trial.
Have these ready before you start:
- A few approved testimonials, or a form link you are about to send.
- Edit access to the landing page, built in the Unbounce Classic Builder.
- The page’s live address, so you can test it at the end.
Step 1: Create a Testimonial Form
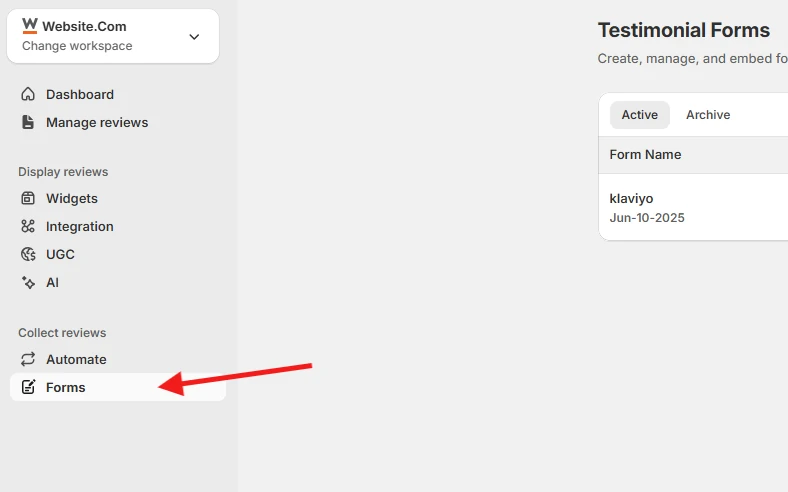
- Sign up for WiserReview, or sign in if you already have an account.
- Go to Collect reviews, then Forms.
- Click Add and choose Ask Questions, so you can write your own questions.
- Type a form name and a slug, such as Customer Story and customer-story.
- Click Create form.
Step 2: Set Up the Questions
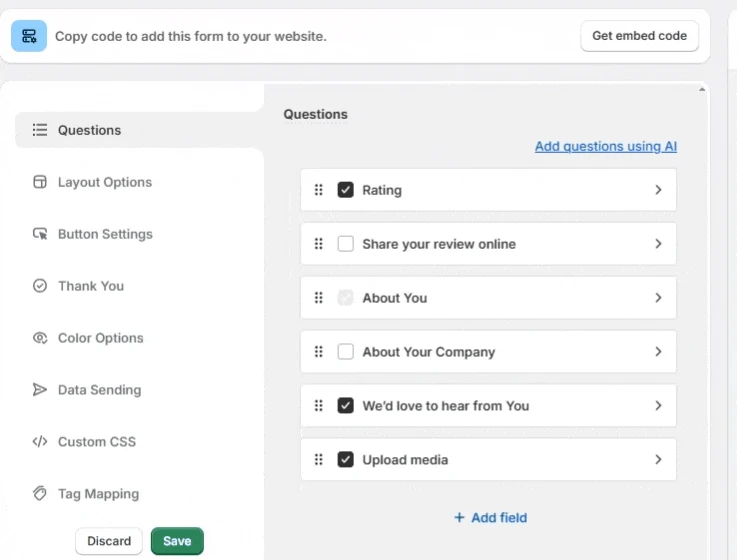
- In the Questions tab, switch on the blocks you want: Rating, About You, About Your Company, the text block and Upload media for photos and video.
- Drag the blocks into order, or click Add field to write your own question.
- Open Layout Options and pick Multi-Step or Single Page. Multi-Step reads better on a phone.
- Click Save, then Get embed code.
- Open the URL tab to copy the form link, or the QR code tab for in-person use.
- Send the link by email, SMS or WhatsApp.
Step 3: Import and Approve Testimonials
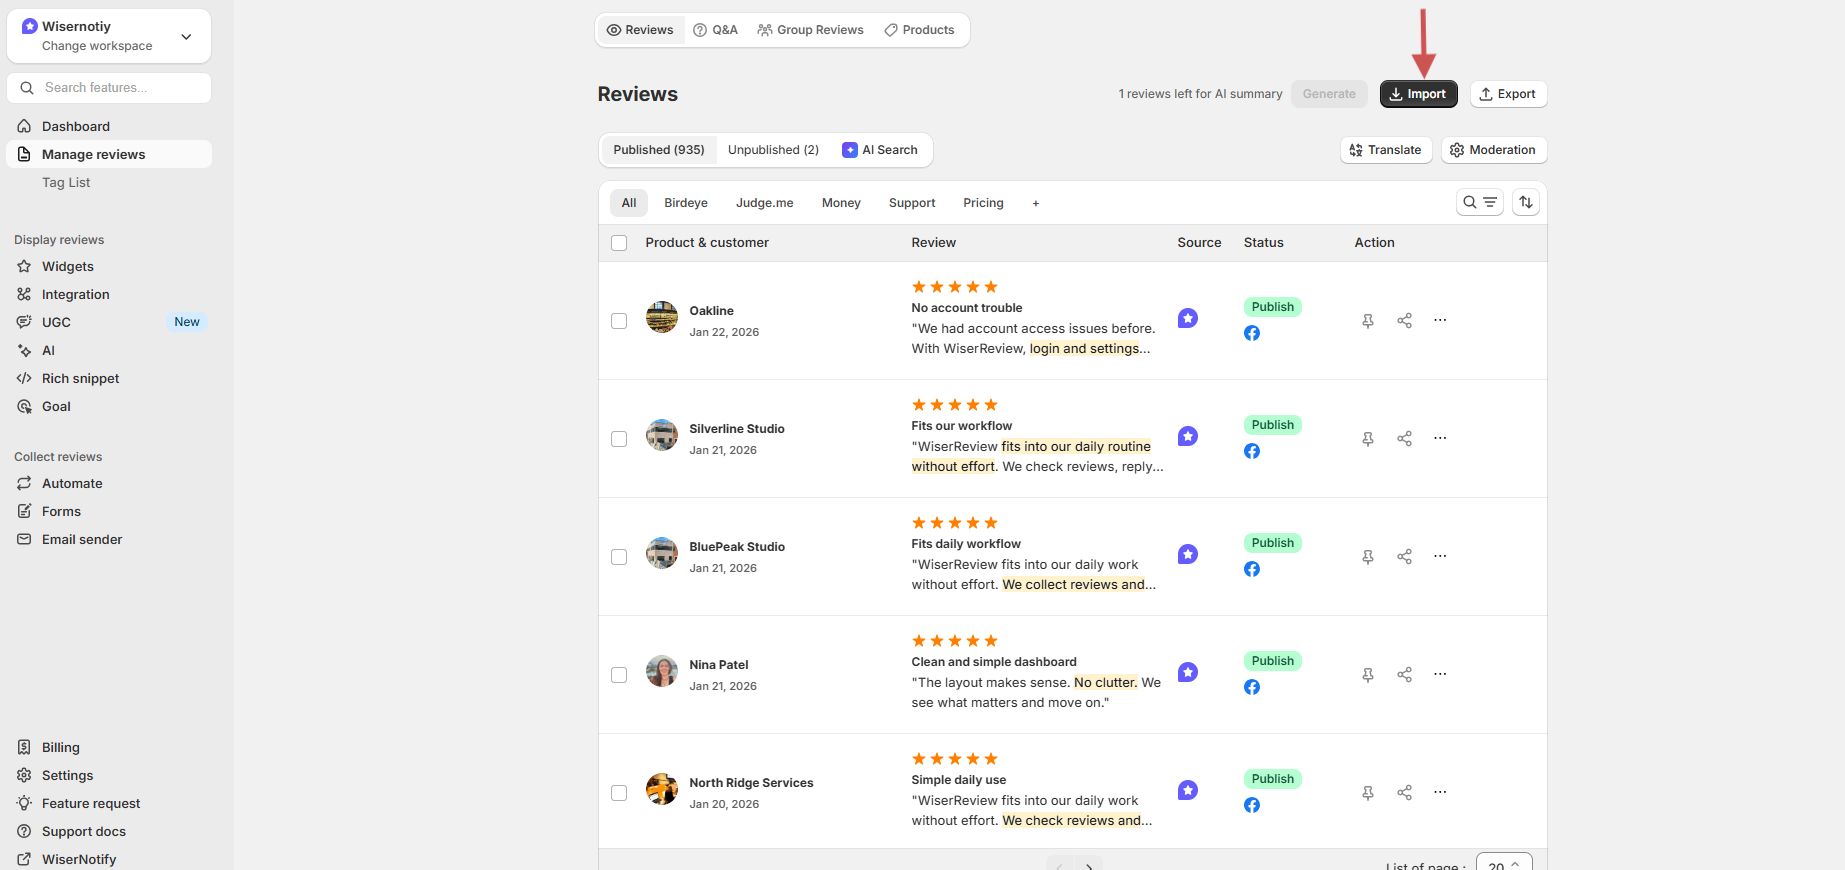
- Go to Manage reviews.
- Click Import to bring in testimonials from Google, Facebook, Amazon, Etsy and other review apps, or upload a CSV file.
- Publish the testimonials you want to show and leave the rest unpublished.
- Turn on Moderation so new submissions wait for your approval.
- Tag each one by offer or audience, such as Agency or Coaching, so a widget can filter by tag.
- Start with three to five strong testimonials. You can add more once the page is live.
Step 4: Open a Widget
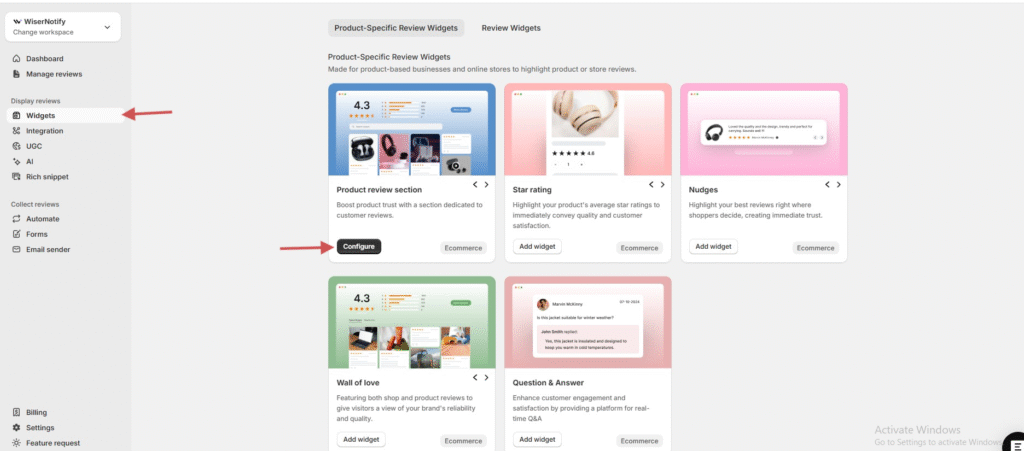
- Go to Widgets in the left menu.
- Open the Review Widgets tab. Wall of love suits a testimonials section, and Carousel suits a single strip of quotes.
- Click Add widget, or Manage if you already have one.
- Name the widget and click Create.
Step 5: Filter and Style It
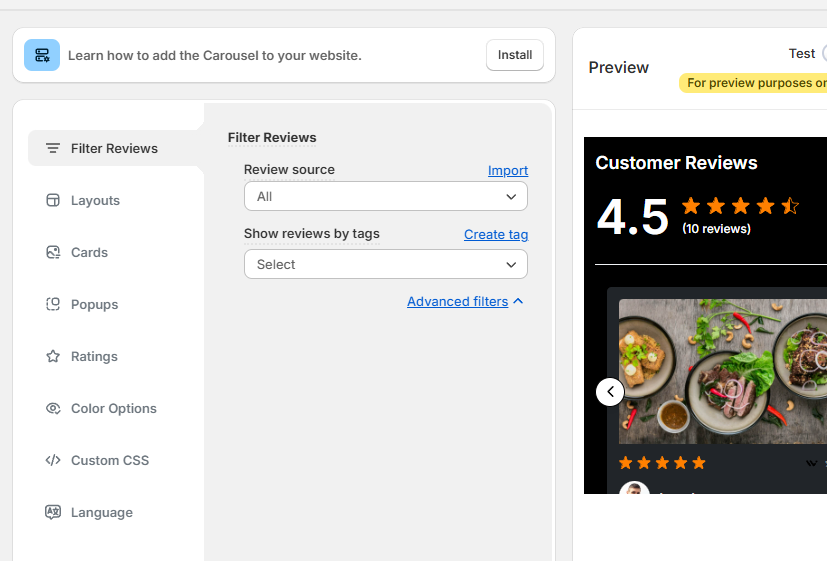
- Open Filter Reviews.
- Set the Review source, then pick the tag from Step 3 under Show reviews by tags.
- Use Layouts, Cards and Color Options to match your Unbounce page.
- Turn on the Write a review button and link your form if visitors can add a testimonial from the page.
- Check the live preview on the right.
Step 6: Copy the Embed Code
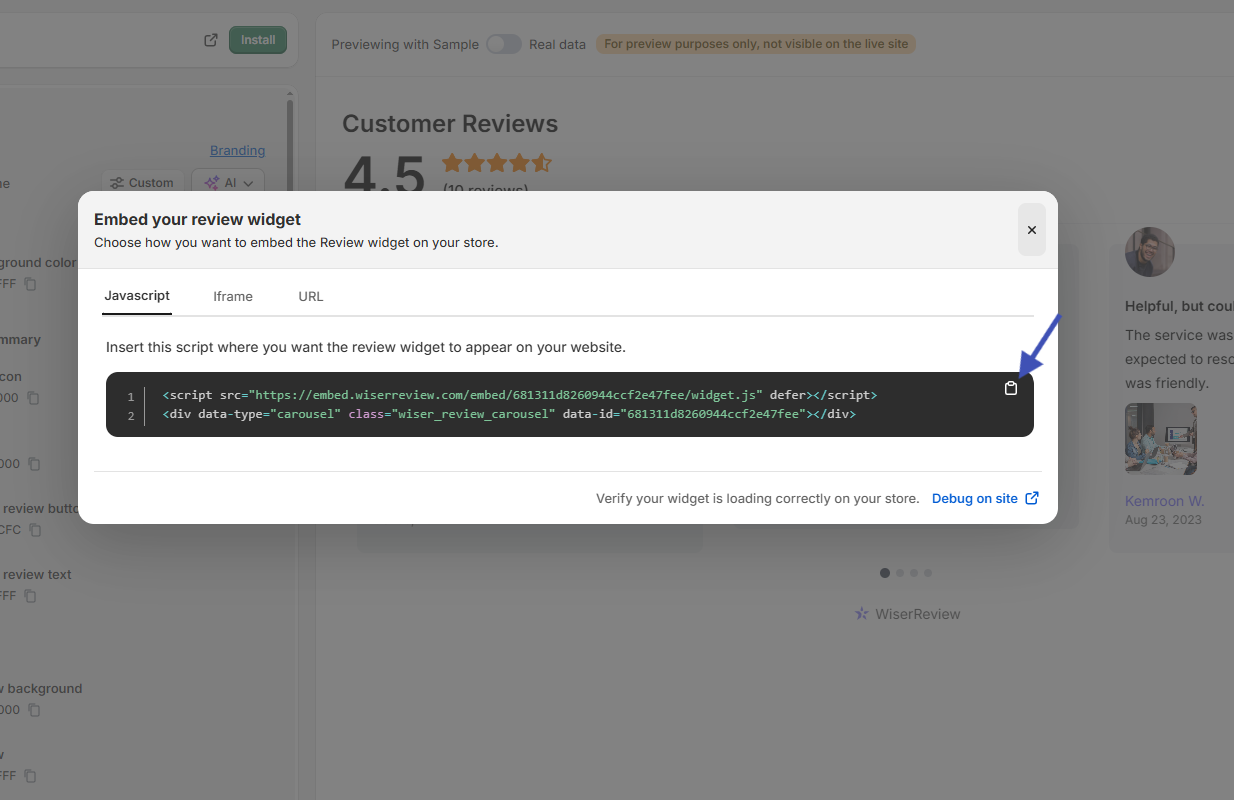
- Click Install at the top right of the editor.
- Stay on the Javascript tab and click the copy icon.
- If your builder blocks scripts, copy the code from the iFrame tab instead.
- The URL tab gives a hosted page for the widget, which you can link to.
Step 7: Paste It into Unbounce
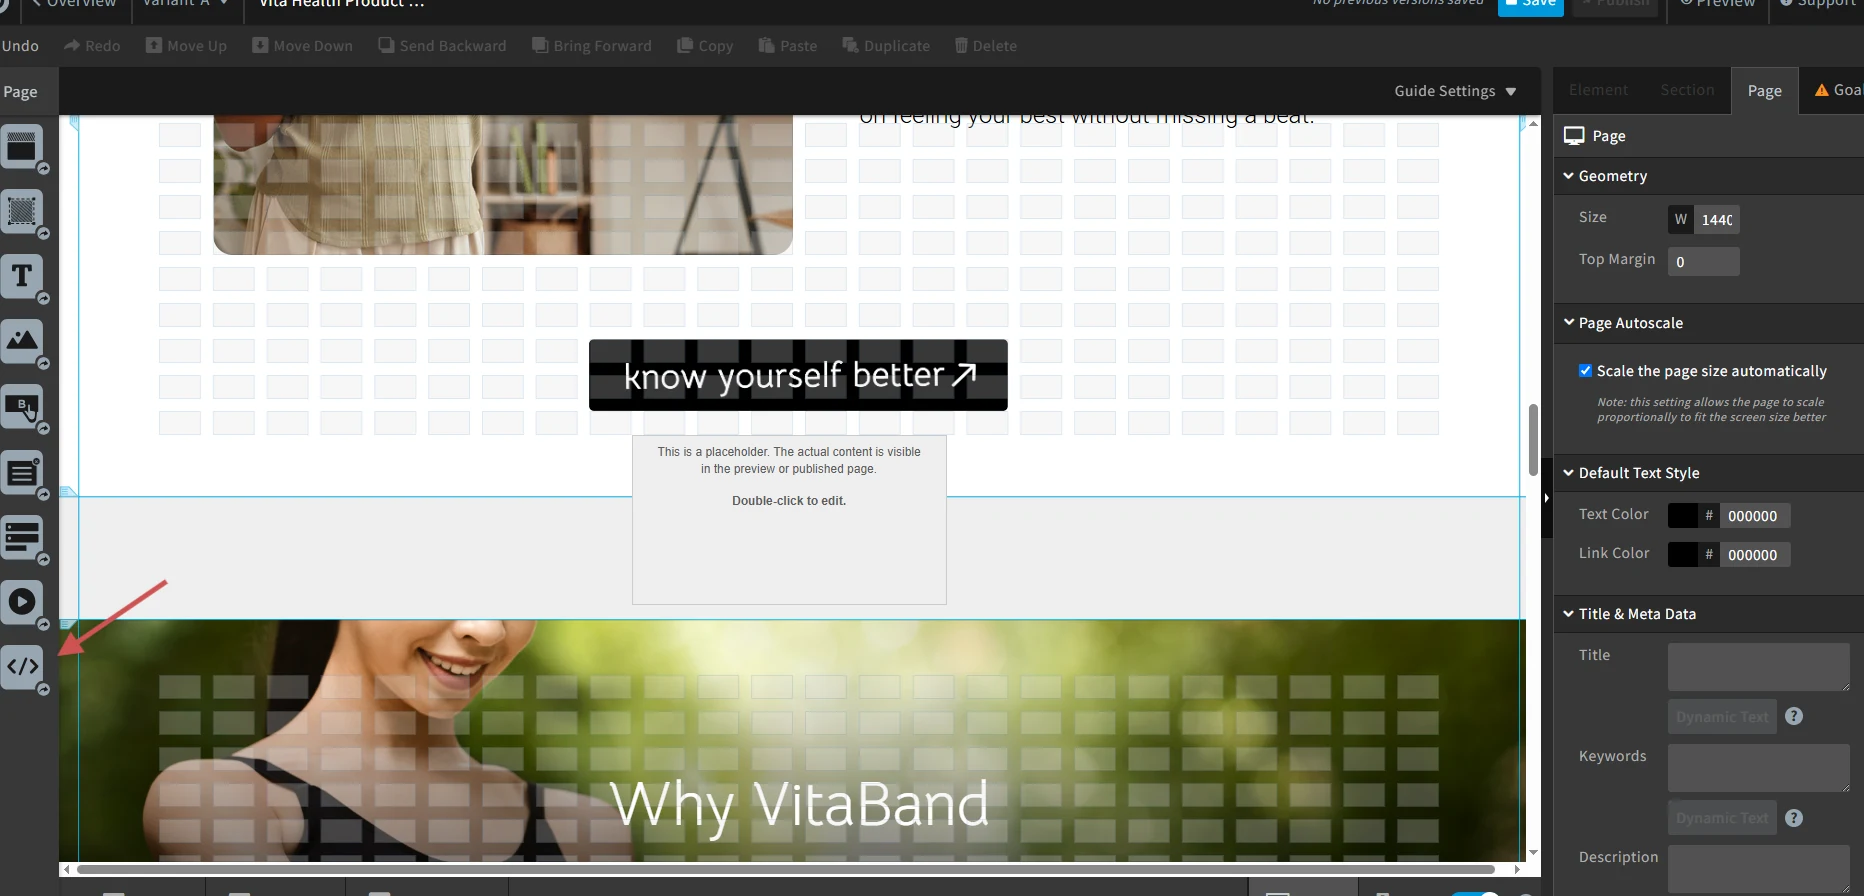
- Open your landing page in the Unbounce Classic Builder.
- Drag the Custom HTML element from the left toolbar to the spot where the testimonials belong.
- Paste the code from Step 6 into the Embed Custom HTML Code box and click Save Code.
- Stretch the box until the whole widget fits, then check it in Preview.
- Switch to the mobile layout and size the box there too.
- Save the page and publish it.
Unbounce’s Custom HTML help page says this element works in the Classic Builder only.

Collect testimonials and show them anywhere
Send one form link, approve what comes back and paste a single code into your page.
What Makes a Testimonial Work on a Landing Page?
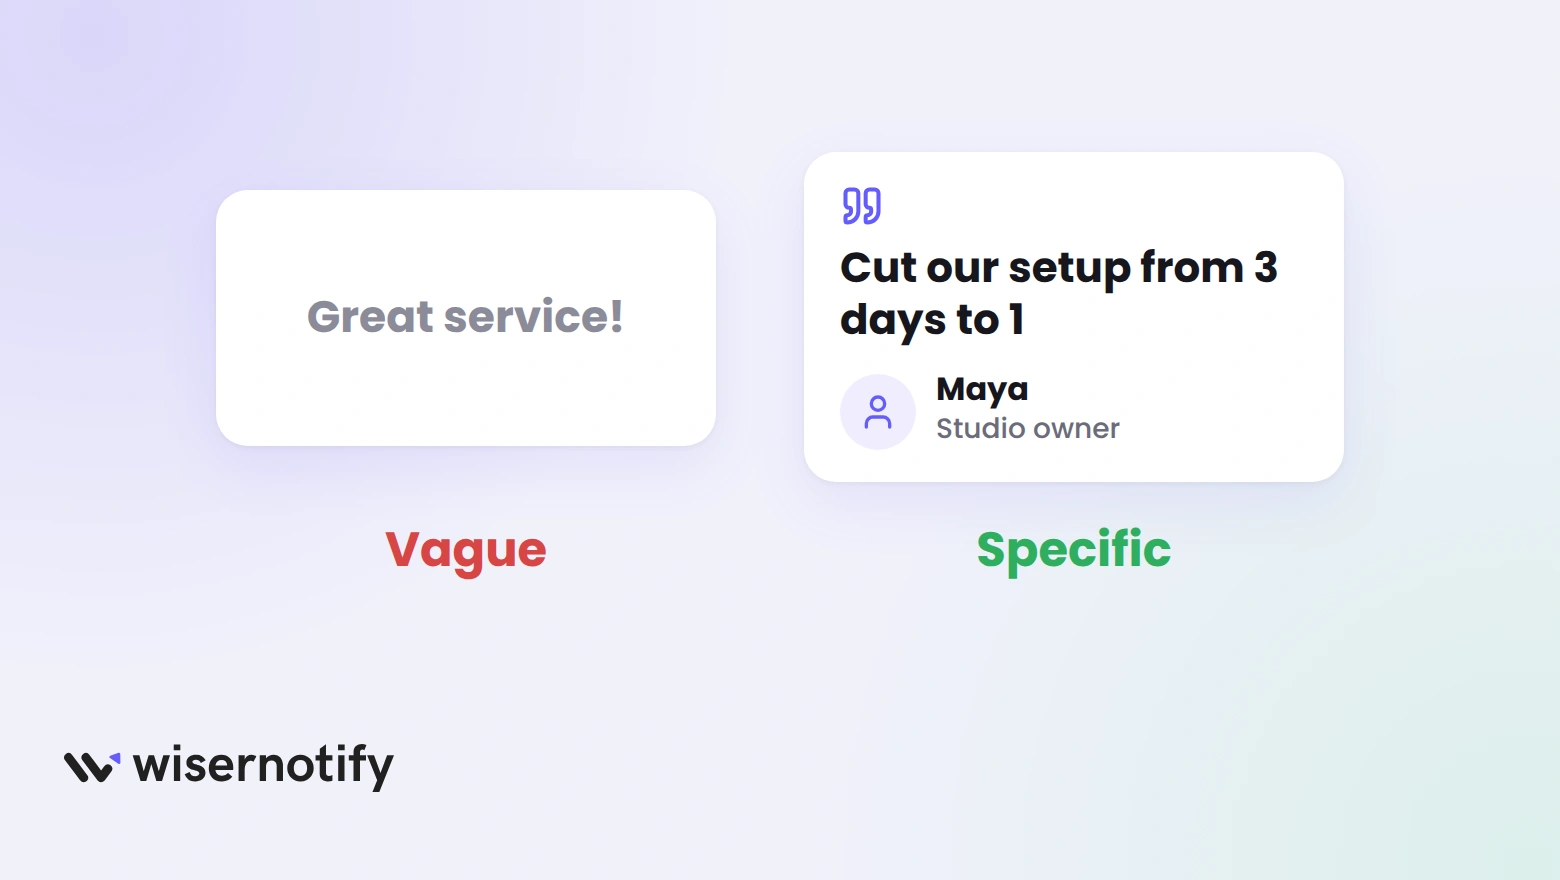
A testimonial works when a stranger can picture themselves in it. That needs a result, a person and a reason to believe both.
- A before and after: the problem the customer had, then what changed.
- One concrete result: a time saved, a task finished or a number, in the customer’s own words.
- A name, a role and a photo: they make the quote read as a person.
- Two or three sentences: pull the strongest line and cut the rest.
- A customer like your visitor: an agency owner should read another agency owner.
- A short video where it fits: WiserReview plays collected videos inside the widget, which suits long pages with a bigger ask.
Here is a fill-in pattern that holds up on a page: “Before [product], we [problem]. Now we [result] in [time].”

WiserReview’s Highlight Key Words setting marks the result inside a quote, so the number or outcome is the first thing a visitor sees. For more ideas, see our testimonial examples.
How to Ask for a Testimonial That Reads Well
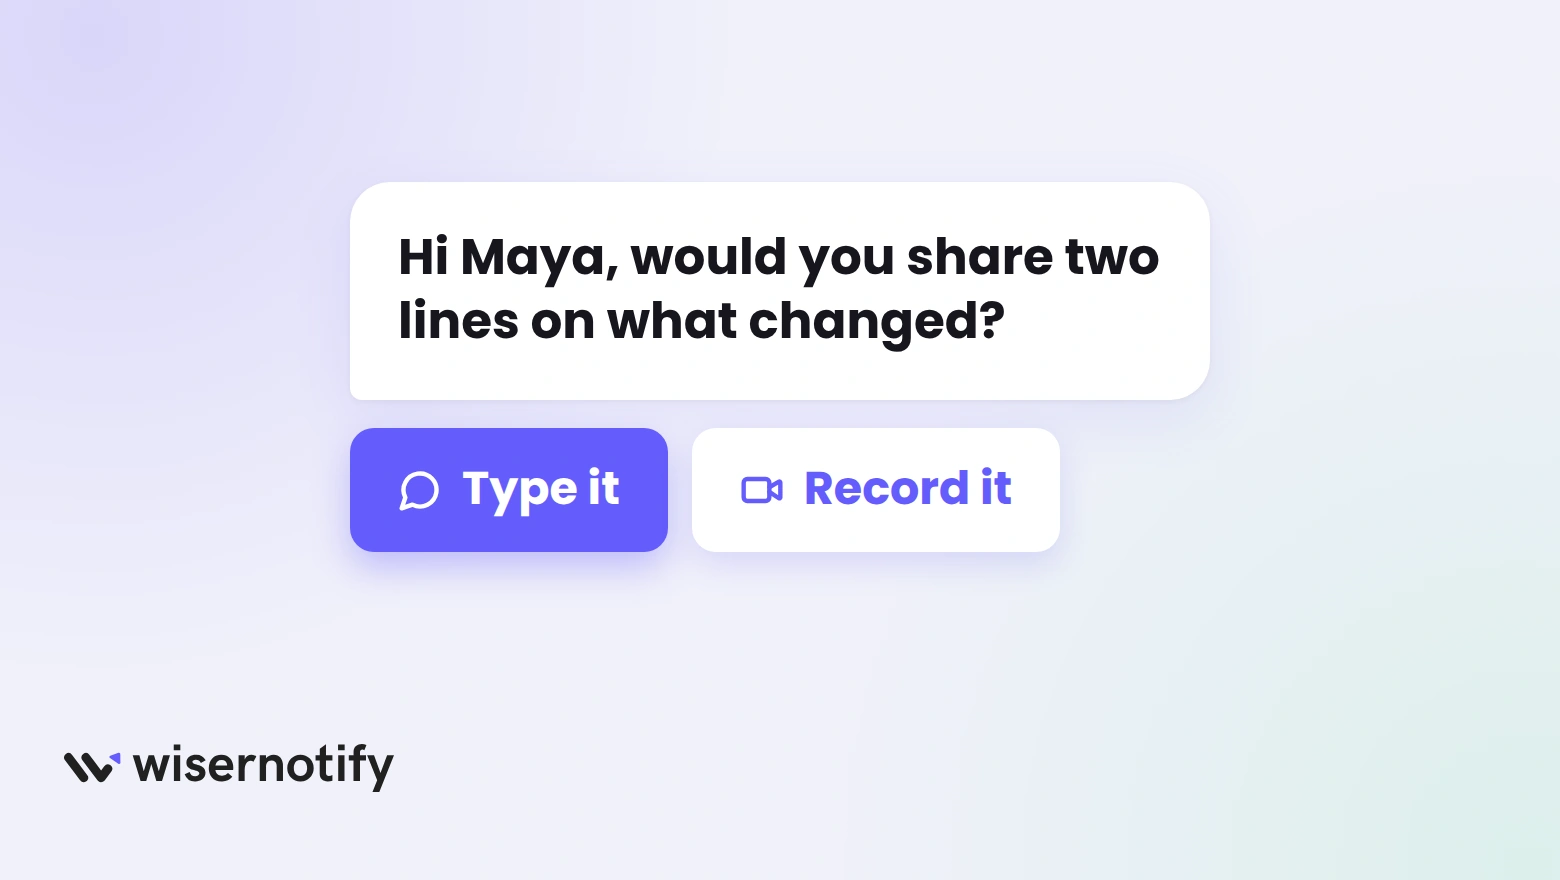
Quotes come out vague when the ask is vague. A short, specific request gets a story you can use.
- Ask right after a win: when the customer hits a result, they remember the detail.
- Ask three questions: what was the problem before, what changed, and what result did you see first.
- Make it one tap: a form link with text, photo and video options gets more replies than a long email.
- Ask for permission: let them approve the name and photo you will show.
A message you can paste into email or WhatsApp:
Hi [name], thanks for choosing us. Would you share two lines on what changed after you started? You can type it, or record a short video here: [form link].
Send the same request to every customer. Choosing only the happy ones before you ask is review gating, and Google’s policies do not allow it for reviews.
Best Places to Show Testimonials on Unbounce
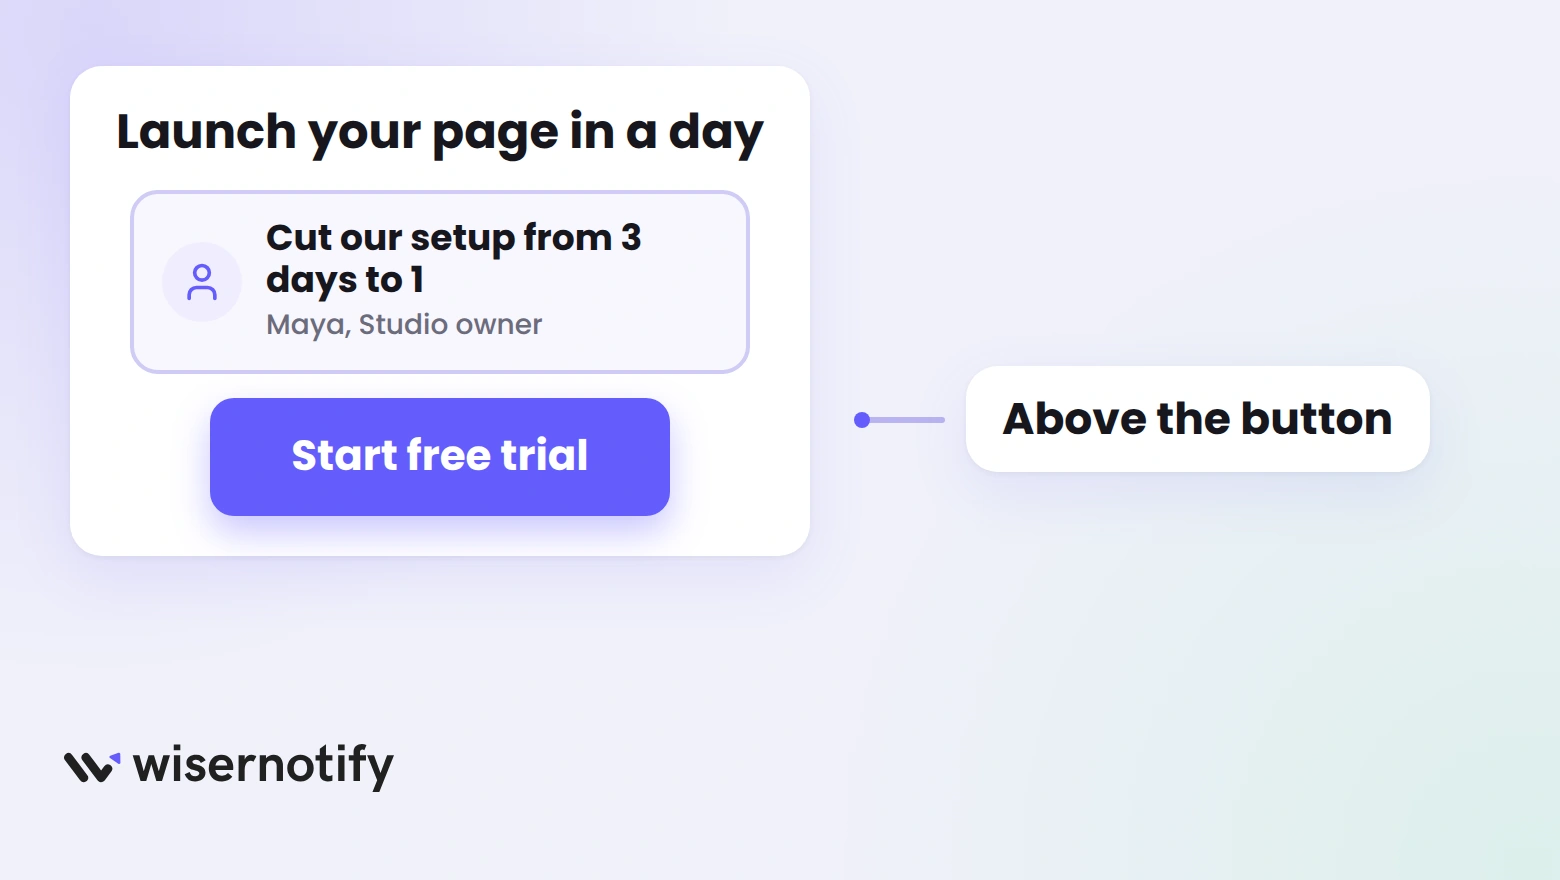
- Above the main button: one strong quote with a photo, so it meets the visitor as they decide.
- Beside the form: a short line that answers the worry about handing over details.
- After the offer details: a carousel, at the point where doubts tend to build.
- Before the last button: a review wall, for visitors who scrolled to the end.
- On the thank-you page: one quote that confirms the choice they just made.
Start with three to five testimonials and rotate the rest in a carousel.
Keep the first screen light. A tall widget there pushes the button down, so save the larger formats for lower on the page. These landing page social proof examples show how teams place proof.
Proof beside every button
Carousels and review walls that update when you approve a new testimonial.
Testimonials Not Showing on Unbounce?
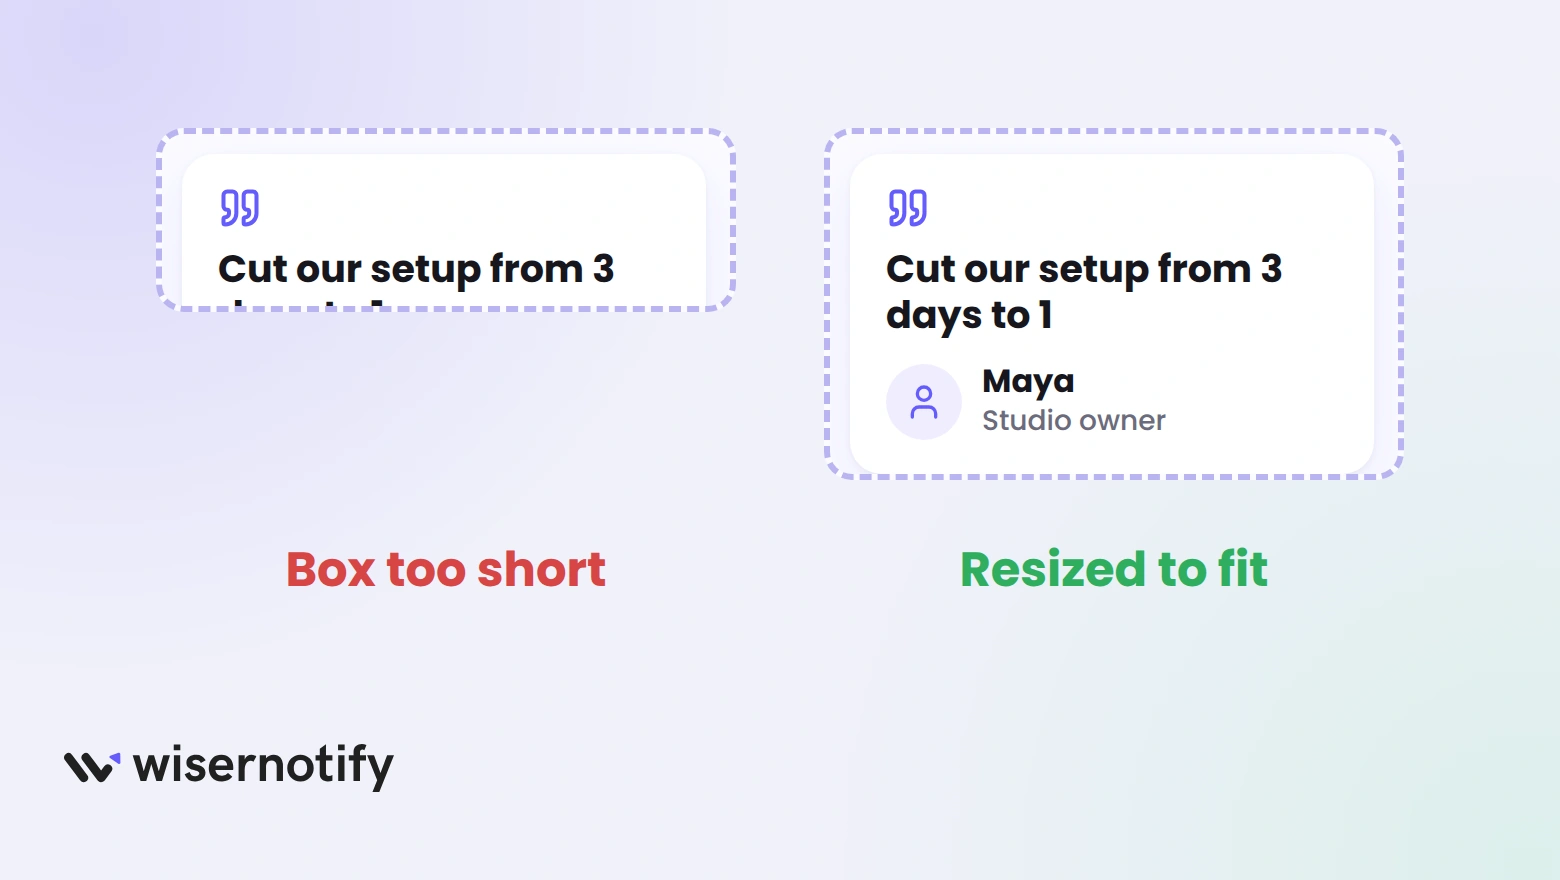
Most missing testimonials come down to the builder, an unsaved box or a filter. Work through these in order.
- The page is not in the Classic Builder: the Custom HTML element is a Classic Builder feature, so build the section there.
- The code is not saved: click Save Code in the box, then save the page.
- The box is too short: the widget gets cut off, so stretch the box and check Preview again.
- The mobile layout is blank: size the box in the mobile view as well.
- The page is not published: Preview shows the new code, but the live page keeps the old one until you publish.
- Nothing is approved: in WiserReview, check that the testimonials are published.
- The wrong code was pasted: copy from the Javascript tab, or from the iFrame tab if scripts are blocked.
- A filter hides everything: set the review source to All for a moment to test.
- You are not sure it loads: click Debug on site in the Install window to check the widget on your page.
Open the live page in a private window to rule out a cached copy.
Testimonial Mistakes on Unbounce
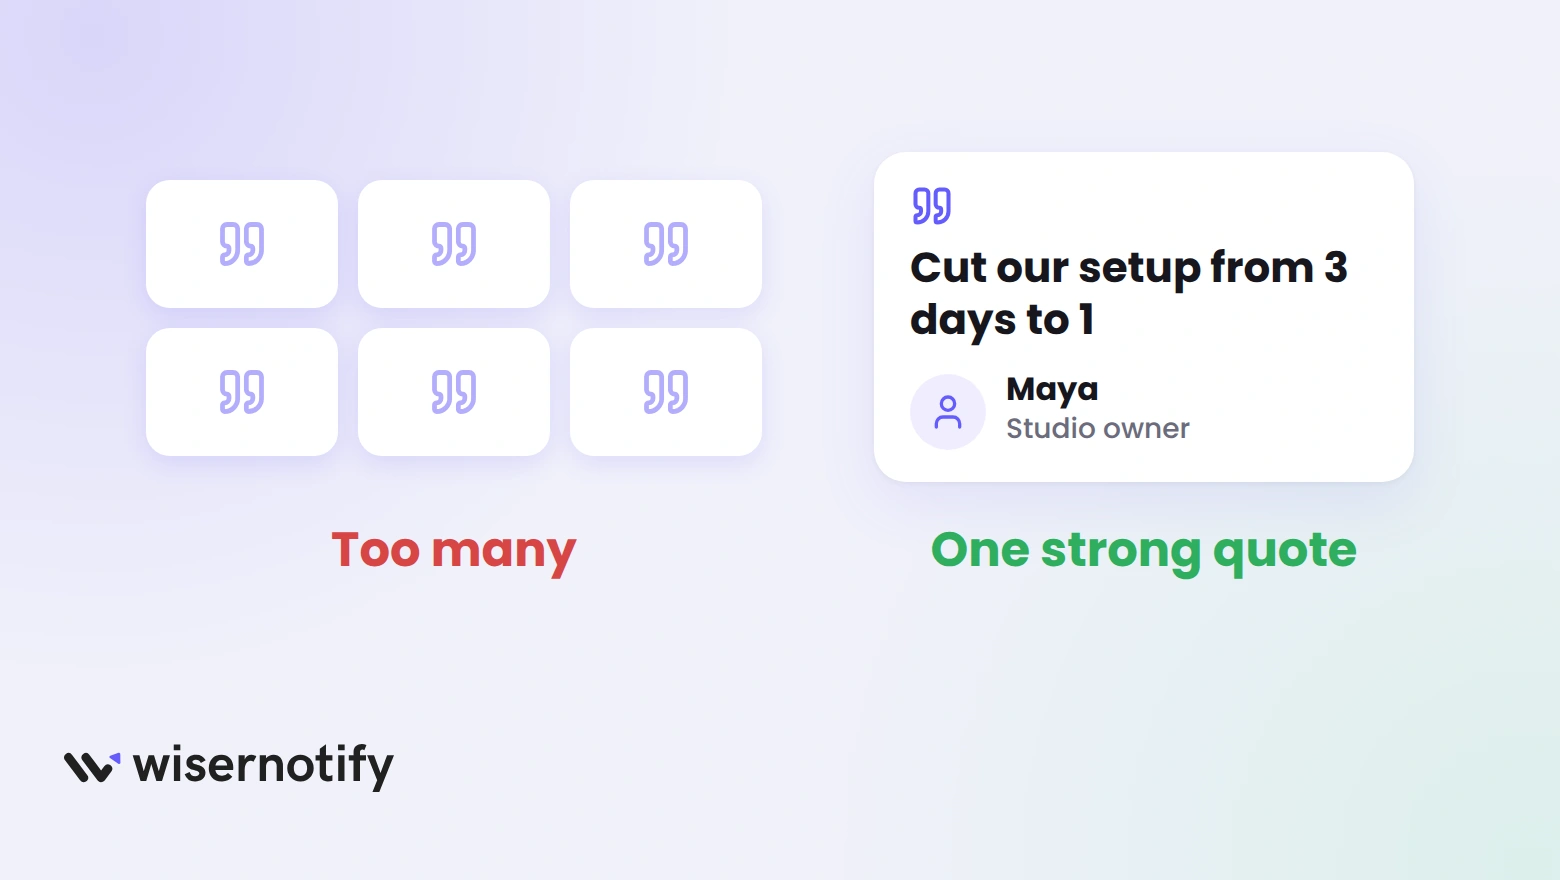
- Vague praise: “Great service!” tells a visitor nothing. Use quotes with a result.
- Too many quotes: a long list buries the best one. Show a few and rotate the rest.
- No face or name: an anonymous quote reads as invented. Show the customer’s name, job title and picture.
- Ignoring the phone: most visitors arrive on mobile, so check the widget in the mobile layout.
Testimonials that update themselves
Approve a new quote in WiserReview and every page that shows the widget picks it up.
Wrap Up
An Unbounce page has seconds to earn a click. A specific testimonial placed beside the button gives a visitor the one thing the headline cannot.
Collect a few good ones, embed a single widget, and keep it where the decision happens.
Related Post
Frequently Asked Questions
How do I add testimonials to an Unbounce page?
Build a testimonial widget in WiserReview, copy its embed code and paste it into a Custom HTML element in the Unbounce Classic Builder.
Does Unbounce have a testimonial block?
Unbounce has text boxes and images you can style as testimonials, but nothing that collects them or keeps them current. Most teams embed a widget instead.
Can I use video testimonials on Unbounce?
Yes. WiserReview collects video through its form, and the widget plays the clips on your page.
Will the testimonial widget work on mobile?
Yes, but size the Custom HTML box in the mobile layout too, since Unbounce keeps a separate mobile view.
How many testimonials should a landing page show?
A few strong ones beat a long list. Put one beside the main button and add a carousel further down.
Is WiserReview free for testimonials?
It is free on the Shopify and Wix app stores. Elsewhere it starts at $6.75 a month billed yearly, after a 7-day free trial.

Krunal Vaghasiya is a marketing tech expert who boosts e-commerce conversion rates with automated social proof and FOMO strategies. He loves to keep posting insightful posts on online marketing software, marketing automations, and improving conversion rates.




 Capterra