
How to Add Testimonials to a Leadpages Landing Page (2026)
Leadpages has testimonial section templates for quotes you type in by hand. To show testimonials you collect, build a review widget, copy its embed code and paste it into the Embed or HTML element on your landing page.
The widget keeps showing new testimonials as you approve them, so the page does not go stale.
The steps below run from the form to the published page.
Leadpages Testimonial Section or a Widget?

Both put a customer quote on your page. They differ in who writes it and who keeps it current.
- Leadpages testimonial section: open the Sections gallery and pick a template from the Testimonials category. You edit each quote, name and photo yourself.
- Review widget: customers send testimonials through a form, you approve them, and the widget shows them on any page where you paste its code.
The rest of this guide covers the widget. Want star-rated reviews instead of testimonials? See how to add reviews to landing pages.
How to Add Testimonials to a Leadpages Landing Page
This guide uses WiserReview. It is free on the Shopify and Wix app stores. Everywhere else it starts at $6.75 a month billed yearly, with a 7-day free trial.
Step 1: Create a Testimonial Form
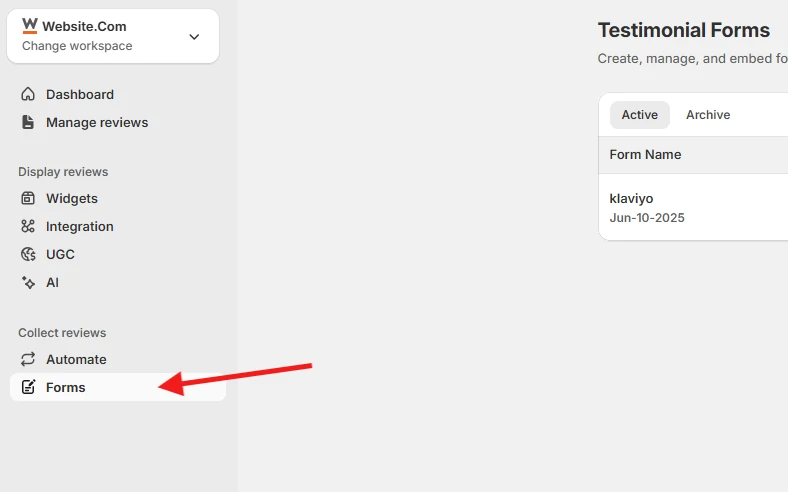
- Sign up for WiserReview and start the 7-day free trial, or log in.
- In the left menu, open Collect reviews, then Forms.
- Click Add and choose Ask Questions.
Step 2: Set Up the Questions
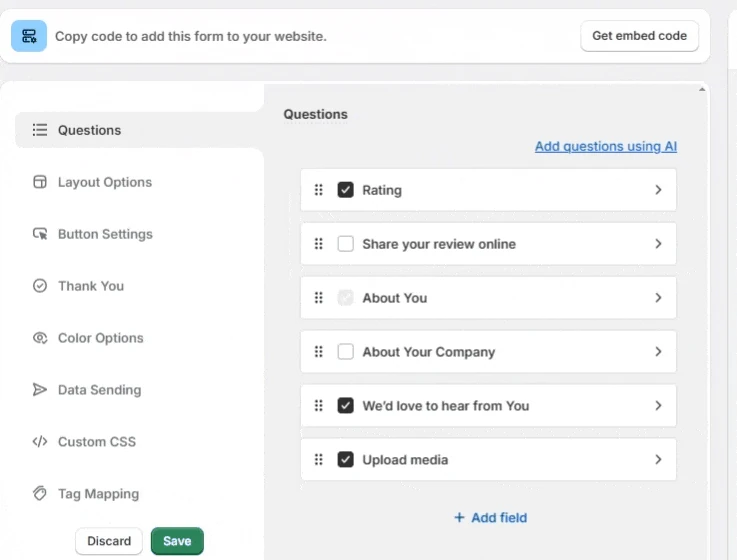
- Open the Questions tab and keep the Rating and About You blocks.
- Add a text block that asks about the result the customer got.
- Switch on Upload media if you want photos or video.
- Click Save, then Get embed code and open the URL or QR tab for a link to send to customers.
Step 3: Import and Approve Testimonials
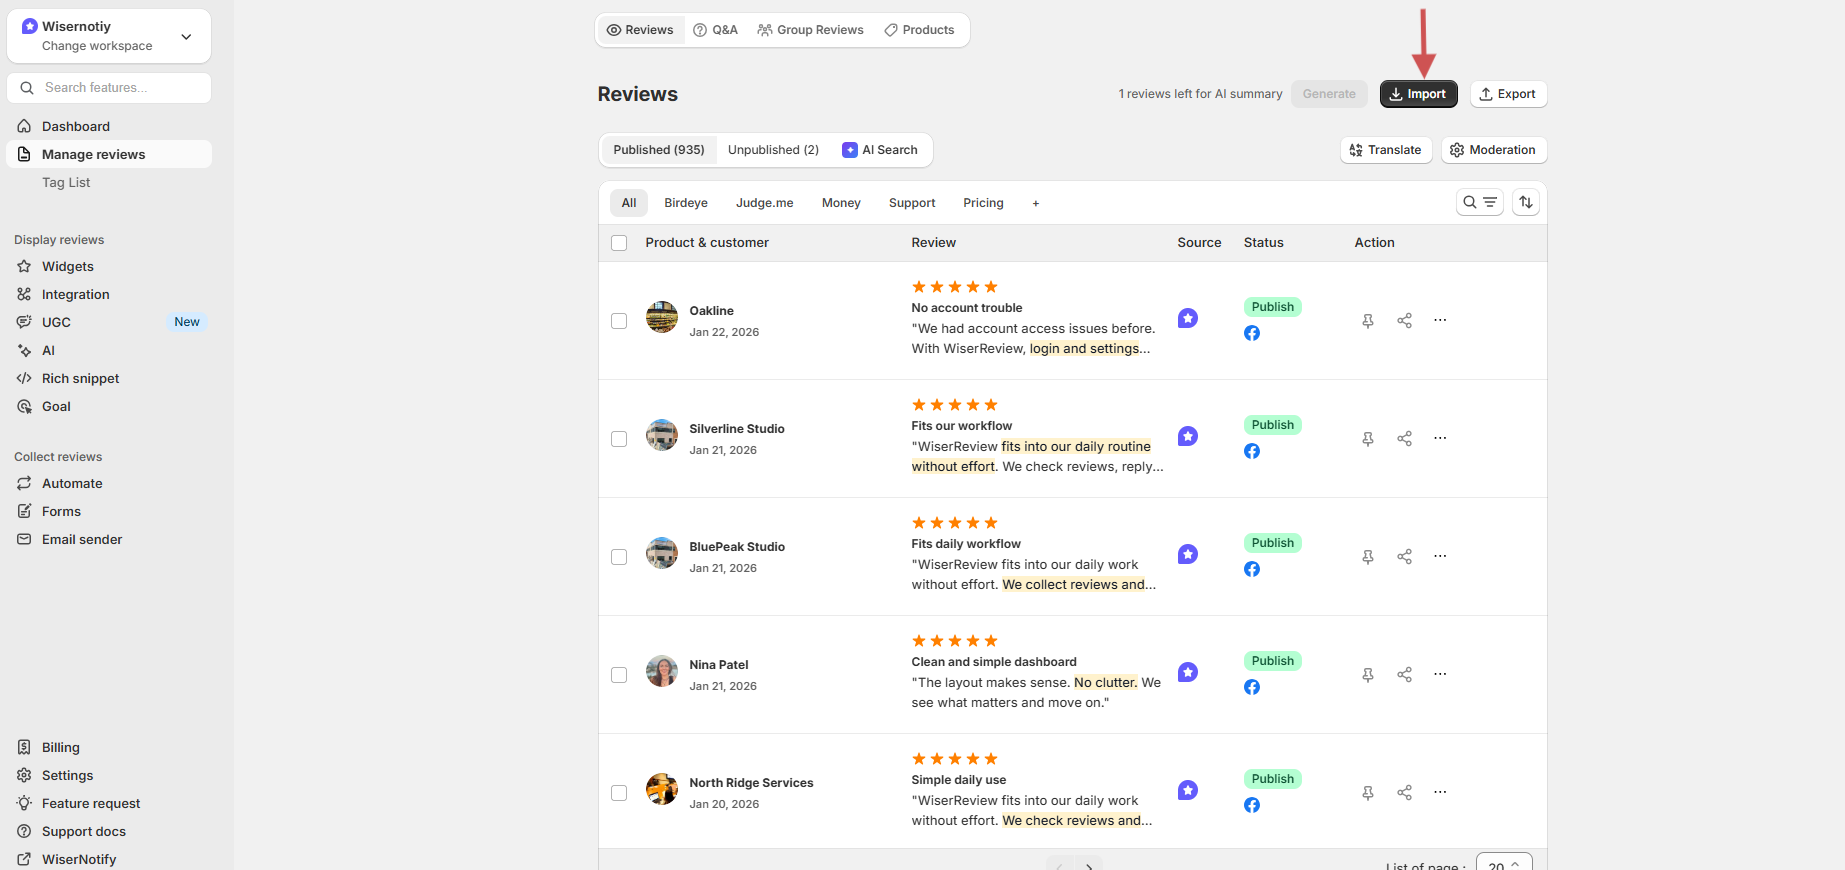
- Open Manage reviews.
- Click Import to bring in testimonials from a CSV or another source.
- Approve the ones you want to show. Only approved testimonials reach the widget.
Step 4: Open a Widget
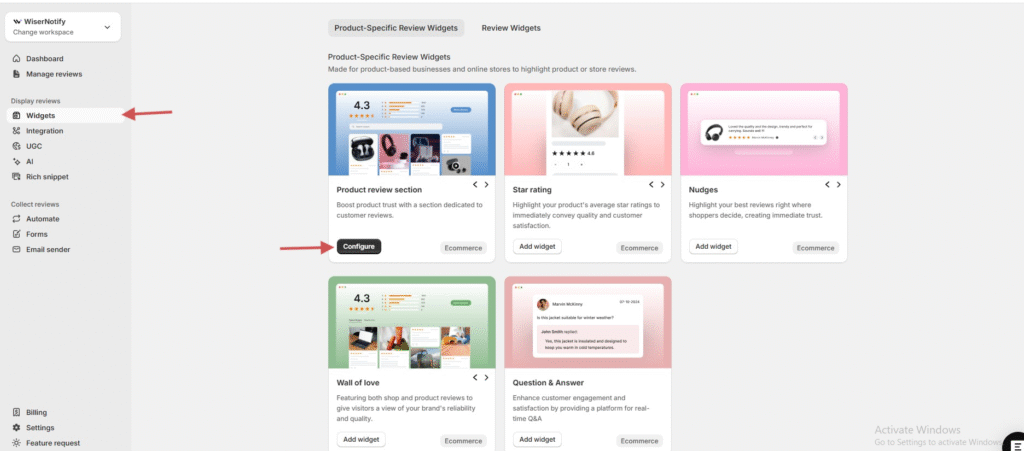
- Click Widgets in the left menu.
- Open the Review Widgets tab.
- Pick Wall of love or Carousel, then click Add widget.
Step 5: Filter and Style It
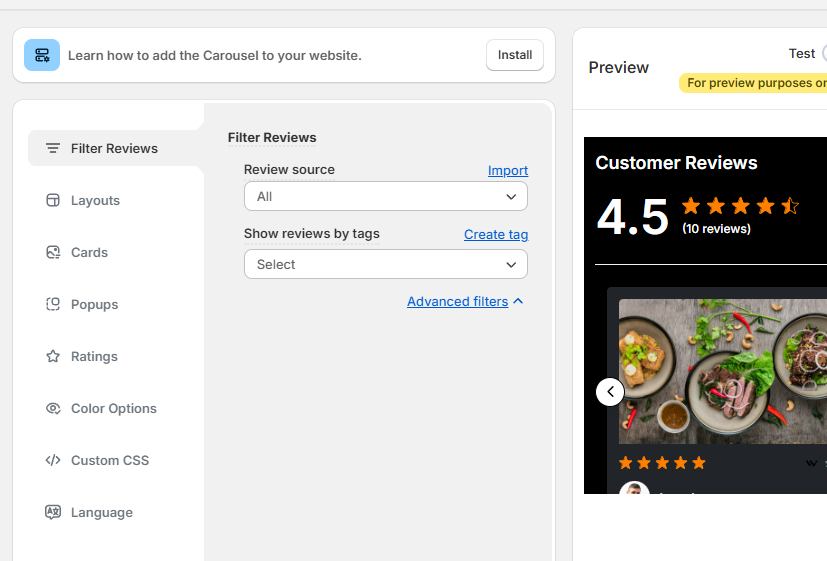
- Open Filter Reviews and pick your Review source.
- Use Show reviews by tags to pick one offer, if you run several landing pages.
- Open Color Options and match the widget to your Leadpages page.
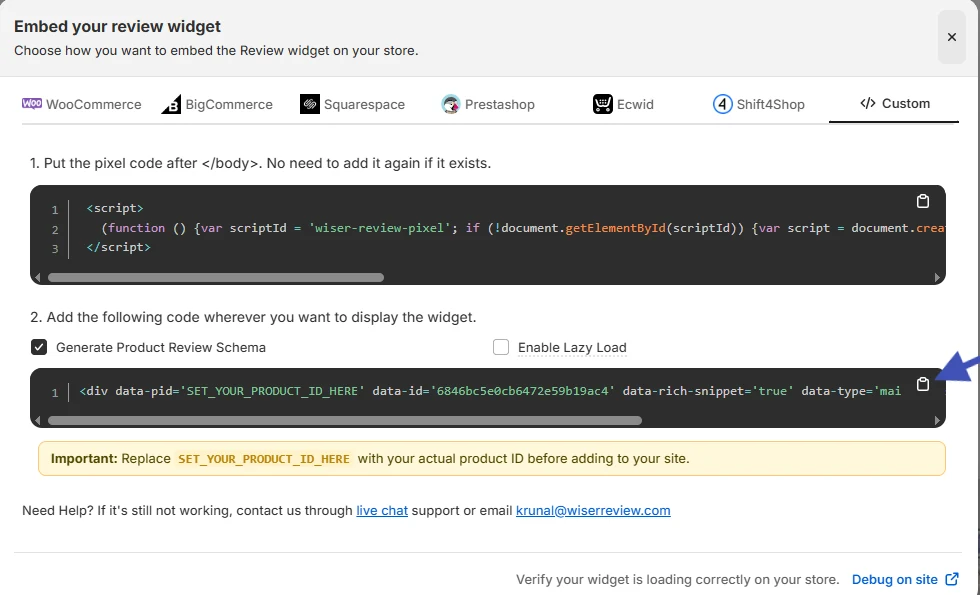
Step 6: Copy the Embed Code
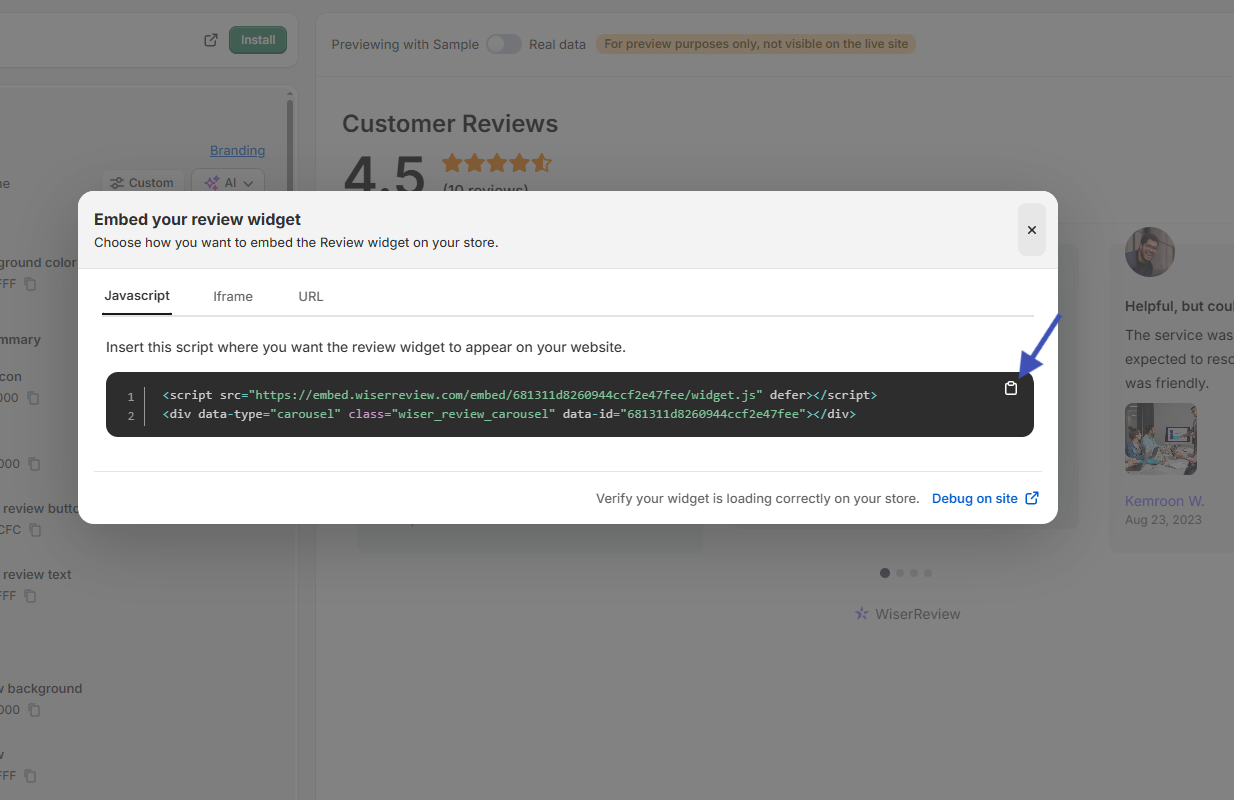
- Click Install on the widget.
- Stay on the Javascript tab and click the copy icon.
- If the script does not run on your page, copy from the iFrame tab instead.
Step 7: Paste It into Leadpages
- Log in to Leadpages and open Landing Pages from the Dashboard.
- Open your page from the Page Studio tab, or from the Classic Builder tab if it is an older page.
- In Page Studio, click the + icon and choose Embed. In the Classic Builder, open Widgets, click Show More and drag the HTML widget to where the testimonials should sit.
- Paste the embed code into the box.
- Click Save inside the widget, then update or publish the page.
Leadpages takes widget code as it is and does not check it, so paste the full code exactly as WiserReview gives it.
If you copy from the Custom tab, paste the pixel in the page Settings, under Analytics, in the box before the closing body tag. Then put the widget code in the HTML or Embed element.

Collect testimonials and show them anywhere
Send one form link, approve what comes back and paste a single code into your page.
What Makes a Landing Page Testimonial Work?

A landing page has one job, so pick testimonials that back that job.
- A result tied to the goal: for an opt-in page, what the freebie helped with. For a sales page, the outcome of the product.
- A clear number or outcome: “28 new leads in two weeks” beats “works great.”
- A starting point: “I had no email list” lets visitors see themselves.
- A name and photo: a real face makes the quote believable.
- Video when possible: a short clip carries more trust than text.

In the widget’s AI settings, switch on Highlight Key Words to mark the result inside long quotes. Visitors who skim still see it.
For layouts to copy, browse these testimonial examples.
How to Ask Customers for a Testimonial
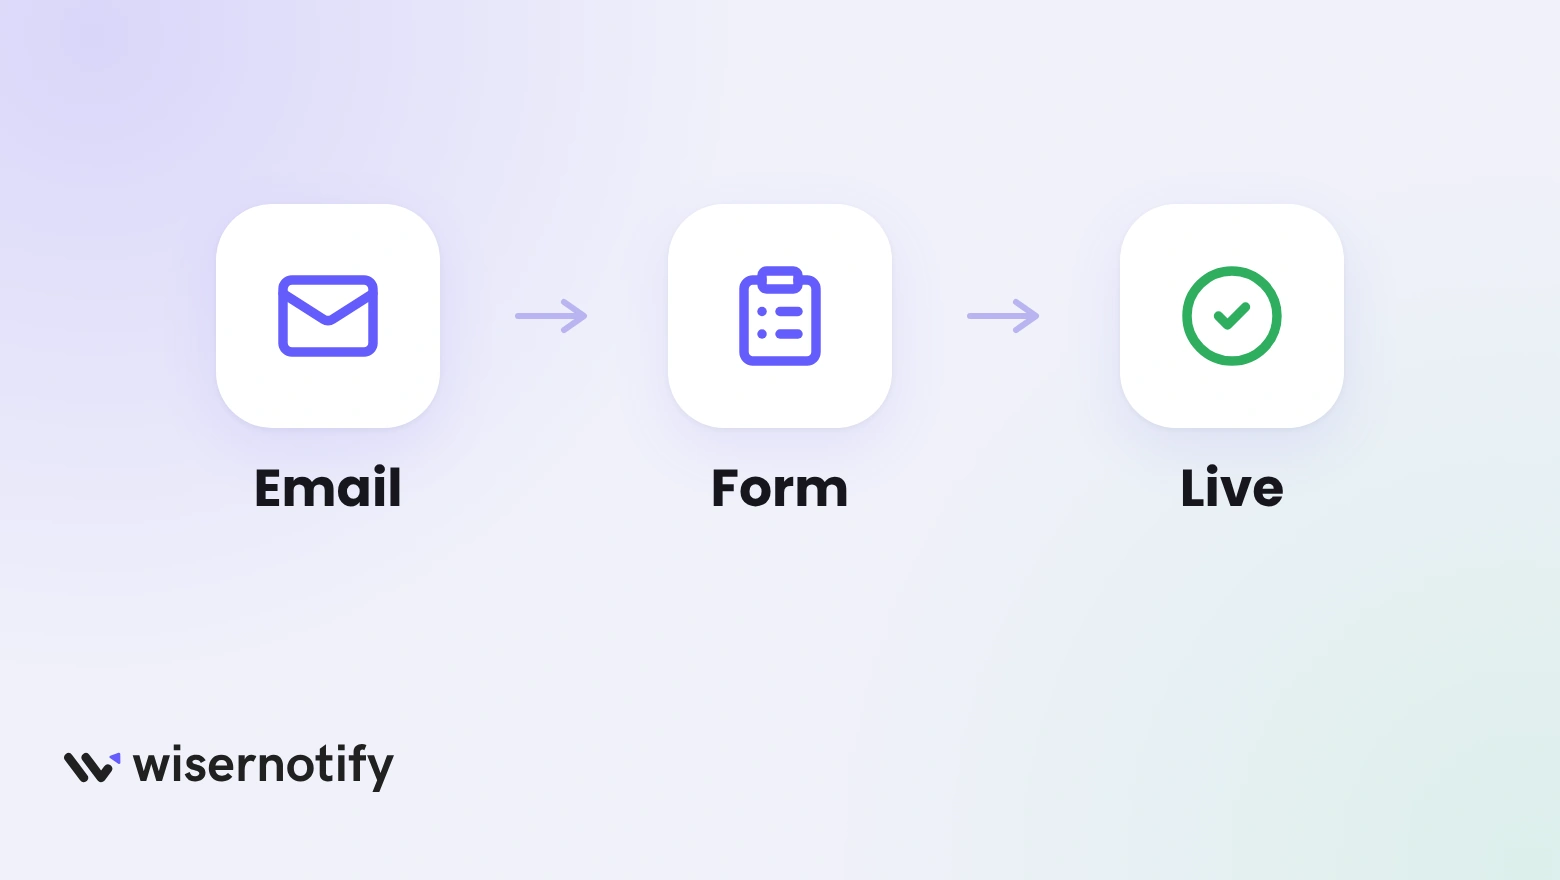
Ask while the result is fresh, such as right after someone signs up, joins your webinar or buys.
- Send one link: the form link from Step 2 fits in a follow-up email.
- Keep it short: ask for two lines on the result, not an essay.
- Offer video: a 30-second clip from a phone is enough.
- Ask three questions: what result they got, how long it took and who they would recommend you to.
For more ways to gather quotes, see our guide to testimonial software.
Best Places to Show Testimonials on Leadpages

- Under the headline: one strong quote near the top builds trust before the visitor scrolls.
- Next to the form: proof beside the sign-up box eases the last bit of doubt.
- By the button: a quote near the call to action helps the click.
- Thank-you page: any page you build in Leadpages can hold the widget, so the same steps apply.
- Long sales pages: spread two or three quotes down the page to reinforce each claim.
Proof beside every button
Carousels and walls that update when you approve a new testimonial.
Testimonials Not Showing on Leadpages?
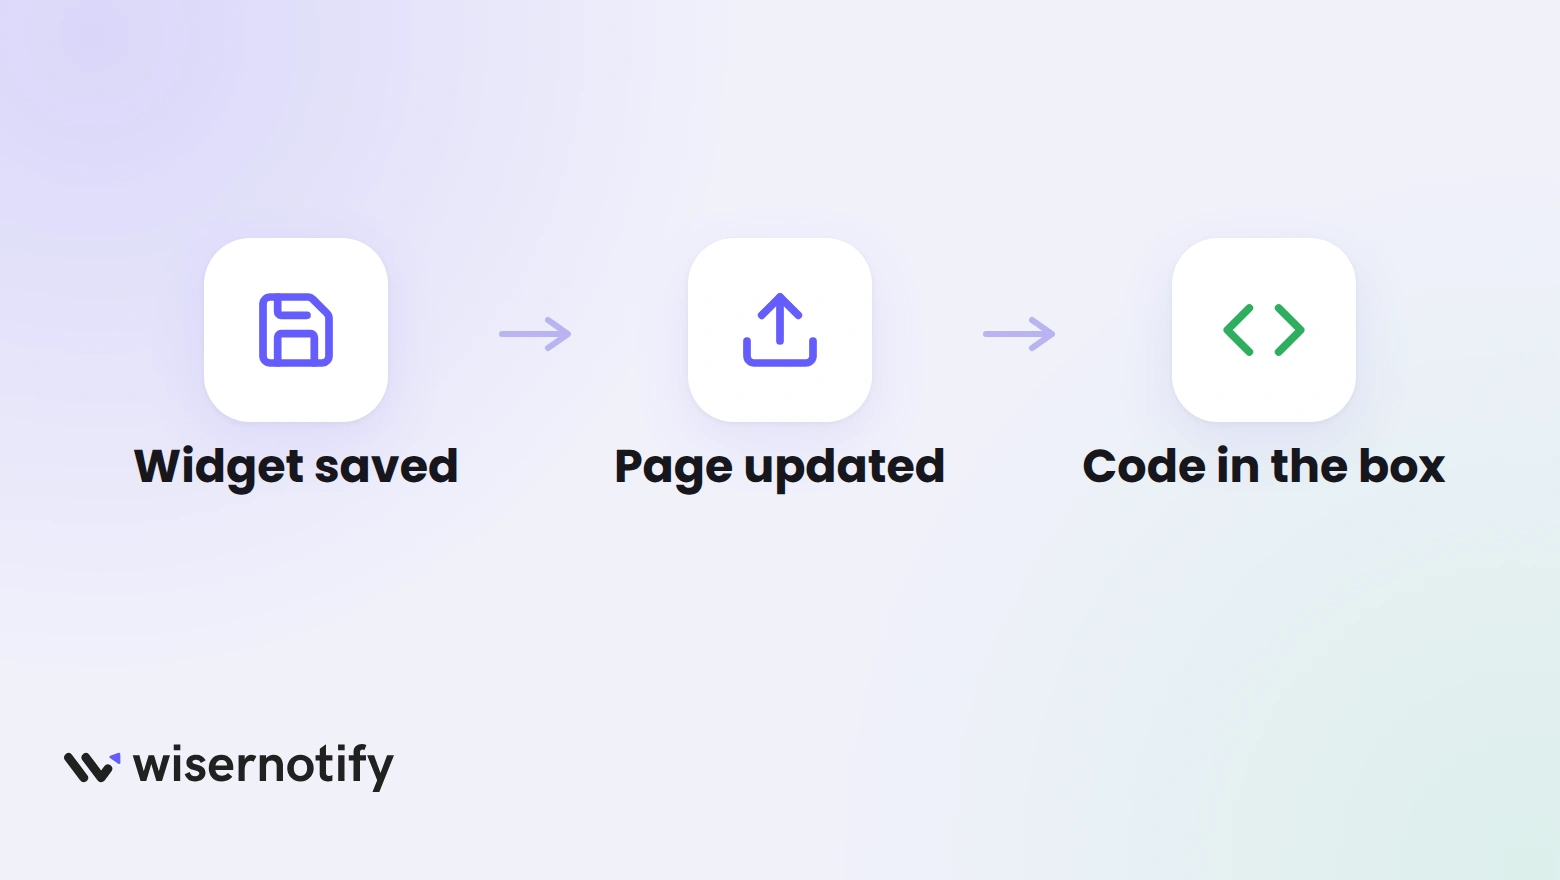
- Widget not saved: click Save inside the HTML or Embed element after you paste, or the code is lost on publish.
- Page not updated: update or publish the page, then reload the live page.
- Wrong builder steps: Page Studio uses the + icon and Embed. The Classic Builder uses the HTML widget.
- Pixel in the wrong box: if you use the Custom tab, the pixel goes in Settings, then Analytics, before the closing body tag.
- Partial code: Leadpages does not validate the code, so a missed line will not show an error. Paste it again in full.
- No approved testimonials: approve at least one in Manage reviews.
- Filter too tight: clear the tag filter in the widget to test.
- Old copy of the page: reload your live page in a private window.
Testimonial Mistakes on Leadpages
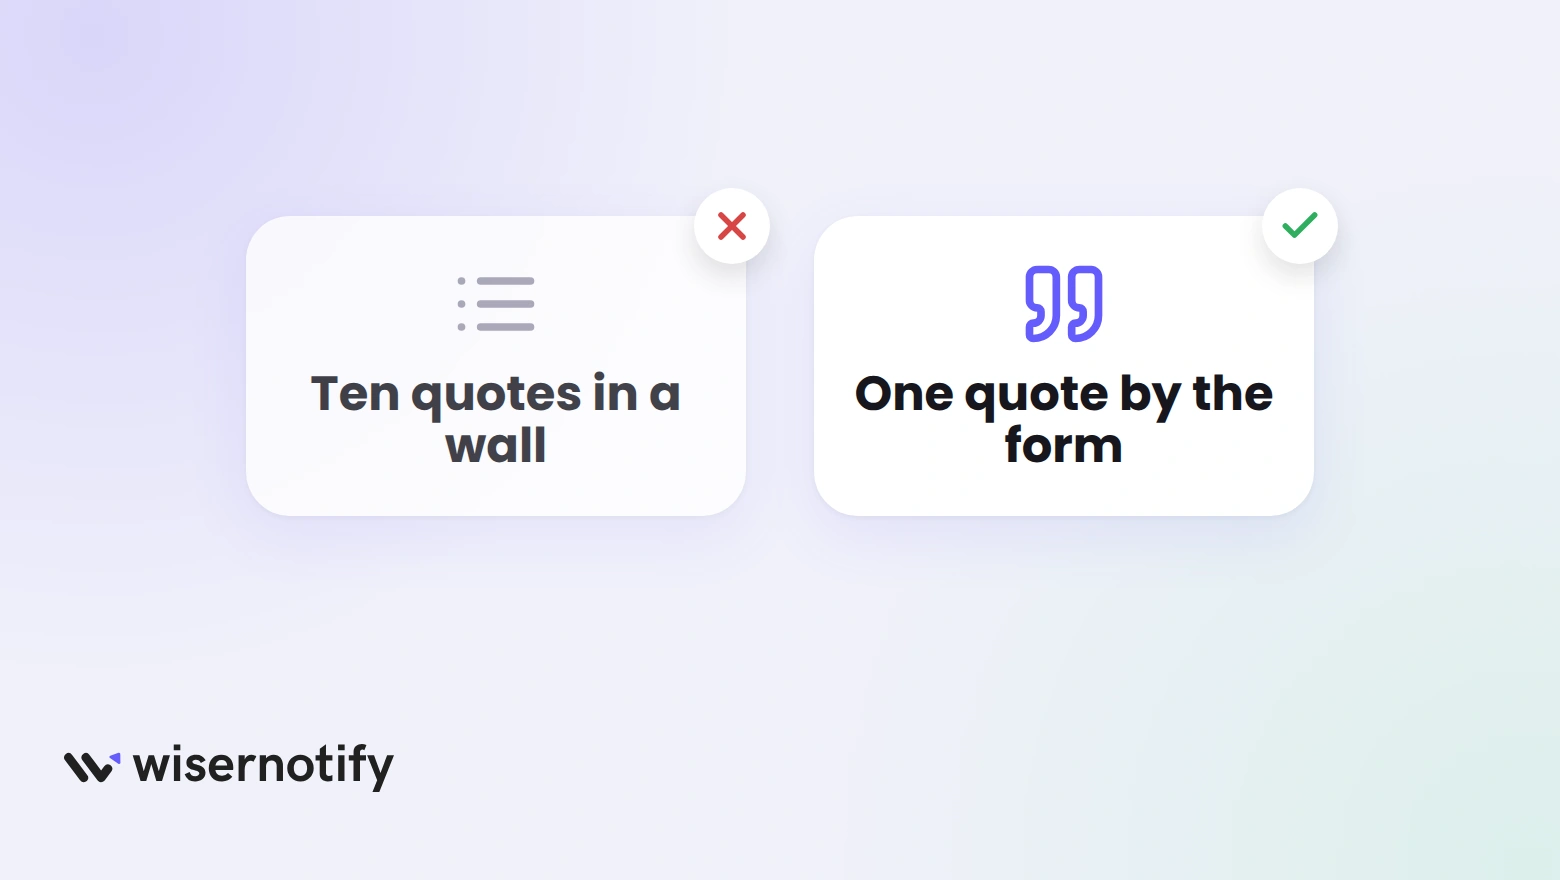
- A wall of quotes: Leadpages itself suggests limiting sections for best conversion. Show the strongest few.
- Vague praise: “Great product” tells a visitor nothing. Ask for the result and the time it took.
- A quote that misses the goal: match the quote to what the page asks visitors to do.
- Styling in the wrong place: Leadpages does not restyle code in an HTML widget. Use the widget’s color options instead.
- Skipping the phone check: preview the page on mobile, since many visitors arrive there.
Wrap Up
Leadpages’ testimonial sections are fine for a handful of typed quotes. A widget is the better fit once you want testimonials to come in and show up without retyping them.
Start with one form, approve your best few testimonials, and place the widget beside your form or button.
Turn happy customers into proof
Collect them with one link and show them on every page that sells.
Related Posts
Frequently Asked Questions
How do I add testimonials to a Leadpages landing page?
Build a testimonial widget in WiserReview, copy the embed code, and paste it into the Embed element in Page Studio or the HTML widget in the Classic Builder. Leadpages’ testimonial sections work for quotes you type in by hand.
Can I use video testimonials on Leadpages?
Yes. The WiserReview form can collect photo and video uploads, and approved testimonials go into the widget.
Where is the best place for testimonials on a Leadpages page?
Put one under the headline, or beside your form or button, with a quote that matches the goal of the page.
How do I collect testimonials for my Leadpages page?
Send customers one WiserReview form link, then approve what comes back. New approved testimonials appear in the widget without retyping.
Do I need to edit page code to add the widget?
No. You paste the widget code into an Embed or HTML element, and you do not touch the rest of the page.
Why is my testimonial widget not showing on Leadpages?
Click Save inside the HTML or Embed element, then update the page. Leadpages does not check pasted code, so paste it again in full.

Krunal Vaghasiya is a marketing tech expert who boosts e-commerce conversion rates with automated social proof and FOMO strategies. He loves to keep posting insightful posts on online marketing software, marketing automations, and improving conversion rates.




 Capterra