How to Add All in One CTA Widget on Your Website?
 Krunal Vaghasiya|Apr 14, 2022
Adding CTA Widget to your website can increase engagement and conversions. This versatile tool combines multiple CTAs into one interactive element, making it easier for visitors to take action.
There are many different types of CTA widgets, but they all have the same goal: increasing conversion rates and user engagement. They offer many benefits such as:
- They help with lead generation
- They integrate with the website’s design
- They have the potential to increase conversions
- They are easy to use
The all-in-one CTA widget is an easy way for marketers to increase the number of conversions on their site by adding CTAs
Related: Top 12 CTA Mistakes to Avoid That 90% of Marketers Make
A study from HubSpot found that adding just one CTA increased conversion rates by 13%.
The all-in-one CTA widget allows marketers to add different types of CTAs such as text, buttons, images, or videos. They can also customize the color and size of their CTA buttons so they stand out from the rest of the page content
In this guide, we’ll show how to effortlessly integrate this powerful widget to turn visitors into loyal customers and followers in just a few simple steps.
Build trust & FOMO
Highlight real-time activities like reviews, sales & sign-ups.


Benefits of Using CTA Widgets on Your Online Store and Website
Call to Action widgets are potent tools that can significantly boost user engagement and conversion rates on your website. By strategically placing these widgets, businesses can direct visitors toward taking specific actions, such as signing up, downloading resources or making a purchase. Here are key use cases for CTA widgets that can help maximize their effectiveness.
1. Driving Sales and Promotions
CTA widgets are highly effective in promoting sales and special offers. By highlighting limited-time deals or exclusive discounts, you can create a sense of urgency that encourages visitors to make a purchase.
Example: An electronics retailer can use a CTA widget to promote a flash sale on selected items, urging customers to “Buy Now” before the offer expires.
2. Increasing Content Engagement
For blogs and content-heavy websites, CTA widgets can be used to direct readers to related articles, encourage them to leave comments, or share the content on social media. This helps increase the time users spend on your site and improves engagement metrics.
Example: A travel blog might have a CTA widget at the end of each post prompting readers to check out related articles or subscribe to receive travel tips.
3. Enhancing Lead Generation
Businesses offering services can use CTA widgets to generate leads by encouraging visitors to request a quote, schedule a consultation, or download a whitepaper. This approach is particularly effective for B2B companies looking to build a pipeline of potential clients.
Example: A digital marketing agency could use a CTA widget to invite visitors to download a free SEO audit report in exchange for their contact information.
5. Promoting Events and Webinars
If your business hosts events, webinars, or workshops, CTA widgets can help drive registrations and attendance. Placing these widgets on relevant pages and during the registration period can maximize visibility and participation.
Example: A software company can use a CTA widget on their homepage to encourage visitors to register for an upcoming webinar on new software features.
6. Collecting Feedback and Reviews
CTA widgets can also be used to solicit feedback and reviews from customers. By prompting users to share their experiences, you can gather valuable insights and testimonials that can be displayed on your site or used to improve your offerings.
Example: An online retailer might use a CTA widget post-purchase to ask customers to rate their shopping experience and leave a review.
7. Encouraging Social Media Follows
To grow your social media presence, CTA widgets can direct website visitors to follow your profiles on platforms like Facebook, Twitter, Instagram, and LinkedIn. This not only increases your social media following but also keeps your audience engaged with your brand across multiple channels.
Example: A lifestyle brand could use a CTA widget to invite visitors to follow them on Instagram for daily inspiration and updates.
Build trust & FOMO
Highlight real-time activities like reviews, sales & sign-ups.

How to Create All-in-One Widgets for your website?
You can create an All-in-one CTA widget without writing a single line of code using WiserNotify. Lets see how you can create and add all in one CTA widget on your website.
- Go to WiserNotify App and Create an account.

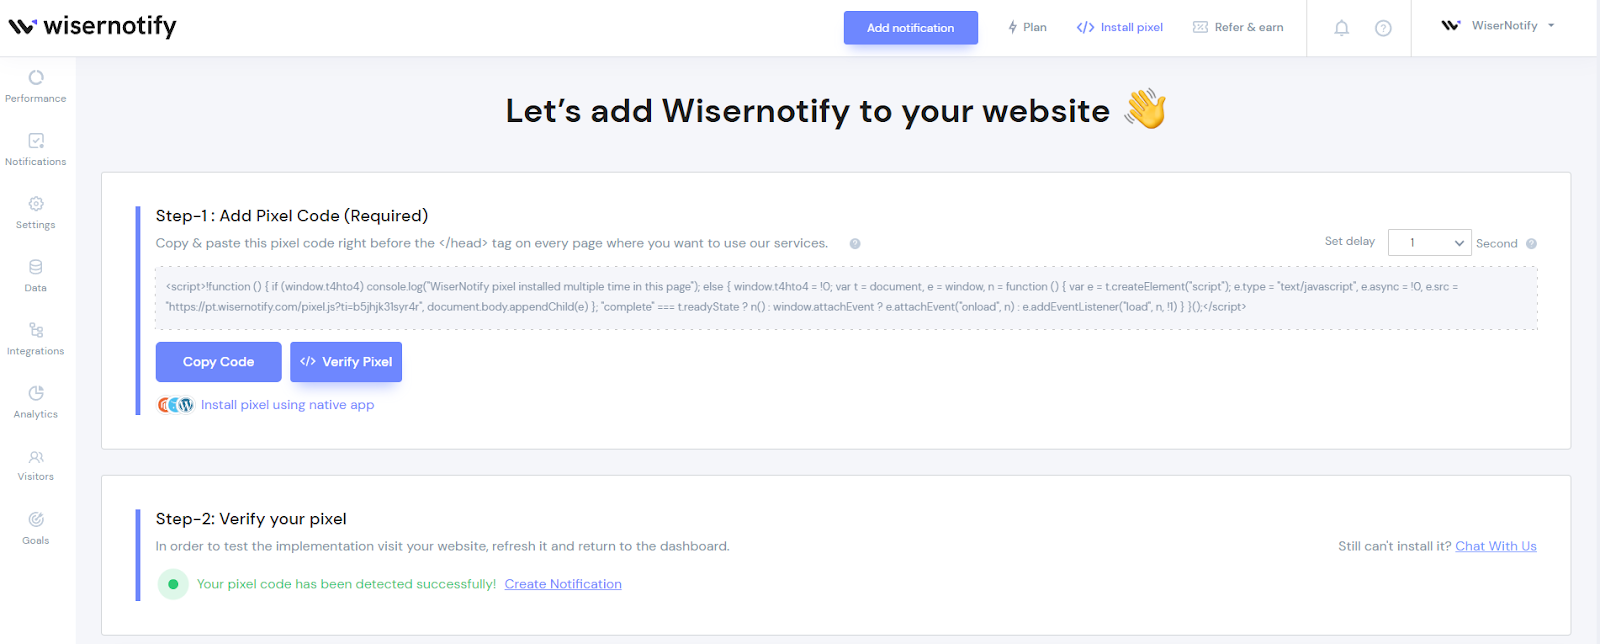
2. Once you log in, install the pixel on your website. You can find your pixel code here.
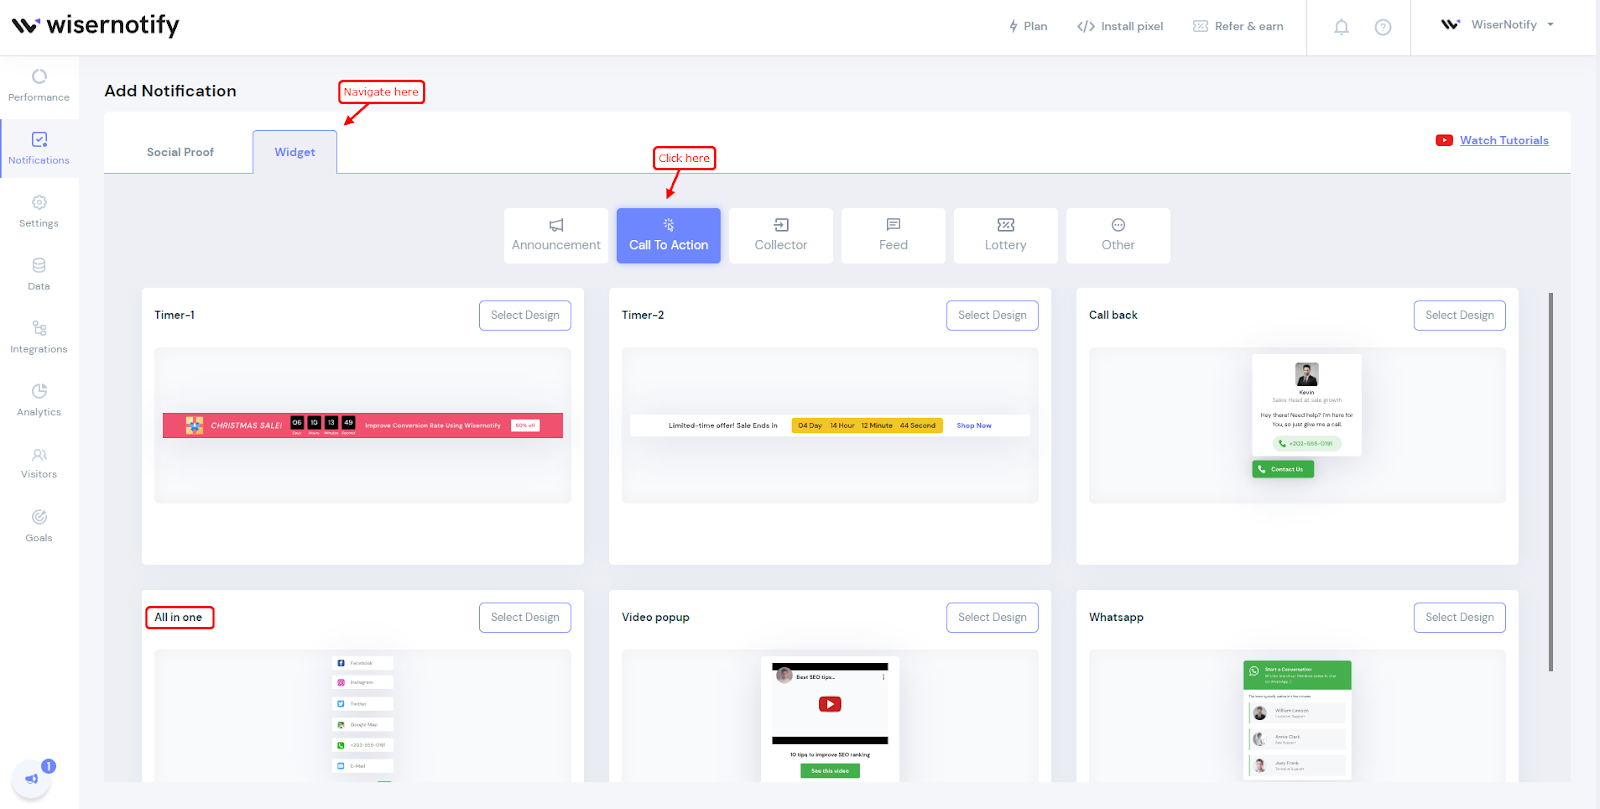
3. Now, click on the “Add Notification” button.

4. You will have different types of social proof notifications and widgets here. Click on Widgets and go to the “Call To Action”. Here you’ll see find the All-in-one CTA widget
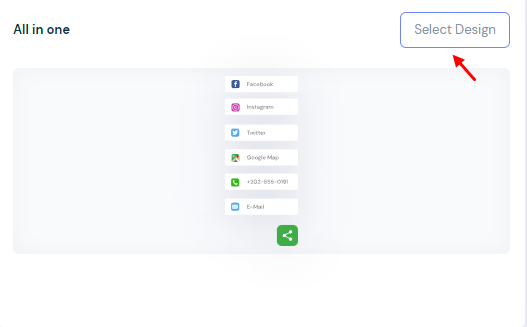
5. Just click on “Select Designs”
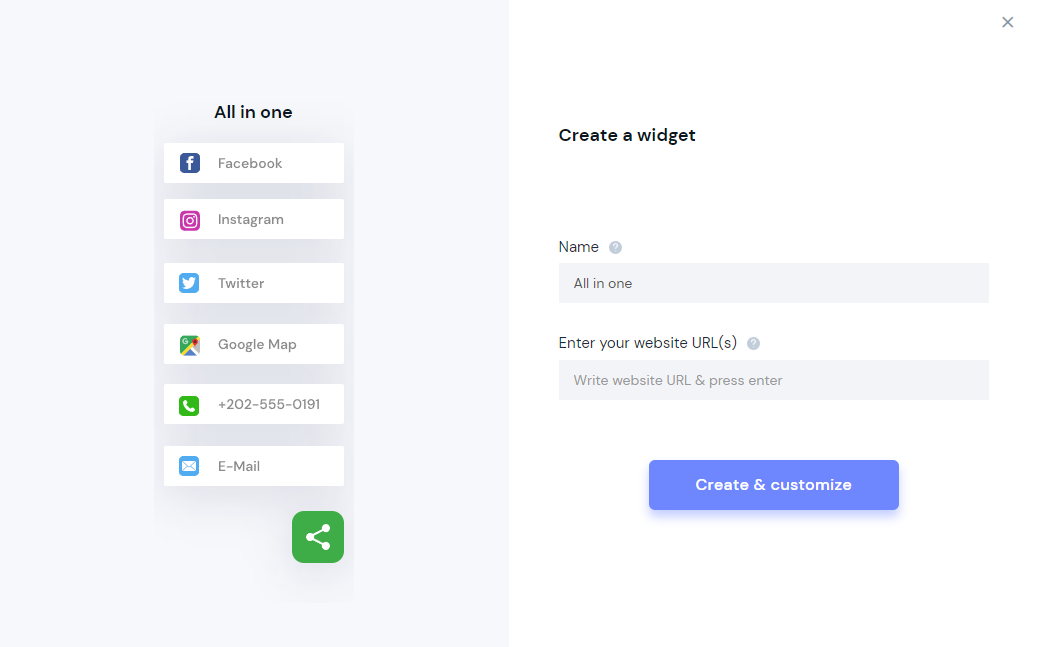
You’ll see a pop-up asking name and URL. Enter a name that is easy to remember, and enter the URL where you want to display all in one CTA widget. You can enter multiple website URLs here. Once you fill in this information, click on “Create & Customize”.
6. You’ll be redirected to the customization page. Here we’ve two sections- Design, & Display.

7. In the design section, you can change the look and feels of the widget.
- See Preview on mobile and desktop screen
- Edit text, Icon, position, animation,
- Choose which CTA’s you want to add
- Skip Seen widgets
- Display widgets in the loop with other notifications
- Apply Behavioral rule- Set start and expiry date for widgets or specific days of the weeks
- Set exit intent, scroll-based intent or time based intent
- Set hide rules and countdown timer
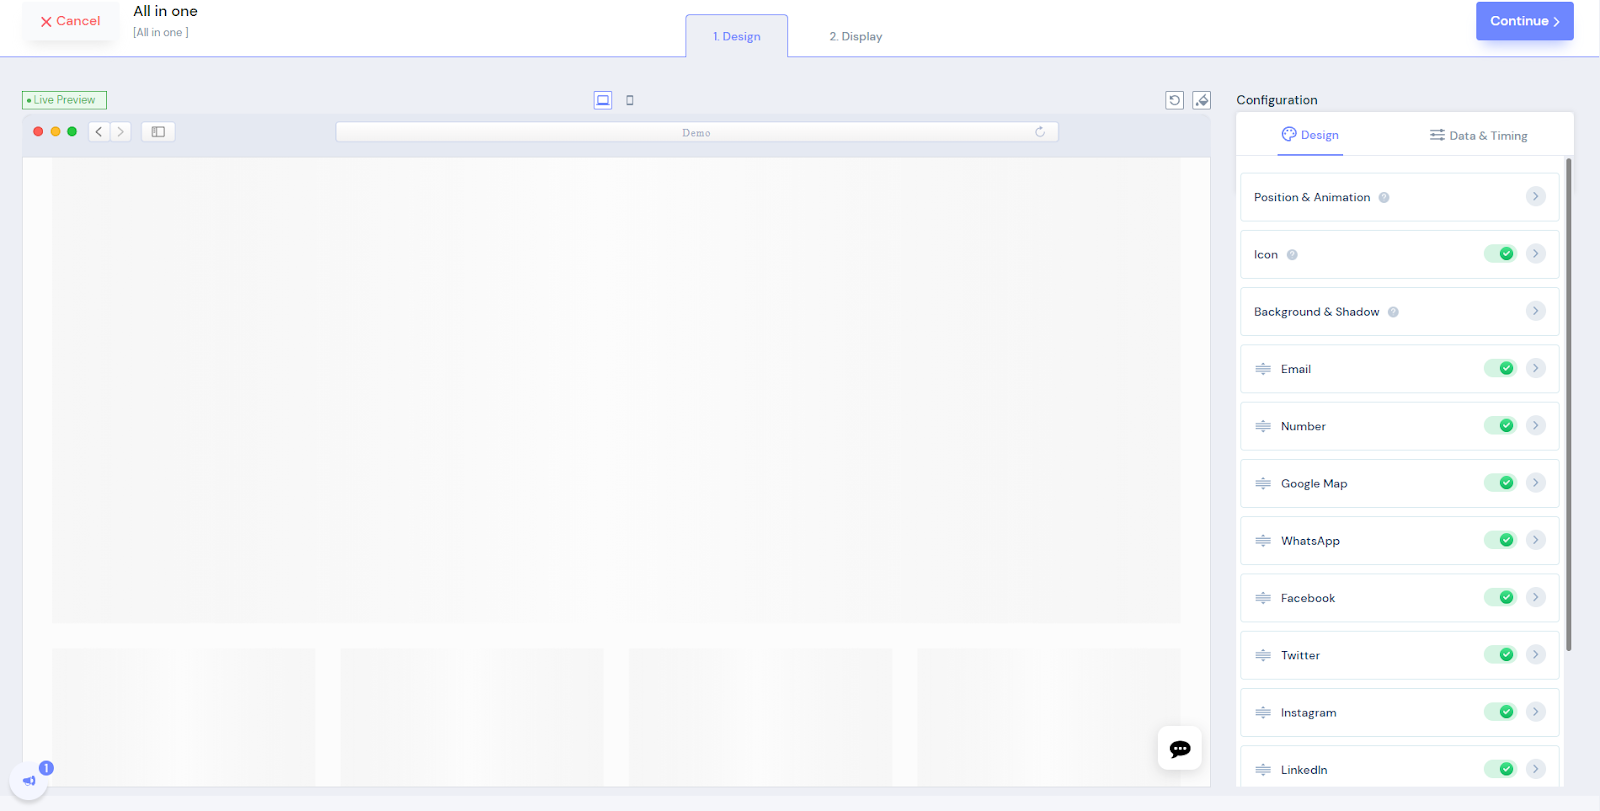
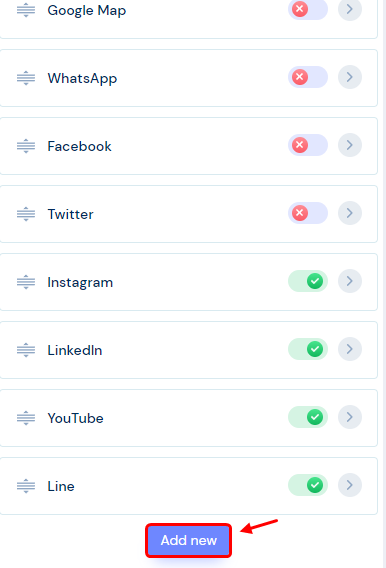
You can enable and disable CTA’s by turning the toggle ON & OFF
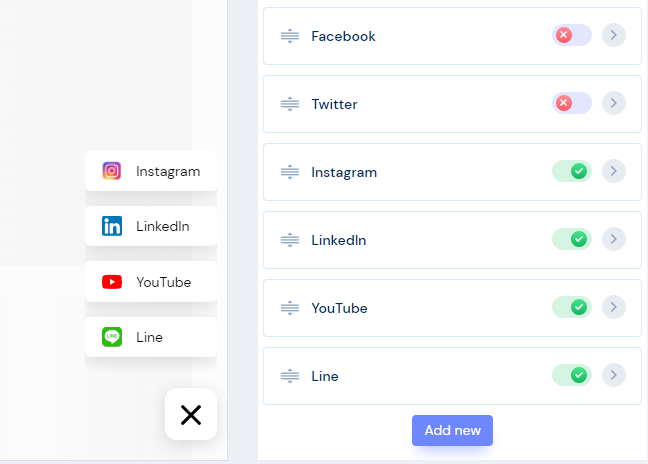
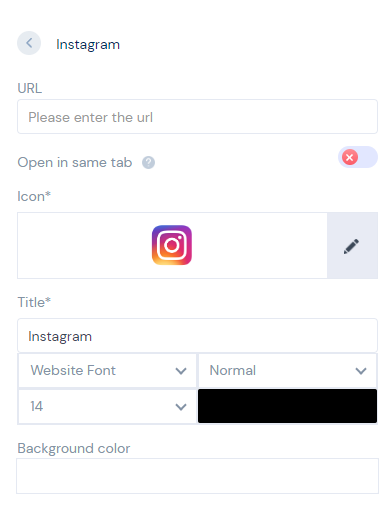
You can add URL’s when you turn the toggle ON. Whenever you turn the toggle ON you’ll see these options to customise that CTA.
You can also add your own CTA’s by using this “Add New” button
8. Once you’ve customized the design section, save it and move to the next option by clicking the continue button.


9. The next section is the display section; here, you can set display rules.
- Choose specific pages you want to display widgets
- Add multiple website URLs
- Choose whether you want to display widgets to new or returning visitors.
- Target audience using UTM source, referrer site, and cookies name
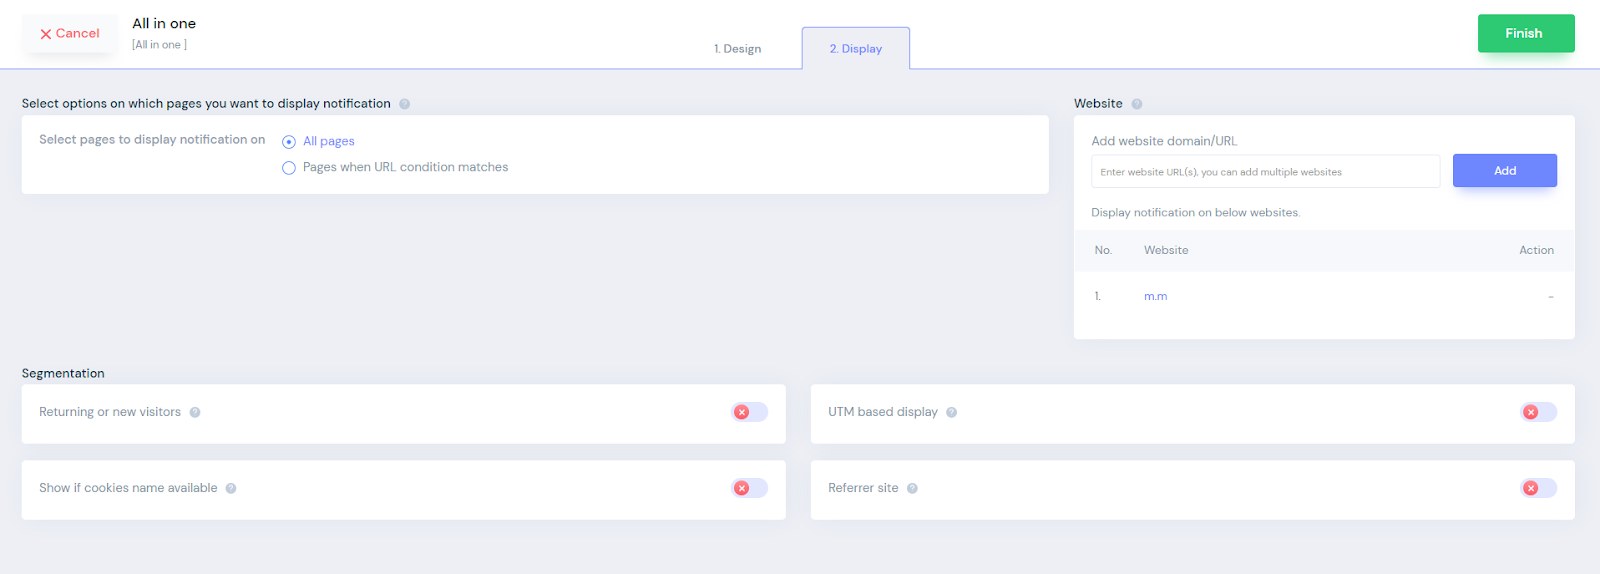
10. Once you have customized both these options, click on “Finish.”
And turn the widget ON

That’s it. The All in one CTA widget will be live on your website. You can check it on your website
So that’s how you can create an All in one CTA widget on your website.
Related: 50+ real examples of social proof
We have also created one video on how you can create all in one CTA widget, you can watch it here.
Boost Conversion Instantly
Add Social Proof & Urgency to your website
Krunal Vaghasiya is a marketing tech expert who boosts e-commerce conversion rates with automated social proof and FOMO strategies. He loves to keep posting insightful posts on online marketing software, marketing automations, and improving conversion rates.