
Easily Add WhatsApp Chat Widget to Teachable Website
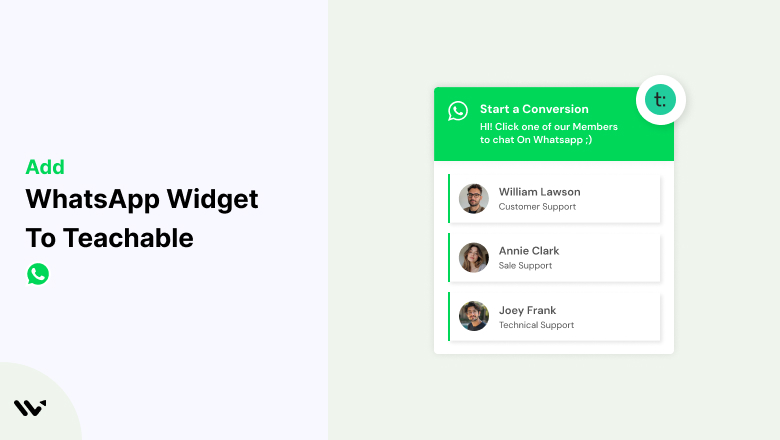
A visitor on your Teachable course page has a question, doesn’t see a fast way to ask it, and leaves instead of enrolling. A WhatsApp chat widget puts a direct line to you right on the page, so that question gets asked instead of costing you the sale.
Teachable doesn’t have a native WhatsApp widget, but connecting a tool like WiserNotify adds one in a few minutes.
Do You Need the WhatsApp Business API for This?
No. What you’re setting up here is a click-to-chat widget, a button that opens a normal WhatsApp conversation, the same as a wa.me link. There’s no approval process, no message templates, and no API to apply for.
The WhatsApp Business API is a separate, more involved system built for things like automated order updates sent to customers who never messaged you first. If all you want is a button that lets visitors reach you on WhatsApp, the widget below is all you need.
How to Add a WhatsApp Chat Widget to Teachable
The widget-building part of this walkthrough matches the video below; the Teachable-specific installation steps are written out beneath it.
Step 1: Get Your WiserNotify Pixel Code
- Sign up for WiserNotify. Create a free account at wisernotify.com, or log in if you already have one, then go to the Install Pixel page and click Copy Code.

Step 2: Add the Pixel Code to Teachable
- In Teachable, click your profile picture in the top right, select Admin, then go to Site > Code Snippets.
- Paste the pixel code into the Head Code Snippets box and click Save.
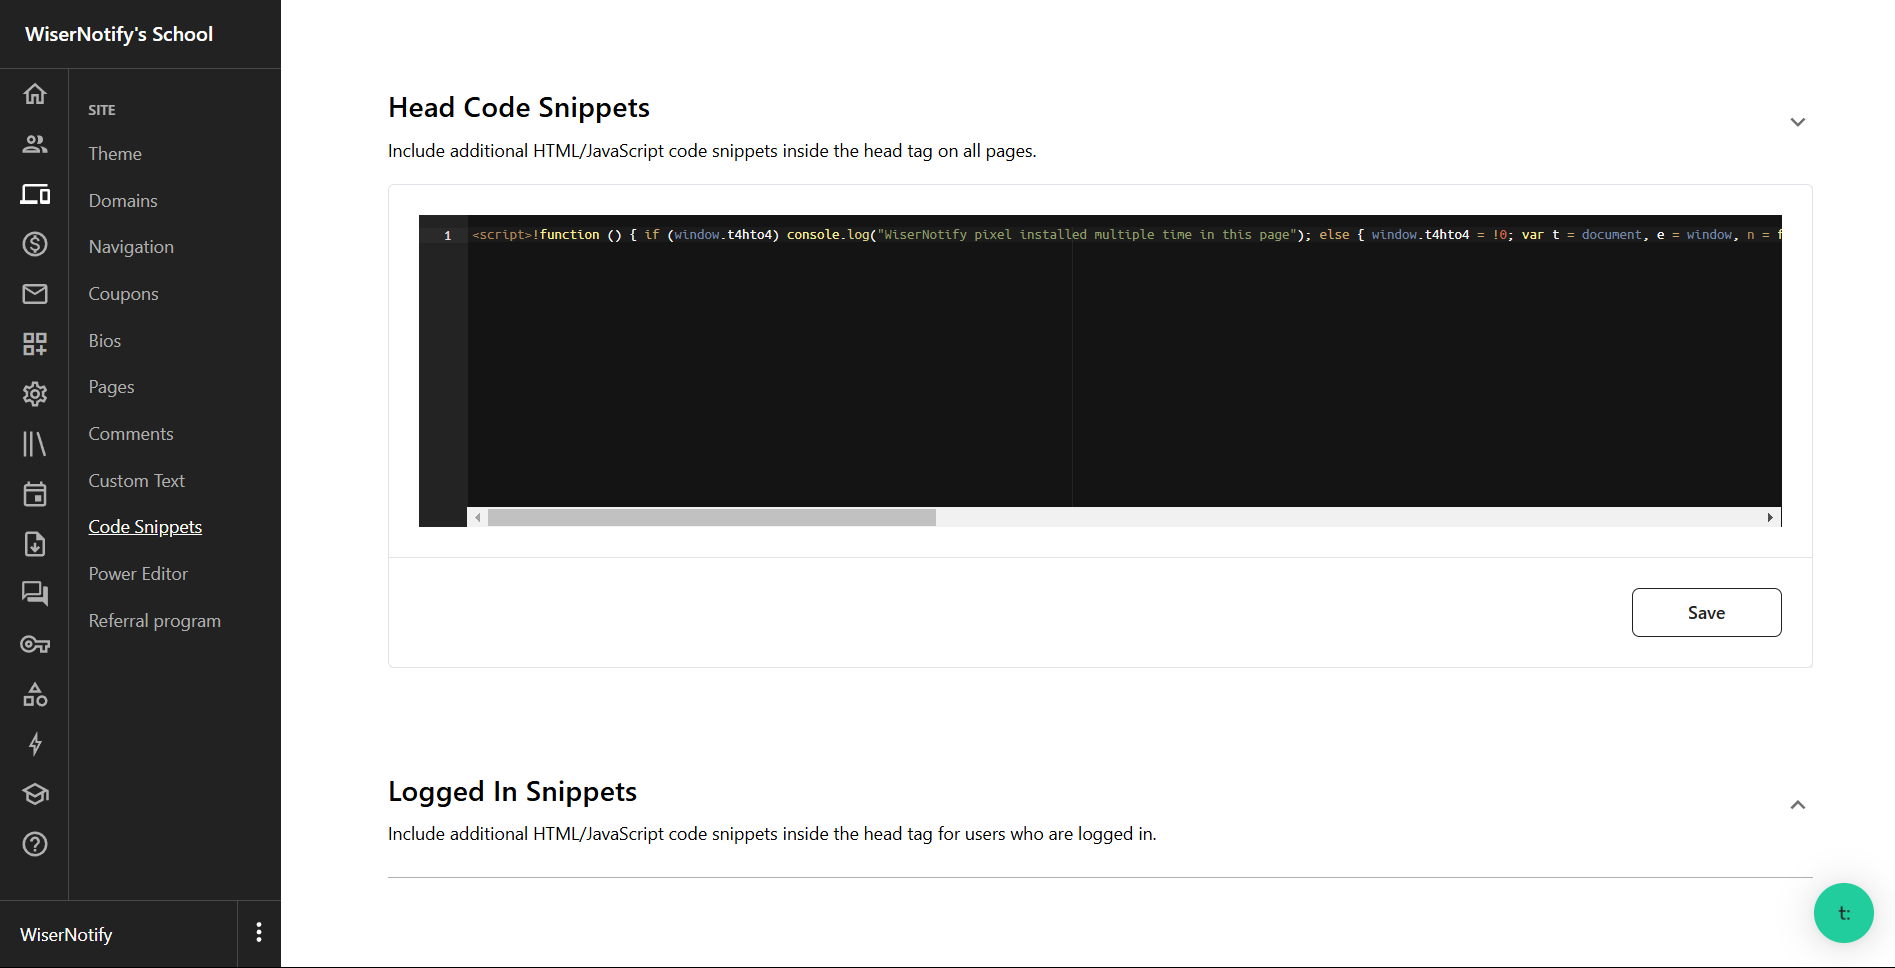
See the full Teachable integration guide for more detail on this step.
Step 3: Verify the Install
- Visit your Teachable site once, then go back to the WiserNotify pixel page and click Verify pixel installation. You should see a “Pixel Active” message.

Step 4: Connect Enrollment and Sign-Up Data (Optional)
This step is only needed if you want your widget or notifications to reference real leads or enrollments, separate from the chat button itself.
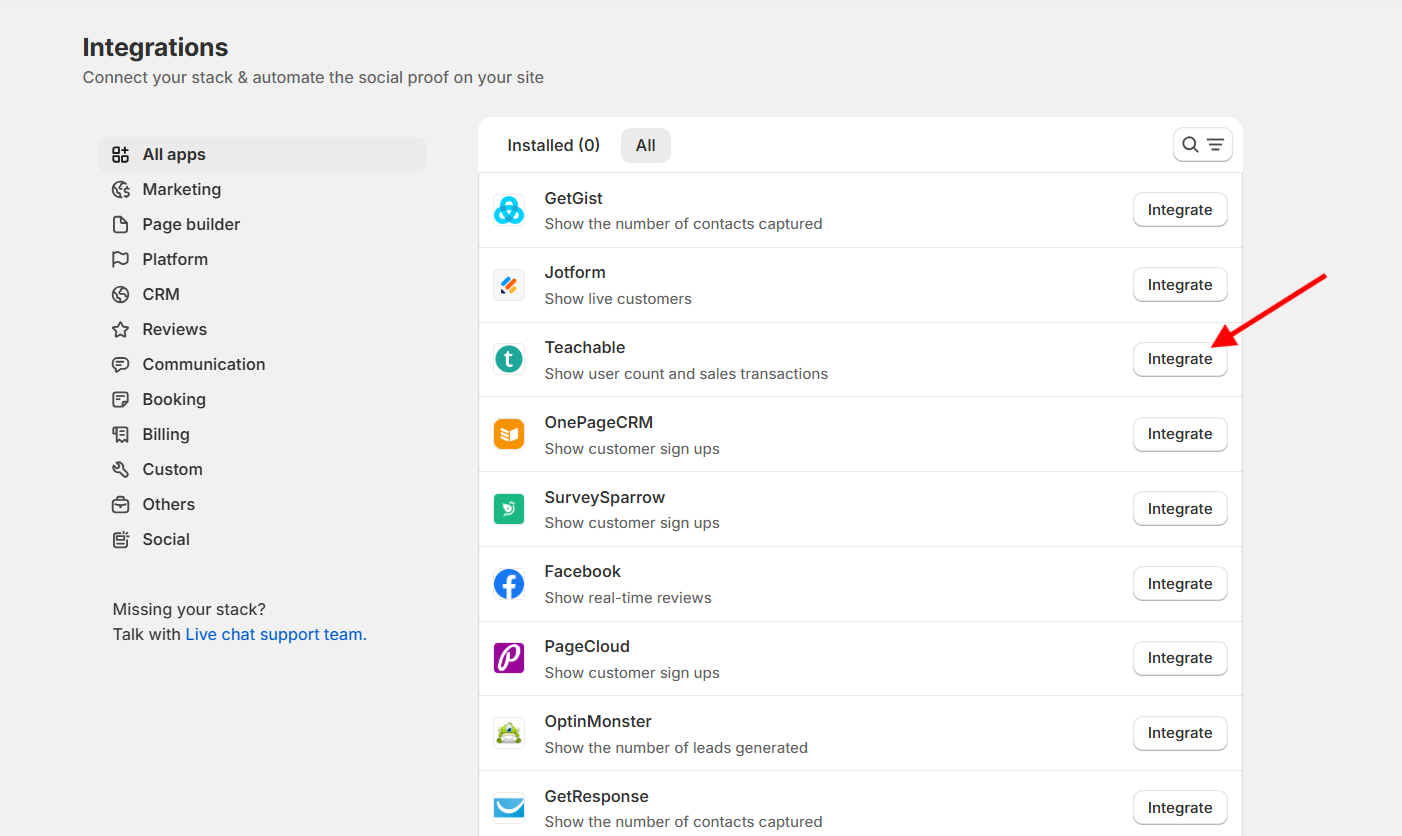
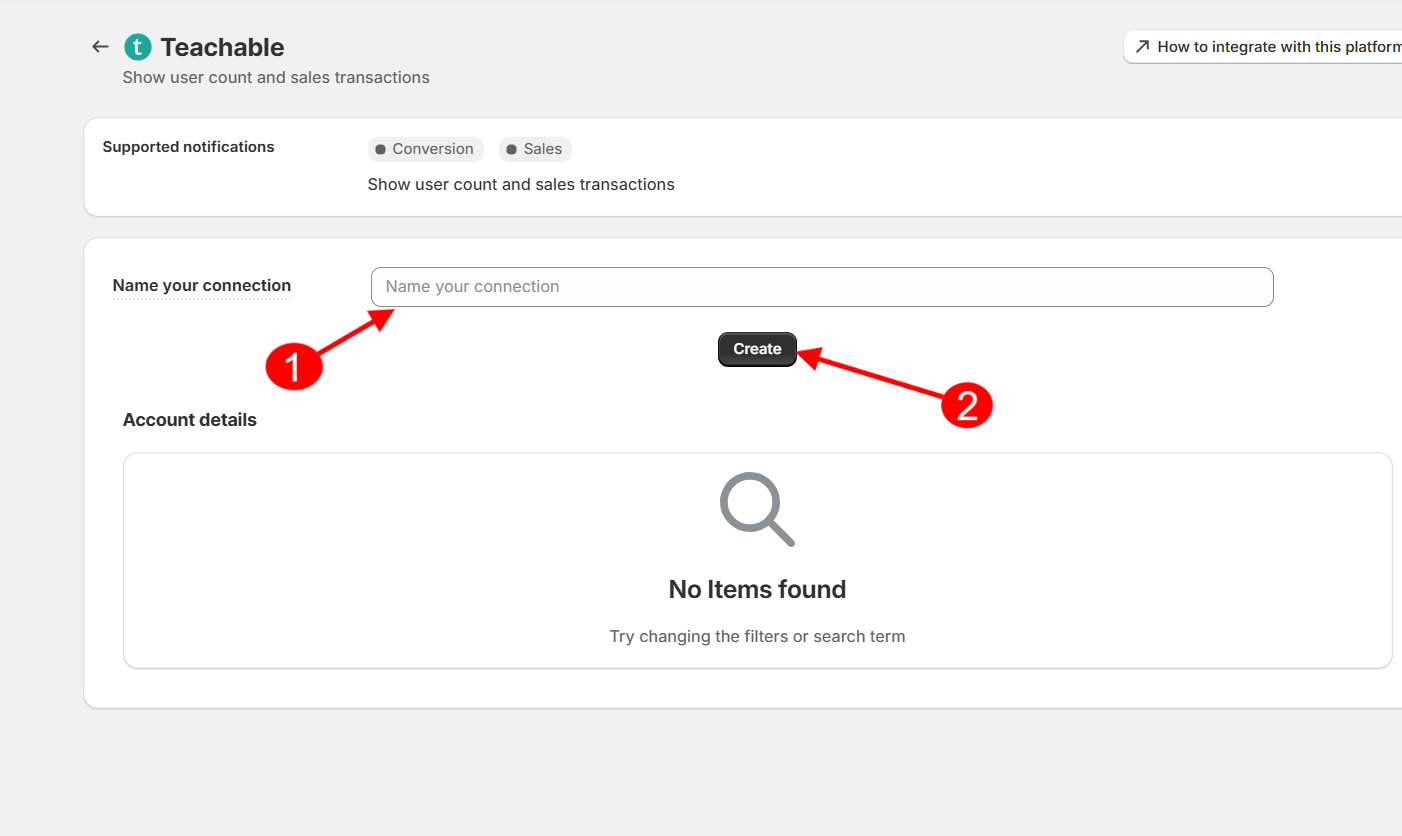
- In WiserNotify, go to Teachable Integration, click Integrate, name the connection, click Create, and copy the webhook URL.
- In Teachable, go to Settings > Webhooks, click Create a Webhook, choose New User Sign-Up or New Enrollment as the event type, paste in the webhook URL, set it to send as a JSON array, and click Create Webhook.
Make sure to select this integration as the data source under Customize notification > Data-source. See the full Teachable integration guide for the complete webhook setup.
Step 5: Create and Customize the WhatsApp Widget
- In WiserNotify, click Widgets in the sidebar, select the Call To Actions tab, find WhatsApp, and click Add. Enter the website name and click Create and Customize.
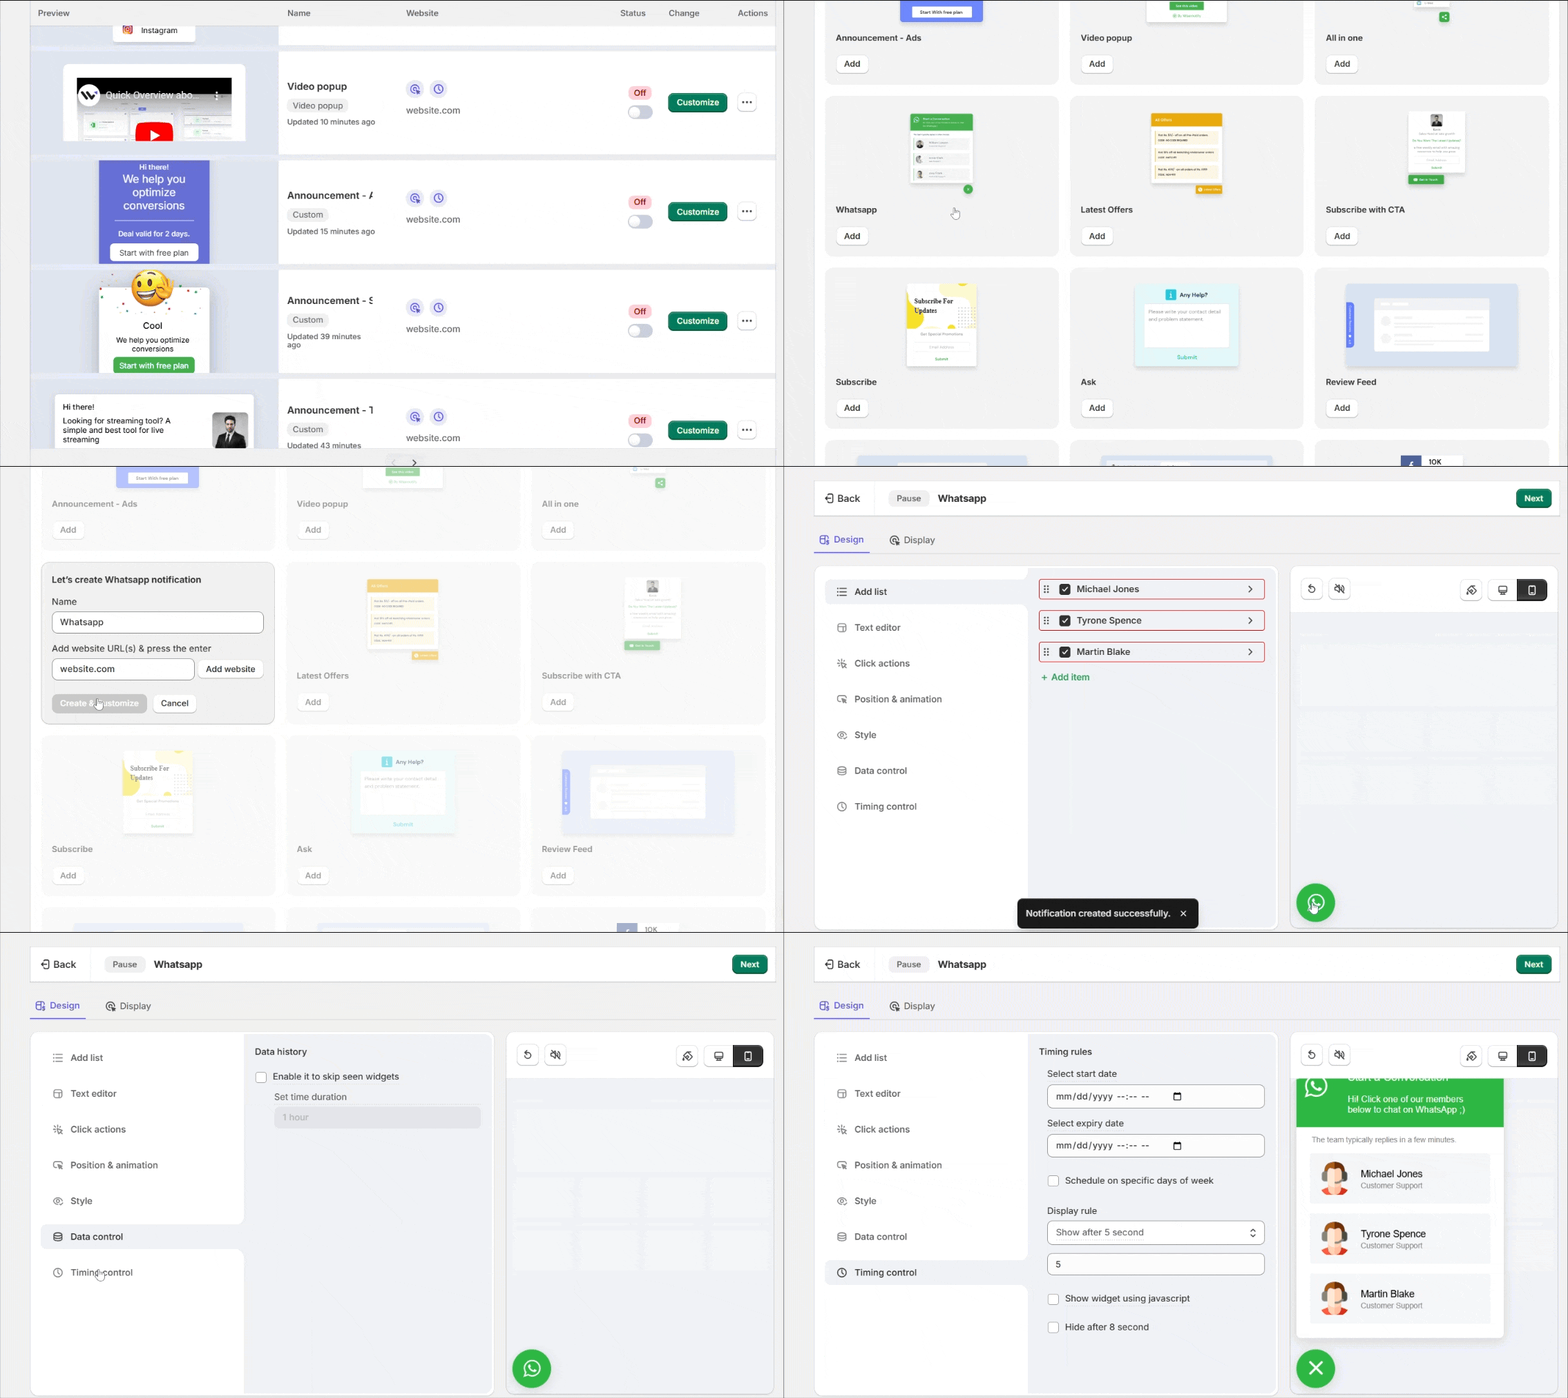
- Add your team. In Add List, add each rep’s WhatsApp number, avatar, name, and a message that auto-sends with the page URL when clicked.
- Set the text. In Text Editor, add a heading and a short welcome message.
- Style it. Use Click Actions, Position & Animation, and Style to set the icon, placement, and colors.
- Set the timing. In Timing Control, choose a trigger (delay, scroll, exit intent) and how long it stays visible.
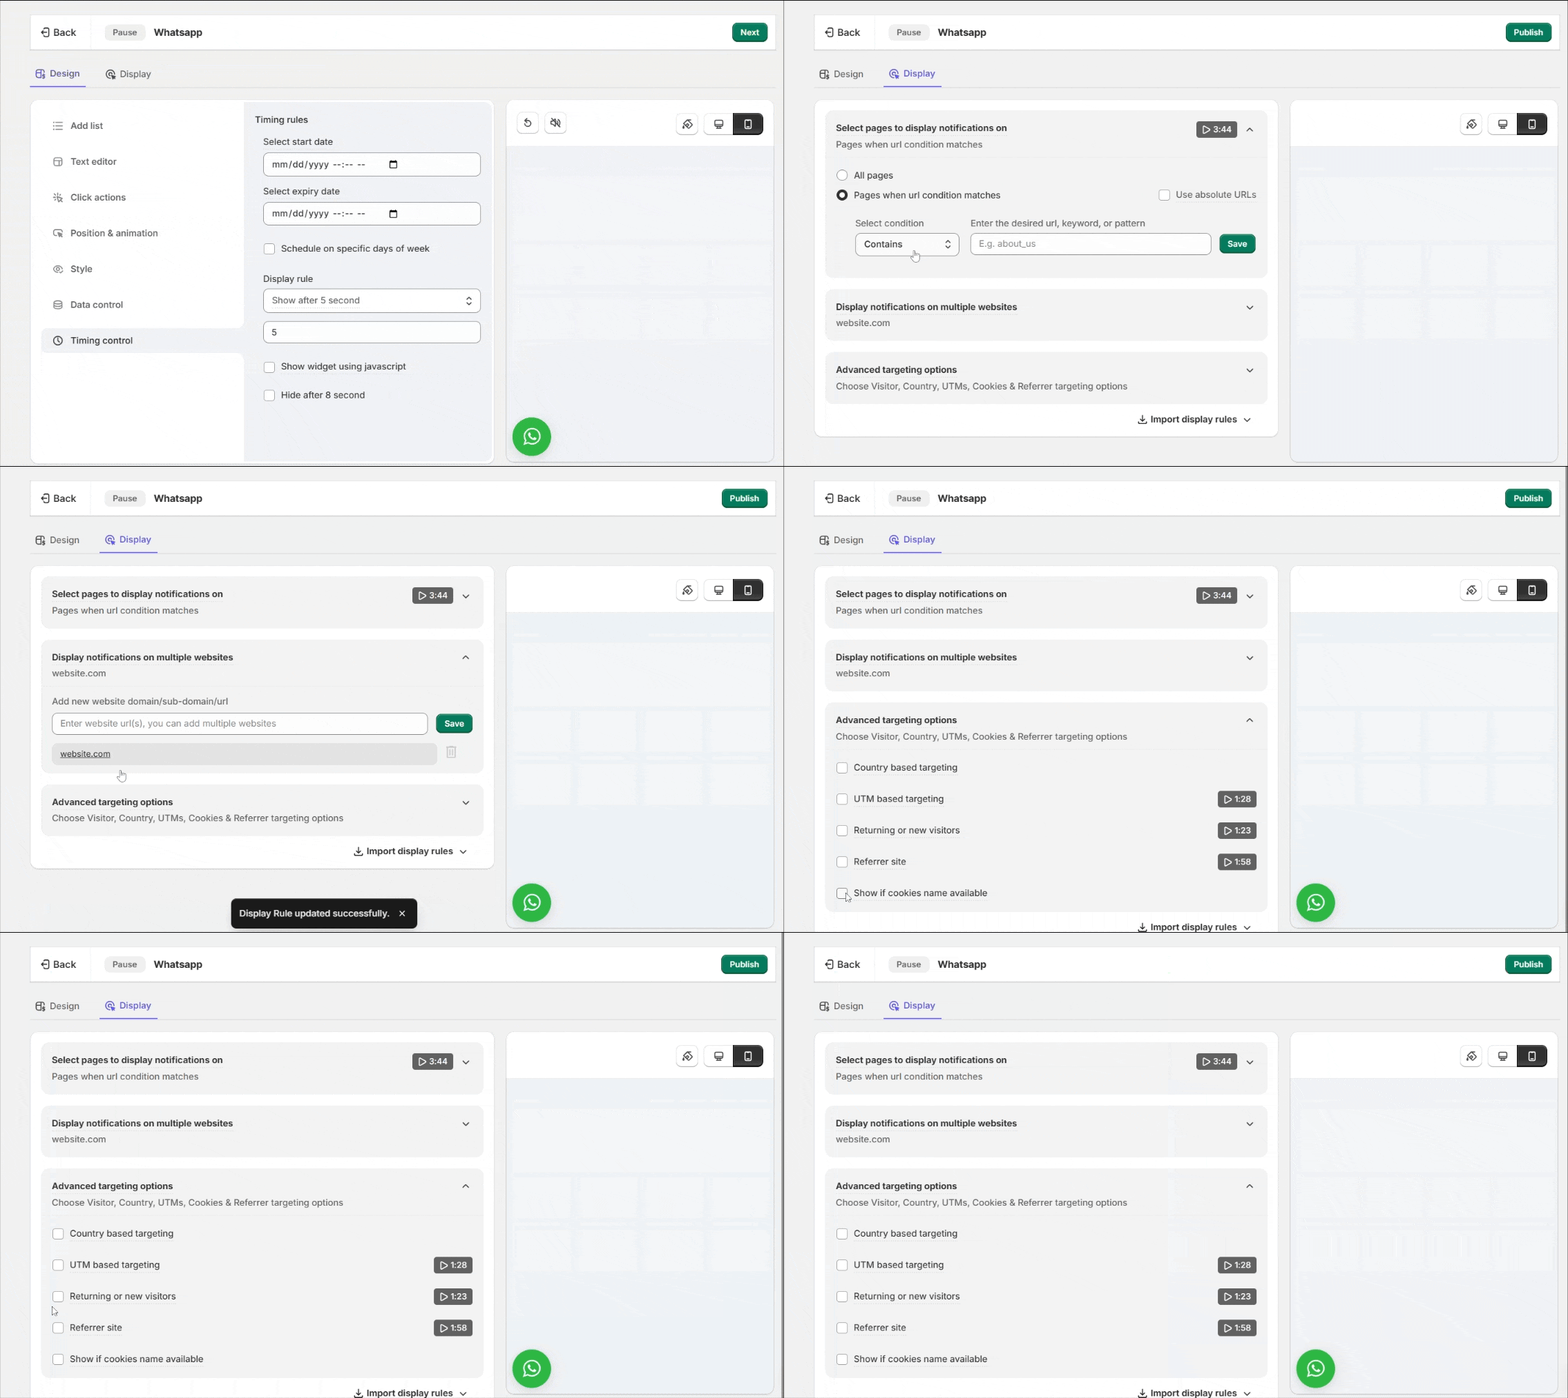
- Choose where it shows. In Display, target all pages or specific ones, and add advanced targeting if needed.
- Publish and test. Click Publish, then check your live site in a private browser to avoid cache issues. If it’s not showing, use the Troubleshoot option in the widget list.
See the full WhatsApp widget guide for every option in this editor.

Boost Conversion Instantly
Add Social Proof & Urgency to your website
Where to Place the Widget on a Teachable Site
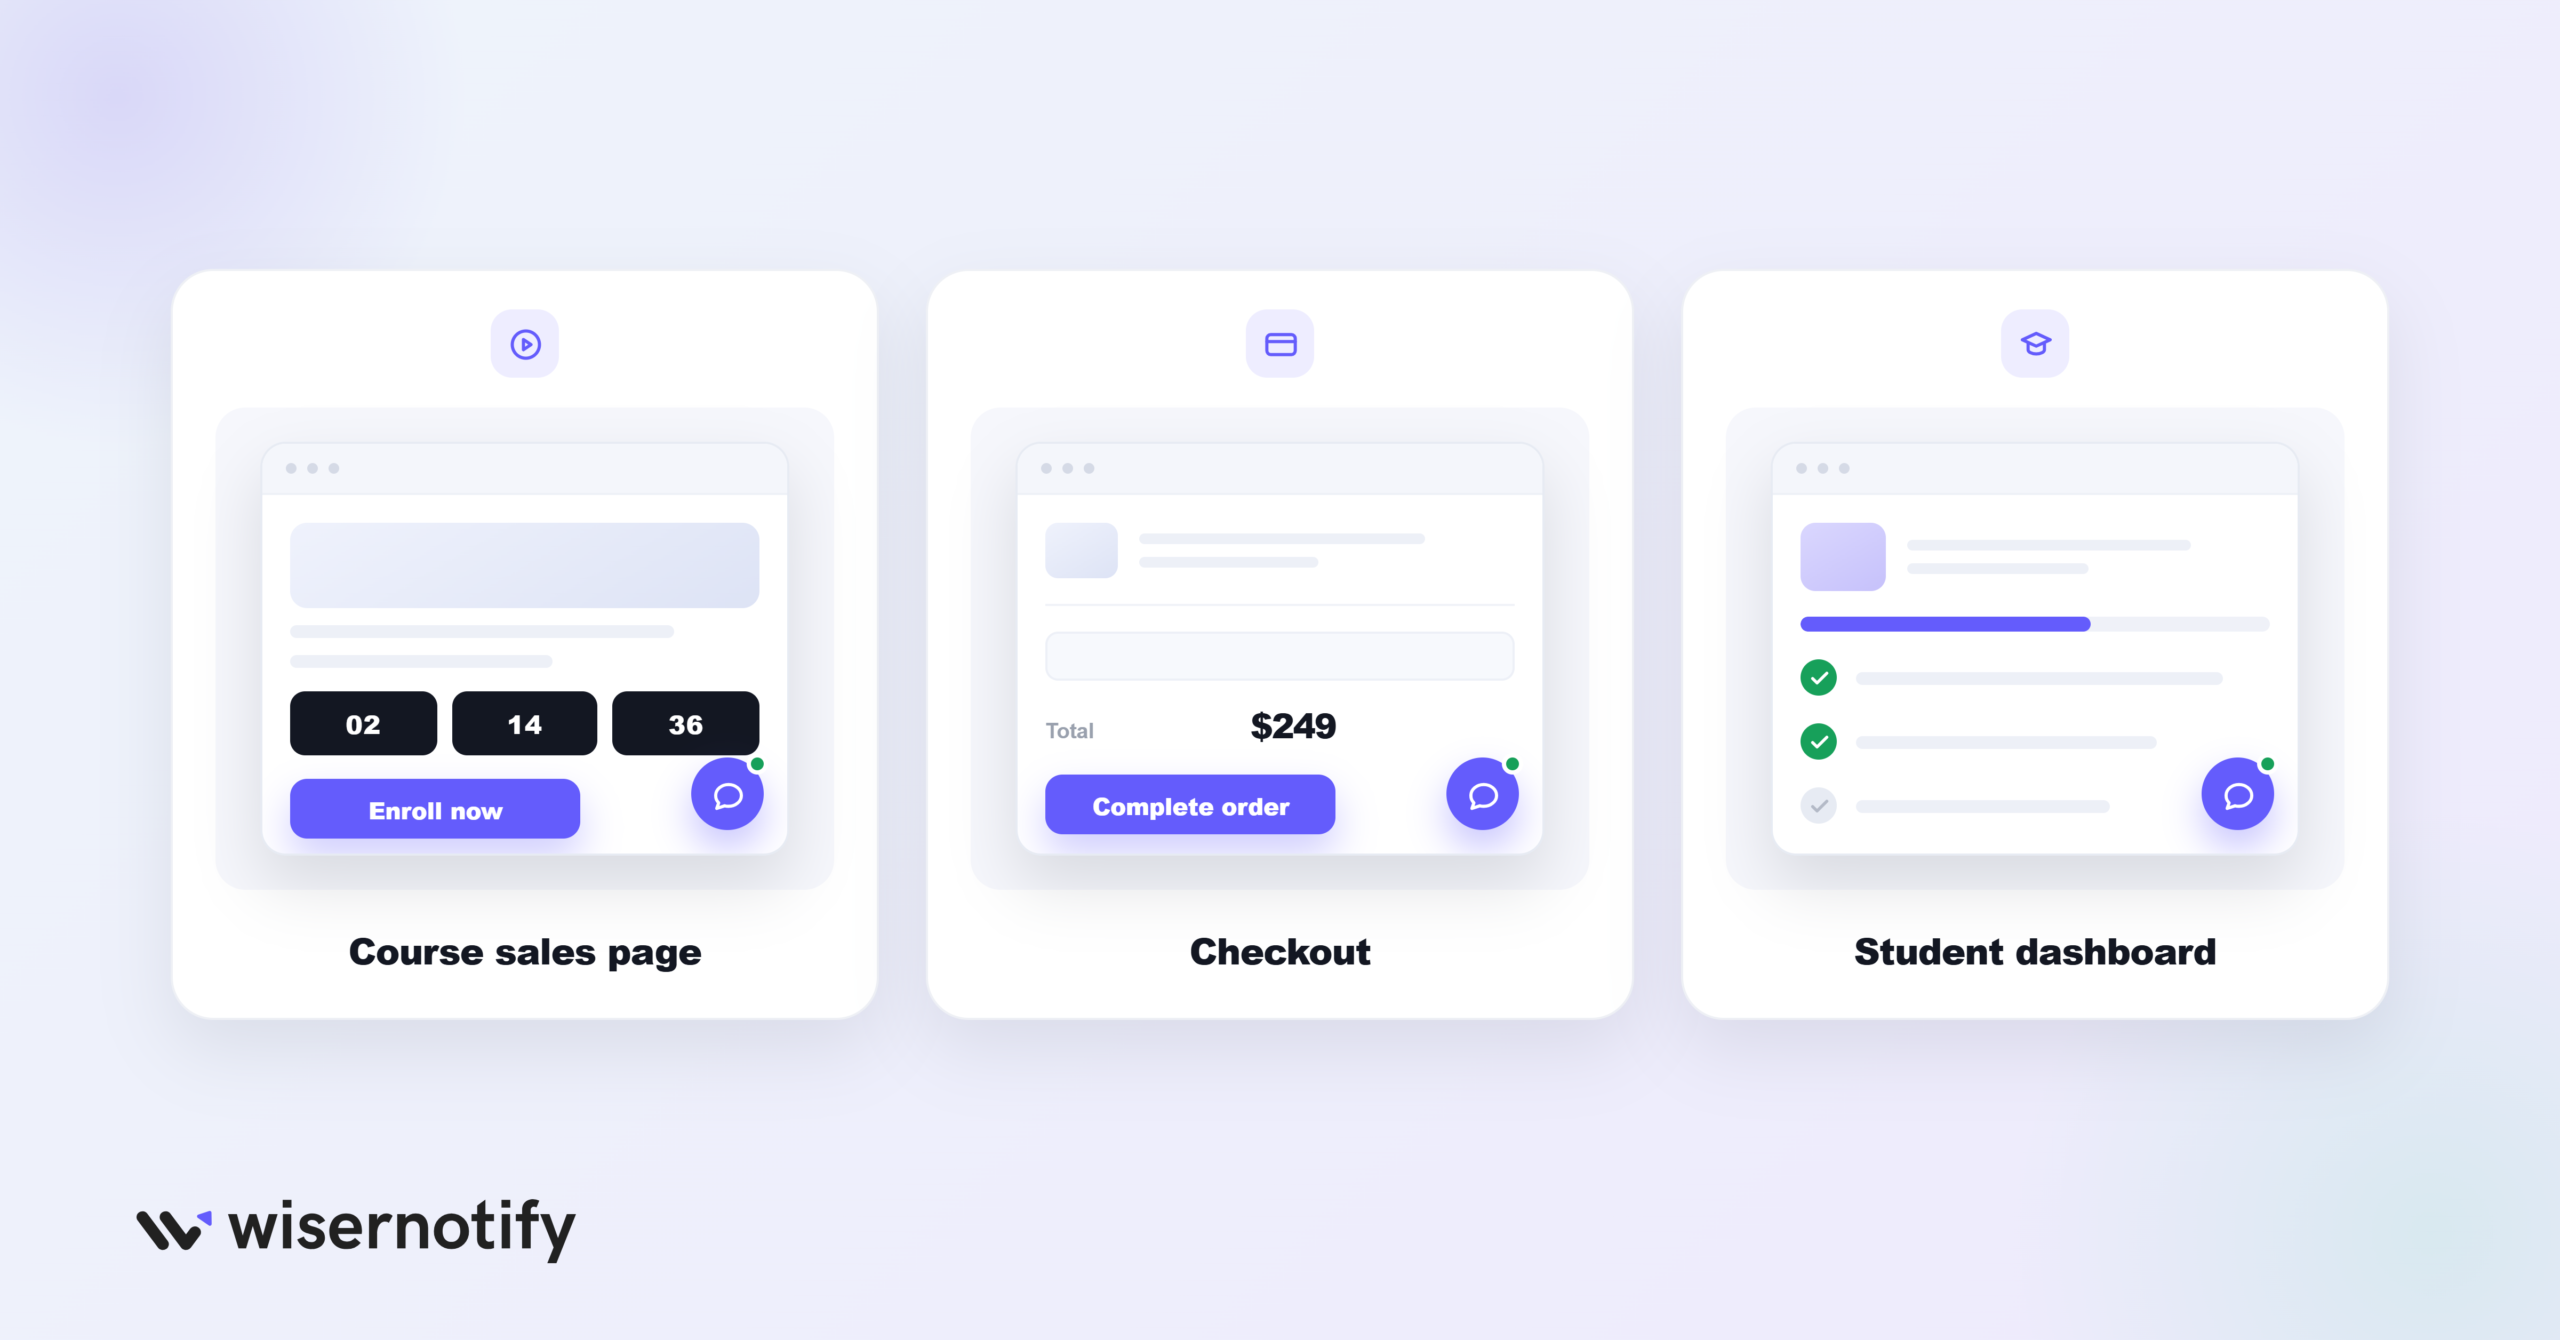
A course site’s key moments are a bit different from a typical online store:
- Course sales pages: this is where someone is deciding whether to enroll, and a quick question answered here can save the sale. Pairing it with a countdown timer on Teachable works well for limited-time enrollment windows.
- Checkout pages: hesitation right before payment is common; a chat option can catch last-minute doubts.
- Student dashboard or course access pages: enrolled students with technical or content questions benefit from a fast way to reach you too.
Use the Display targeting from Step 5 to limit the widget to these pages if you don’t want it showing across every lesson.
Best Practices for Your WhatsApp Chat Widget
- Put it somewhere obvious: a bottom corner works well, since students scanning a page will notice it there. Pairing it with testimonials on Teachable reinforces the same trust signal.
- Open with something warm: a line like “Questions about the course? We’re happy to help” reads a lot friendlier than a bare chat icon.
- Make it look like it belongs: match the colors and style to your course pages so it doesn’t feel bolted on.
- Say when you’re around: a note about your hours saves people from wondering why nobody answered at midnight.
- Run it through a business account: it comes with quick replies and an away message, and it looks more legitimate than a personal number.
- Glance at the numbers now and then: your WiserNotify dashboard will show you whether students are clicking it.
Common Mistakes to Avoid
- Chatting from a personal number: it works, but a business account gives you tools a personal line just doesn’t have.
- Never testing it yourself: a widget you haven’t checked might be broken or invisible on someone’s phone.
- Piling on too many popups: one chat widget is helpful; three overlapping widgets on the same page just annoys people.
- Leaving it unanswered for hours: without some kind of quick reply set up, people give up waiting and move on.
How to Measure Your Chat Widget’s Impact
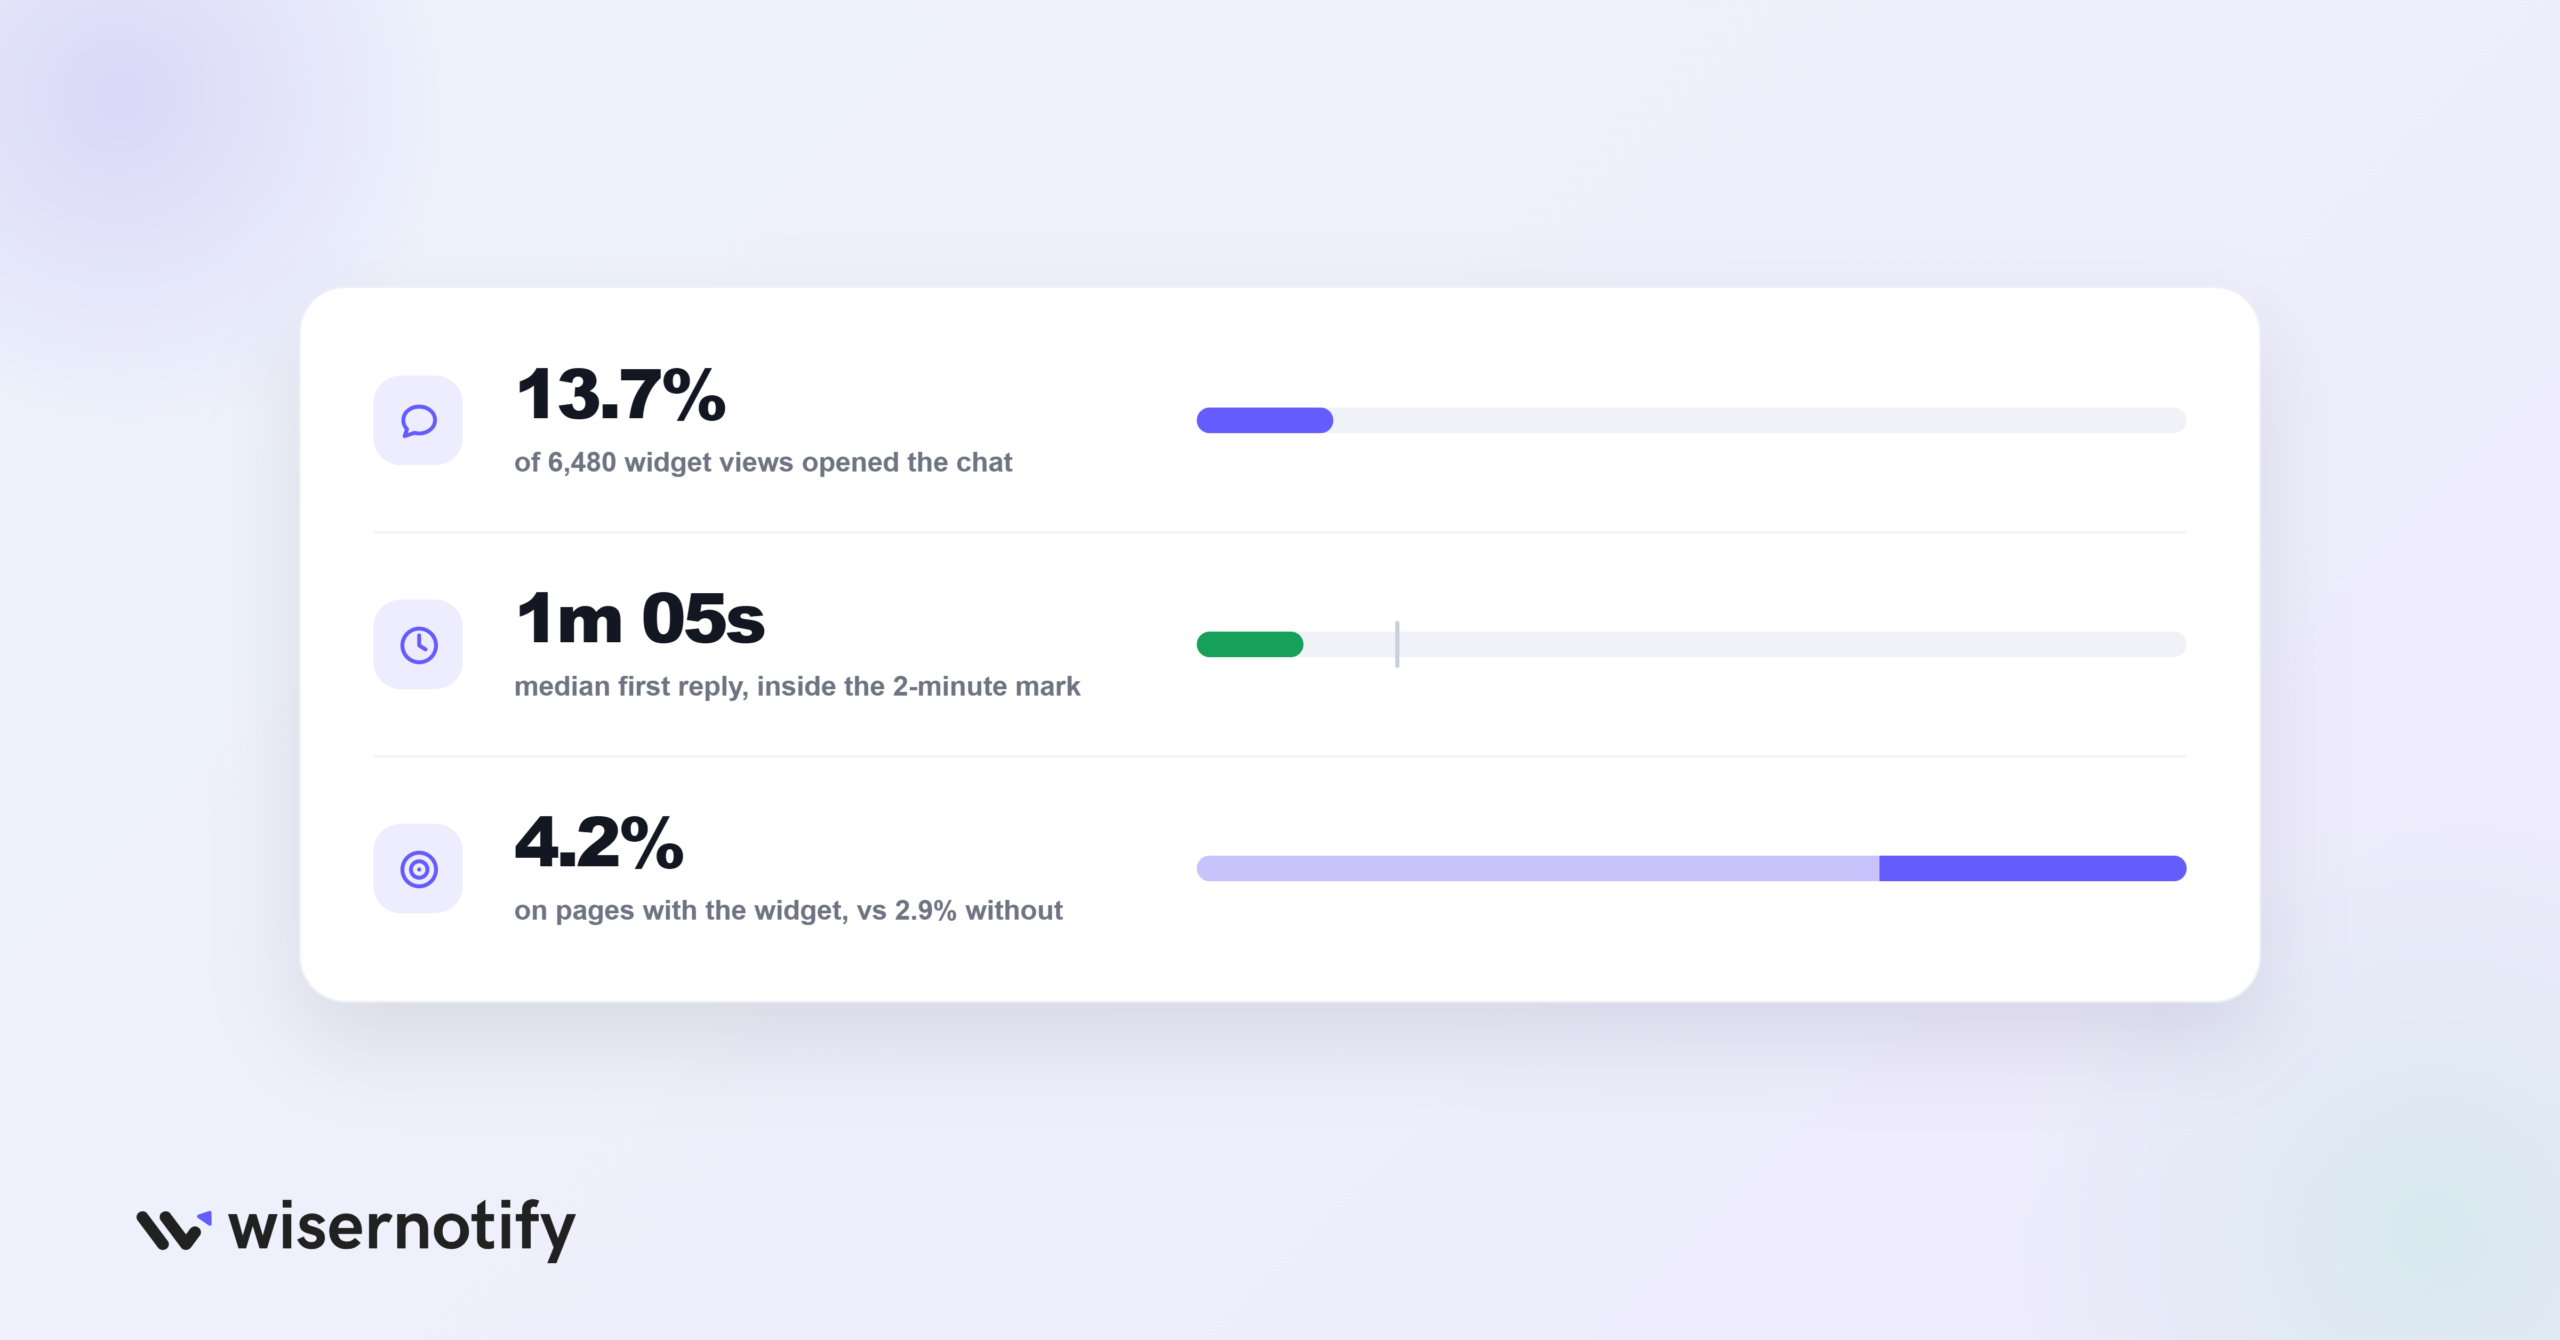
A widget that’s live doesn’t automatically mean people are using it.
- Widget views and clicks: both in your WiserNotify dashboard; together, they show whether people are noticing and opening the chat.
- Response time: a slow reply is one of the fastest ways to lose someone who was ready to enroll.
- Conversion rate on pages with the widget: compare against pages without it over a week or two.
Build trust & FOMO
Highlight real-time activities like reviews, sales & sign-ups.

Conclusion
Adding a WhatsApp chat widget to your Teachable site is a simple step that puts real-time help in front of visitors right when they need it.
Connecting WiserNotify takes a few minutes, and once it’s set up, you can build and manage the widget entirely from the dashboard without touching code.
Use a proper business account, keep it easy to find, and keep an eye on how people are using it.
Related Posts:
Frequently Asked Questions
How can I add a WhatsApp chat widget to my Teachable site?
Install the WiserNotify pixel via Teachable’s Site > Code Snippets > Head Code Snippets, then create a WhatsApp widget from the Call To Actions tab in your WiserNotify dashboard. No custom code needed beyond pasting the pixel once.
Can I use my personal WhatsApp number for the chat widget?
Yes, and it’s recommended. A WhatsApp Business account gives you quick replies, away messages, and a proper business profile that a personal number doesn’t have.
Does the WhatsApp widget work on mobile devices?
Yes, the widget editor lets you set separate animation and position settings for mobile and desktop.
How can I track student interactions on WhatsApp?
Your WiserNotify dashboard shows widget views and clicks. For replies and response times, check WhatsApp Business’s own analytics.
Can I automate responses in the WhatsApp chat widget?
That part is handled in WhatsApp Business itself, not in WiserNotify. Set up quick replies and away messages there so students get an immediate response even outside your hours.

Krunal Vaghasiya is a marketing tech expert who boosts e-commerce conversion rates with automated social proof and FOMO strategies. He loves to keep posting insightful posts on online marketing software, marketing automations, and improving conversion rates.




 Capterra