
How to Add Custom (Manually Entered) Reviews to Your Website
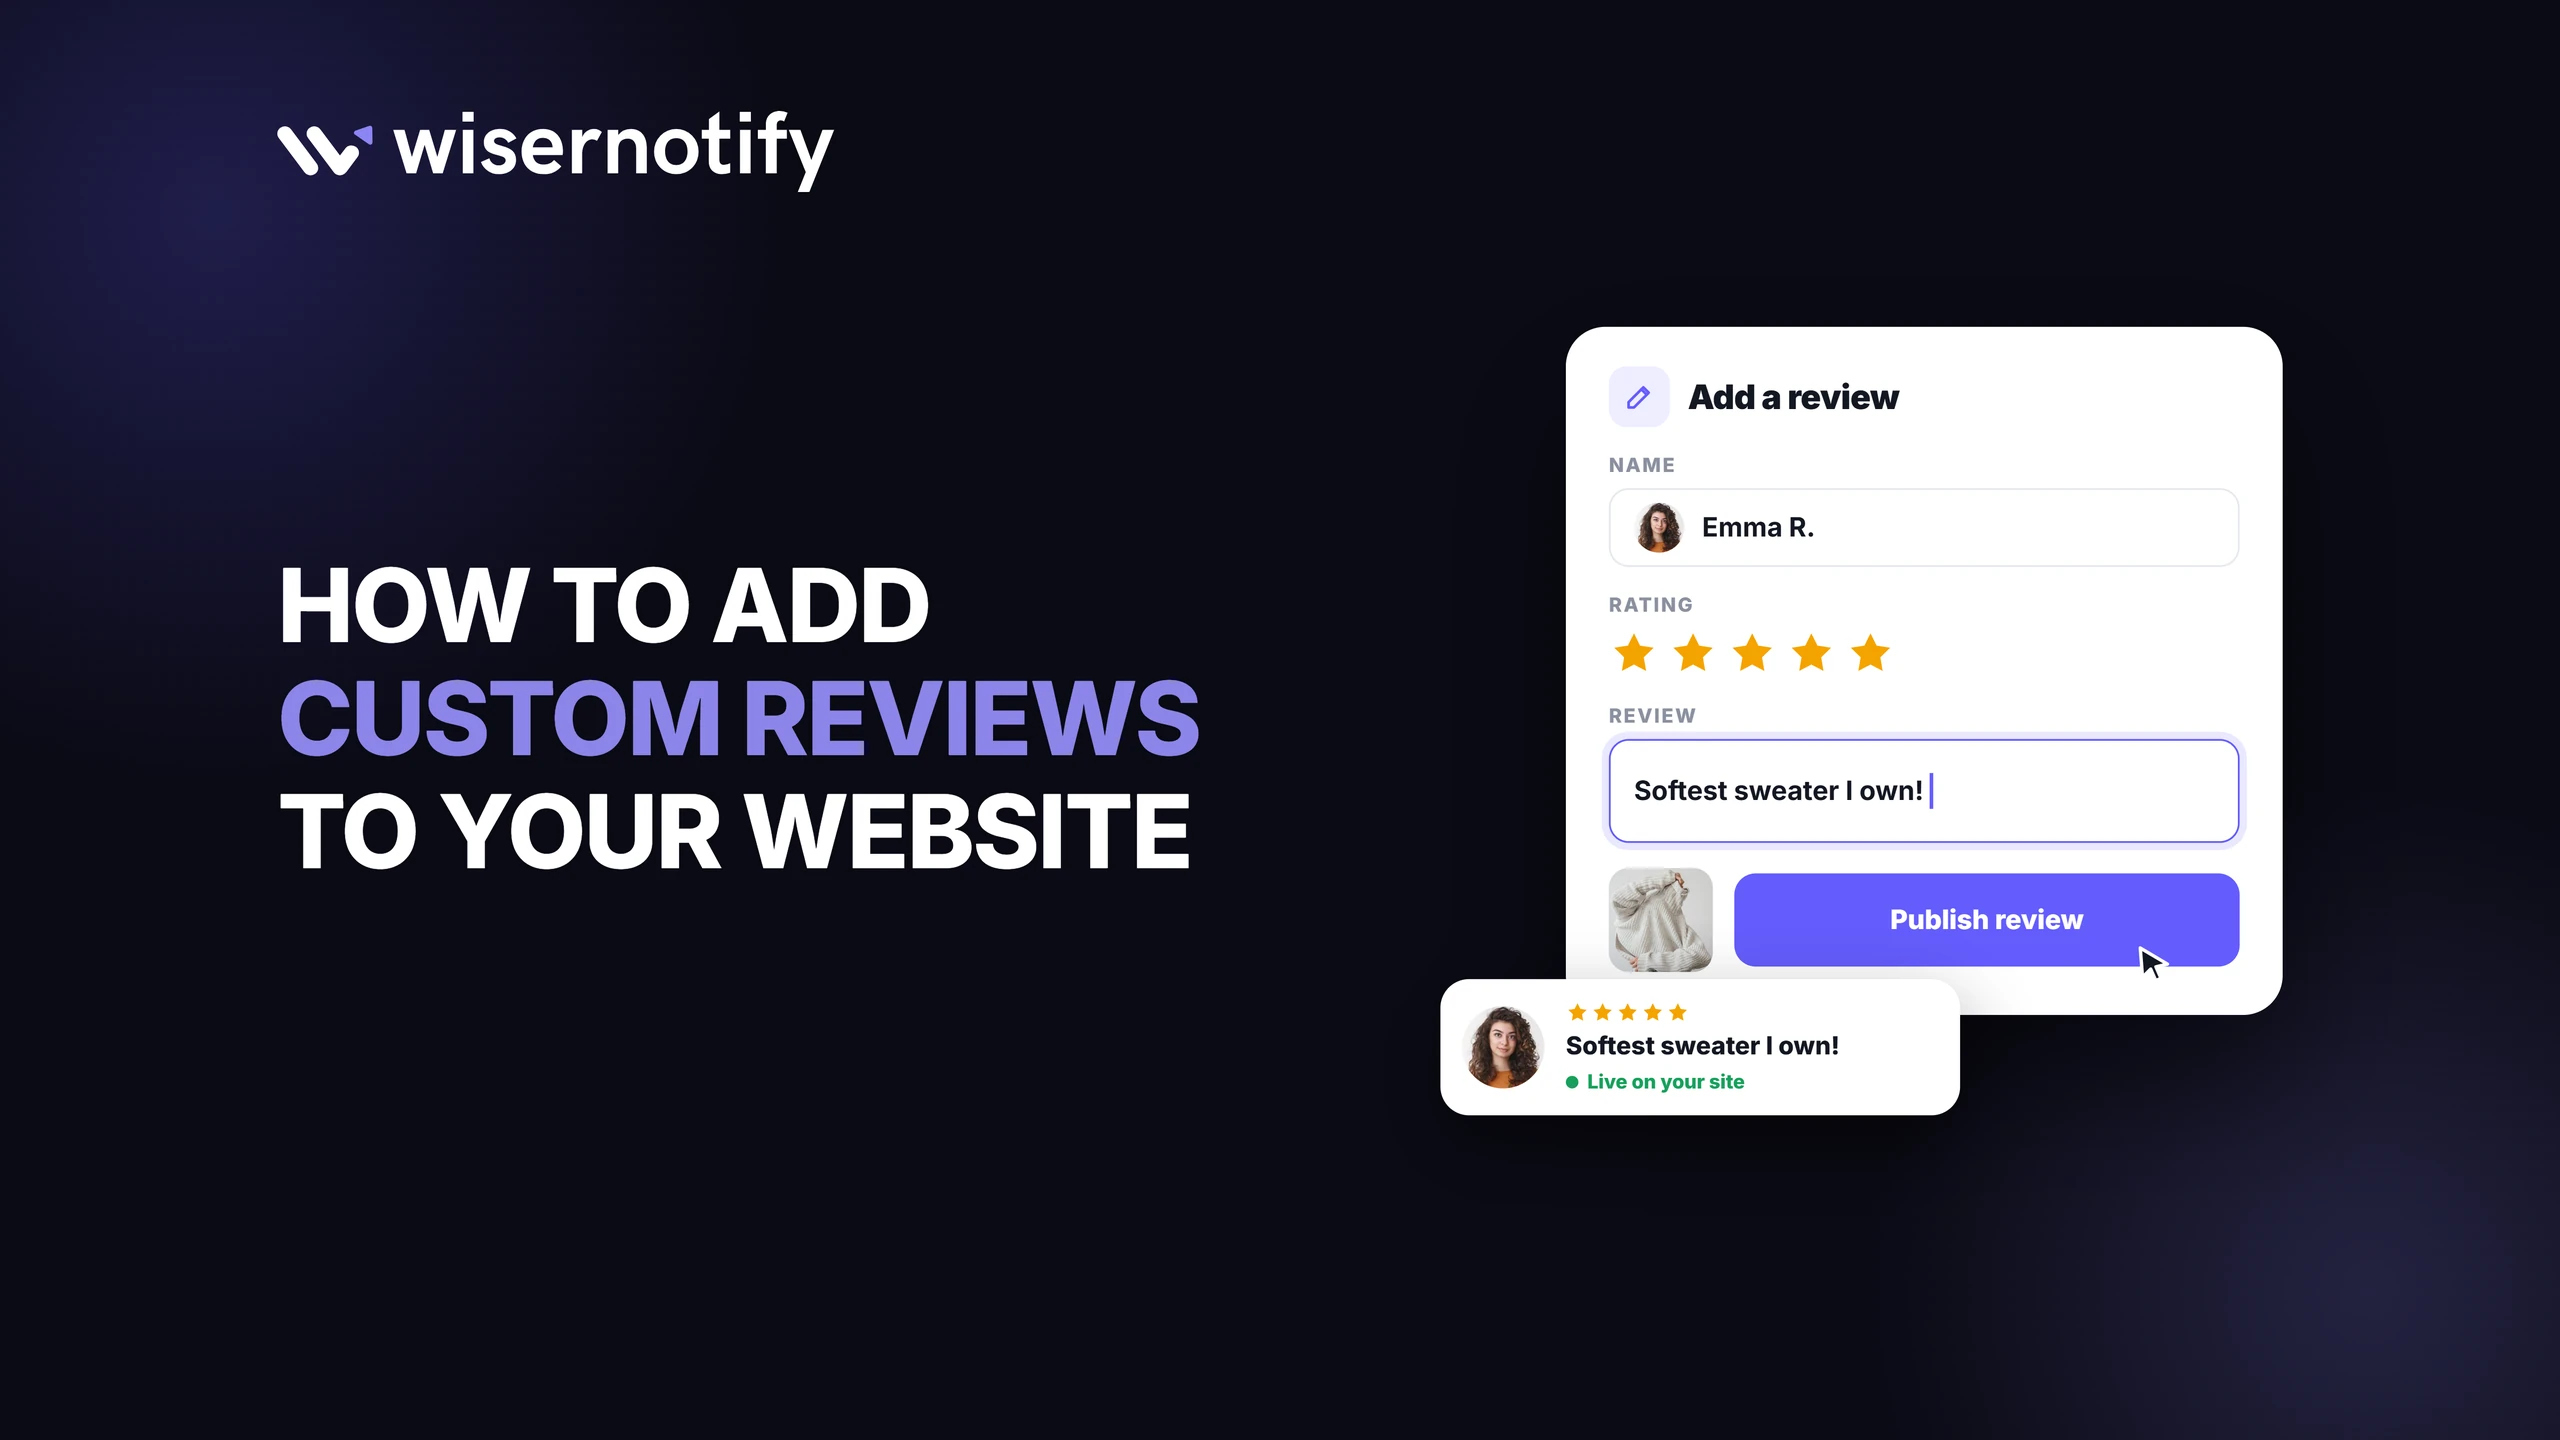
You can show reviews that didn’t come from Google or Facebook by adding them to WiserNotify yourself. Type them in by hand or import a CSV, then show them with a Review Feed widget on your site.
Every step below has its own screenshot, and the last section covers what to check when the reviews don’t show.
There is no free plan, but you can build and test the widget during the 7-day free trial that comes with every plan.
What You Need Before You Start
- A WiserNotify account, which step 1 sets up.
- Your reviews as text, or as a CSV with the reviewer name, rating, review text, and date.
- Access to your site’s <head> section, to paste the WiserNotify pixel.
How to Add Custom Reviews to Your Website
You set up the reviews first, then the widget that shows them.
Step 1: Sign Up for WiserNotify
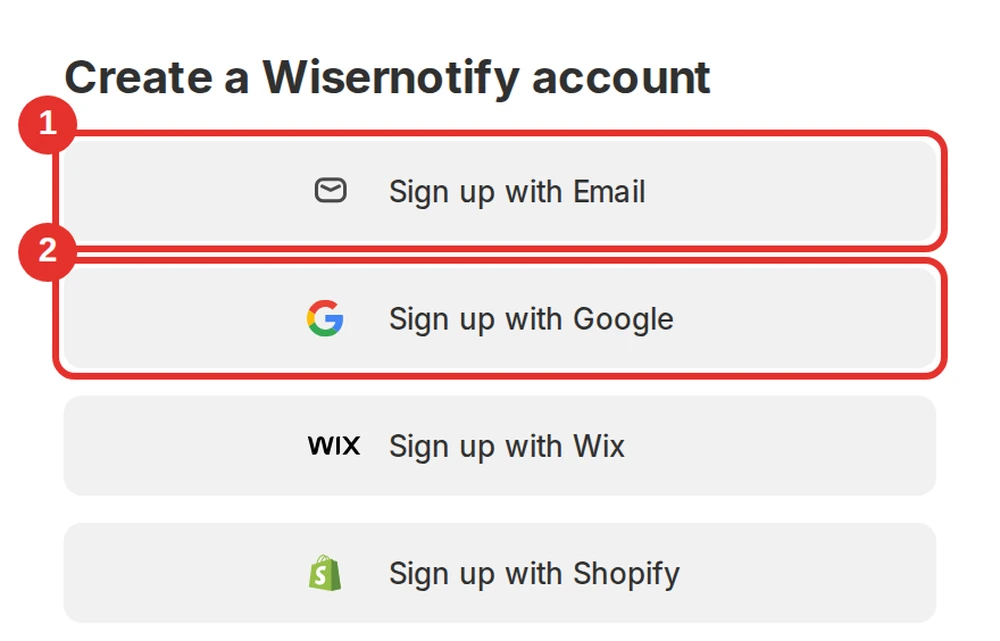
- Open the WiserNotify sign-up page, which starts your 7-day free trial.
- Press Sign up with Email or Sign up with Google and finish the form.
Already have an account? Press Log in and skip to step 2.
Step 2: Install the WiserNotify Pixel

- Open the Install Pixel page and press Copy code.
- Paste it before the closing </head> tag of every page where the reviews should show. Other platforms have their own steps in the pixel install guides.
- Press Verify pixel installation and look for the Pixel Active message.
Step 3: Open Custom Reviews
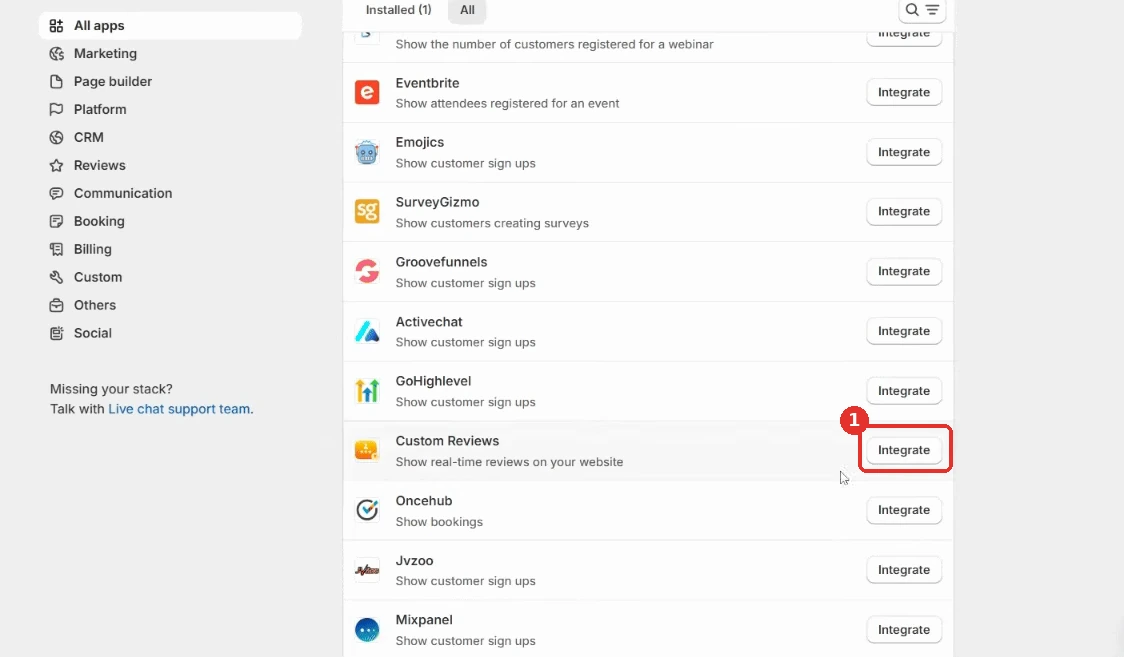
- In WiserNotify, open Integrations.
- Find Custom Reviews in the app list.
- Press Integrate.
Step 4: Create a Connection
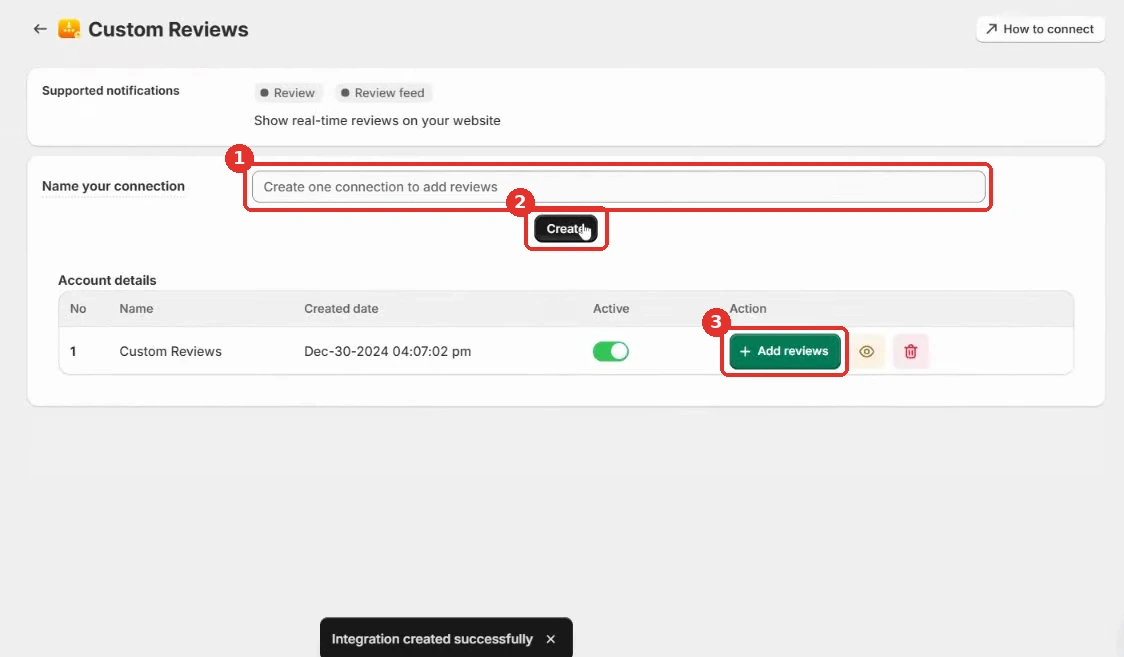
- Type a name in Name your connection, such as Customer stories.
- Press Create.
- Check that your connection appears with its Active toggle on.
Step 5: Add Reviews by Hand
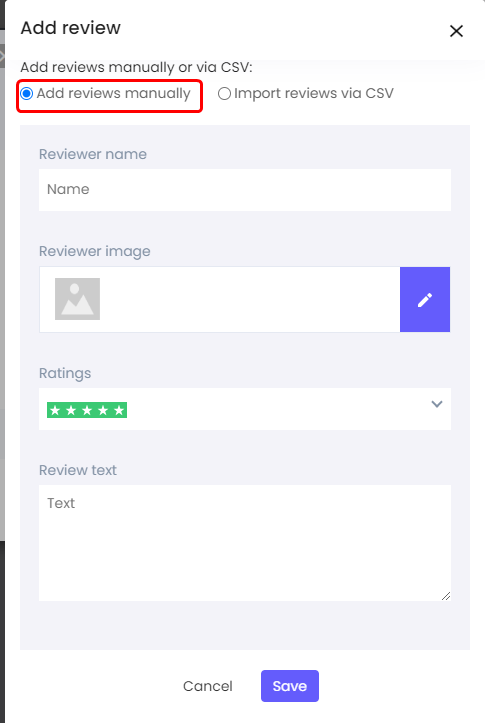
- Press + Add reviews in your connection row.
- Leave Add reviews manually selected.
- Enter the reviewer name, image, rating, and review text, then press Save.
- Repeat for each review. The eye icon shows everything you have added.
Step 6: Import Reviews From a CSV
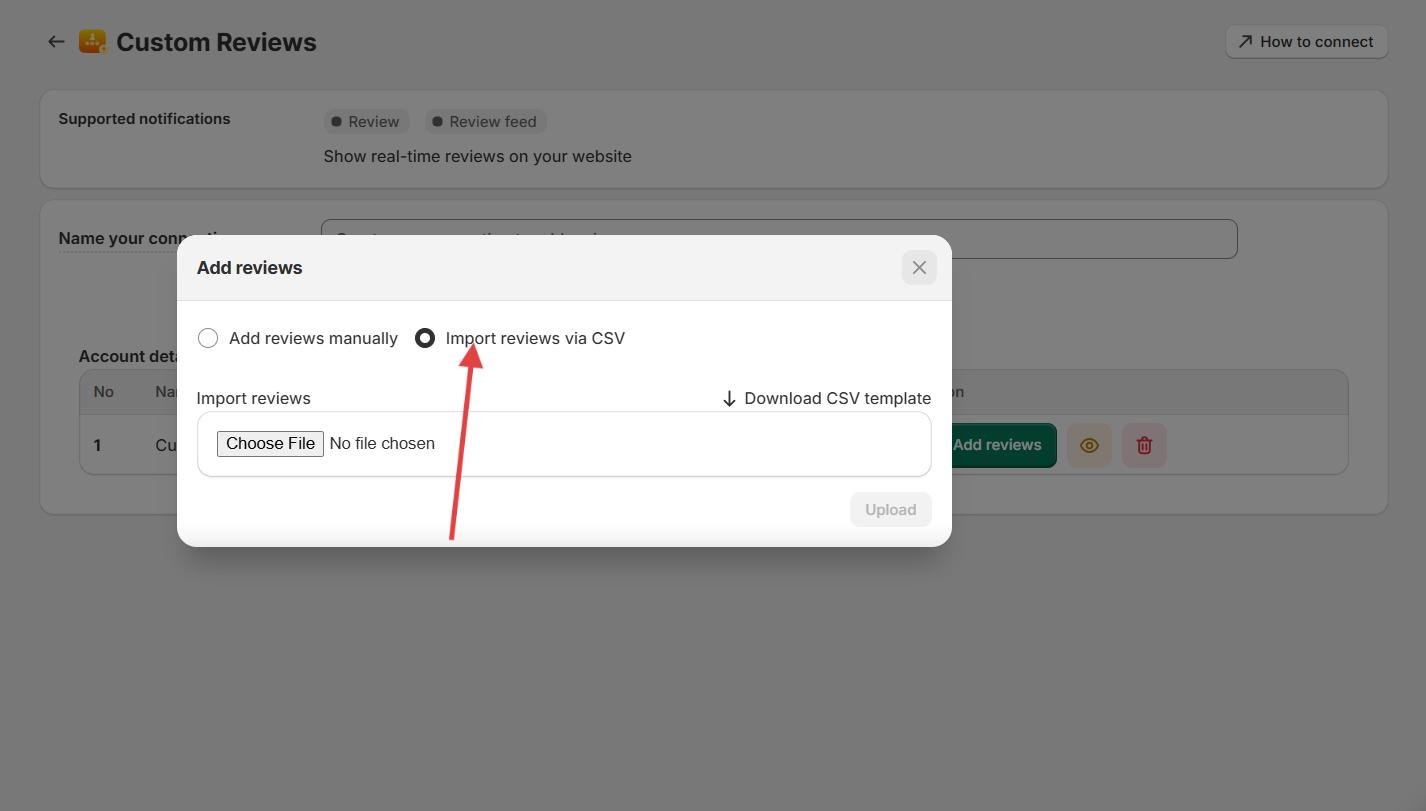
- Press + Add reviews again and choose Import reviews via CSV.
- Press Download CSV template and fill it in. Dates must use the MM-DD-YYYY format.
- Choose your file and press Upload.
Step 7: Save Non-English CSV as UTF-8
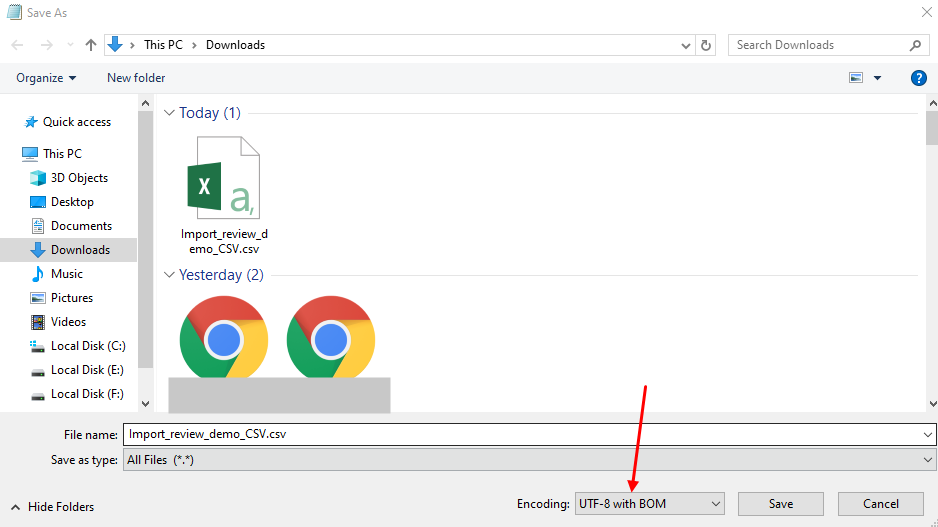
- Right-click the CSV and open it in Notepad.
- Choose Save as and set Save as type to All Files.
- Pick UTF-8 in the Encoding list and save.
- Upload that copy in step 6.
Skip this step if your reviews are in English.
Step 8: Create a Review Feed Widget
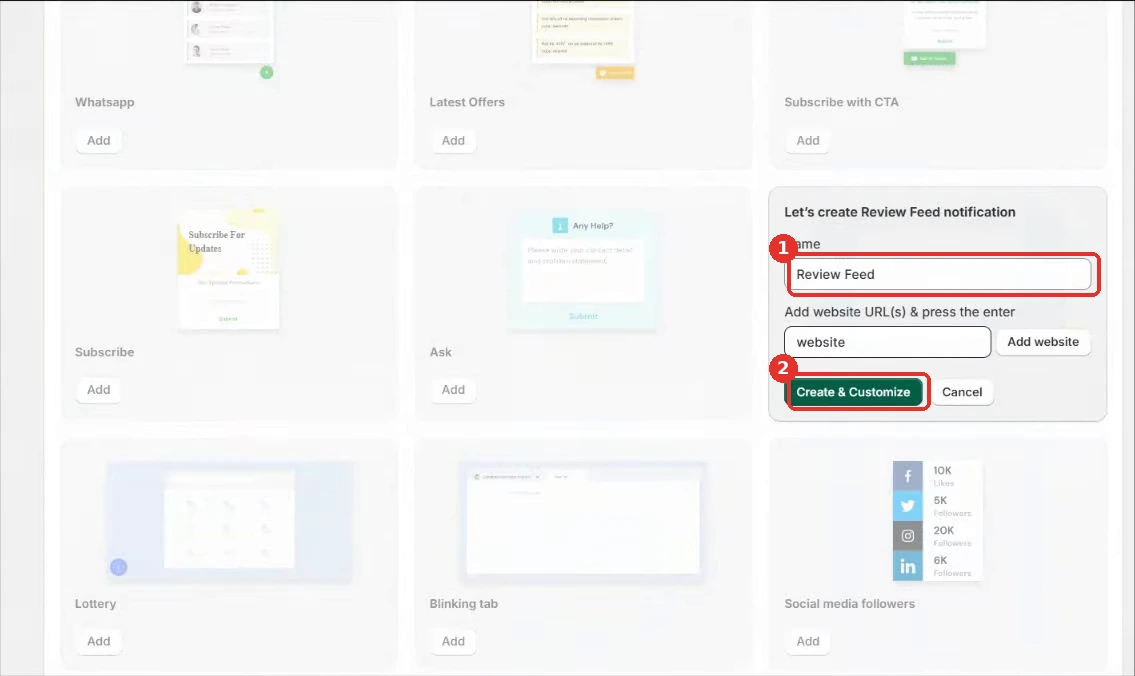
- Open Widgets and press + Add notification.
- Find Review Feed and press Add.
- Name the widget, add your website URL, and press Create & Customize.
Step 9: Design the Widget
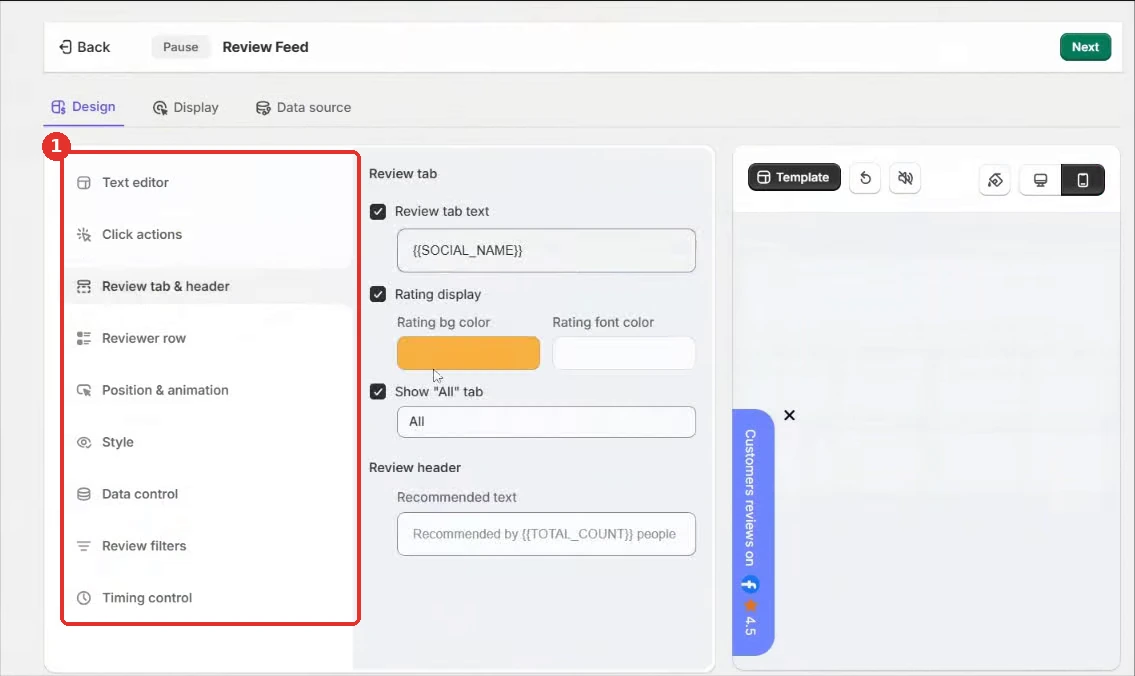
- In the Design tab, open Review tab & header to set the tab text and rating colors.
- Use Review filters to keep only the star ratings you want to show.
- Use Position & animation to pick the corner and the entrance style.
Step 10: Choose Where It Shows
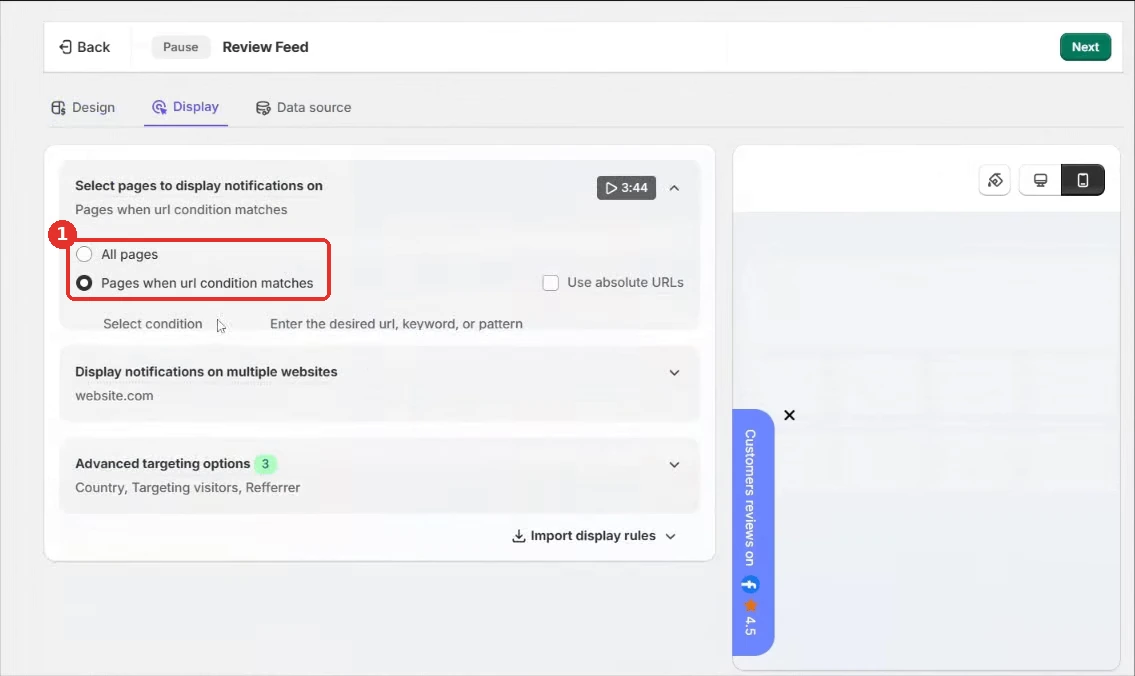
- Press Next to open the Display tab.
- Pick All pages, or pick Pages when URL condition matches and enter the page rule.
- Open Advanced targeting options if you want to target by country, UTM, new or returning visitors, or referrer.
Step 11: Connect Reviews and Publish
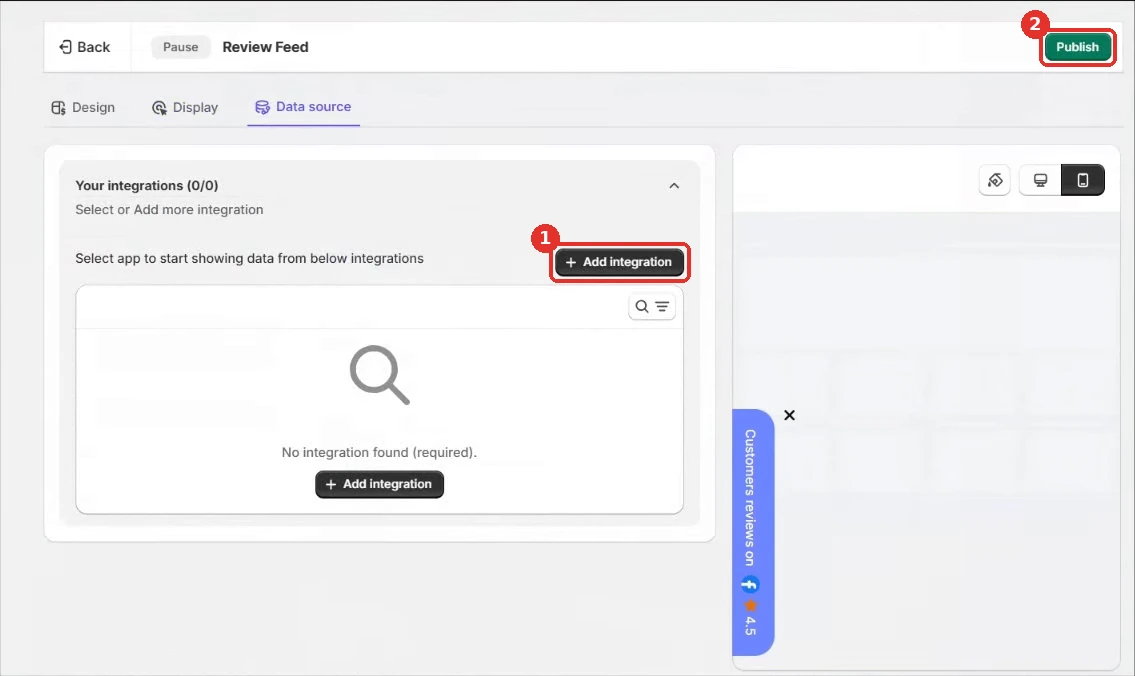
- Press Next to open the Data source tab.
- Press + Add integration, open the Custom category, and choose Custom Reviews.
- Select your connection as the data source.
- Press Save, then Publish.
- Visit your site in a private window.
Prefer popups that show one review at a time? Pick the Review notification under the Customers Reviews tab in step 8. Every other step stays the same.
For more detail, see the guide to adding reviews manually or by CSV and the Review Feed widget guide.
Build trust & FOMO
Highlight real-time activities like reviews, sales & sign-ups.
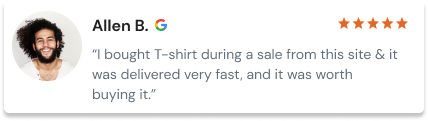

Manual Entry or CSV Import?
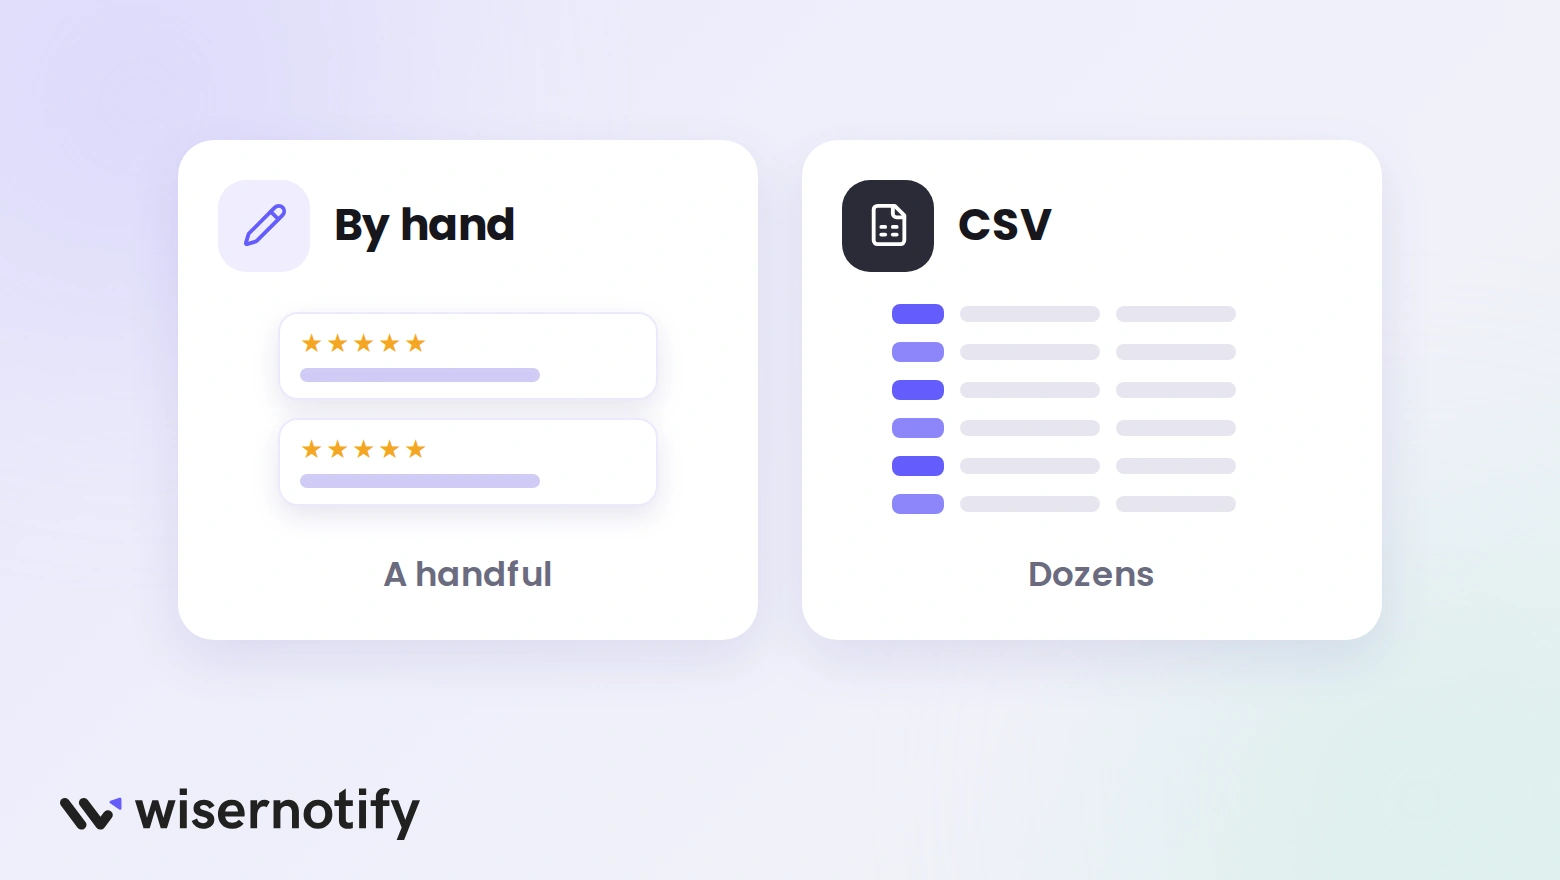
- By hand: best for a handful of reviews, since each one takes a minute.
- CSV: best for dozens of reviews, such as a list exported from an older tool.
When Custom Reviews Make Sense
- Reviews that reached you by email, DM, or phone, so no platform collected them.
- Testimonials from a source WiserNotify has no integration for.
- Reviews from an old system you still want to show.
- Quotes from client case studies.
Only add reviews that real customers gave you, and get their permission to publish them.
Custom Reviews Not Showing on the Site?
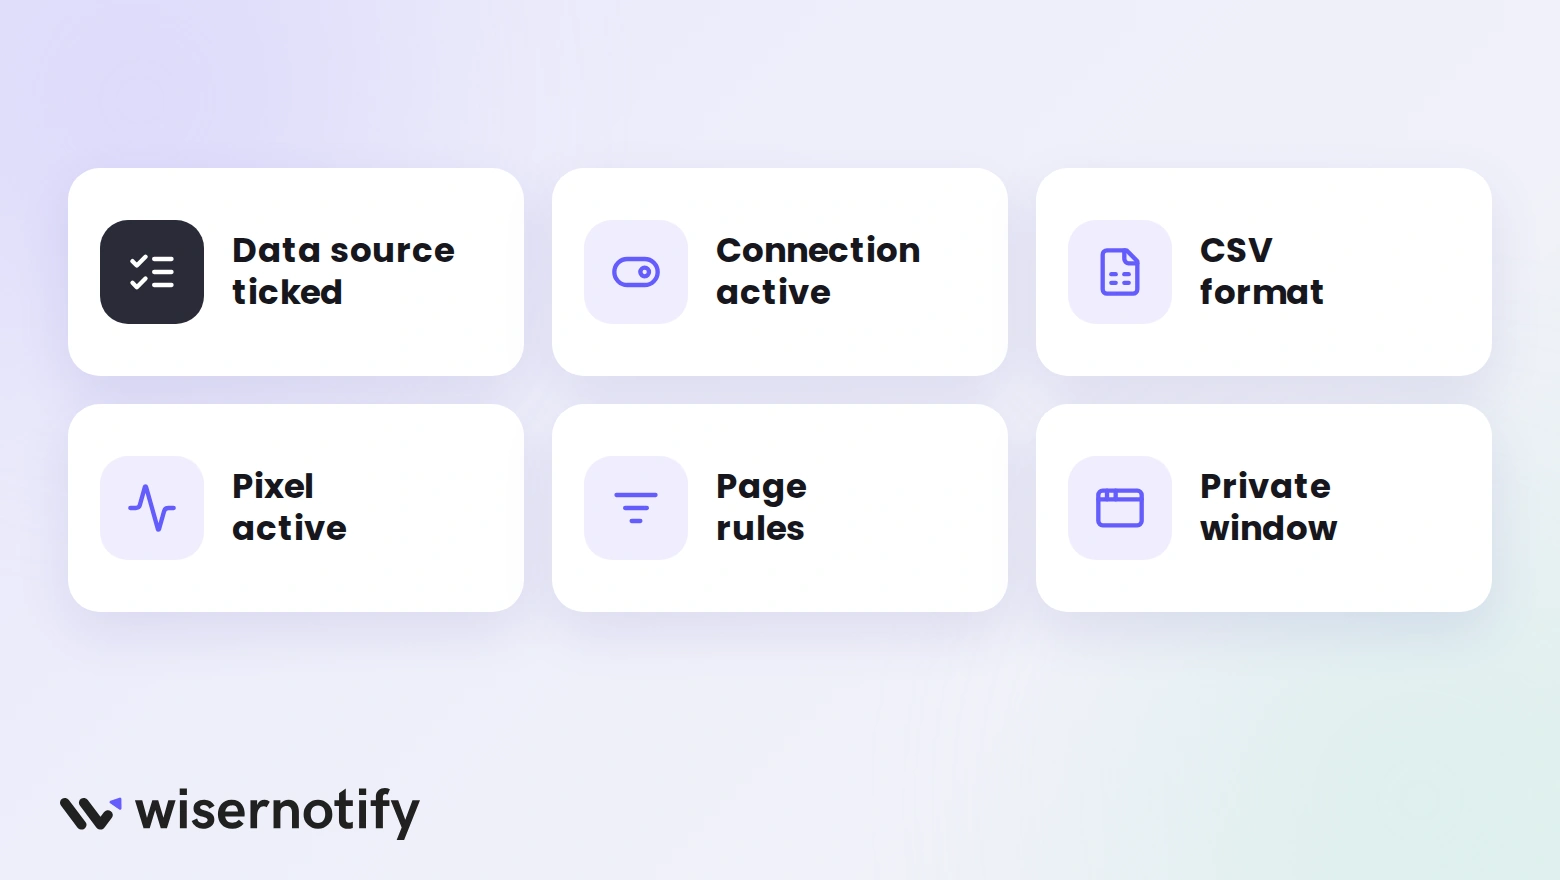
- Nothing ticked: the widget only shows reviews from the connection selected under Data source.
- Connection is off: the Active toggle on your Custom Reviews connection needs to be on.
- CSV rows missing: check the date format and, for non-English text, the UTF-8 encoding.
- No pixel: the pixel must be on the page, and Verify pixel installation should say Pixel Active.
- Page rules: the Display tab may exclude the page you are checking.
- Old page: view the site in a private window, since a cached copy can hide the widget.

Boost Conversion Instantly
Add Social Proof & Urgency to your website
Conclusion
Custom reviews let you show social proof from places no platform tracks. Add them once, select the connection as the data source, and the widget keeps showing them.
Related guides
Frequently Asked Questions
What are custom reviews in WiserNotify?
Reviews you add yourself, either typed in one by one or imported from a CSV file, instead of pulled from a review platform.
Can I import many reviews at once?
Yes. Choose Import reviews via CSV, fill in the template, and upload it. Dates must use the MM-DD-YYYY format.
Do I need to install anything on my site?
Yes. Paste the WiserNotify pixel into your site’s head once, then the widget shows on the pages you pick.
Can I show custom reviews next to Google or Facebook reviews?
Yes. The Data source tab lets you add more than one integration, so custom reviews can sit next to reviews from other sources.
What does each custom review include?
Each review takes a reviewer name, an image, a rating, and the review text.
Is there a free plan?
No, but every plan starts with a 7-day free trial.

Krunal Vaghasiya is a marketing tech expert who boosts e-commerce conversion rates with automated social proof and FOMO strategies. He loves to keep posting insightful posts on online marketing software, marketing automations, and improving conversion rates.




 Capterra