
Countdown timers are a powerful tool to create urgency and motivate visitors to take action. On Thinkific, countdown timers can be used to drive course enrollments, highlight limited-time offers, or promote upcoming webinars.
While Thinkific does not have a built-in countdown timer feature, you can easily integrate one using third-party tools or custom code. This guide will show you how to add a countdown timer to your Thinkific site and share tips to maximize its effectiveness.
When and Where to Use Countdown Timers
Strategically using countdown timers on your Thinkific site can significantly enhance engagement and conversions. Here are some ideal use cases:
Limited-Time Course Offers
- Display timers on course landing pages to promote expiring discounts or bonuses, like “Enroll Now—Offer Ends in 2 Hours!”
Event Webinars
- Use timers to highlight deadlines for webinar registrations with messages like “Register Before It’s Too Late—Only 1 Day Left!”
Seasonal Promotions
- Highlight holiday promotions such as Black Friday or Christmas deals with countdown timers on sales pages.
Course Launch Pages
- Add timers to new course launch pages to build anticipation. A message like “Launching in 5 Days!” can encourage pre-registrations.
Checkout Pages
- Add timers to checkout pages to reduce hesitation with CTAs like “Complete Your Purchase in 10 Minutes to Get This Bonus!”
By placing timers strategically, you can create urgency and boost conversions.
Add Countdown Timer to Thinkific
You can add a countdown timer to Thinkific using:
- Third-Party Tools
- Custom Code (Embedded HTML)
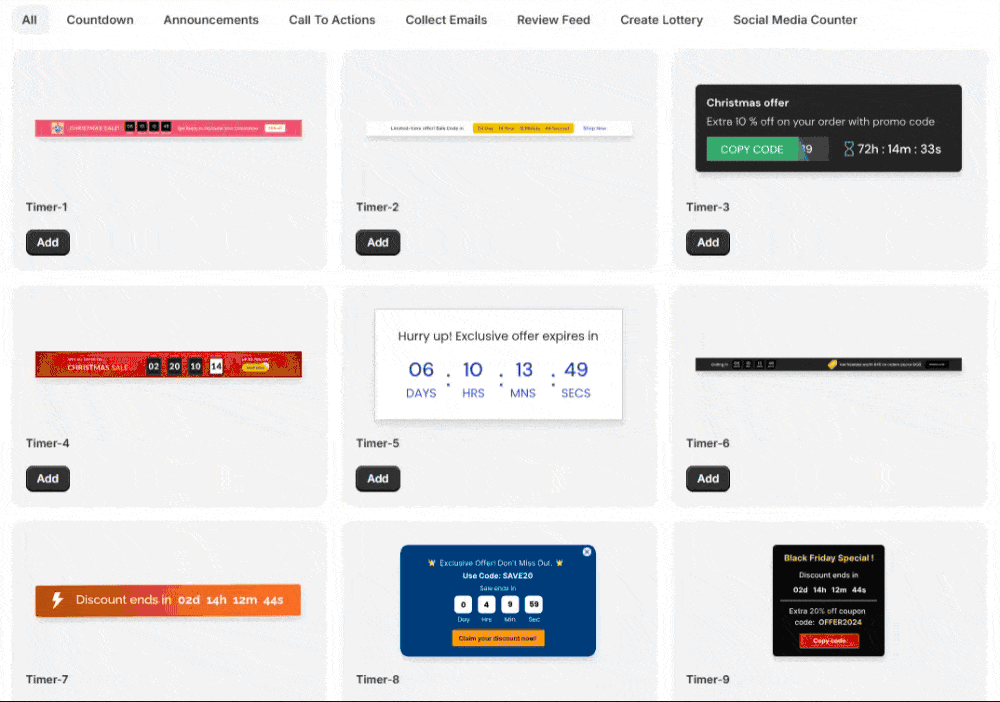
Now that you understand how countdown timers work, let’s look at how to add one to your website or store. It’s simple and takes about 10 to 20 minutes if done properly. Start by creating a WiserNotify account. Click any CTA button on this page. You can begin with the 7-day free trial to test the impact and see if it fits your needs. Once your account is created, go to your WiserNotify dashboard. From there, click on Notifications → Widget → Add Notification. Next, go to the Countdown section. You’ll see several types of countdown timers. Pick the one you like, click Add, and enter a name and the website URL where you want it to appear. Watch this full video tutorial for step-by-step guidance: And this is just the beginning of what WiserNotify can do. Next, go to the Countdown section. You’ll see several types of countdown timers. Other urgency widgets Social proof widgets WiserNotify also gives you advanced analytics to see what’s working and what’s not. Plus, you can use A/B testing to try different widget types and find what performs best. Here’s another full video tutorial if you want to explore more:


How to Add a Countdown Timer to Thinkific
Option 1: Using Third-Party Countdown Timer Tools
- Choose a Countdown Timer Tool:
- Popular tools include Elfsight Countdown Timer, Powr.io, and Countdown Timer Generator.
- Configure the Countdown Timer:
- Set up the timer on the third-party tool’s dashboard by specifying the end date, time, and style.
- Customize the timer’s appearance to match your Thinkific branding.
- Generate Embed Code:
- Once your timer is ready, copy the embed code provided by the tool.
- Embed the Timer in Thinkific:
- Log in to your Thinkific admin panel.
- Navigate to the course or landing page where you want the timer.
- Click Edit Page and add a Custom HTML Block.
- Paste the embed code into the block.
- Preview and Publish:
- Save your changes and preview the page to ensure the timer displays and functions correctly.
- Publish the page to make the timer live.
Common Mistakes to Avoid
- Undefined Campaigns: Ensure every timer is tied to a clear promotion or event to avoid confusing visitors.
- Expired Timers: Remove or update timers promptly when the campaign ends to maintain credibility.
- Overusing Timers: Limit timers to one per page for better clarity and focus.
- Poor Placement: Position timers in high-visibility areas like headers, banners, or above CTAs for maximum impact.
- Neglecting Responsiveness: Test timers on all devices to ensure they display correctly.
Conclusion
Adding a countdown timer to your Thinkific site is a simple yet effective way to boost urgency, engagement, and conversions. Whether using third-party tools or custom code, countdown timers can make your promotions more impactful and encourage quick action.
Follow this guide to seamlessly integrate timers into your Thinkific pages and enhance your course marketing strategies. Start using countdown timers today to elevate your Thinkific success!
