Table of Contents
Countdown Timer to Oxygen Builder

Easy Ways to Add Countdown Timer to Oxygen Builder

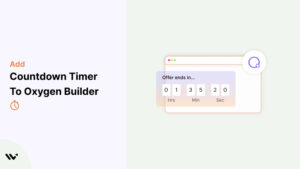
Countdown timers are a fantastic way to create urgency and motivate visitors to take quick action. Whether you’re running a flash sale, promoting an event, or launching a new product, countdown timers can drive conversions effectively.

Oxygen Builder, with its highly customizable design capabilities, allows you to add countdown timers using built-in elements, third-party plugins, or custom code. This guide will show you how to integrate countdown timers into your Oxygen Builder site and share tips for optimizing their impact.

When and Where to Use Countdown Timers

Strategically placing countdown timers on your Oxygen Builder site can significantly boost engagement. Here are some ideal scenarios and placements:

Limited-Time Promotions

  • Highlight expiring offers with timers like, “Sale Ends in 2 Hours!” on your homepage or product pages.

Event Registration Pages

  • Add timers to webinar or event landing pages to emphasize deadlines. For example, “Register Now! Event Starts in 1 Day!”

Product Launch Pages

  • Use timers on product launch pages to build excitement. A countdown like “Launching in 5 Days!” attracts early interest and sign-ups.

Seasonal Campaigns

  • Include timers in headers or pop-ups for holiday promotions such as Black Friday or Cyber Monday sales.

Checkout Pages

  • Add timers to the checkout page to encourage faster decision-making, such as, “Complete Your Order in 10 Minutes to Save 20%!”

By placing timers strategically, you can effectively enhance urgency and drive user action.

Add Countdown Timer to Oxygen Builder

Oxygen Builder offers the flexibility to add countdown timers using:

  1. Third-Party Plugins
  2. Custom Code

WiserNotify simplifies the process by providing an intuitive platform for effortlessly creating, designing, and displaying countdown timers. Whether you’re promoting a sale, launching a product, or hosting an event, adding a countdown timer with WiserNotify takes just a few minutes and can significantly enhance your website’s performance.

WiserNotify provides a range of features and tools that make adding and managing countdown timers on your website simple and effective.

Features Offered by WiserNotify Countdown Timers

  • Easy Integration
    WiserNotify integrates seamlessly with your (builder), allowing you to install the timer quickly with minimal effort.
  • Customizable Templates
    Choose from pre-designed countdown timer templates that suit different campaign needs, such as flash sales, product launches, and event promotions.
  • Drag-and-Drop Editor
    Use an intuitive drag-and-drop editor to customize your countdown timer’s design, including colors, fonts, and messaging, to match your brand’s aesthetic.
  • Real-Time Timer Updates
    The timers are dynamic and updated in real time, ensuring accuracy and maintaining the urgency needed to drive conversions.
  • Flexible Display Rules
    Show your countdown timer on specific pages, to certain audiences, or based on user behavior, such as time spent on a page or exit intent.
  • Advanced Scheduling
    Set start and end times for your timer campaigns to automate when they appear and disappear.
  • A/B Testing
    Test different versions of your countdown timer to identify which design, messaging, or placement drives the best results. Optimize your strategy based on data-backed insights.
  • Analytics and Insights
    Track the performance of your countdown timer with real-time analytics, including impressions, clicks, and conversions, to measure its impact on your website.
  • Mobile-Optimized Design
    Countdown timers are fully responsive and look great on all devices, ensuring an excellent user experience for both desktop and mobile users.
  • Custom Call-to-Actions (CTAs)
    Include compelling CTAs with your countdown timer, like “Shop Now” or “Register Before Time Runs Out,” to drive immediate action.

Using WiserNotify for your website countdown timers saves time and ensures your campaigns are effective and professionally executed. Its advanced features and easy-to-use tools make it an excellent choice for businesses looking to drive urgency and increase conversions.

Start by signing up for a free plan to explore its features. Log in to your dashboard, add your site, and generate a unique pixel code for seamless integration.

Below are simple steps for setting up a countdown timer.

1. Create a Countdown Timer

  • Log in to the WiserNotify dashboard.
  • Navigate to the Create Notification section and select the Countdown Timer widget.

Customize the design by:


  • Adding a compelling message like “Hurry! Offer Ends in:” or “Limited Time Remaining.”
  • Setting the end date and time for your campaign.
  • Choosing the appropriate font, colors, and background to match your website branding.
  • Including a clear Call-to-Action (CTA) button, such as “Shop Now” or “Register Now.”
  • Preview the design to ensure it looks engaging and aligns with your brand.
  • Save the timer widget and press Next.

2. Set Display Rules

  • Configure where the timer will appear:
  • Display the countdown timer on specific pages, such as the homepage, product pages, or checkout pages.
  • Target specific users based on their behavior (e.g., time spent on the page or scroll percentage).
  • Schedule the timer:
  • Set the start and end times for your campaign.
  • This ensures the timer is visible only during the relevant time frame.

3. Preview and Activate

  • Preview the countdown timer to verify its design and functionality.
  • Make any necessary adjustments based on the preview.
  • Publish the widget to make it live on your website.

Watch the video below to see exactly how to add a countdown timer to your website, with detailed steps for each part of the process.

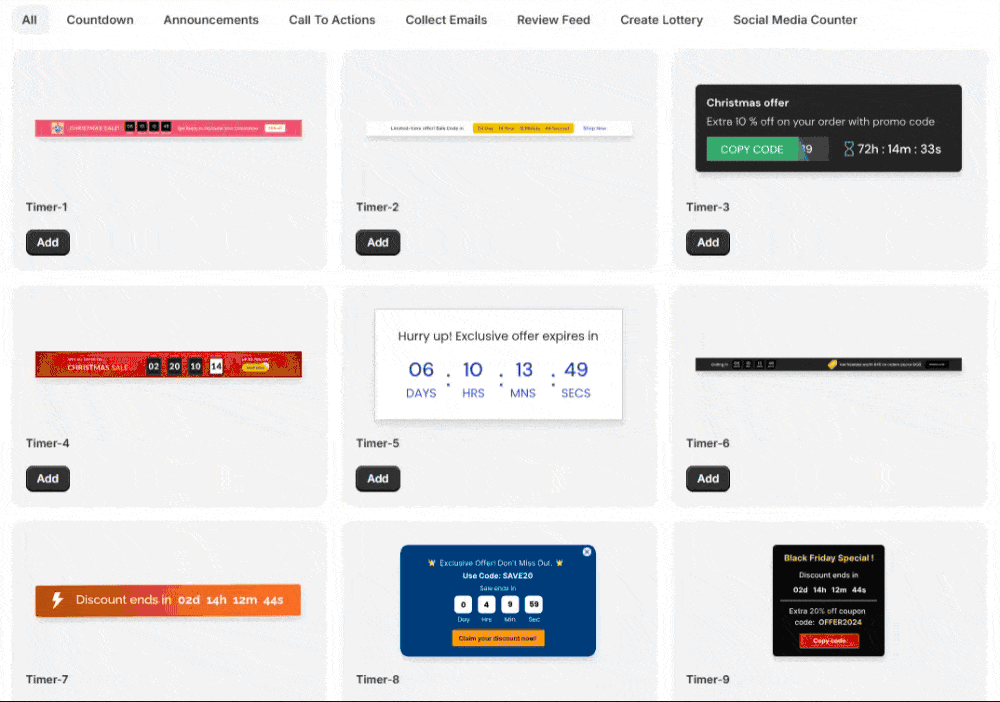
How to Add a Countdown Timer to Oxygen Builder

  1. Install a Countdown Timer Plugin:
    • Go to Plugins > Add New in your WordPress dashboard.
    • Search for plugins like Countdown Timer Ultimate, HurryTimer, or Evergreen Countdown Timer.
    • Install and activate your chosen plugin.
  2. Create a Countdown Timer:
    • Access the plugin’s settings from your WordPress dashboard.
    • Configure the timer with the target date, time, and styling options.
  3. Add the Timer to Oxygen Builder:
    • Copy the shortcode generated by the plugin.
    • Open your Oxygen Builder editor.
    • Add a Shortcode Element where you want the countdown timer to appear.
    • Paste the shortcode into the element and save your changes.
  4. Preview and Publish:
    • Preview your page to ensure the timer displays correctly.
    • Publish your changes to make the timer live.

Common Mistakes to Avoid

  • Undefined Goals: Ensure timers are tied to specific campaigns or events to avoid confusing visitors.
  • Expired Timers: Remove or update expired timers promptly to maintain credibility.
  • Poor Placement: Position timers in high-visibility areas like headers, banners, or above the fold for maximum impact.
  • Overuse of Timers: Avoid placing multiple timers on the same page to prevent overwhelming users.
  • Neglecting Responsiveness: Test timers on all devices to ensure proper display and functionality.

Conclusion

Adding a countdown timer to your Oxygen Builder site is a simple yet powerful way to boost urgency and engagement. Whether using third-party plugins or custom code, you can integrate timers that align with your branding and campaigns.

Follow the steps in this guide to seamlessly add countdown timers to your site and maximize their impact. Start using countdown timers today to elevate your site’s performance and drive better results!

FAQ's

No, Oxygen Builder doesn’t include a native countdown timer, but you can add one using plugins or custom code.

Popular options include Countdown Timer Ultimate, HurryTimer, and Evergreen Countdown Timer.

Yes, both plugin-generated and custom-coded timers can be styled using CSS or Oxygen’s built-in tools.

Position timers in high-visibility areas such as banners, headers, or near CTAs for maximum impact.


Use WordPress analytics plugins or external tools like Google Analytics to monitor impressions, clicks, and conversions.

Picture of Krunal Vaghasiya
Krunal Vaghasiya
Krunal Vaghasiya is a marketing tech expert who boosts e-commerce conversion rates with automated social proof and FOMO strategies. He loves to keep posting insightful posts on online marketing software, marketing automations, and improving conversion rates.
Wisernotify
Struggling with low conversions?
Use Social Proof & FOMO
Social Media icon