Browse categories
Creating Blinking Tab Widget
2 min read
If you want to add an interactive Blinking Tab widget-type notification to your website, WiserNotify makes it easy to set up and customize widget notifications to enhance engagement and drive action.
Follow this step-by-step guide to design, configure, and publish your widget-type notification.
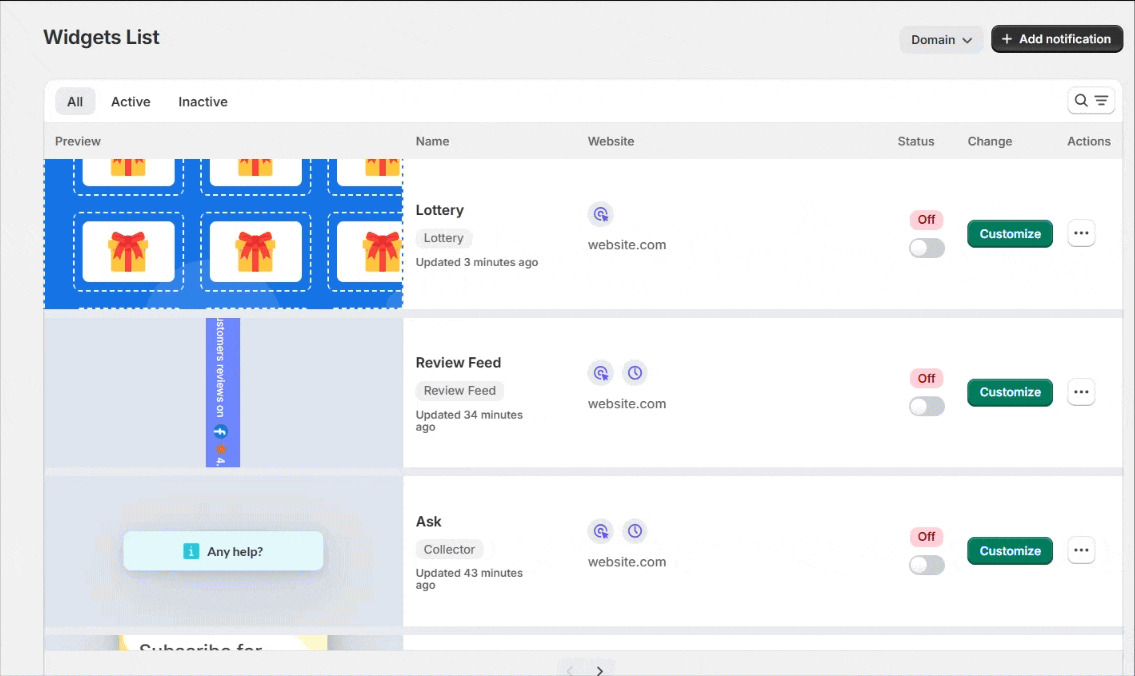
Step 1: Create a Widget-Type Notification
- Log in to your WiserNotify dashboard.
- Navigate to the Social Proof section and select Blinking Tab from the widget options.
- Click the “Add” button under the Blinking Tab widget to begin
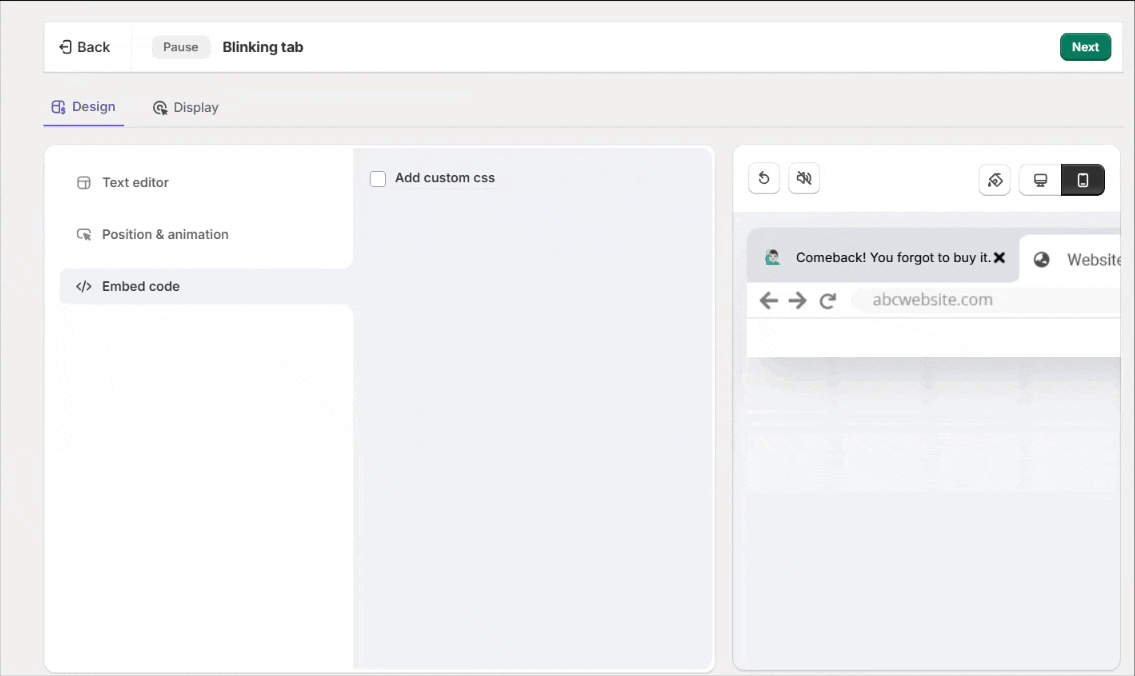
Step 2: Customize Your Notification
In the Design Section, customize the notification to align with your brand and preferences:
- Text Editor:
- Modify the text that appears in the blinking browser tab. For example, you can set attention-grabbing phrases like:
- “Come Back!”
- “Don’t Miss Out!”
- It allows you to personalize the blinking message to re-engage users who have switched to another browser tab.
- Modify the text that appears in the blinking browser tab. For example, you can set attention-grabbing phrases like:
- Position & Animation:
- Customize how the tab notification behaves:
- Control the blinking effect (e.g., speed and duration).
- Choose animations or styles for the tab title text to make it visually noticeable.
- Customize how the tab notification behaves:
- Embed Code:
- Use custom HTML, CSS, or JavaScript code to add advanced functionality or further customize the blinking tab behavior.
Here, you can all options in the designs section in detail.
Step 3: Configure Display Settings & Publish
Under the Display Section, define where and how your notification will appear:
- Select Pages: Choose specific pages or display notifications across all pages.
- Multiple Websites: Configure settings for notifications on multiple domains.
Here, you can all options in the display section in detail.
Click “Save” and then “Publish” your notification.
Now, Visit your site.
Still stuck? A human will do it with you
Live chat from your dashboard — real answers in minutes, every day of the year.