This guide will walk you through:
- Displaying Notifications: Add the WiserNotify pixel code to your Wishpond pages.
- Capturing Leads & Sales: Connect Wishpond with WiserNotify using a webhook to fetch real-time lead and sales data.
Install WiserNotify Pixel Code to Wishpond pages
Step 1: Get your wisernotify pixel code
- Log in to your WiserNotify account.
- Navigate to the Install Pixel page.
- Copy your Pixel Code.

Step 2: Add the Pixel Code to Wishpond
Login with Wishpond,
- Edit your campaign.
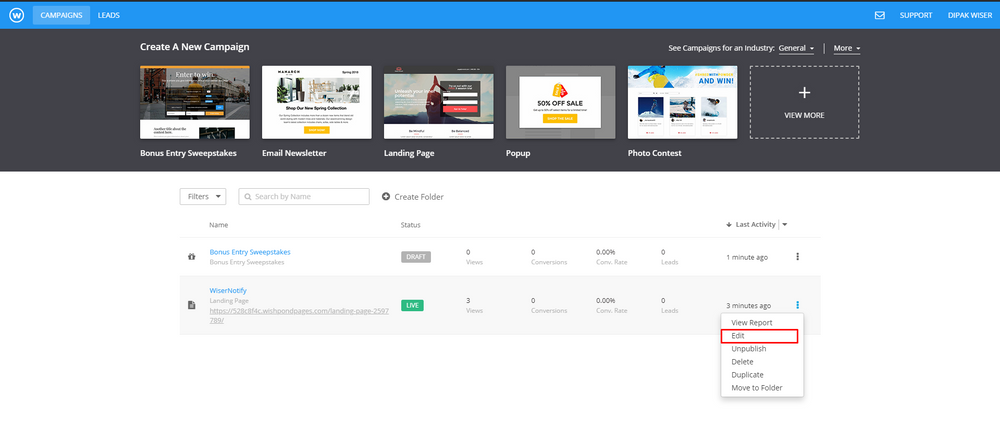
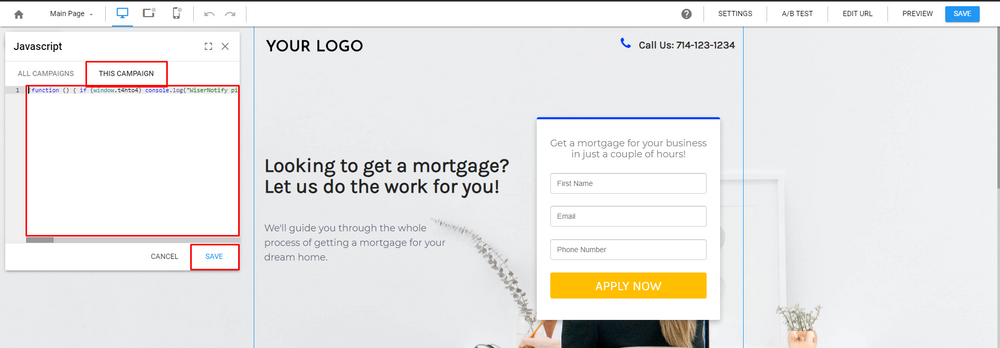
- Click on Settings > CSS and Javascript > Javascript.

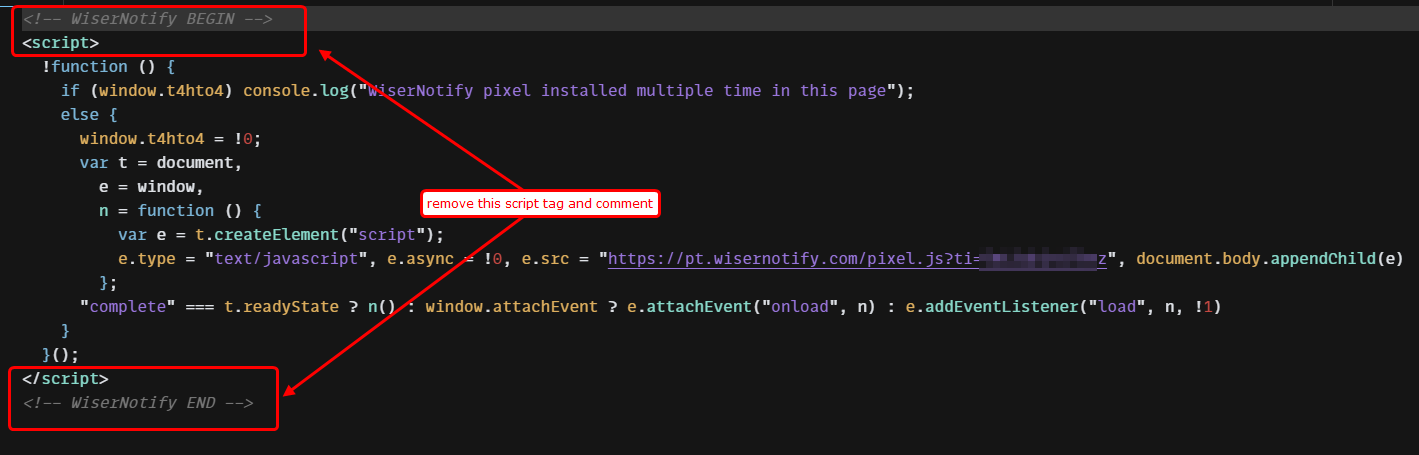
- Paste copied WiserNotify Pixel tracking code.
- Remove comment and <script>…</script> in pixel code
- Click on Savthe e button.
Step 3: Verify Installation
- Go back to your Wisernotify pixel page.
- Click on verify pixel installation to check if the pixel is active.
- If installed correctly, you will see a “Pixel Active” successfully message.
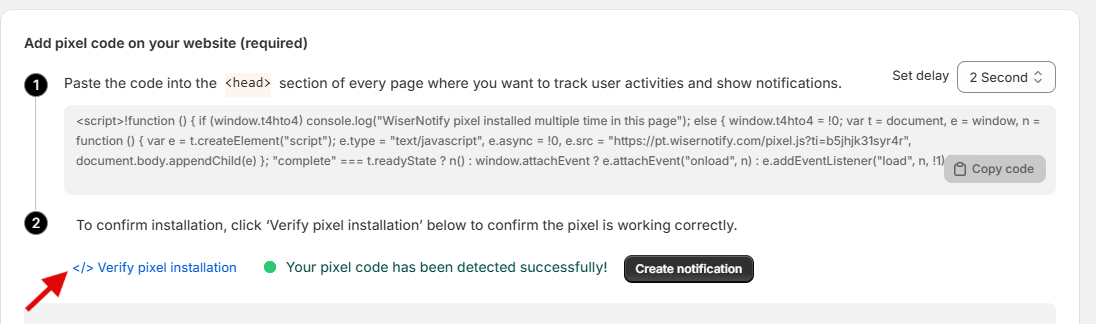
Note: This pixel script tag is required on every page wherever you want to track visitor activities, capture form submit events & display notifications.
Done,
Add API Key to Connect Wishpond to pull the events sales data
Step 1: Get the API Key from Wishpond
Login with Wishpond.
2. Click profile name > API keys.
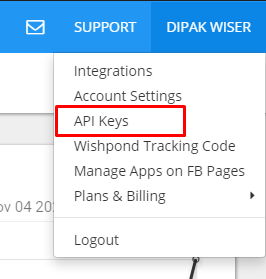
3. Copy the API key.

Step 2: Configure API Key in WiserNotify
- Go to WiserNotify > Wishpond Integration.
- Click on the Integrate button inside the Integration box.
1. Enter Connection Name
2. Paste into the API Key field in the WiserNotify Wishpond popup.
3. Click on the Create button.
The last 30 entries from the API key will be fetched automatically once you provide the correct details. This enables you to start displaying the existing old data in the notifications.