If you’re using WP Fluent Forms, you can easily install WiserNotify by adding the tracking code to your site’s <head> section. Follow these steps:
Step 1: Copy the WiserNotify Pixel Code
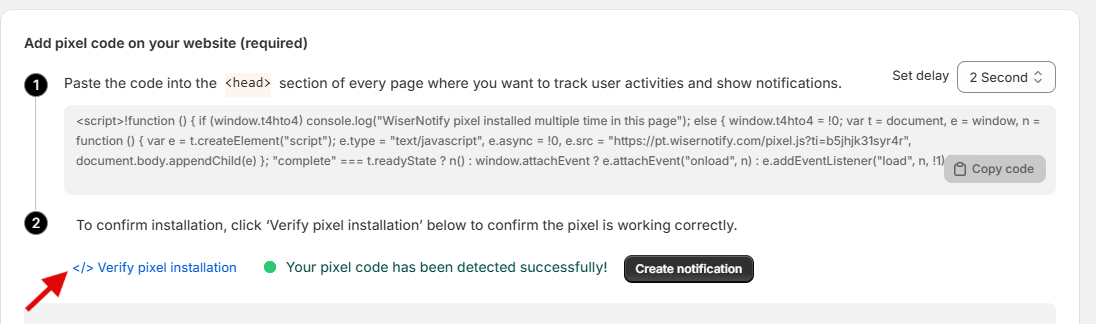
- Go to Install Pixel page
- Click Copy Code to copy your script.

Step 2: Add the Pixel Code to WP Fluent Forms
Login with WordPress,
1. Navigate to Fluent Forms > All Forms.
2. Click on Settings in your Form.

3. Click on Custom CSS/JS.
4. Paste WiserNotify Pixel code into Custom Javascript box.
Please remove below text from the script.
i) </p><p><br></p><p>ii)

5. Click on Save CSS and JS

Now, visit your site & reload or refresh it.
Step 3: Verify Installation
- Go back to your Wisernotify pixel page.
- Click on verify pixel installation to check if the pixel is active.
- If installed correctly, you will see a “Pixel Active” successfully message.
Note: This pixel script tag is required on every page wherever you want to track visitor activities, capture form submit events & display notifications.
After that, return to the WiserNotify panel & recheck the install pixel page & Wait for 5 seconds; it should show pixel detected popup. If not, then click on the verify my pixel button. It should display if installed correctly.