This guide will walk you through:
Capturing Sales Activities: Connect Invoiced with WiserNotify using a webhook to fetch real-time invoice creation and Sales data.
Add Webhook Integration to Connect Invoiced to pull the events sales & lead data
Step 1: Get the Webhook URL from WiserNotify
- Go to WiserNotify > Invoiced Integration.
- Click on the Integrate button inside the Integration box.

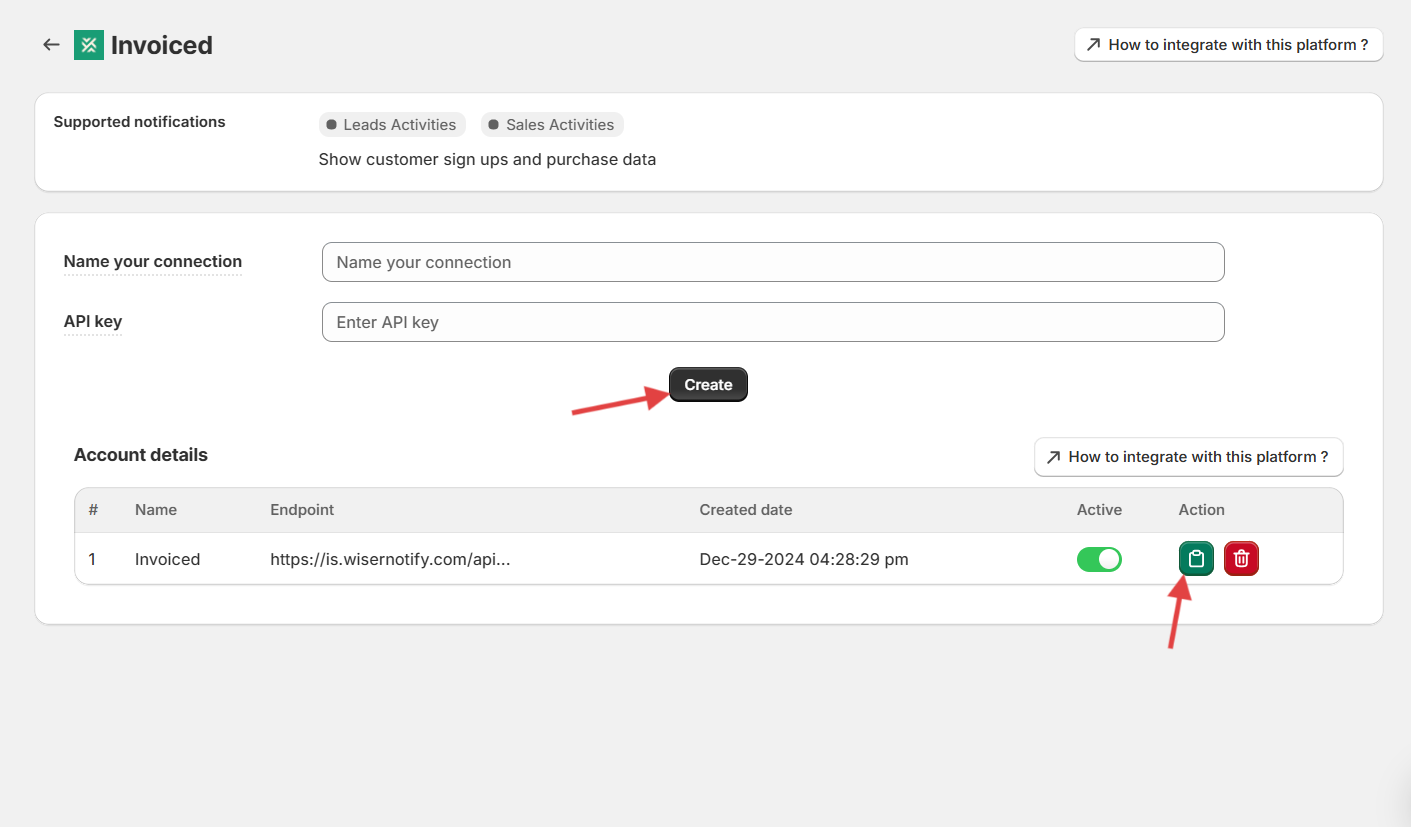
1. Enter the Name of the connection.
Login with Invoiced.
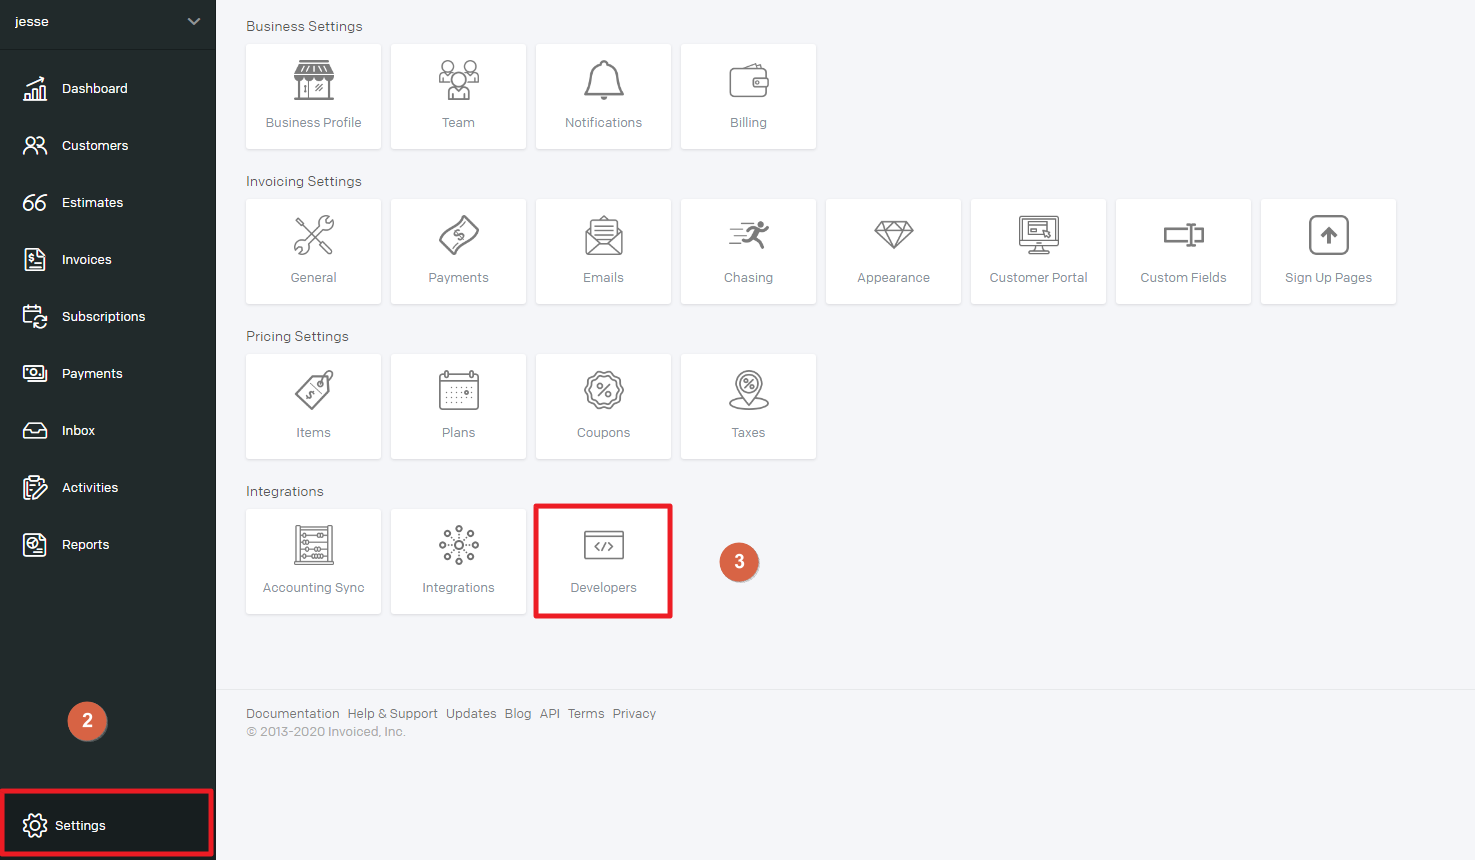
2. Navigate to Setting.
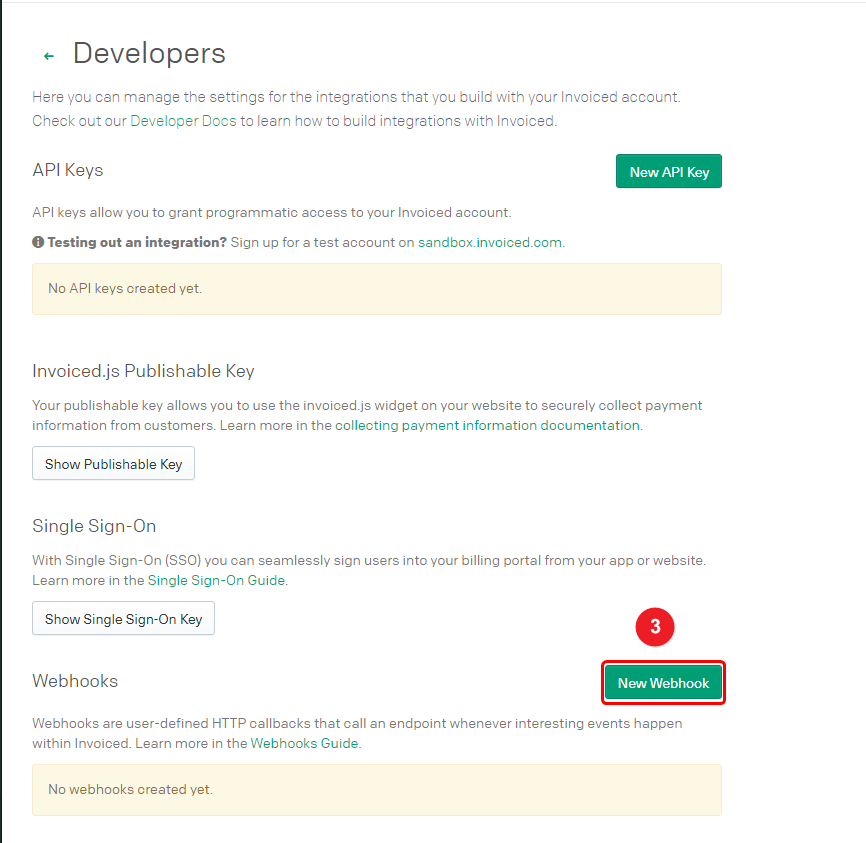
3. Click on Developers inside Integrations.
4. Click on the New API key.

5. Enter KEY DESCRIPTION.
6. Click on the Save button.

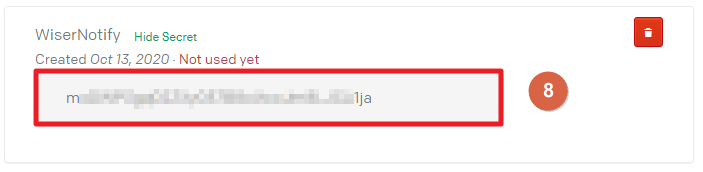
7. Click on Show Secret.

8. Copy API key.
9. Paste into the API Key field in the WiserNotify Invoiced popup.
10. Click on the Create button.
11. Click and copy the URL.
Step 2: Configure Webhook in Invoiced
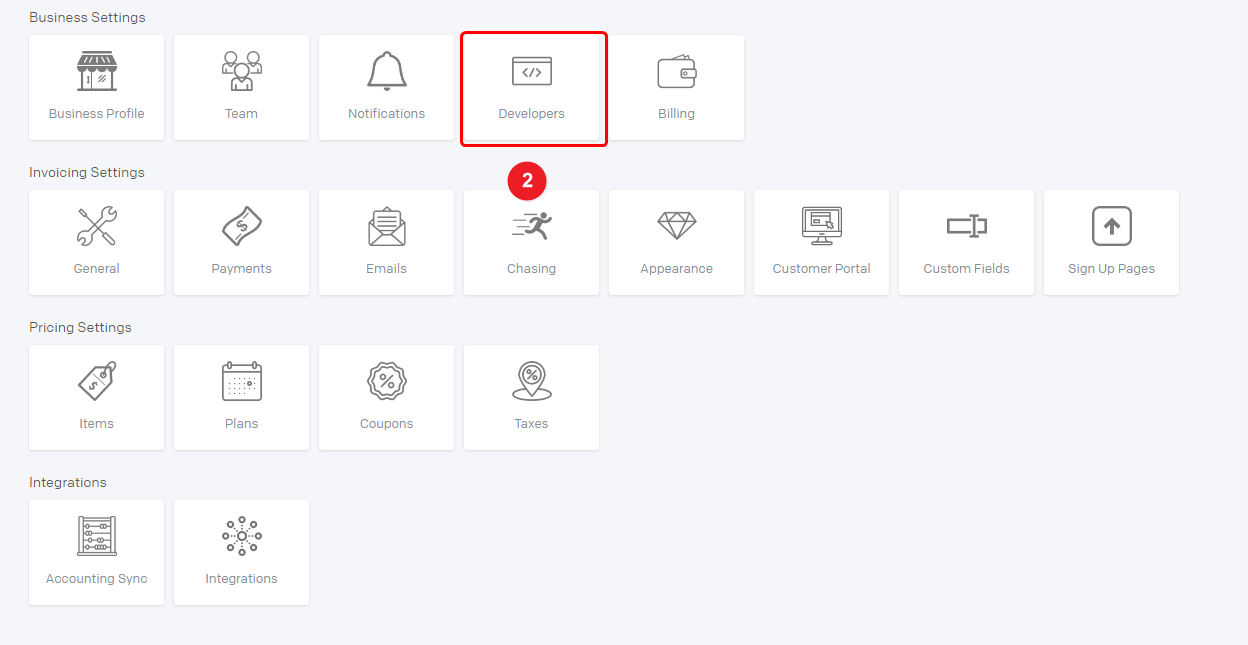
1. Click on the setting at the bottom.

2. Click on the developer box inside the business setting section.
3. Click on the New Webhook button.
4. Paste the copied URL.
5. On the webhook.
6. Click on the Select event radio button.
7. Select two event contacts: created, and subscription: created.
8. Click on the Save button.

The last 30 entries from the API key will be fetched automatically once you provide the correct details. This enables you to start displaying the existing old data in the notifications.
Please test by adding new data & visit the WiserNotify – Dashboard Data page. Here, You can see all the captured/ received data with its source name.