Browse categories
Timing Control Options for Timer Widget
2 min read
The Timing Control section shown in the screenshot allows you to configure when and for how long your notification will appear on your website. Here is a detailed explanation of each feature within this section:
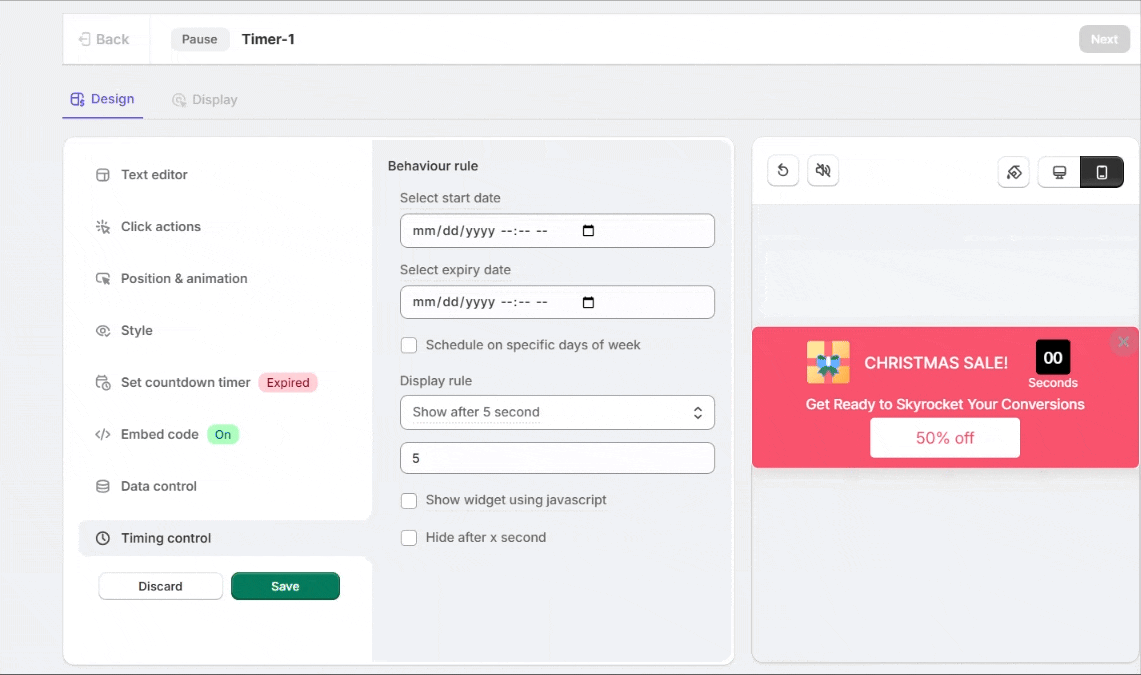
1. Select Start Date
- This field allows you to set a specific start date and time for the notification to begin displaying.
- Use this option to plan notifications for a specific campaign or event launch.
- Format:
MM/DD/YYYYwith a time picker for more precise scheduling.
2. Select Expiry Date
- This field is for setting an end date and time for the notification.
- It is useful for time-sensitive promotions, countdowns, or offers that have a defined end date.
- Format:
MM/DD/YYYYwith a time picker for the exact expiry time.
3. Schedule on Specific Days of the Week
- This checkbox enables you to show the notification only on selected days of the week.
- Example: You can schedule the notification to display only on weekends for special weekend deals.
4. Display Rule
- Show After X Seconds: You can define the delay (in seconds) before the notification appears on the page after it loads.
- Example: Setting “5 seconds” will display the notification 5 seconds after the page is fully loaded.
- This setting ensures the notification doesn’t disrupt users as soon as they land on the page, allowing for a smoother browsing experience.
5. Show Widget Using JavaScript
- This option allows you to trigger the notification using a custom JavaScript event rather than time-based rules.
- It is beneficial for advanced use cases where notifications need to be displayed based on specific actions, like clicking a button or scrolling to a certain part of the page.
6. Hide After X Seconds
- This setting allows you to set a time limit (in seconds) for how long the notification stays visible.
- Example: If you set “10 seconds,” the notification will automatically disappear 10 seconds after appearing.
Still stuck? A human will do it with you
Live chat from your dashboard — real answers in minutes, every day of the year.