Browse categories
Embed Code Options for Annoucement Widget
2 min read
The Embed Code section shown in the image provides the necessary tools for integrating a WiserNotify notification onto your website. It also includes advanced customization options through CSS for tailored designs. Here’s a detailed explanation of each element:
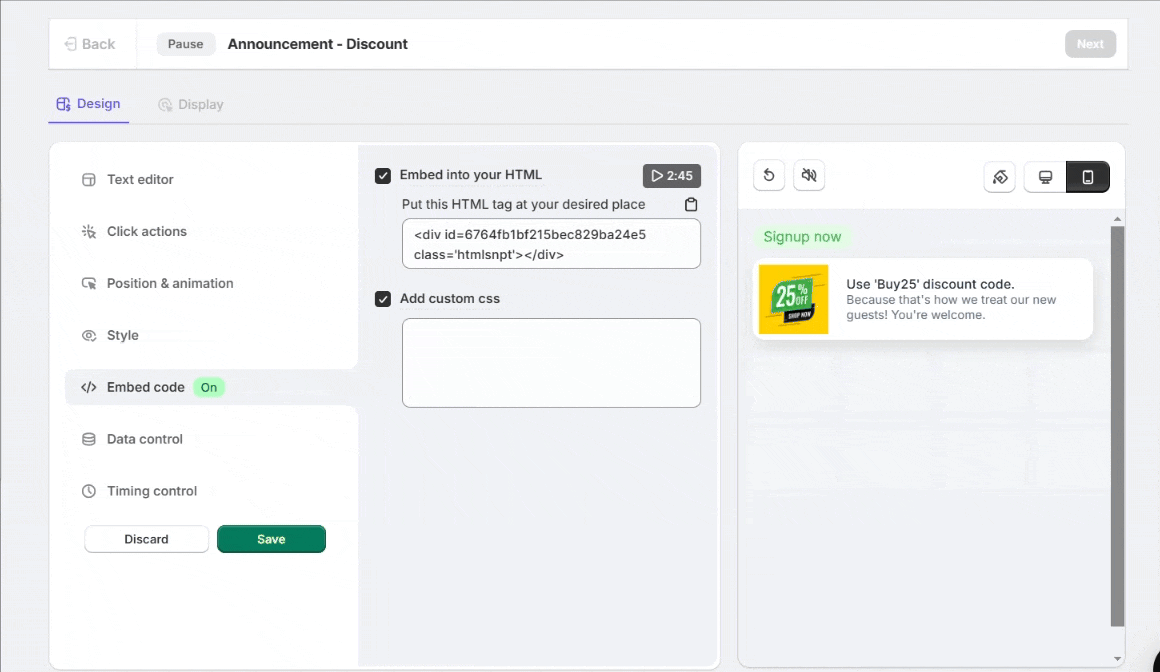
1. Embed into Your HTML
- This section provides an HTML snippet to integrate your notification on your website.
- HTML Tag Provided:
- The given code snippet (e.g.,
<div id="6764fb1bf215bec829ba24e5" class="htmlsnpt"></div>) is specific to your notification. - This code must be copied and pasted into the desired location of your website’s HTML where you want the notification to appear.
- The given code snippet (e.g.,
- Purpose:
- Embeds the notification directly into your webpage.
- Ensures the notification loads at the specified place in your website structure.
Steps to Use the HTML Embed Code:
- Copy the code using the provided copy button.
- Open the HTML editor or CMS backend of your website.
- Paste the code:
- If you want it on all pages, add it to your global header or footer.
- For specific pages, paste the code within the body tag of the required page.
2. Add Custom CSS
- Checkbox to Enable Custom CSS:
- When checked, this option allows you to style your notification with additional CSS.
- Custom CSS Input Box:
- You can write or paste CSS code here to override default styles and align the notification’s design with your website’s branding.
- Use Cases:
- Modify colors, fonts, or spacing.
- Customize how the notification behaves responsively on different screen sizes.
- Add animations or transitions to enhance user experience.
3. Embed Code Toggle
- The toggle labeled “On” indicates that the embed code is active and enabled for integration.
- If turned Off, the embed code will not function, and notifications won’t appear on your website.
4. Video Tutorial Icon
- The play icon next to “Embed into your HTML” likely provides a video tutorial for additional guidance on embedding the code.
Still stuck? A human will do it with you
Live chat from your dashboard — real answers in minutes, every day of the year.