
Beaver Builder is a popular drag-and-drop WordPress page builder that empowers users to create stunning websites with ease.
However, like all websites, those built with Beaver Builder often face the challenge of visitors leaving without taking meaningful action.
Abandoned forms, unclicked CTAs, or unfinished purchases can lead to missed opportunities and reduced conversions.
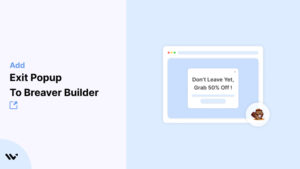
Exit intent popups are an effective solution to this challenge. These smart popups detect when a visitor is about to leave your Beaver Builder site and display a targeted message to re-engage them.
Whether you’re capturing leads, promoting discounts, or encouraging visitors to stay, exit intent popups can help boost engagement and drive conversions.
This guide explores the benefits of exit intent popups for Beaver Builder users, provides step-by-step integration instructions, and shares actionable strategies for maximizing their performance.
What and Why: Creating Exit Intent Popups on Beaver Builder
Exit intent popups trigger when a visitor’s behavior indicates they’re about to leave your site. For Beaver Builder users, these popups can be instrumental in improving engagement and conversions.
Why Exit Intent Popups Are Essential for Beaver Builder
Capture More Leads: Offer valuable resources like free eBooks or exclusive discounts in exchange for email addresses.
Recover Abandoned Actions: Re-engage visitors who are about to leave without completing a form or purchase.
Promote Time-Sensitive Offers: Highlight flash sales, early-bird discounts, or limited-time deals.
Reduce Bounce Rates: Redirect visitors to other pages, resources, or products instead of losing them.
Enhance Engagement: Provide helpful resources, live chat options, or personalized assistance to hesitant visitors.
Stat Spotlight: Exit intent popups can recover up to 15% of abandoning visitors, making them an invaluable tool for Beaver Builder websites.
How to Create the Exit Intent Popup for Beaver Builder


How to Embed Exit Intent Popups on Beaver Builder
Step-by-Step Guide for Integration
1. Design Your Popup with Wisernotify
- Use Wisernotify to create a visually engaging popup that aligns with your Beaver Builder site’s branding and goals.
2. Generate the Embed Code
- Wisernotify provides a JavaScript snippet after your popup is finalized.
3. Access Your WordPress Dashboard
- Log in to your WordPress admin area and navigate to the site built with Beaver Builder.
4. Insert the Script Using Beaver Builder
- Open the page editor for the page where you want the popup to appear.
- Add an HTML Module from Beaver Builder’s drag-and-drop editor.
- Paste the Wisernotify script into the HTML module. Place it in the footer area to ensure it runs site-wide if needed.
5. Set Popup Triggers in Wisernotify
- Configure the popup to activate on exit intent and customize additional rules, such as targeting specific pages or behaviors.
6. Test the Popup
- Preview the page to ensure the popup triggers correctly when visitors attempt to leave.
7. Publish and Monitor
- Save your changes and use Wisernotify analytics to track performance. Refine your popup messaging and targeting based on visitor interactions.
Exit Intent vs. Other Popups
Why Exit Intent Popups Excel on Beaver Builder
Behavior-Driven Timing
- Exit Intent: Activates when a visitor is about to leave, making it timely and relevant.
- Standard Popups: Appear based on time or scroll triggers, which can interrupt the user’s journey.
Higher Conversion Rates
- By addressing visitor hesitations at the last moment, exit intent popups typically yield higher engagement and conversions.
Customizable Messaging
- Beaver Builder users can design popups that align perfectly with their site’s purpose and audience.
Improved User Experience
- Exit intent popups feel less intrusive, enhancing visitor satisfaction while driving conversions.
Common Exit Popup Triggers: Words and Phrases
The success of your popup depends on its messaging. Here are some examples tailored for Beaver Builder users:
Urgency: “Wait! Complete your purchase now and save 20%—offer ends today!”
FOMO (Fear of Missing Out): “Don’t miss this deal—this exclusive offer won’t last long!”
Lead Generation: “Sign up today to access free resources and exclusive tips!”
Cart Recovery: “You left something behind—checkout now and enjoy free shipping!”
Supportive Messaging: “Need help? Contact us before you go for personalized assistance!”
Best Places to Show Exit Intent Popups on Beaver Builder Websites
Strategic placement ensures your popups target the right audience. For Beaver Builder, consider these high-impact locations:
Homepage
- Capture first-time visitors with a welcome discount or lead magnet.
Landing Pages
- Highlight limited-time offers or exclusive content to drive conversions.
Cart Pages
- Recover abandoned carts by offering incentives like free shipping or discounts.
Checkout Pages
- Address hesitations with reassurance or bonuses.
Blog Pages
- Convert readers into subscribers by offering exclusive content upgrades.
3 Exit Intent Popup Mistakes to Avoid on Beaver Builder Websites
Overusing Popups
- Too many popups can frustrate visitors and lead to higher bounce rates. Use them sparingly and at critical moments.
Ignoring Mobile Optimization
- Ensure your popups are fully responsive and easy to interact with on mobile devices, as mobile traffic often accounts for a significant portion of site visitors.
Generic Messaging
- Tailor your popup content to match the visitor’s intent. For instance, a checkout recovery popup won’t resonate with someone browsing a blog.
Wrap Up
Exit intent popups are a powerful tool for Beaver Builder users, helping to capture leads, recover lost visitors, and drive conversions.
By integrating Wisernotify-powered popups, you can create visually appealing, high-performing notifications that align seamlessly with your website’s goals.
Ready to enhance your Beaver Builder site? Start building high-converting exit intent popups with Wisernotify today and turn abandoning visitors into loyal customers!
Related Post
- Create an Exit Popup in Big Cartel.
- Create an Exit Popup in Google Site.
- Create an Exit Popup in GoDaddy.
