SwipePages, a fast and intuitive platform for creating high-converting landing pages, empowers businesses to capture leads and drive sales.
But even with visually stunning pages and persuasive copy, many campaigns fall short without one key ingredient: trust. Testimonials provide the social proof needed to establish credibility and nudge potential customers into action.
In this guide, we’ll explore how testimonials can transform your SwipePages landing pages, where to strategically place them for maximum impact, and best practices to ensure they work effectively to boost your conversion rates.
Why Add Testimonials to SwipePages?
Build Trust and Credibility: Customers are more likely to trust a brand that others endorse. Studies reveal that 88% of consumers trust testimonials and reviews as much as personal recommendations. For SwipePages users, testimonials validate your offer’s authenticity and value.
Increase Conversion Rates: Strategically placed testimonials can increase landing page conversions by up to 34%. By addressing potential objections and showcasing real success stories, testimonials guide visitors to complete desired actions like signing up or purchasing.
Overcome Buyer Hesitation: Potential customers often hesitate due to doubts about product effectiveness or service reliability. Testimonials that highlight positive experiences from others help resolve these concerns, making it easier for visitors to trust your brand.
Shorten the Sales Cycle: Effective testimonials can fast-track decision-making. When visitors see relatable stories and proven results, they’re more likely to act quickly without prolonged deliberation.
Boost SEO: Testimonials are not only persuasive; they can also improve your landing page’s SEO. When users share detailed feedback containing relevant keywords, it enhances your page’s search visibility.
Build trust & FOMO
Highlight real-time activities like reviews, sales & sign-ups.
How to Add Testimonials to SwipePages
Now let’s get into how to embed a testimonial on your site or store, whether it’s text, photo, or video.
First, sign up for WiserReview. There is a free plan if you are just starting, but there are also upgrades available for SMBs and enterprise businesses.
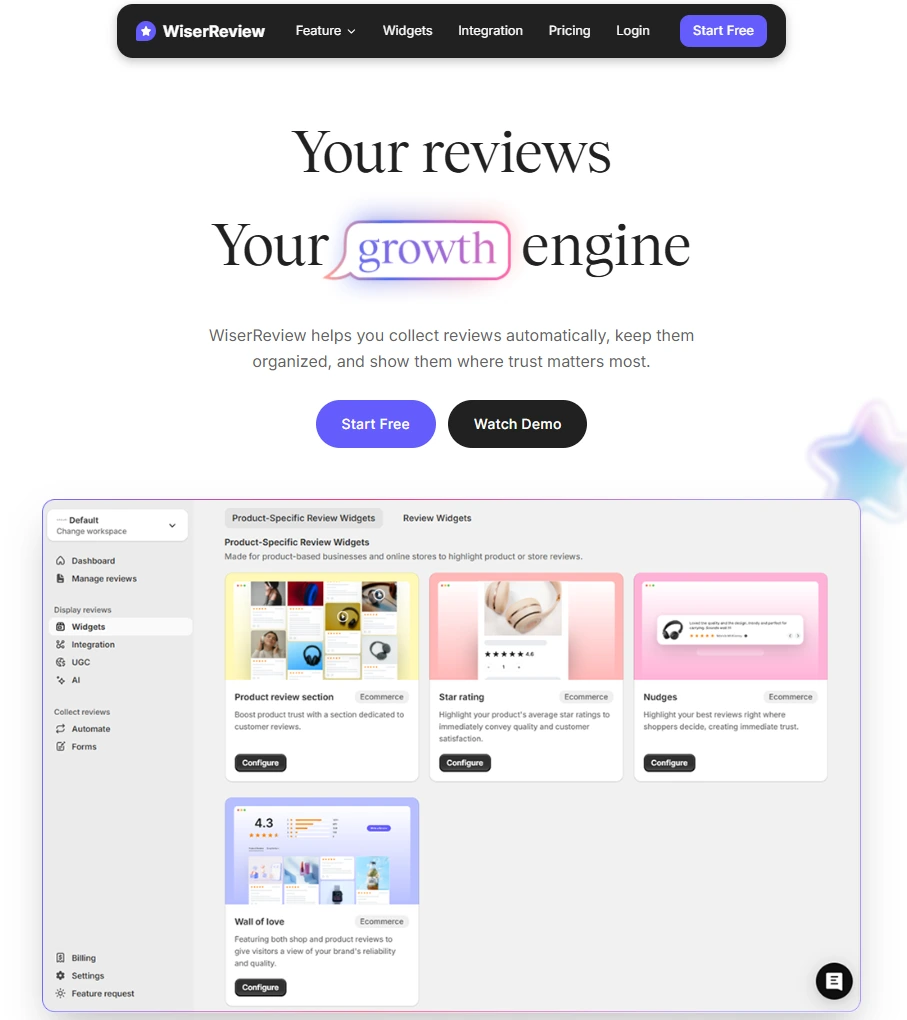
Once you sign up for your account, you can see the WiserReview dashboard.
This dashboard is your control center, where you can manage all aspects of your testimonial management. It provides a clear overview of your testimonial collection, moderation, and display processes.
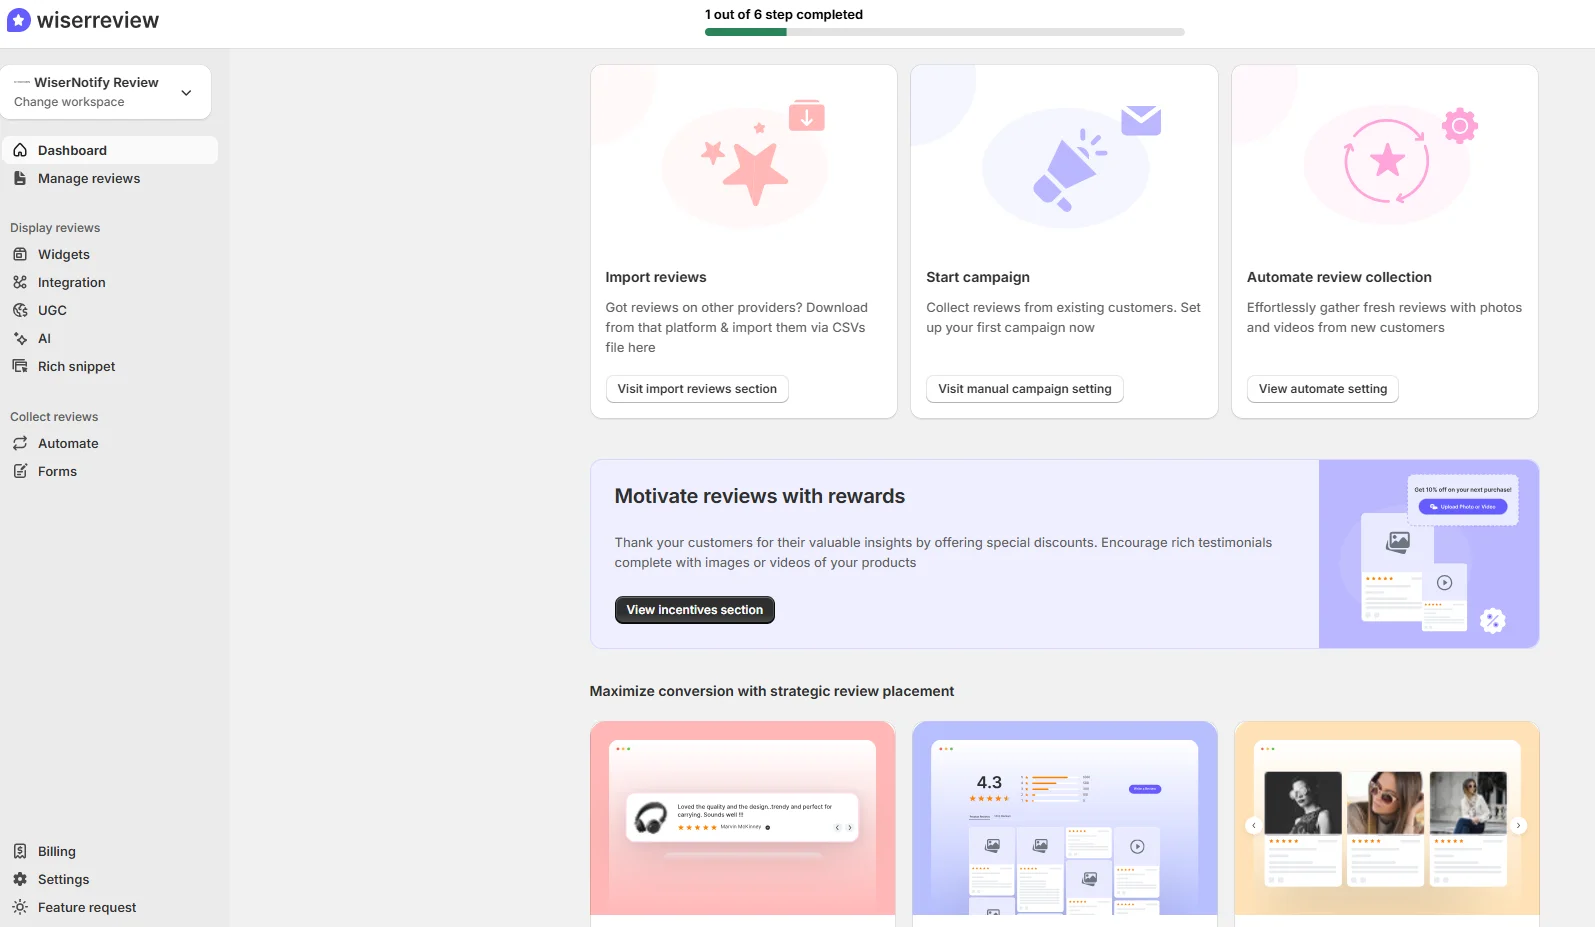
Don’t be overwhelmed. WiserReview is a comprehensive testimonial management software that not only helps you add testimonials but also collects and moderates them.
And the best part? It’s designed to be user-friendly, so you’ll find it easy to navigate and use.
From the dashboard:
Go to → Manage reviews section and click on the “Import” button.
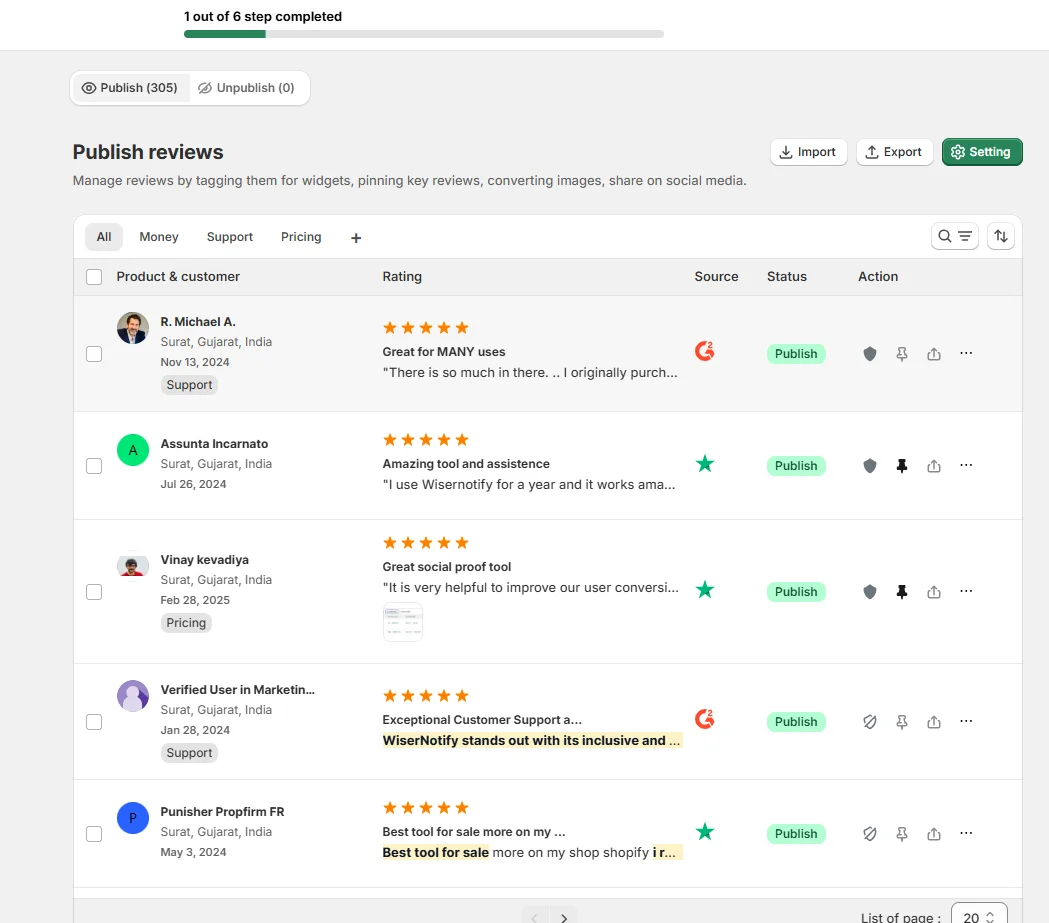
From there, you have many options to import testimonials from; select any of them.
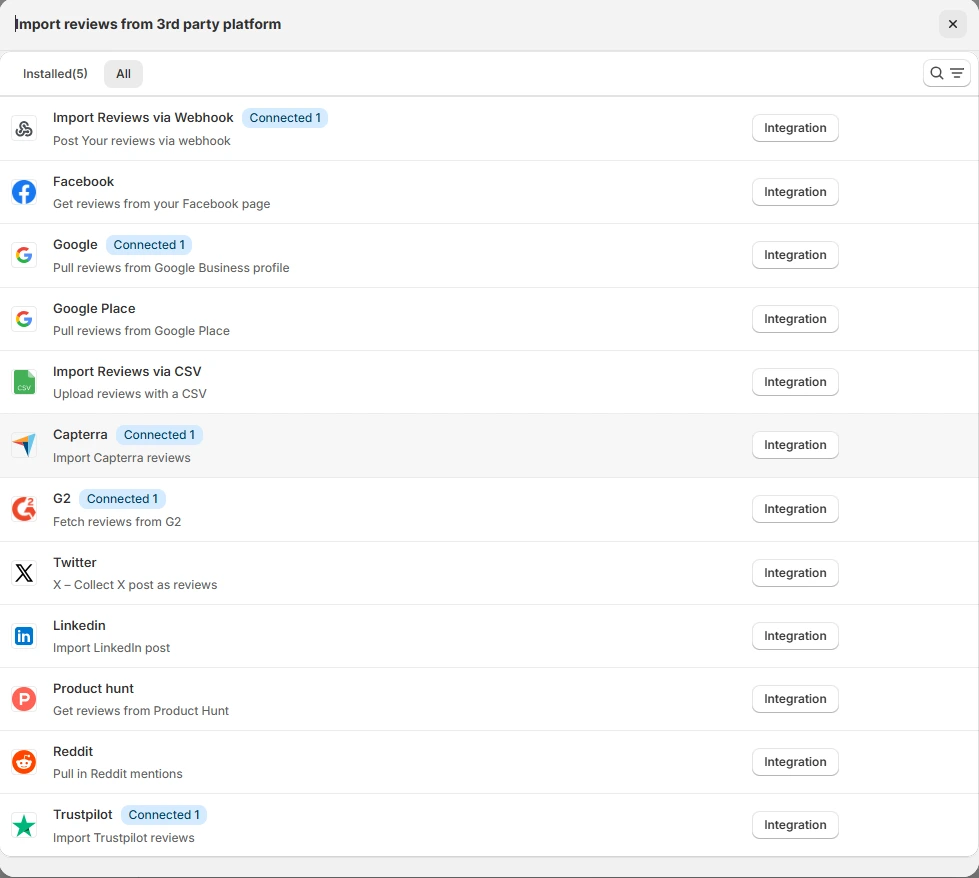
Once done, you have a testimonial showing in the manage reviews section.
Now let’s go to the “Widget” section.
Here, you have a wide range of widgets to choose from. Simply click on “configure” for any widget you need.
Each one is designed to build trust, credibility, and drive more conversions and sales through immediate consumer decision-making.

For example, we chose the “Review wall” widget for our second product.
This widget displays a dynamic wall of your testimonials, creating a visually appealing and trustworthy display for your potential customers. And yes, we use Wiserreview’s testimonial widget for this purpose.
Once you click on configure, you can see the widget customization dashboard. In it, click on “Filter”.
In it, select the Review source.

Now your testimonial appears on the widget, and you can easily customize the widget to match your brand’s style.
It’s a straightforward process, and we’re confident you’ll find it intuitive and user-friendly.
Now, once it’s done, click on “Install” and choose from any of the three options.
- JavaScript – Insert this script where you want the testimonial widget to appear on your website.
- Iframe – Use this iframe code to embed the testimonial widget in a specific section of your site.
- URL – Share this URL to display the testimonial widget on a separate page.
Now the widget is live and ready to build trust and drive conversions.
We are also using this on our site, WiserReview, and Wisernotify.
Here is an example of it:

And wait, that’s just the tip of the iceberg of what Wiserreview can do for testimonial management.
WiserReview can:
Automated testimonial collection
Create a smart testimonial form with the following setup:
- Set up your testimonial submission link.
- Add buttons for easy interaction.
Display a star rating or feedback question on the first screen to assess intent. If the feedback is low, prompt for detailed comments. If the feedback is positive, direct the user to submit their testimonial.
WiserReview simplifies the process of requesting testimonials, automating personalized requests via email, SMS, or other messaging channels, making it easier for businesses to collect testimonials.
Integrate the testimonial form link with your existing POS, email, and SMS systems.
You can also post new sales data to the WiserNotify webhook API to automate the process. This streamlines testimonial requests and enhances customer engagement through your existing channels.
Centralized Testimonial Management

Testimonial Aggregation: WiserReview aggregates testimonials from various platforms (emails, forms, social, etc.), bringing them into one central dashboard. This helps businesses track their testimonials and gain real-time insights.
Testimonial Monitoring: The platform notifies businesses whenever a new testimonial is submitted, allowing them to stay up-to-date with feedback.
AI reply: WiserReview helps businesses respond to customer testimonials automatically with AI.
AI-powered testimonial display and sharing

- Automatically select positive sentiment testimonials.
- Publish them live on your site.
- Convert these testimonials into graphics and post them on your social media channels.
This enhances customer trust and promotes positive feedback across platforms.
Step-by-Step Guide
1. Collect Testimonials
- Request feedback from satisfied customers. Encourage them to share specific details about their experience.
2. Log in to SwipePages
- Access your SwipePages dashboard and choose the landing page you want to edit.
3. Add a Testimonial Section
- Use SwipePages’ drag-and-drop builder to insert a testimonial block.
- Choose from pre-designed templates or create a custom layout.
4. Input Testimonial Content
- Add the customer’s name, photo, and feedback.
- Use quotes or paraphrase their experience, ensuring it remains authentic.
5. Customize the Design
- Match the testimonial’s fonts, colors, and style to your page’s overall branding.
6. Optimize for Mobile
Preview the page on mobile devices to ensure testimonials are clear and visually appealing.
7. Publish and Test
- Save your changes and test the page to verify that the testimonials display correctly across devices.
3 Testimonial Optimization Tips
Focus on Specifics: Avoid vague statements like “Great product!” Instead, use detailed testimonials that highlight specific benefits or results.
Incorporate Video Testimonials: Video testimonials are engaging and build trust quickly. A short clip of a happy customer sharing their success story can significantly enhance credibility.
Showcase Diversity: Feature testimonials from different demographics, industries, or use cases to appeal to a broader audience.
Best Places to Show Testimonials on SwipePages
Above the Fold
- Placing a compelling testimonial in the hero section grabs attention immediately. This is especially effective for high-traffic landing pages.
Near Call-to-Action (CTA) Buttons
- Position testimonials close to your CTAs to provide reassurance and reduce friction. For example, next to a “Start Free Trial” button, include a quote like, “I saw results within days of signing up!”
Pricing Sections
- Use testimonials in your pricing section to highlight the value of your product or service. This can help justify your pricing and encourage conversions.
Dedicated Testimonial Section
- Create a dedicated section to showcase multiple testimonials in one place. Use sliders or grids to organize them without overwhelming the page.
Checkout Pages
- On checkout pages, testimonials can ease last-minute doubts. Include quotes like, “The process was seamless, and the results exceeded my expectations.”
Post-Purchase Thank You Pages
- Reinforce a customer’s decision by featuring testimonials on your thank you pages. This can also encourage them to explore additional offers.
Other Ways to Add Testimonials to SwipePages
Pop-Ups
- Use pop-ups to display real-time testimonials dynamically. For example, showcase a recent customer review when a visitor spends time on a particular section of the page.
Social Media Feeds
- Embed live social media feeds displaying positive reviews or mentions. This adds authenticity and highlights real-time interactions.
Email Campaigns
- Incorporate testimonials into your email marketing campaigns. For instance, include a success story in a promotional email to drive traffic back to your landing page.
Blog Posts
- Publish detailed customer stories or case studies on your blog and link them to your SwipePages landing pages. This not only builds trust but also drives traffic.
Video Testimonials
- Host video testimonials on platforms like YouTube and embed them directly into your SwipePages. Video content is highly engaging and can significantly boost conversions.
3 Testimonial Mistakes on SwipePages
Using Generic Testimonials
- Avoid reviews like “Great service!” They lack impact and fail to address specific customer concerns. Focus on detailed, relatable experiences.
Overcrowding the Page
- While testimonials are important, too many can clutter the page. Balance quantity with quality by featuring only the most impactful ones.
Ignoring Mobile Responsiveness
- Ensure your testimonials are optimized for mobile devices. Over 50% of web traffic comes from mobile users, and a poor mobile experience can hurt conversions.
Wrap Up
Testimonials are a game-changing addition to any SwipePages landing page. By strategically placing authentic, impactful testimonials throughout your pages, you can build trust, overcome objections, and drive higher conversions.
Ready to maximize your SwipePages potential? Start implementing these testimonial strategies today and watch your conversion rates soar!
Related Posts:
