This guide will walk you through:
- Display Notifications: Add the WiserNotify pixel code to your Unbounce pages to display real-time notifications.
- Capturing Sales Activities: Connect Unbounce with WiserNotify using a webhook to fetch real-time sales data.
Install WiserNotify Pixel Code to Unbounce pages
Step 1: Get your wisernotify pixel code
- Log in to your WiserNotify account.
- Navigate to the Install Pixel page.
- Copy your Pixel Code.

Step 2: Add the Pixel Code to Unbounce
Login with Unbounce,
1. Navigate to SETTINGS > Script Manager.
2. Click on Add your first script button.

3. Select the Custom Script option in the dropdown.
4. Enter the Script Name.
5. Click on the Add Script Details button.

6. Select Head Placement into the dropdown.
7. Select All Include to drop it down.
8. Paste the copied WiserNotify pixel code.
9. Click on the Save and Publish Script button.

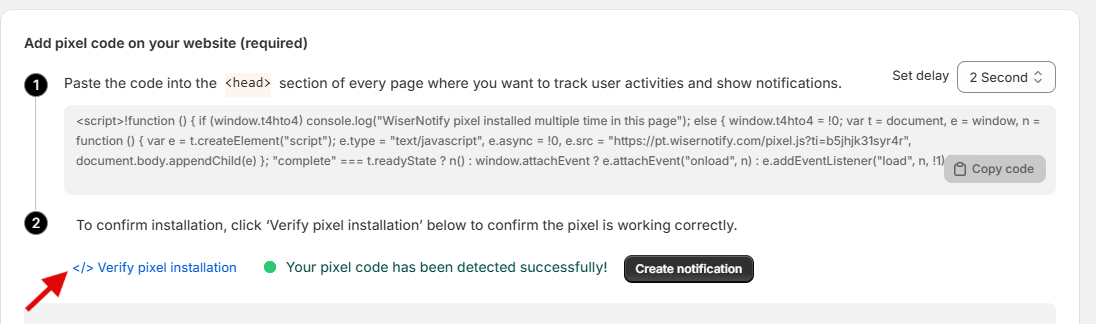
Step 3: Verify Installation
- Go back to your Wisernotify pixel page.
- Click on verify pixel installation to check if the pixel is active.
- If installed correctly, you will see a “Pixel Active” successfully message.
Note: This pixel script tag is required on every page wherever you want to track visitor activities, capture form submit events & display notifications.
Now, visit your site & reload or refresh it.
After that, return to WiserNotify panel & recheck the install pixel page & Wait for 5 seconds; it should show pixel detected popup. If not, then click on the verify my pixel button. It should display if installed correctly.
Add Webhook Integration to Connect Unbounce to pull the events sales data.
Step 1: Get the webhook URL from wisernotify.
– Go to WiserNotify > Unbounce Integration.
– Click on the Integrate button inside the Integration box.
1. Enter Connection Name
2. Click on the Create button.
3. Click on the copy button.
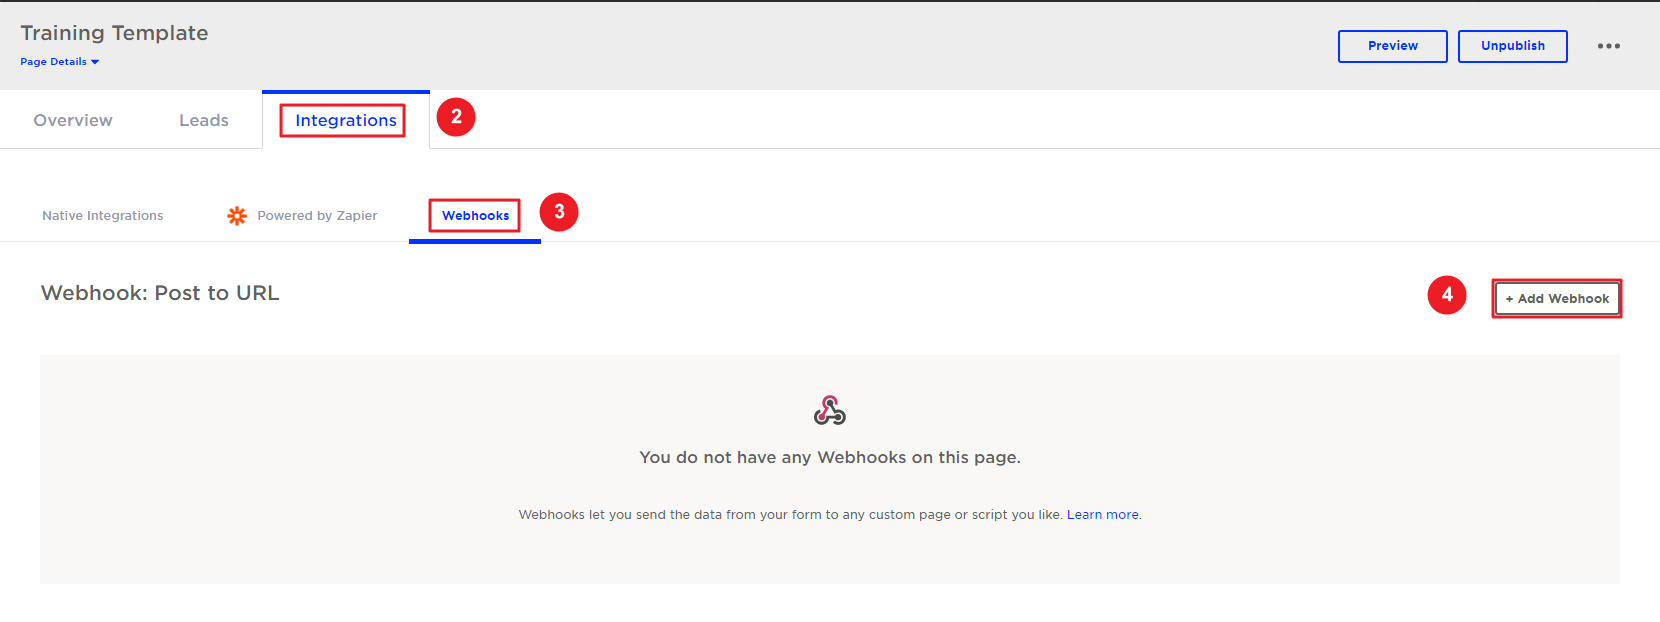
Step 2: Configure the webhook URL to Unbounce
1. Click on your Page.

2. Click on the Integrations tab.
3. Click on the Webhook tab.
4. Click on the Add Webhook button.
5. Paste copied Webhook URL.
6. Configure your field mapping.
{
“full_name”: “full_name”,
“email_address”: “email”,
“ip_address”: “ip_address”,
“name”: “name”
}
7. Click on the Save Changes button.

Please test by adding new data & visit the WiserNotify- Dashboard Data page. Here, You can see all the captured/ received data with its source name.