This guide will walk you through:
- Display Notifications: Add the WiserNotify pixel code to your Acadle pages.
- Capturing Enrollment Activities: Connect Acadle with WiserNotify using a webhook to fetch real-time course enrollment data.
Install WiserNotify Pixel Code to Acadle pages
Step 1: Get your wisernotify pixel code
- Log in to your WiserNotify account.
- Navigate to the Install Pixel page.
- Copy your Pixel Code.

Step 2: Add the Pixel Code to Acadle
Login with Acadle admin,
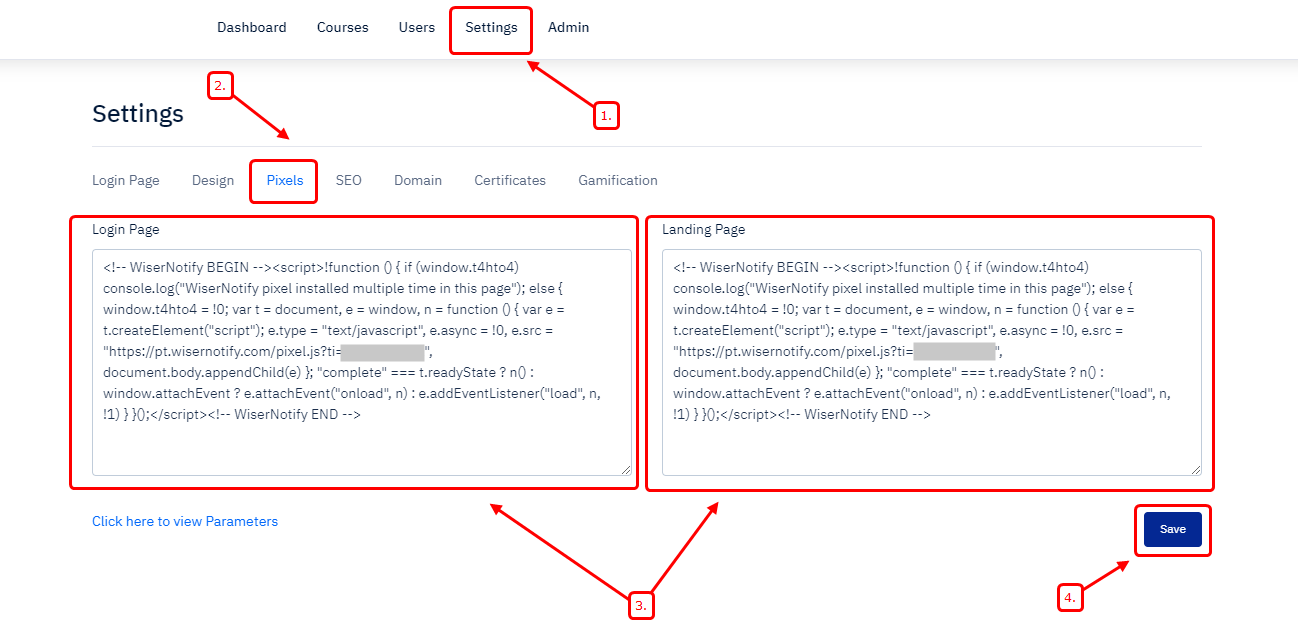
- Navigate to Settings > Pixels.
- Paste the WiserNotify Pixel code into the Login and Landing page.
- Click on save.
Done,
Step 3: Verify Installation
- Go back to your Wisernotify pixel page.
- Click on verify pixel installation to check if the pixel is active.
- If installed correctly, you will see a “Pixel Active” successfully message.
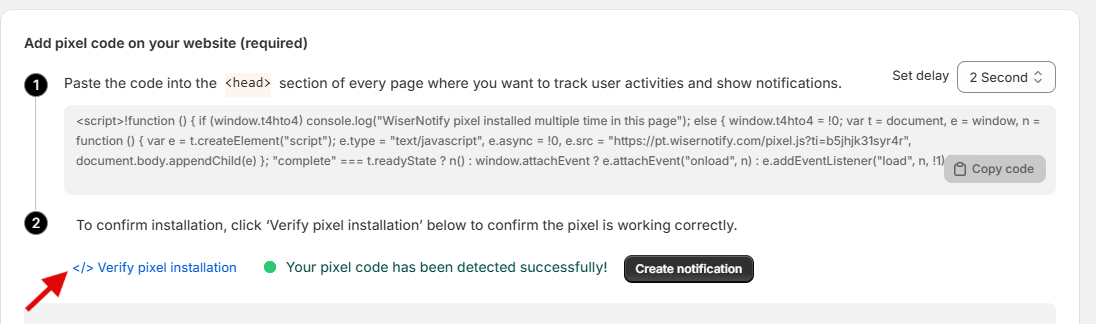
Note: This pixel script tag is required on every page wherever you want to track visitor activities, capture form submit events & display notifications.
Now, visit your site & reload or refresh it.
Add webhook to Acadle to receive the data for Enrollment Activities
Step 1: Get the webhook URL from Wisernotify.
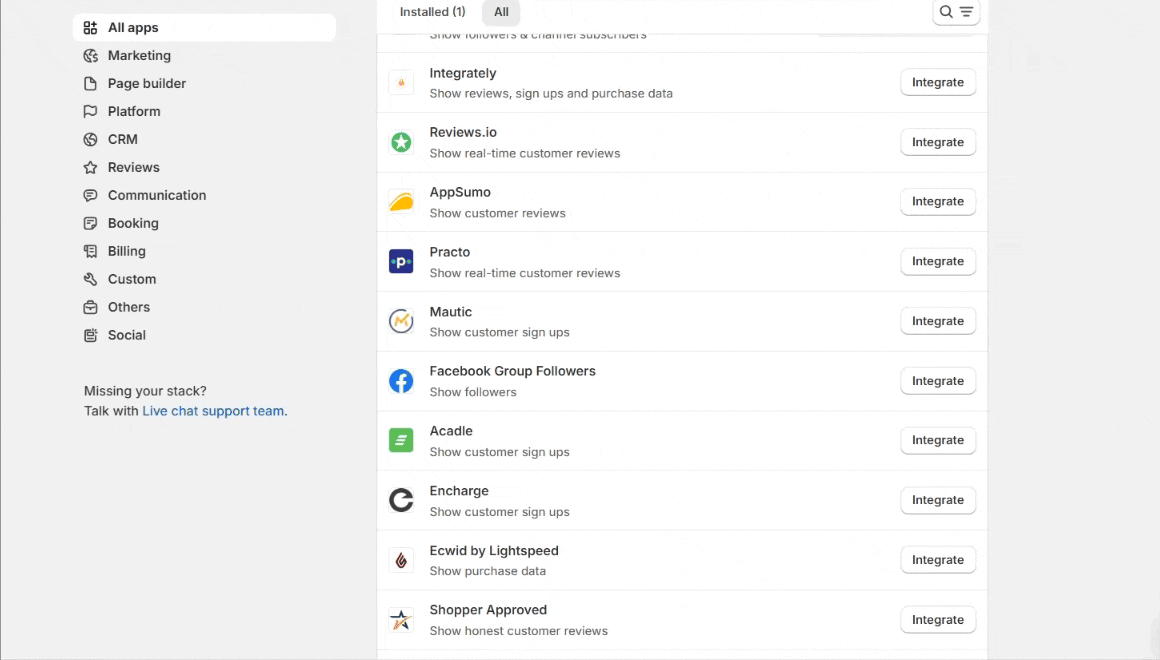
Go to WiserNotify > Acadle Integration.
Click on the Integrate button inside the Integration box.
- Enter Connection Name
- Click on the Create button.
- Click on the copy button.
Step 2: Configure the webhook URL to Acadle
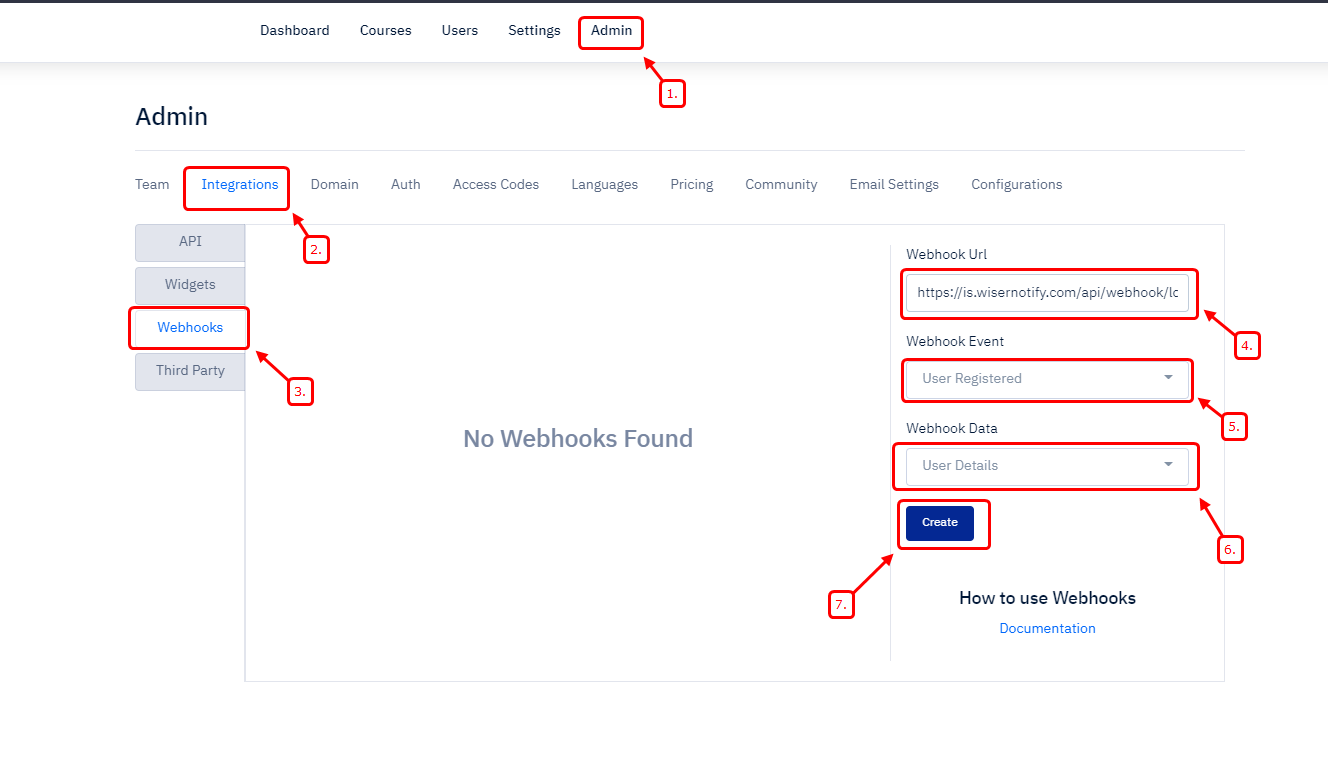
- Log in to the Acadle Admin Panel.
- Navigate to Admin > Integration > Webhooks
- Paste WiserNotify Webhooks URL
- Select User Registered event.
- Select User Details Data
- Click on Create
Done.
Please do the test by adding new data & visit the WiserNotify Dashboard – Data page.