
How to Add a Recent Sales Notification Popup to a Website

A website that shows no visitor activity can feel quiet, even unreliable. A first-time visitor lands, sees no sign that anyone else is buying or signing up, and leaves.
That missing social proof is what holds people back, and social proof statistics show around 70% of people check for proof before they act.
A recent sales popup fixes it. A small message like “Daniel from Los Angeles just signed up for the webinar” shows real activity in real time.
Whether you run a store, a blog, a service, or a lead-gen site, WiserNotify adds these popups to any website, no code needed.
What Is a Sales Notification Popup?
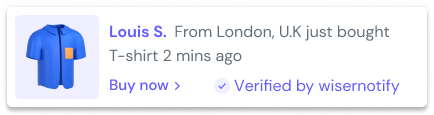
A sales notification popup is a small message that appears on your website showing a recent action, like a purchase, signup, or booking. A typical one reads “Sarah from Chicago just bought the Starter Plan.”
It’s a form of social proof. Instead of claiming your product is popular, it shows real, recent activity, which reassures a new visitor that other people trust you.
These popups pull from your live data, so they update on their own as new orders and signups come in. On any website, WiserNotify runs them from a single pixel.
Why Add a Sales Notification Popup to Your Website?
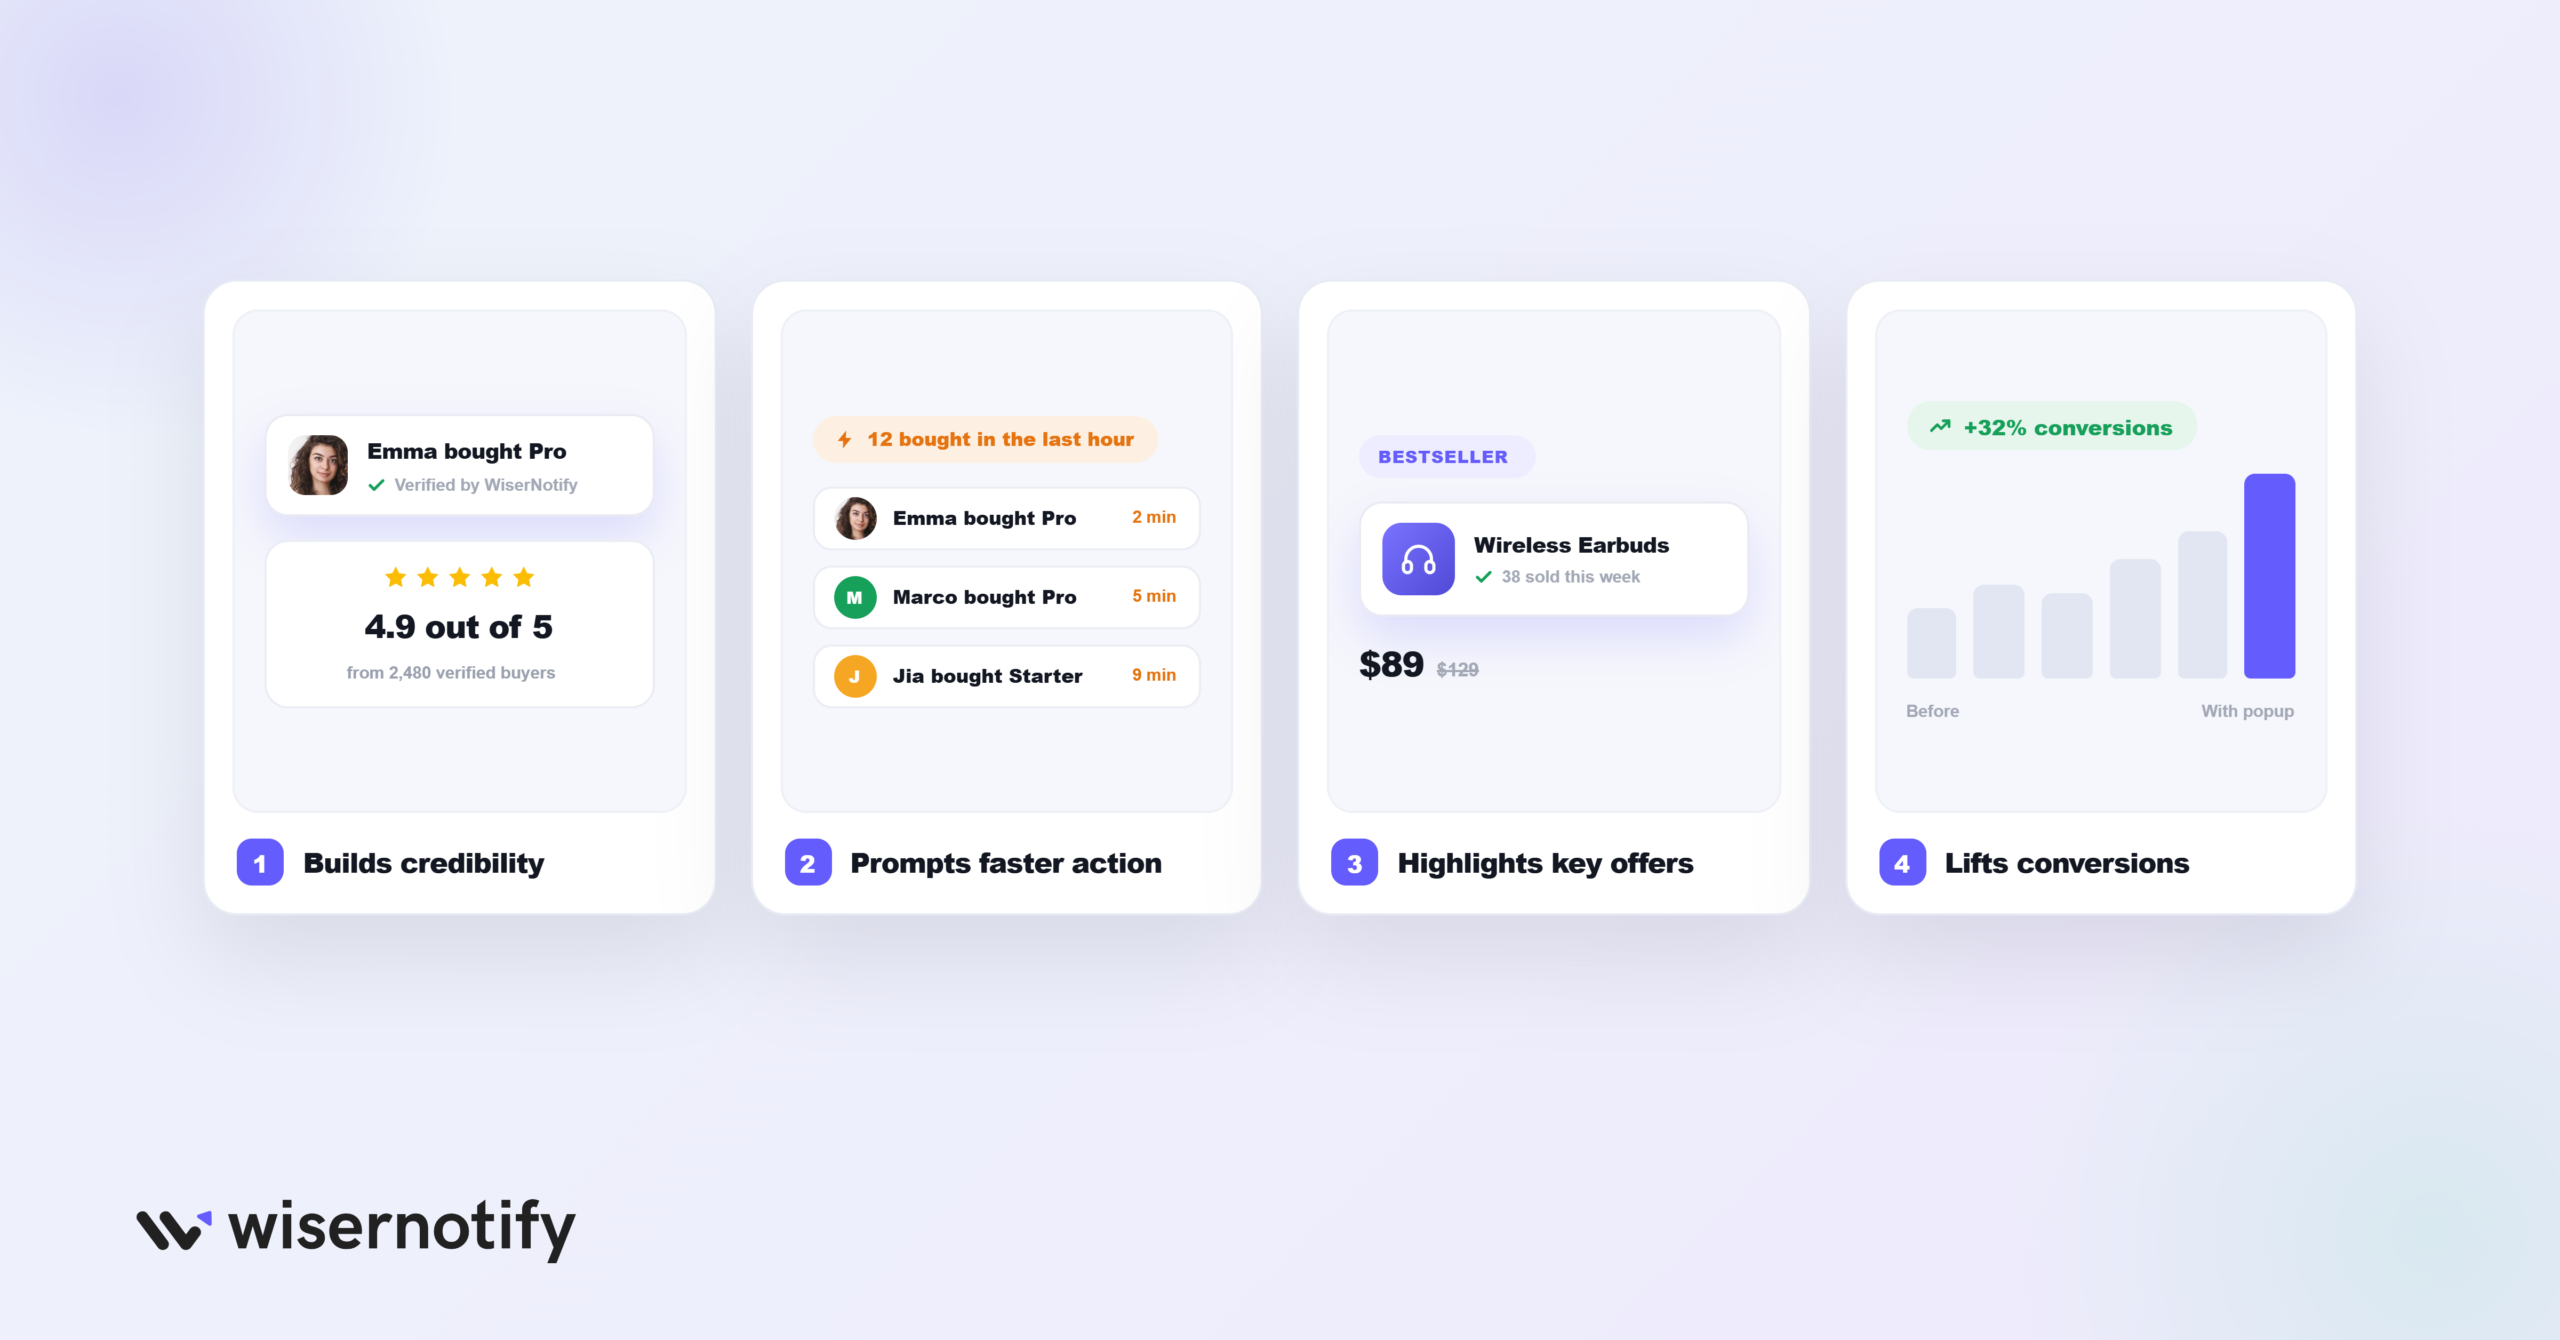
A sales popup makes a site feel active and trustworthy at the moment a visitor is deciding. Here’s what it does:
- Builds credibility: showing that real people are buying or signing up reassures a visitor who isn’t sure about your brand yet.
- Prompts faster action: seeing others act is a natural way of creating urgency in sales, so a hesitant visitor is more likely to move before they leave.
- Highlights key offers: a popup can point visitors to your bestsellers, a limited deal, or your most popular content.
- Lifts conversions: the mix of trust, urgency, and visibility nudges more signups, purchases, and downloads.
Build trust & FOMO
Highlight real-time activities like reviews, sales & sign-ups.

How to Add a Sales Popup to Any Website
The whole setup is no-code and works with any website or builder that lets you add a snippet. You paste one WiserNotify pixel, then build and manage the popup from the dashboard.
The video below walks through creating the notification, and the steps are written out under it.
Step 1: Copy Your WiserNotify Pixel
Create a free WiserNotify account or log in. Open the Install Pixel page and click Copy Code.

Step 2: Add the Pixel to Your Website
Paste the pixel into your site’s head section or custom code area, so it loads on every page. Most platforms, WordPress, Shopify, Wix, Webflow, Squarespace, and custom sites, have a place for head or tracking code. Save and publish.
If your platform has a dedicated WiserNotify guide, the integrations docs cover the exact steps.
On Swipe Pages: add the pixel through the page’s header script settings, or drop it in via Google Tag Manager if you’re already using that. If the page is running as AMP, make sure you’re serving the AMP-compatible version of the script, since standard tracking scripts don’t run on AMP pages.
Step 3: Verify the Pixel
Open your site once so it loads the pixel, then go back to the WiserNotify pixel page and click Verify pixel installation. A “Pixel Active” message means you’re connected.

Step 4: Create a Sales Notification
In the WiserNotify dashboard, click Add Notification and open the Sales Activities tab. You get two options:
- Recent Sales: shows each buyer’s name, location, product, and time.
- Sales Count: shows the total number of sales over a period.
Pick Recent Sales, choose a design, then name it and enter your website URL.

Step 5: Design the Notification
In the Design section, set the popup to match your site:
- Style: adjust the icon, position, animation, borders, and colors.
- Text editor: edit the wording and change the language if you need to.
- Click action: turn on a CTA button if you want the popup to link somewhere.
- Data and timing: set a display delay and how long the popup stays on screen.
Save your changes when the design looks right.

Step 6: Connect Data, Set Display, and Publish
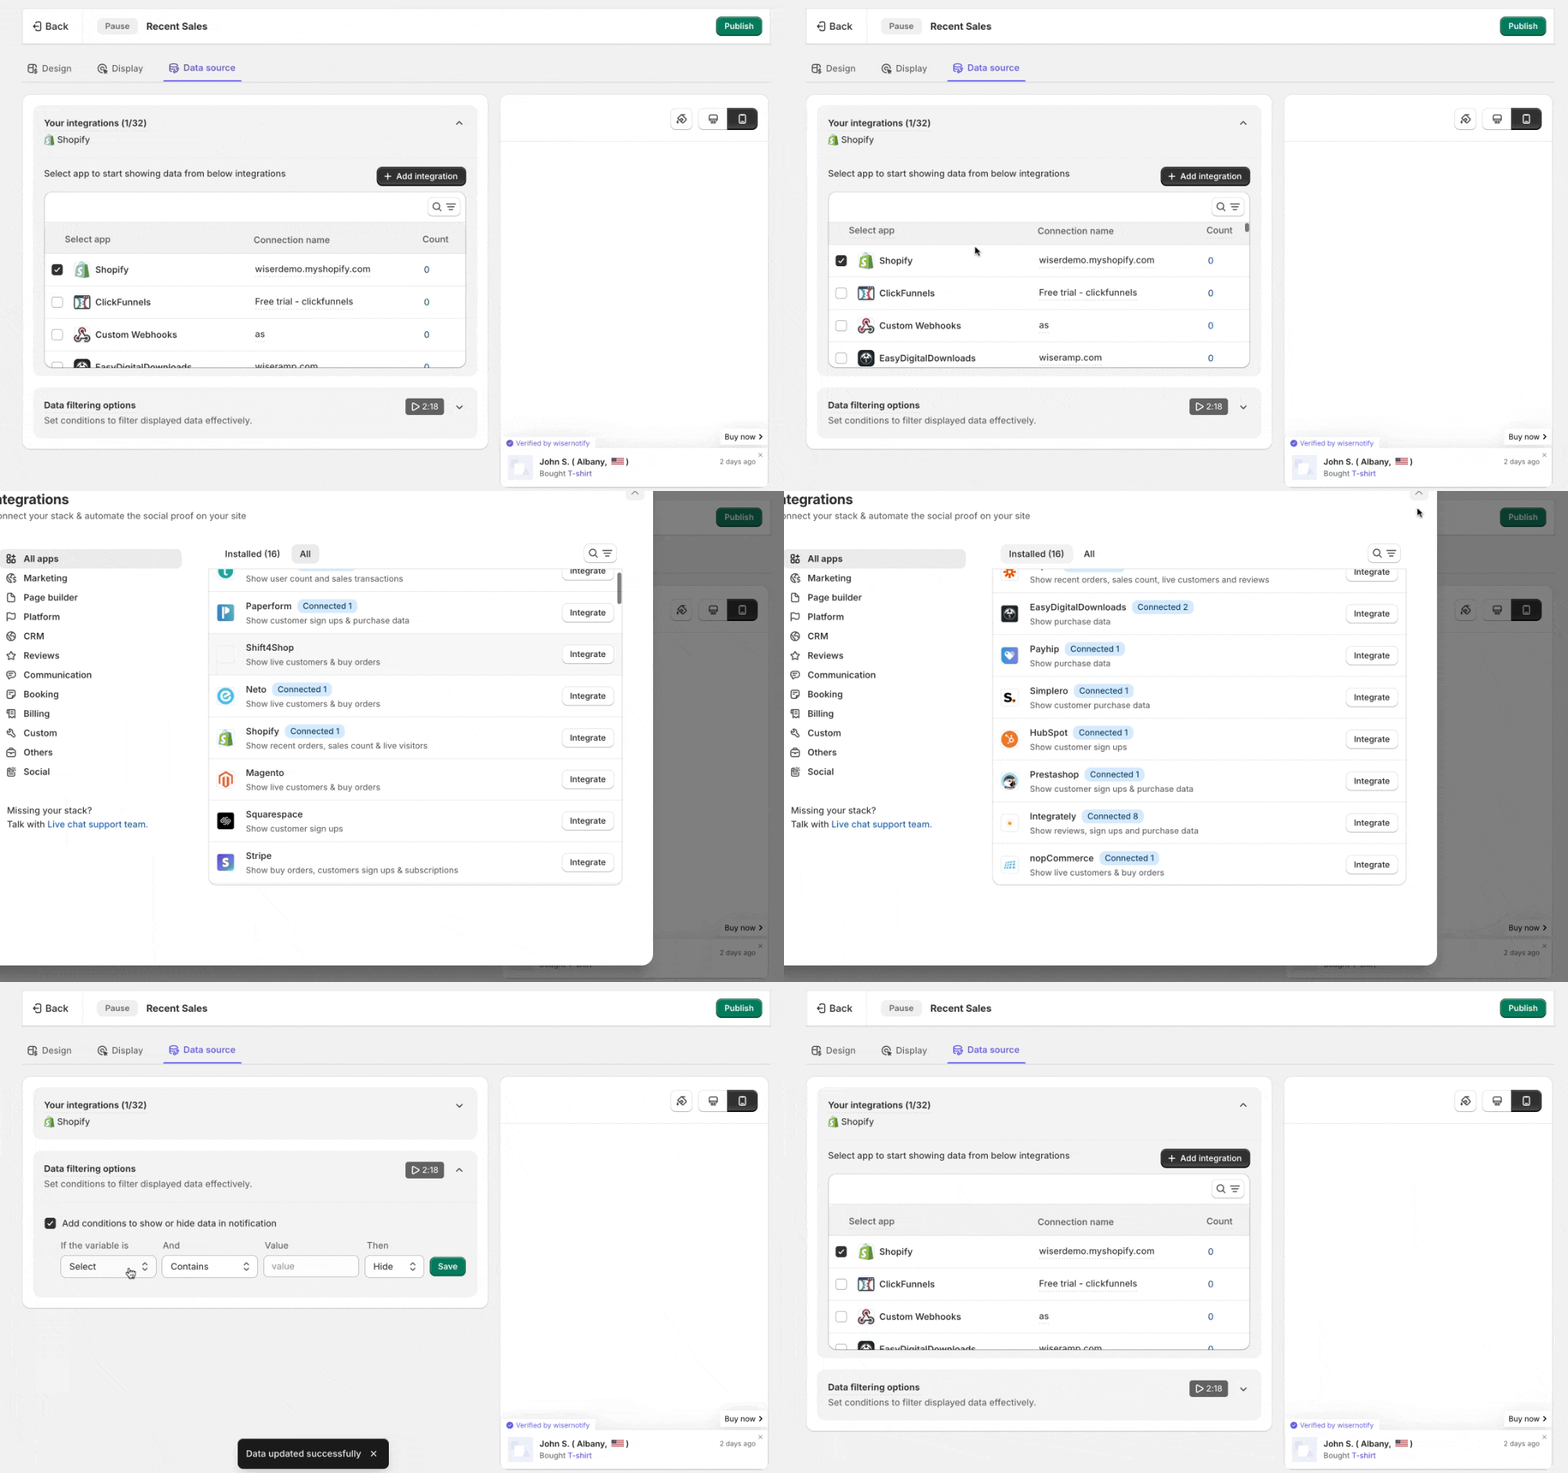
In Data Source, connect where your sales or leads come from, a store, form tool, payment gateway, or webhook, so the popup runs on real activity. In Display, choose which pages it shows on.
Then click Finish, turn it on, and open your site in a private window to see it live.

Boost Conversion Instantly
Add Social Proof & Urgency to your website
Popup Not Showing Up on Your Website?
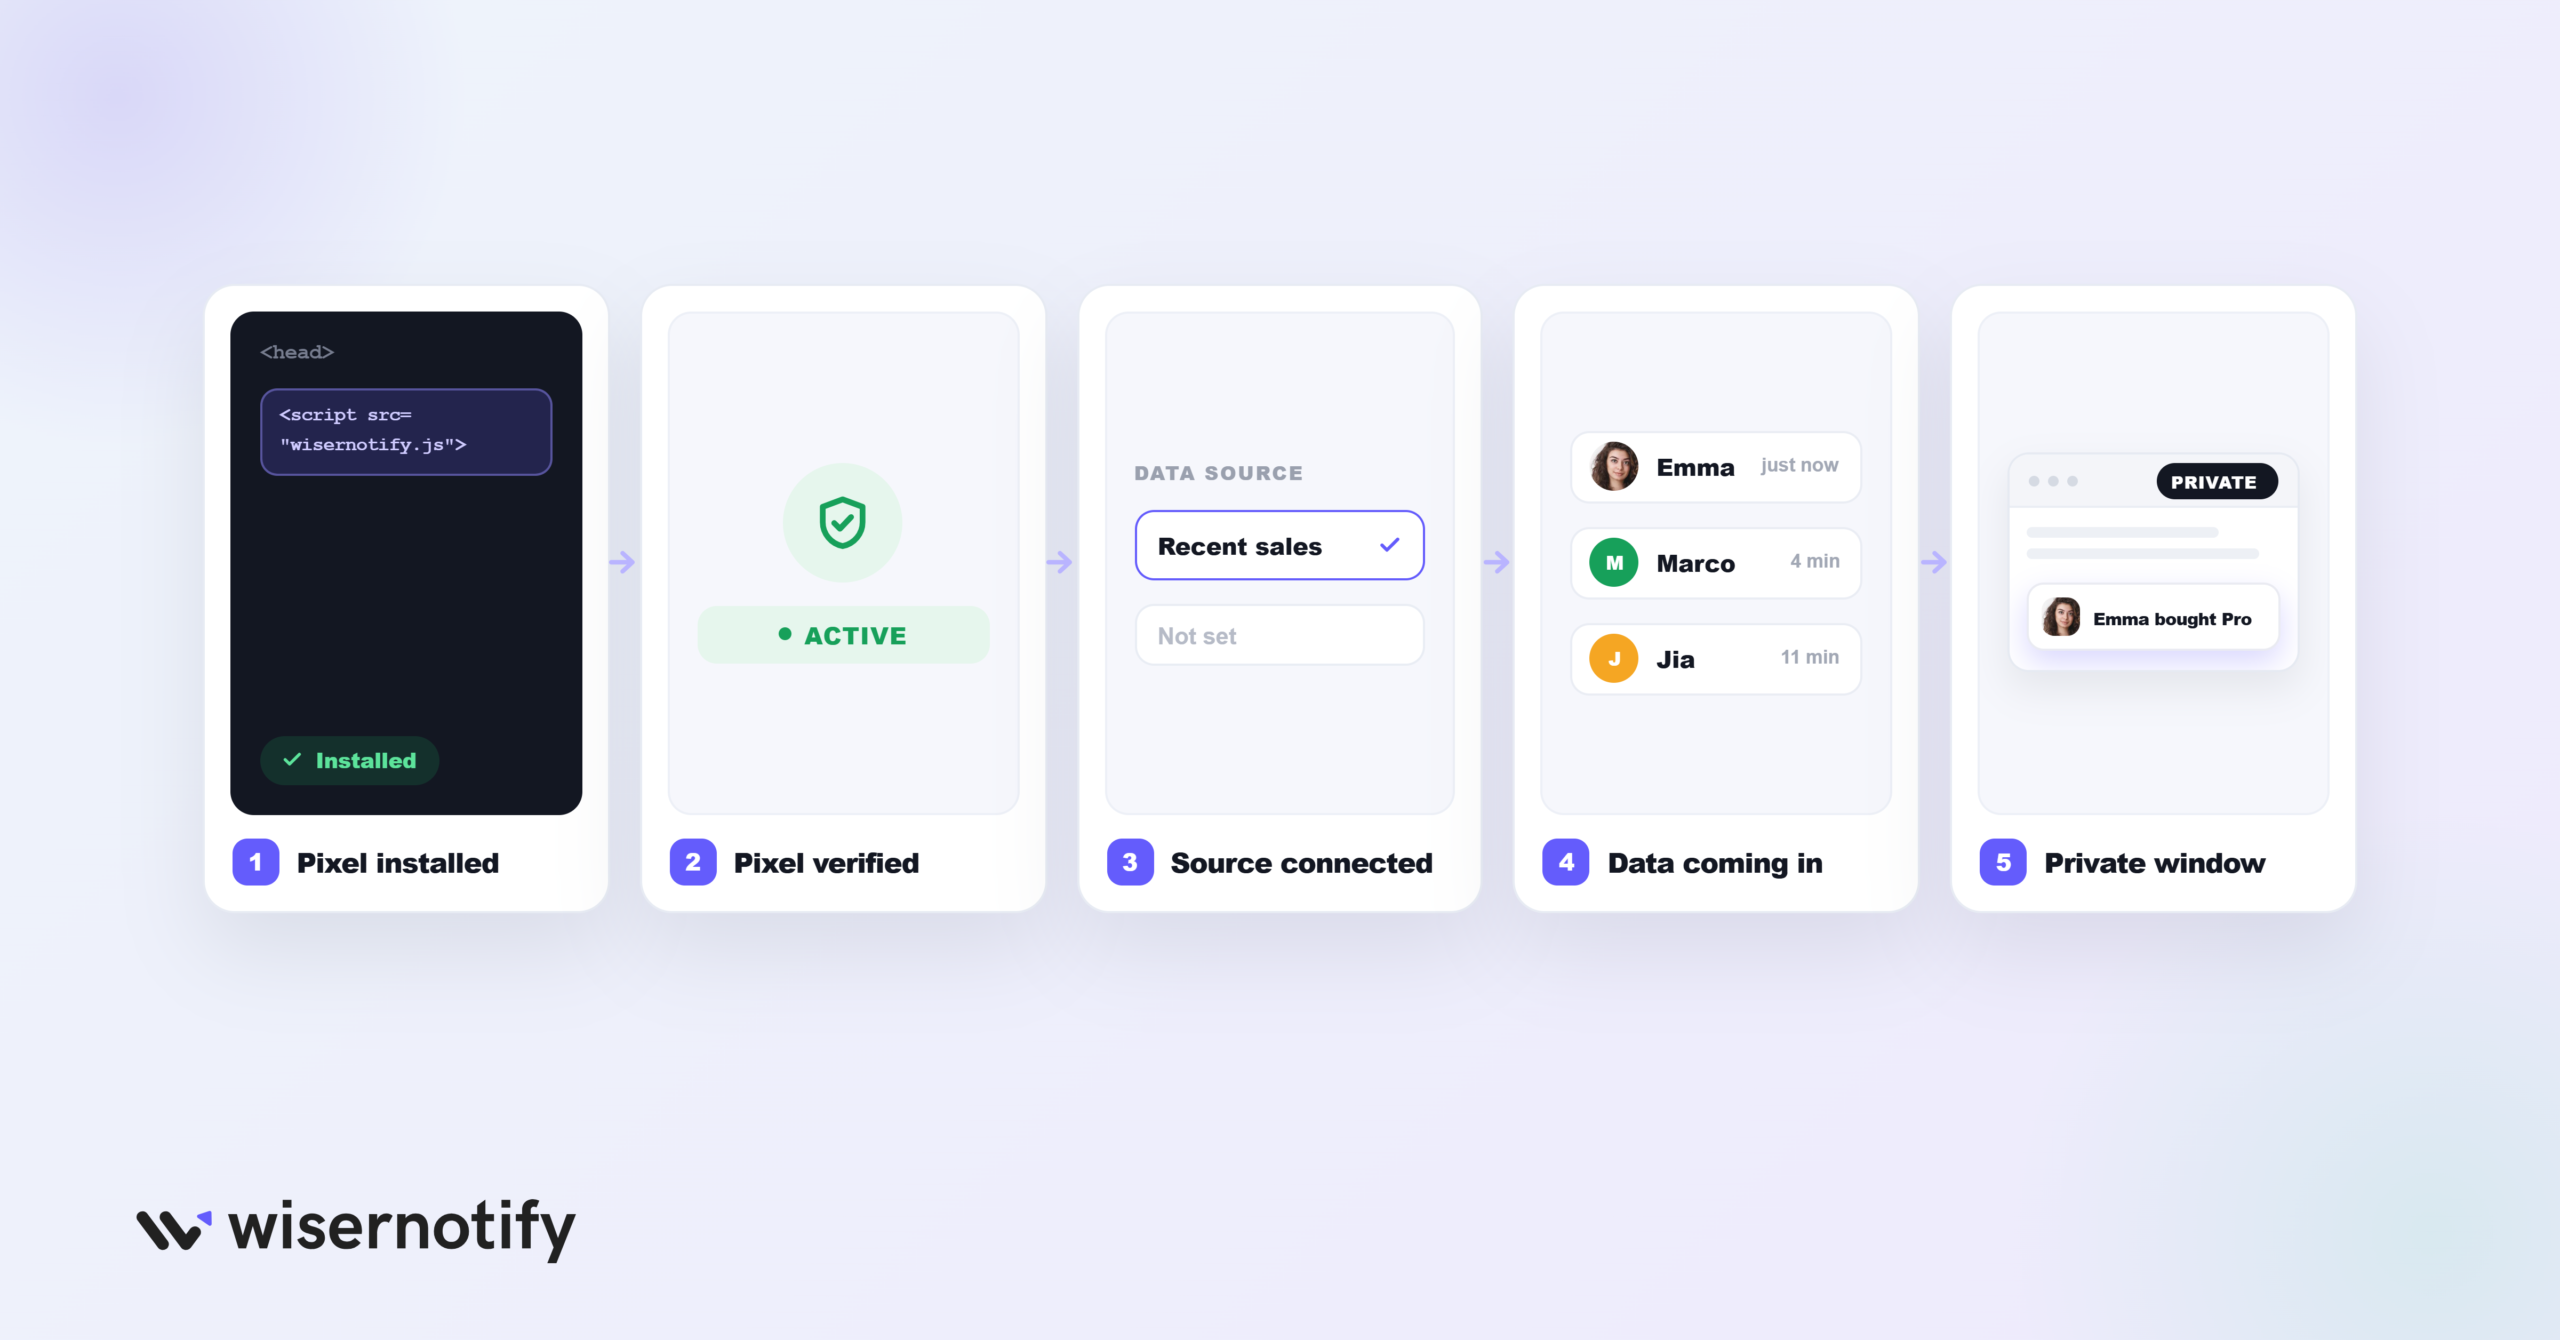
If the popup isn’t showing on your live site, check these first:
- Pixel not installed: the code has to be in your site’s head or custom code area, and the site has to be published.
- Pixel not verified: load the site once, then click Verify pixel installation and confirm it shows Active.
- Wrong data source: in the notification’s Data Source, confirm the right sales or lead source is connected.
- No data yet: a Recent Sales popup needs real orders or signups, so make sure data is coming in.
- Cache: open the site in a private window so you’re not seeing an old version.
Still stuck? WiserNotify’s dashboard has a built-in check that shows what’s wrong, and live chat can help.
Is the Sales Notification Popup Free?
You can try it free. WiserNotify offers a 7-day free trial, so you can add the pixel to your website, set up a popup, and see how it performs before you pay anything.
After the trial, you pick a paid plan based on your monthly visitor traffic. Plans scale up as your traffic grows, and higher tiers add more widgets and features.
For most websites, the trial is enough time to run a live recent-sales popup and see whether it lifts conversions before committing.
Where to Use Sales Popups on Your Website
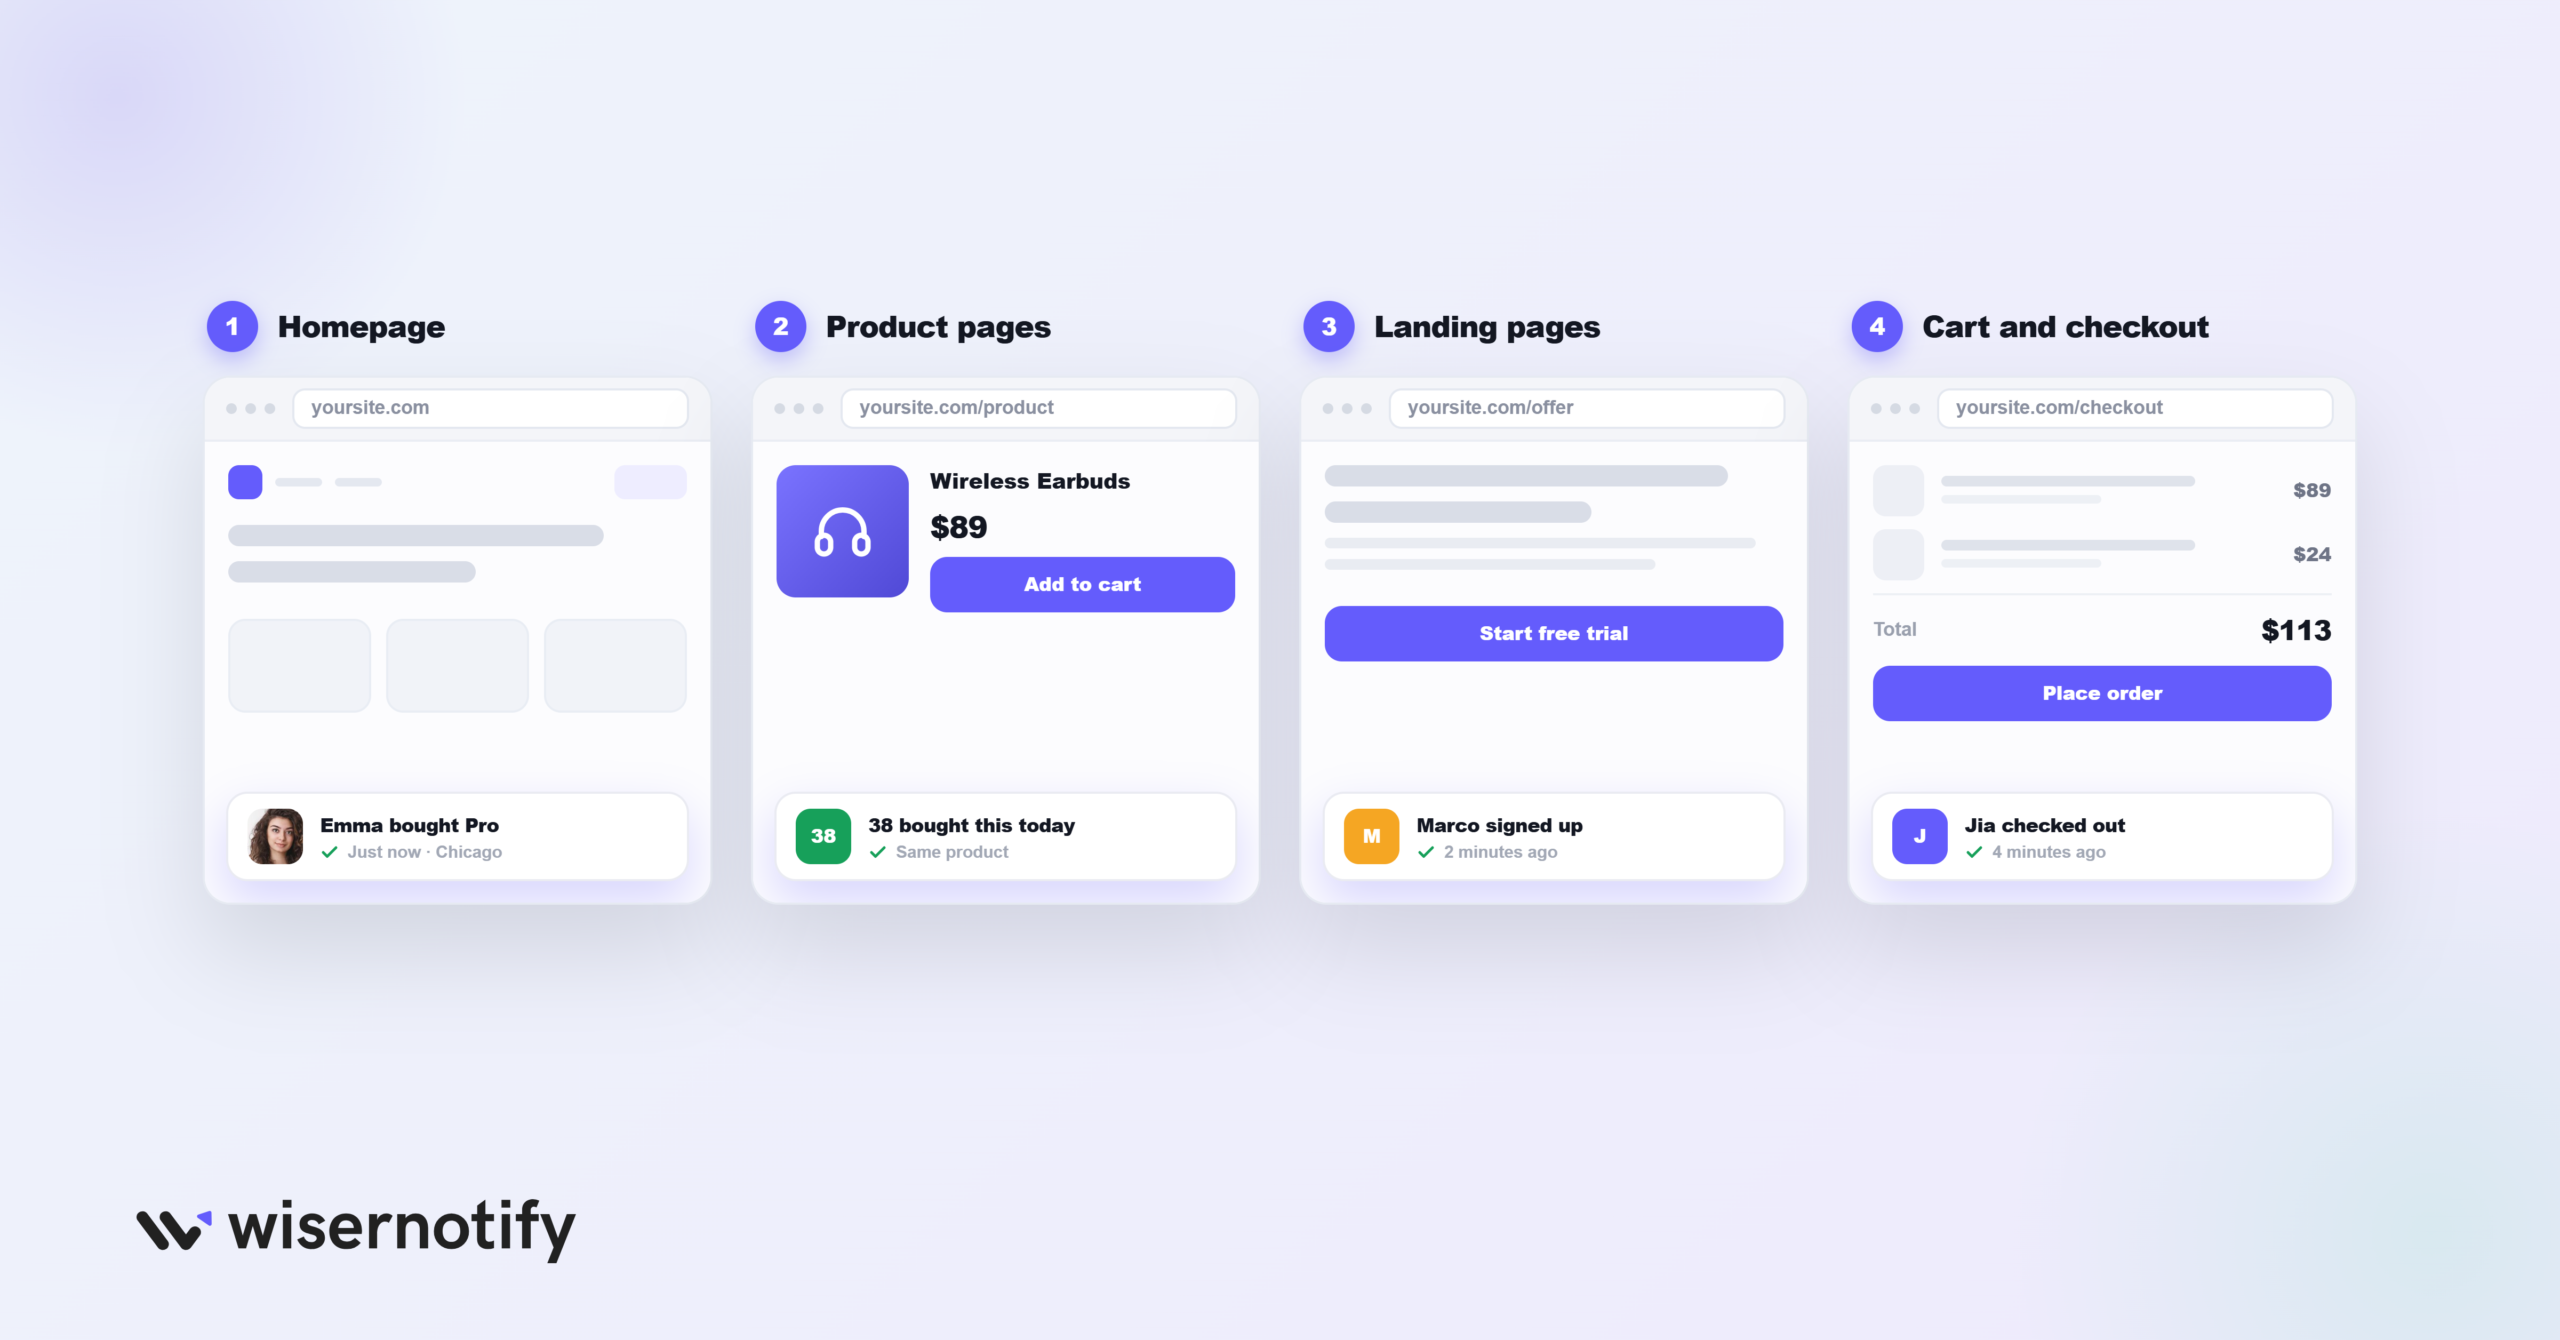
Popups work best on the pages where visitors decide, so focus them there:
- Homepage: greet a first-time visitor with proof that others are buying or signing up.
- Product or service pages: back up the exact item someone is considering with recent activity.
- Landing pages: reinforce a single offer or campaign with live signups.
- Cart and checkout: a bit of proof at the last step helps a hesitant buyer follow through and cuts cart abandonment.
Skip low-intent pages like your About or contact page, where a popup feels out of place.
Sales Popup Tips for Websites
- Match your site design: use your brand’s colors, fonts, and style so the popup looks like part of the site, not an interruption.
- Write specific messages: real names, cities, and product names make it believable, as the best social proof examples show. “Emily from Austin just booked a yoga session” beats “someone bought a product.”
- Time it right: don’t fire it instantly. Wait 10 to 20 seconds or until the visitor scrolls halfway down the page.
- Focus on high-intent pages: put popups where decisions happen, homepage, product pages, checkout, not every page.
- Track and adjust: use the WiserNotify dashboard to watch impressions, clicks, and conversions, then tweak the message and timing.
Sales Popup Mistakes to Avoid
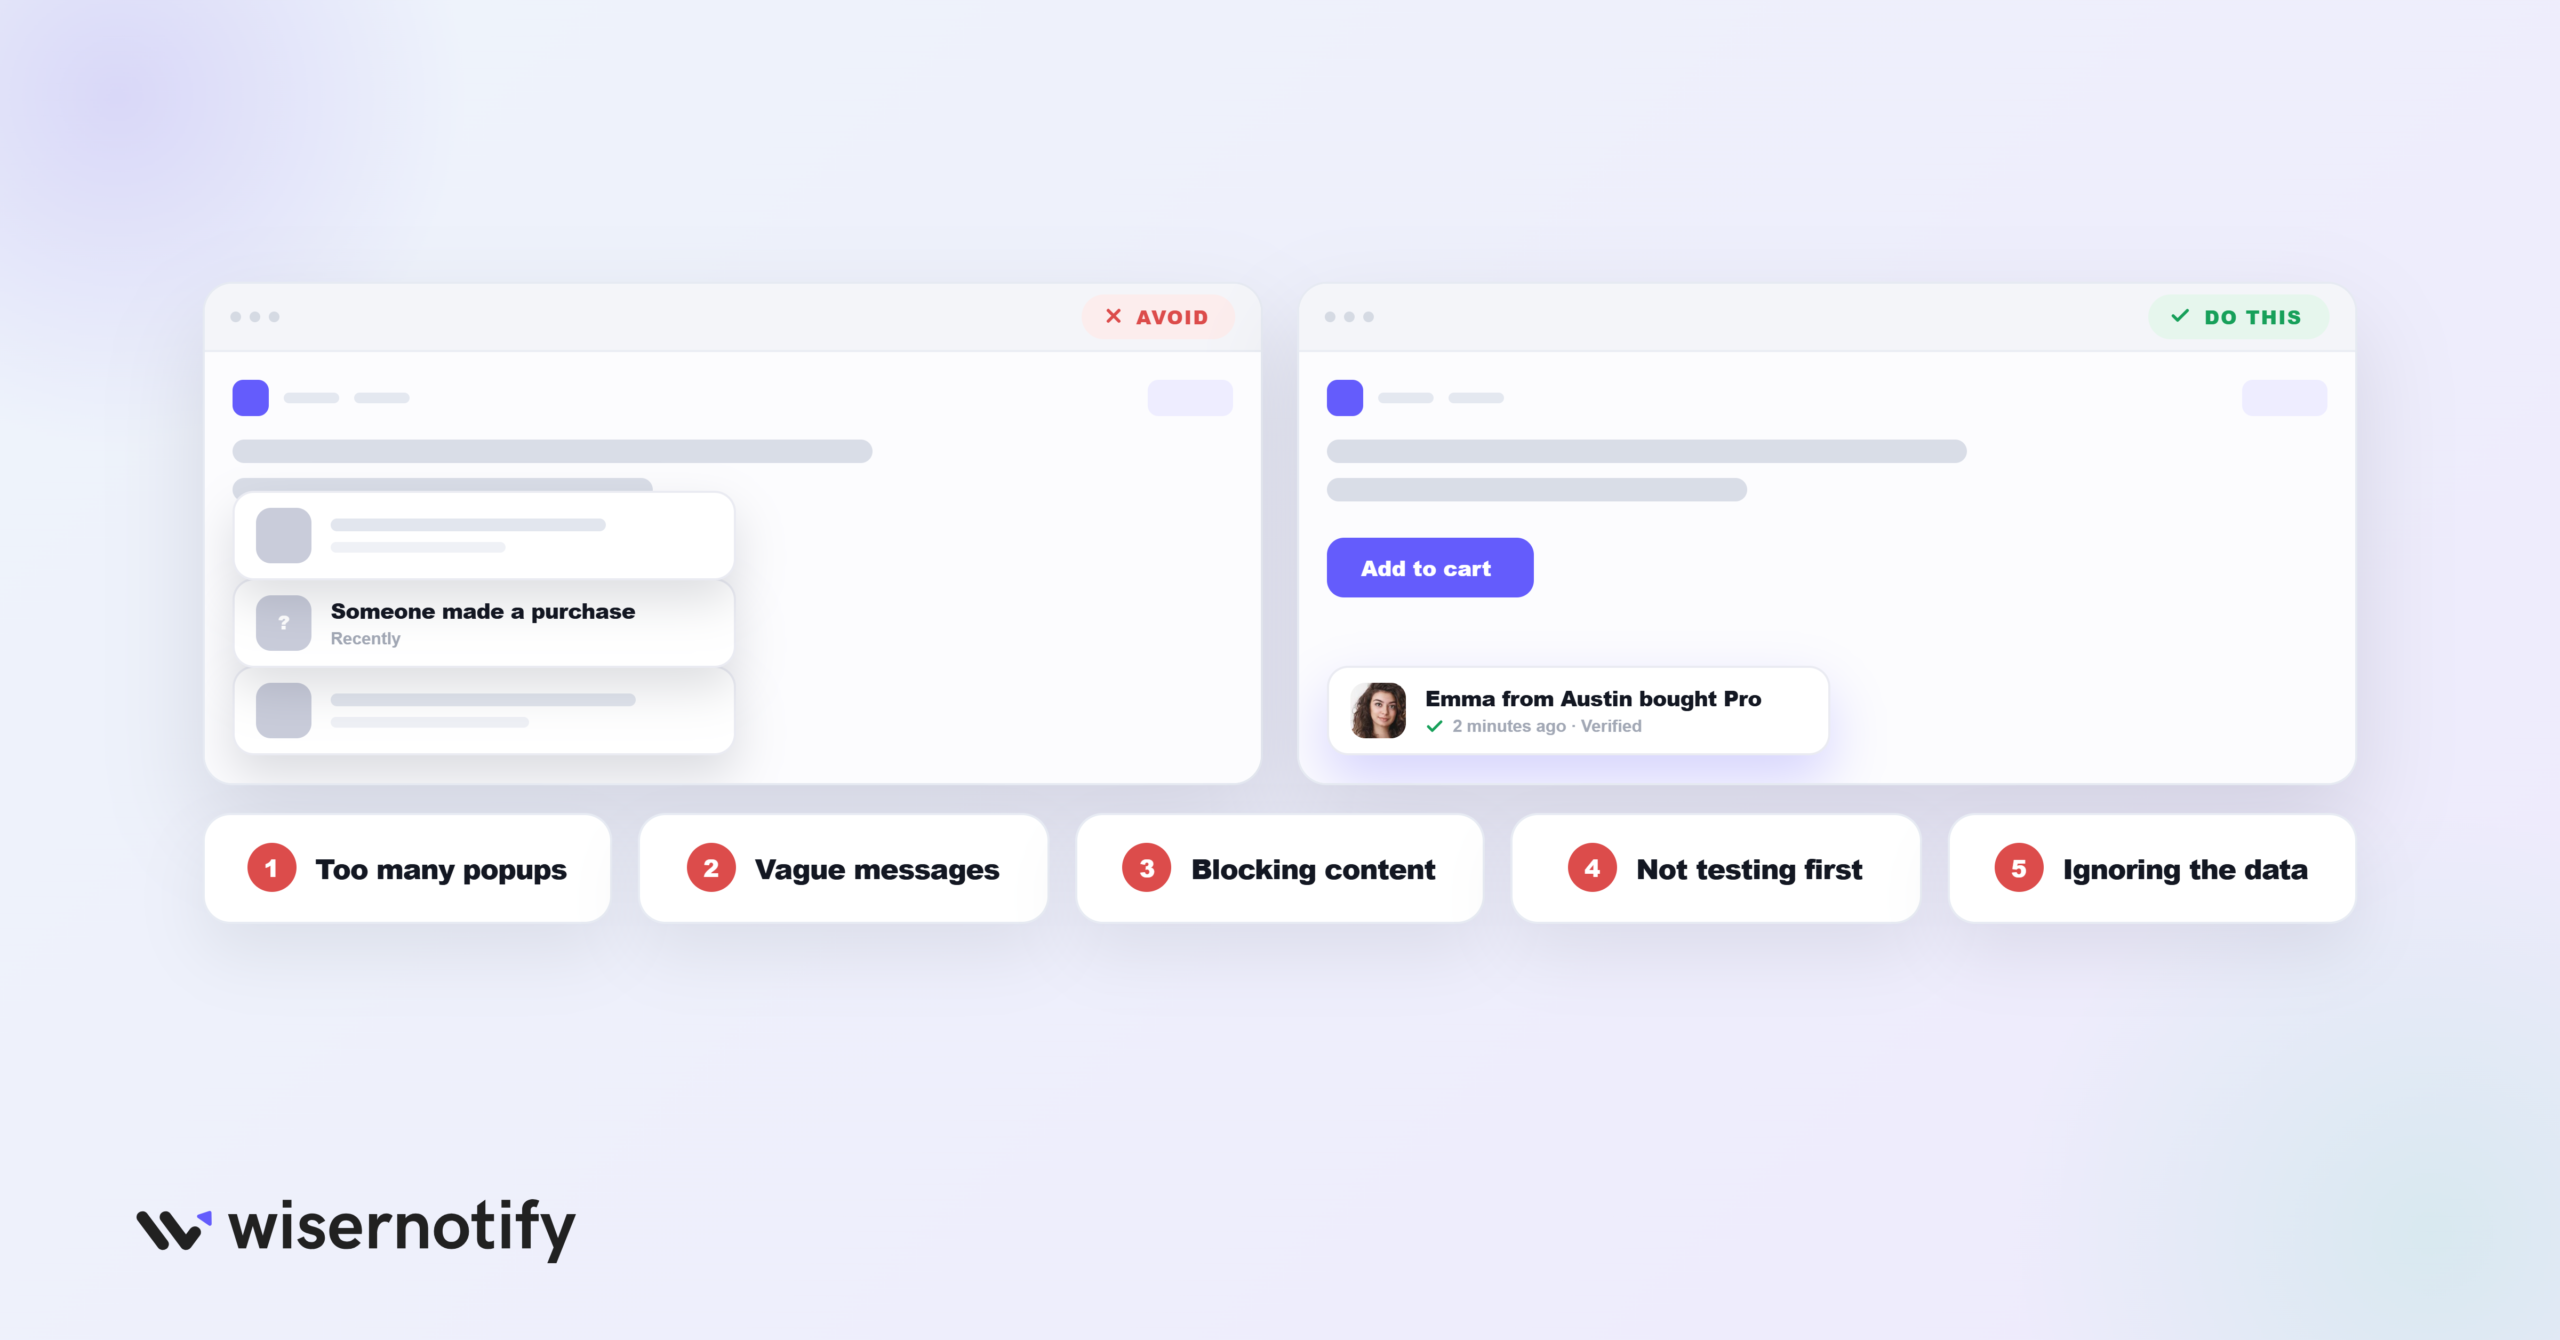
- Too many popups: constant notifications annoy visitors and raise your bounce rate. Keep it to one every 30 seconds and no more than three per visit.
- Vague messages: “someone made a purchase” sounds automated. Use real names and details so it reads as authentic.
- Blocking content: a popup that covers your menu, CTA, or checkout button hurts more than it helps, especially on mobile. Keep it in a corner and test on a phone.
- Not testing first: check how the popup looks and behaves across screen sizes and browsers before you rely on it.
- Ignoring the data: without tracking, you keep running setups that don’t work. Watch the numbers and adjust.
Build trust & FOMO
Highlight real-time activities like reviews, sales & sign-ups.
Wrap-Up
A website that shows real activity converts better than one that looks quiet. Sales popups add the trust that helps a visitor act.
With light, customizable popups tied to real orders and signups, you give visitors more confidence and help them decide faster, without redesigning your site or touching checkout.
Set up your WiserNotify popup on your website and turn quiet traffic into signups and sales.
Platform-specific setup guides
The steps above work on any website. If you’re on a specific platform, these guides cover the exact setup for it:
- Sales notification popup on WooCommerce
- Sales notification popup on Magento 2
- Sales popup on Wix
- Sales notification popup on Webflow
- Sales notification popup on Squarespace
- Sales notification popup on PrestaShop
- Sales notification popup on Weebly
- Sales notification popup on Kajabi
- Sales notification popup on Framer
- Sales notification popup on ClickFunnels
- Sales notification popup on Carrd
- Sales notification popup on Divi
- Sales notification popup on landing pages
Frequently Asked Questions
What is a recent sales notification popup?
A recent sales notification popup is a small message that shows real activity, like a purchase or signup, so first-time visitors see that others are acting and feel more confident converting.
How do I add a sales notification popup to my website?
Copy your WiserNotify pixel, paste it into your website’s head or custom code area, publish the site, then verify the pixel and build the popup from the WiserNotify dashboard. No code needed.
Does it work with any website?
Yes. WiserNotify works with any website or builder that lets you add a code snippet, including WordPress, Shopify, Wix, Webflow, Squarespace, and custom sites.
What can the sales popup show?
Recent Sales shows each buyer’s name, location, product, and time. Sales Count shows the total number of sales or signups over a period you choose.
Is there a free recent sales notification popup?
WiserNotify offers a free 7-day trial, so you can add the pixel to your website and set up a recent-sales popup to test it before choosing a paid plan.

Krunal Vaghasiya is a marketing tech expert who boosts e-commerce conversion rates with automated social proof and FOMO strategies. He loves to keep posting insightful posts on online marketing software, marketing automations, and improving conversion rates.




 Capterra