Webflow is a designer’s dream.
You’ve built a sleek, responsive website with full control over your layout and animations—but even perfect visuals can leave visitors unsure.
When someone sees “Rachel from Toronto just bought the Eco Yoga Mat”, they immediately feel more confident. That’s the power of social proof.
Wisernotify gives your Webflow site this trust-boosting feature through real-time sales notifications.
It shows that others are engaging with your brand right now—boosting conversions.
Here’s a quick guide video for adding sales pop-ups on Webflow. The process is simple and takes just a couple of minutes.
Why Add a Sales Notification Pop-up on Webflow?
Webflow allows you to tell a visual story with elegance and control. Wisernotify introduces real-time engagement cues that convert that story into results. Popups help bridge the gap between visual design and user trust. Here’s why integrating Wisernotify into your Webflow project is a strategic move:
Create trust at a glance: Visitors instantly see others interacting with your site, which builds immediate credibility.
Motivate action: FOMO (Fear of Missing Out) is powerful. Seeing others take action can prompt users to do the same.
Works across industries: Whether you’re selling digital products, offering services, or running lead-gen funnels, real-time popups validate your offering.
Effortless implementation: Add Wisernotify to Webflow via script or Google Tag Manager. It doesn’t disrupt your code or workflows.
Custom styling for continuity: Use Wisernotify’s design options to match your Webflow theme. This ensures branding consistency across all touchpoints.
Use Case Example: A Webflow-based online education startup integrated Wisernotify across their course landing pages. They showed popups for new student signups and content downloads. In less than a month, they experienced a 29% boost in conversion rates and a 19% reduction in bounce rate. Users reported feeling more confident in the platform due to the visible activity of other learners.
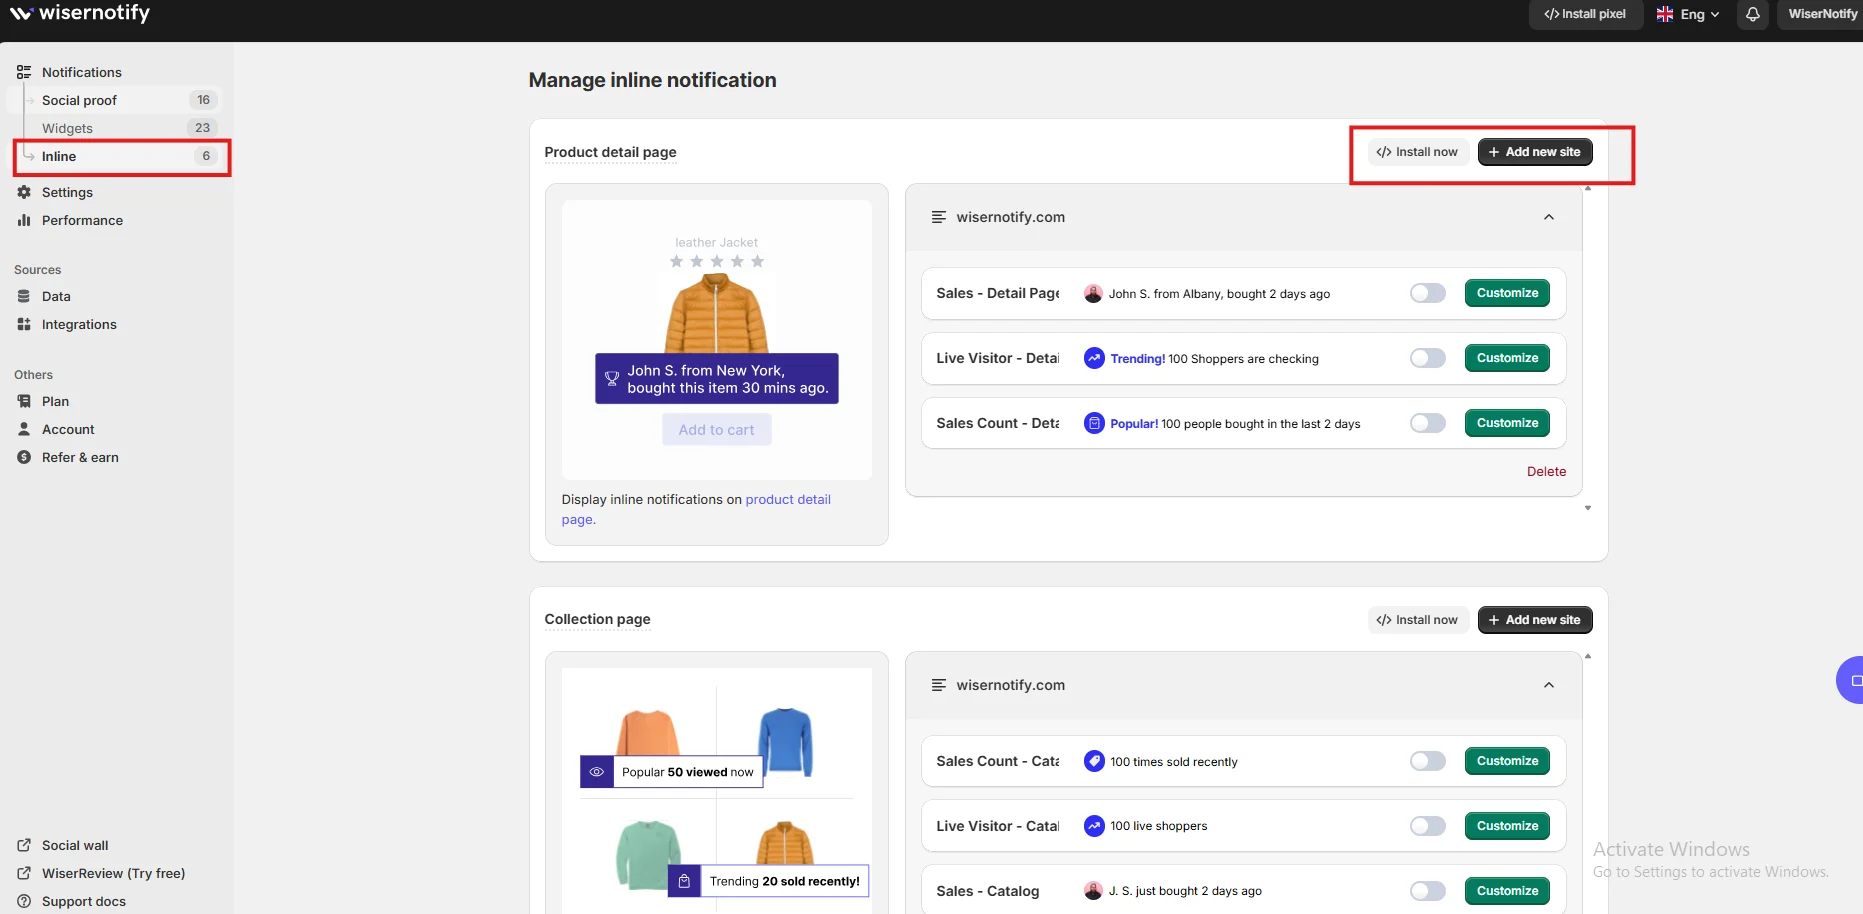
How to Add Sales Pop-up on Webflow

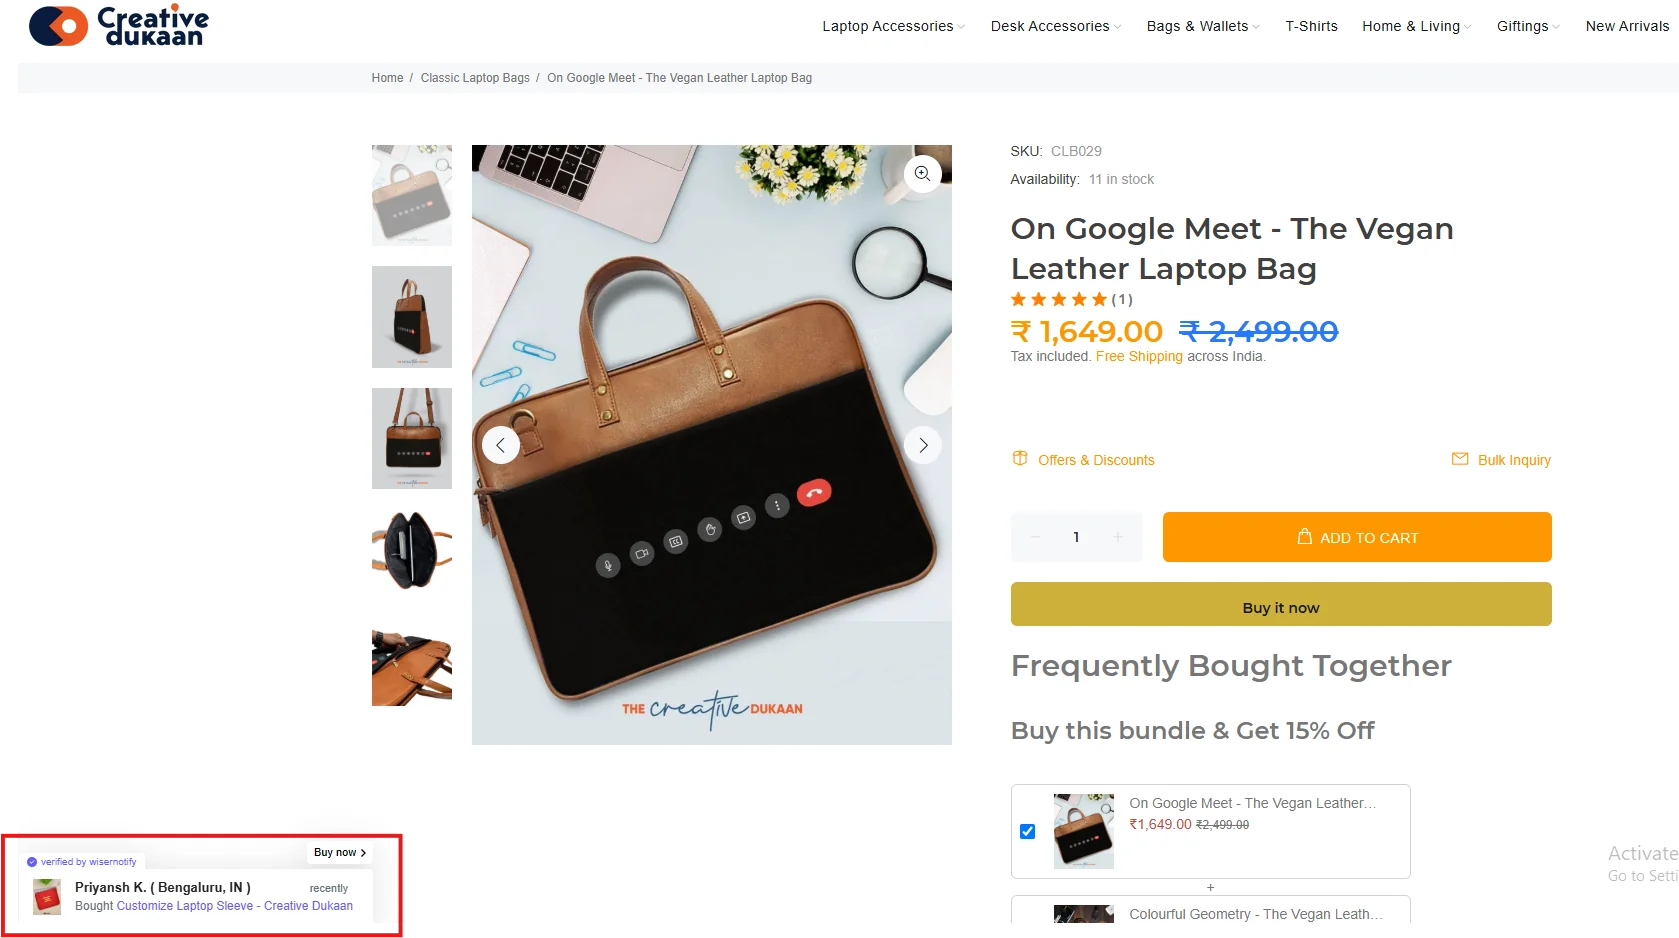
3 Best Sales Pop-up Examples

Sales Pop-up Tips for Webflow
Here are the main tips for sales pop-ups on Webflow:
1. Customize using Webflow’s style system
Use Webflow’s global classes and design tokens to match popups with your site’s fonts, buttons, and background colors.
Consistency in typography, padding, and shadows ensures that popups blend naturally into your page, enhancing trust and professionalism.
2. Trigger popups with intent signals
Rather than displaying popups immediately, configure them to appear after meaningful interactions—such as scrolling 40% of the page, hovering on a CTA, or idling for more than 10 seconds.
These behavioral triggers engage users without being disruptive.
3. Target specific user behavior
Show product-specific or page-specific notifications.
For example, if a user is on a pricing page, display a popup like “Emma from Dallas just signed up for our Pro Plan.”
This reinforces the user’s interest and encourages completion.
4. Personalize with location and action
Personalization drives credibility.
Use dynamic fields to insert real customer names, cities, and actions (e.g., purchase, signup, download).
This not only humanizes the popup but makes it feel authentic and relevant to the visitor.
5. Optimize for all devices
Check popup layout and visibility across Webflow’s responsive breakpoints.
Wisernotify offers settings to tweak size, spacing, and placement for desktop, tablet, and mobile.
Popups should never block menus or CTAs.
6. Minimize intrusiveness with animation
Use light fade-ins or bottom-corner slides. Avoid bright colors or loud sounds.
Popups should complement your content experience, not steal attention from it.
7. Test placement on key funnel pages
Add popups to your homepage, landing pages, checkout, and even blog CTAs.
Each location represents a micro-conversion point where social proof can ease uncertainty and guide users forward.
8. Limit session frequency
To avoid annoying users, restrict popups to 2–3 per session with a delay of 30–60 seconds between them.
Less is more when it comes to trust-building.
9. Use analytics to refine strategy
Wisernotify’s dashboard tracks views, clicks, and conversions.
Use this data to optimize your timing, messages, and popup locations.
A/B test subtle changes to see what converts best.
Sales Popup Mistakes to Avoid on Webflow
Here are some common mistakes to avoid:
1. Flooding users with popups
Displaying too many popups in one session is overwhelming.
It can diminish user experience and damage credibility.
Keep notifications timely and relevant to the user’s behavior.
2. Lacking message specificity
Vague alerts like “Someone made a purchase” don’t resonate.
Use specific names, locations, and actions to create believability and engage curiosity.
Precise messaging builds more trust.
3. Interfering with page layout
Popups should never cover CTAs, navigation bars, or form fields.
Always preview popup placement on multiple devices and adjust via Wisernotify’s positioning tools and Webflow’s layout guides.
4. Ignoring your visual language
A popup that doesn’t match your site’s design feels out of place.
Match colors, font sizes, and padding to your global Webflow styles so the user experience feels intentional and polished.
5. Failing to adapt or test
Set-and-forget popup strategies often go stale.
Monitor performance regularly using Wisernotify’s analytics and test variations in text, placement, and appearance to maintain high engagement over time.
Wrap-Up
Webflow gives you the tools to design beautiful, conversion-ready websites.
Wisernotify complements that by providing real-time trust signals that encourage user action. Together, they form a powerful combination that balances visual appeal with performance.
By installing Wisernotify on your Webflow site, you create a dynamic and trustworthy user experience that converts.
Social proof isn’t just a bonus—it’s a necessity in today’s competitive online landscape. Start using Wisernotify today and let your customers’ actions inspire new ones in real time.
