
Add a Sales Popup to Teachable in 5 Minutes
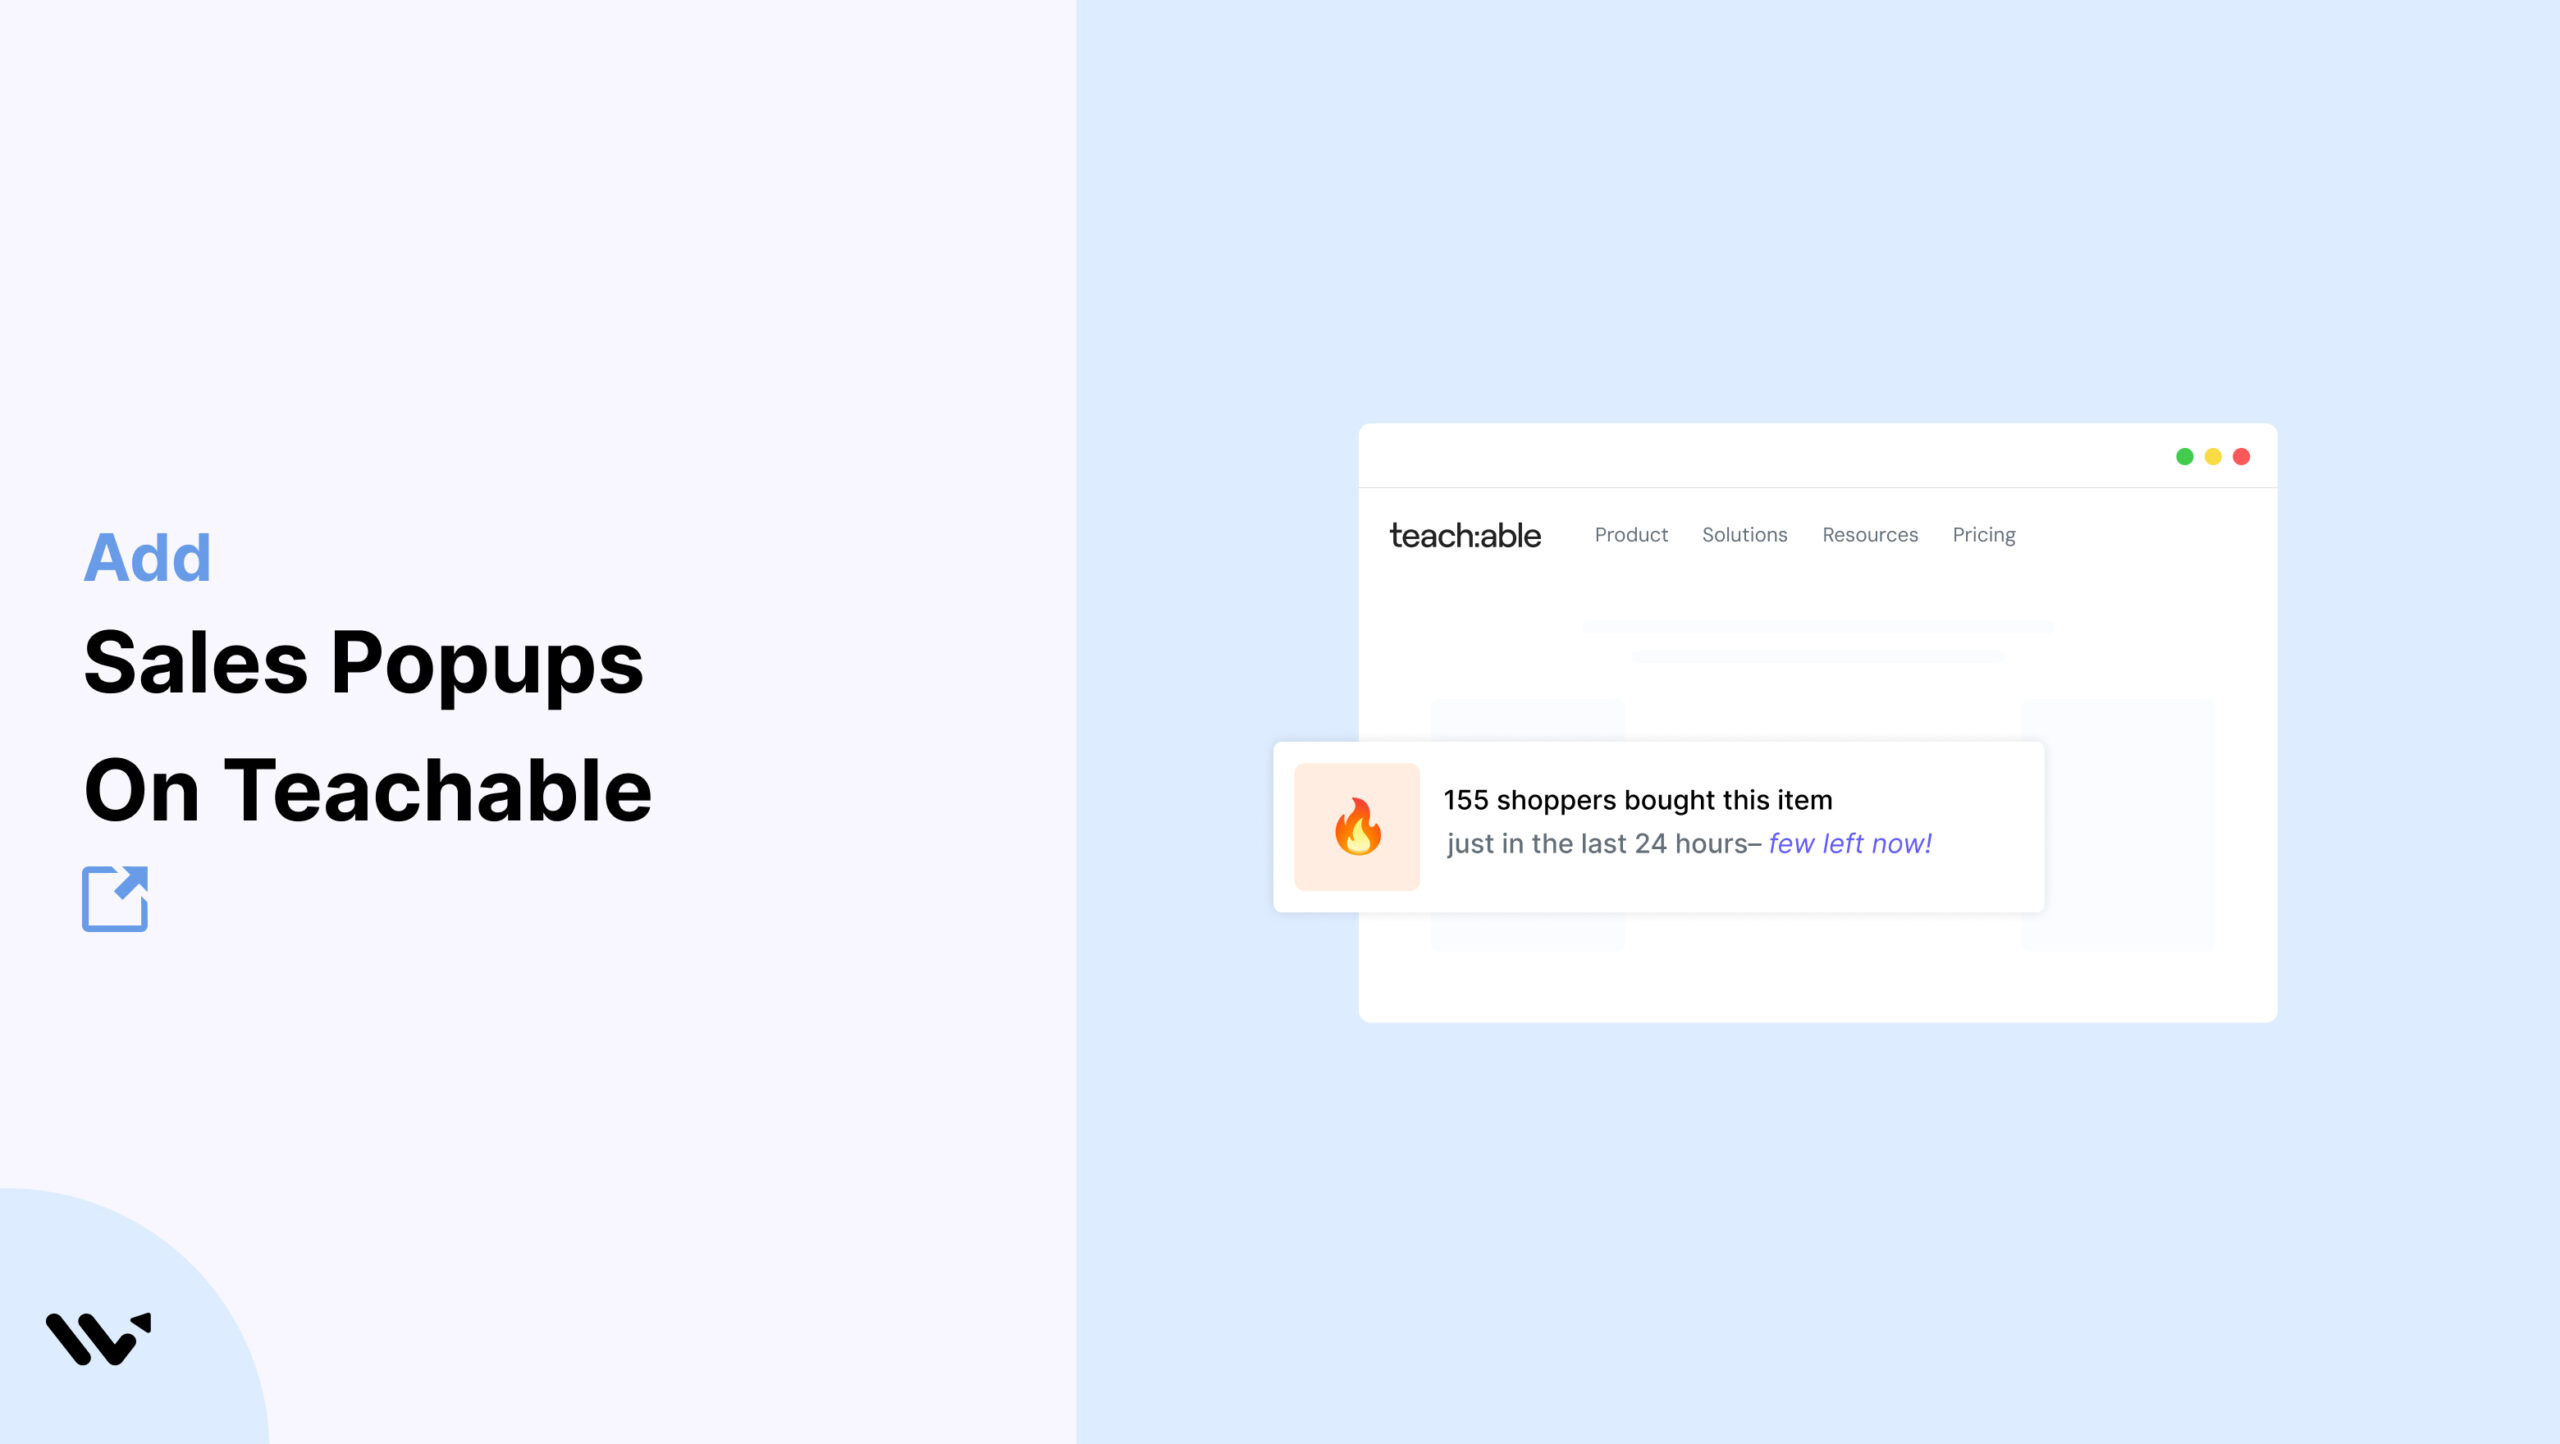
To add a sales popup to Teachable, paste the WiserNotify pixel into Site, then Code Snippets, in the Head Code Snippets box, and build the Recent Sales widget under Social Proof. Five minutes, no code edits, no theme changes.
The payoff is the question every course page leaves hanging. Are other students in here, or am I the first?
A small popup saying “Aisha from Mumbai joined SEO Mastery” settles it on the spot. I run WiserNotify, and course creators are one of our biggest user groups, so every step below is the exact flow with screenshots.
Key takeaways
- The pixel lives in Site, then Code Snippets, in the Head Code Snippets box. It covers your sales pages, checkout, and course pages in one paste.
- Teachable has no popup builder of its own, so live enrollment and review popups come from a tool layered on top.
- Teachable’s webhook feeds real enrollments and sales into the popup, so every message shows a real student.
- Enrollment, module-completion, and review popups fit course pages better than generic purchase messages.
Does Teachable Have Built-In Popups?
No. Teachable ships page sections, banners, and checkout settings, but no popup builder and no way to show live student activity on a page.
That matters because a course is a trust purchase. Visitors want evidence that real students enroll, finish lessons, and leave happy reviews before they hand over money for one.
So the social proof layer comes from outside. One pixel in your school’s Code Snippets adds live popups without touching your Teachable theme, and the same pixel later powers review widgets if you decide to add reviews to Teachable too.
Which Notification on Which Teachable Page
Not every notification type suits every page. Here’s a quick reference for where each one earns its keep:
| Notification type | Best page | Why it fits there |
| Sales pop-up | Course sales page | Shows recent enrollments right where a visitor is deciding whether to buy. |
| Live visitor counter | Checkout page | Reassures a buyer mid-checkout that others are completing the same purchase right now. |
| Review notification | Landing page | Answers the trust question before a first-time visitor has even scrolled to pricing. |
| Countdown timer | Enrollment deadline page | Gives a real, ticking reason to decide now rather than come back later. |
How to Add a Sales Popup to Teachable
You need a WiserNotify account and admin access to your Teachable school. Everything happens in two dashboards and takes about five minutes.
Watch the walkthrough, then follow the written steps with screenshots.
Step 1: Copy Your WiserNotify Pixel
Start a WiserNotify account and open the Install Pixel page. Copy the code. It is one short script, and it is the only thing Teachable ever needs from you.

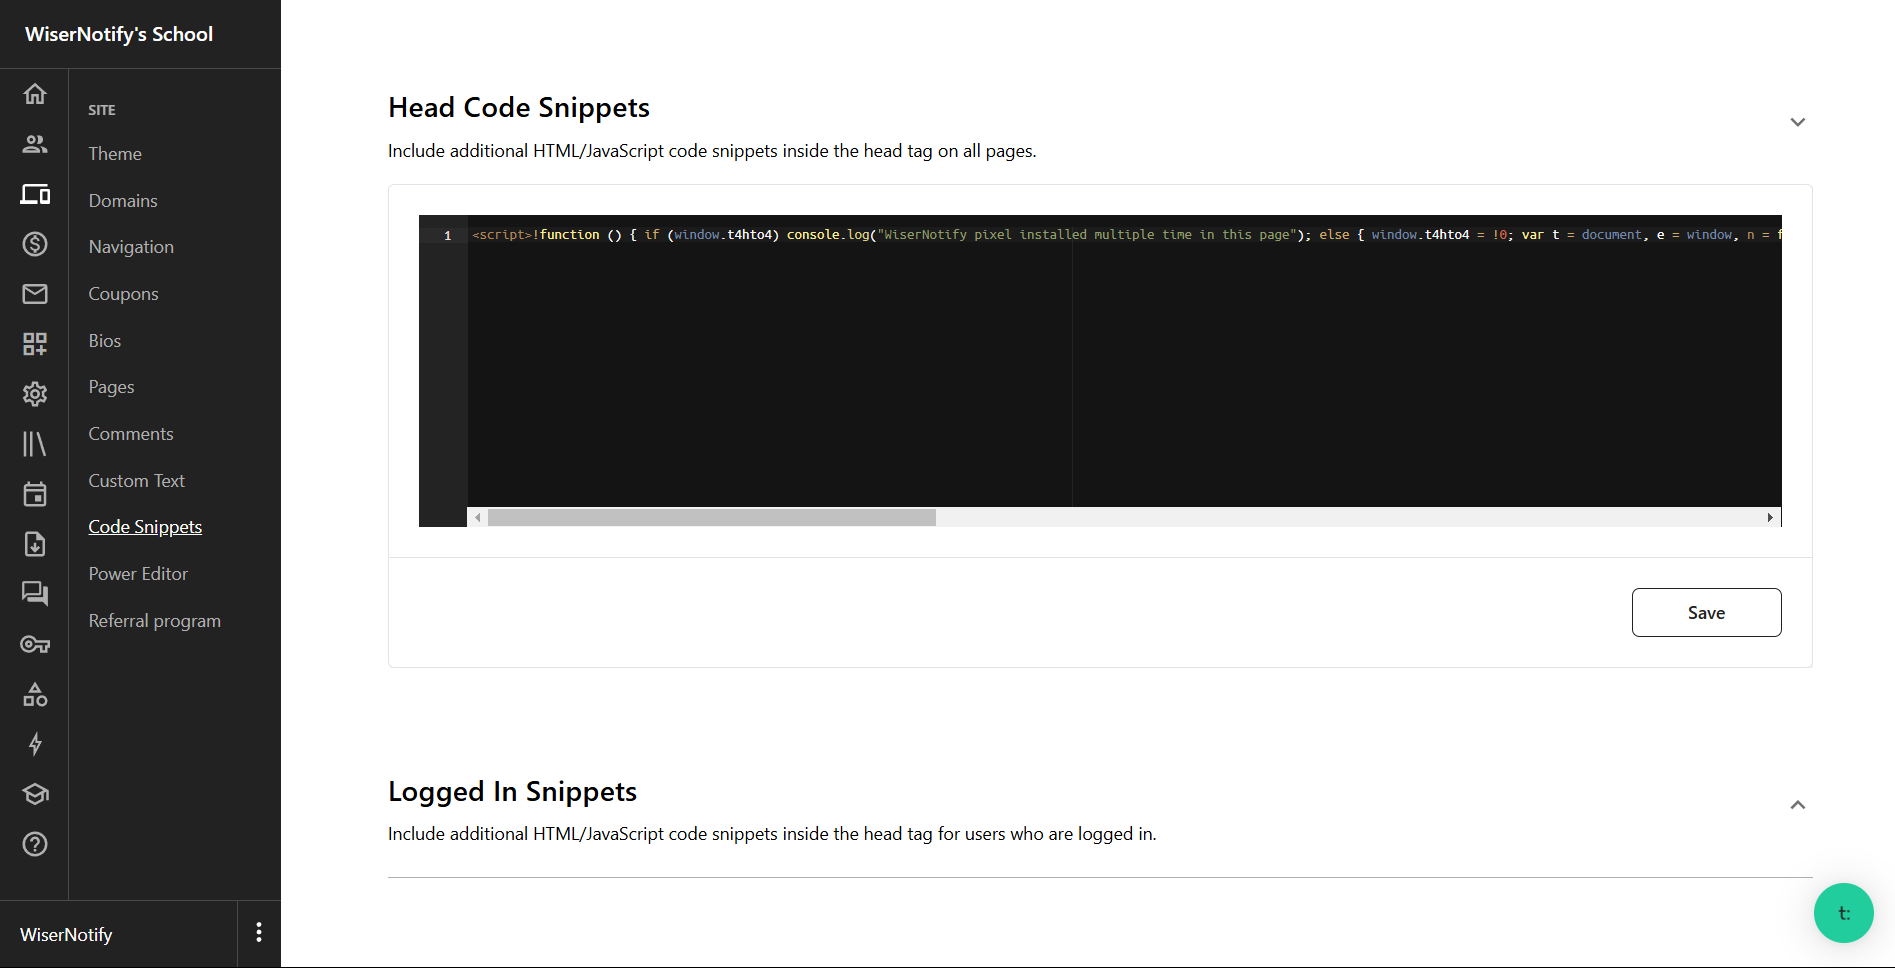
Step 2: Paste It in Head Code Snippets
In your Teachable admin, go to Site, then Code Snippets. Paste the pixel into the Head Code Snippets box and click Save. This loads it across your sales pages, checkout, and course pages at once.
Step 3: Verify the Pixel
Visit your school’s live site once, then click verify pixel installation back in WiserNotify. The Pixel Active message confirms Teachable is serving the script.

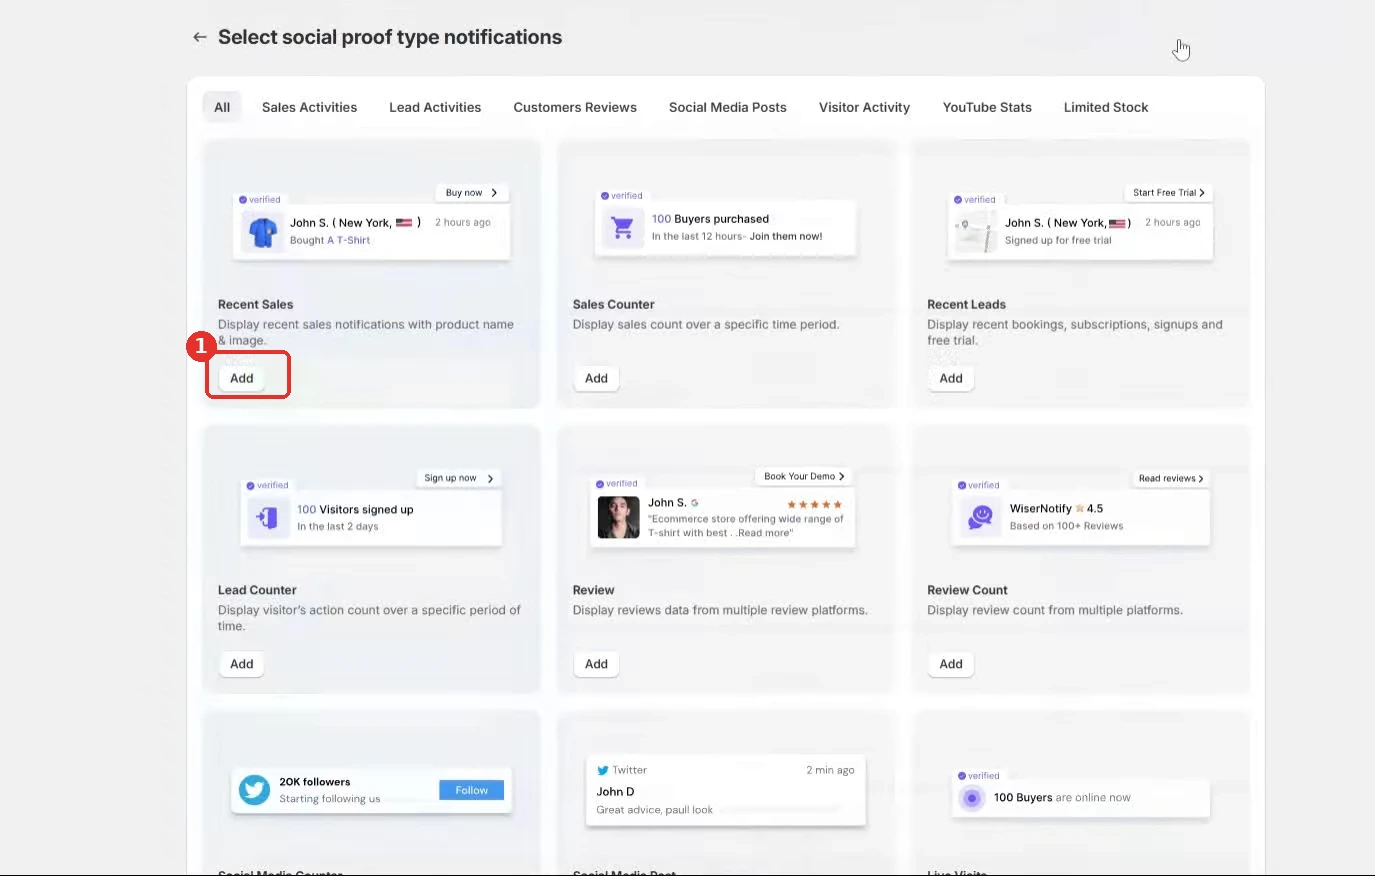
Step 4: Pick the Recent Sales Widget
Open Widgets, then Social Proof, and click Add on Recent Sales. Review, signup, and live-visitor widgets wait in the same list for later, all running off the pixel you already installed.
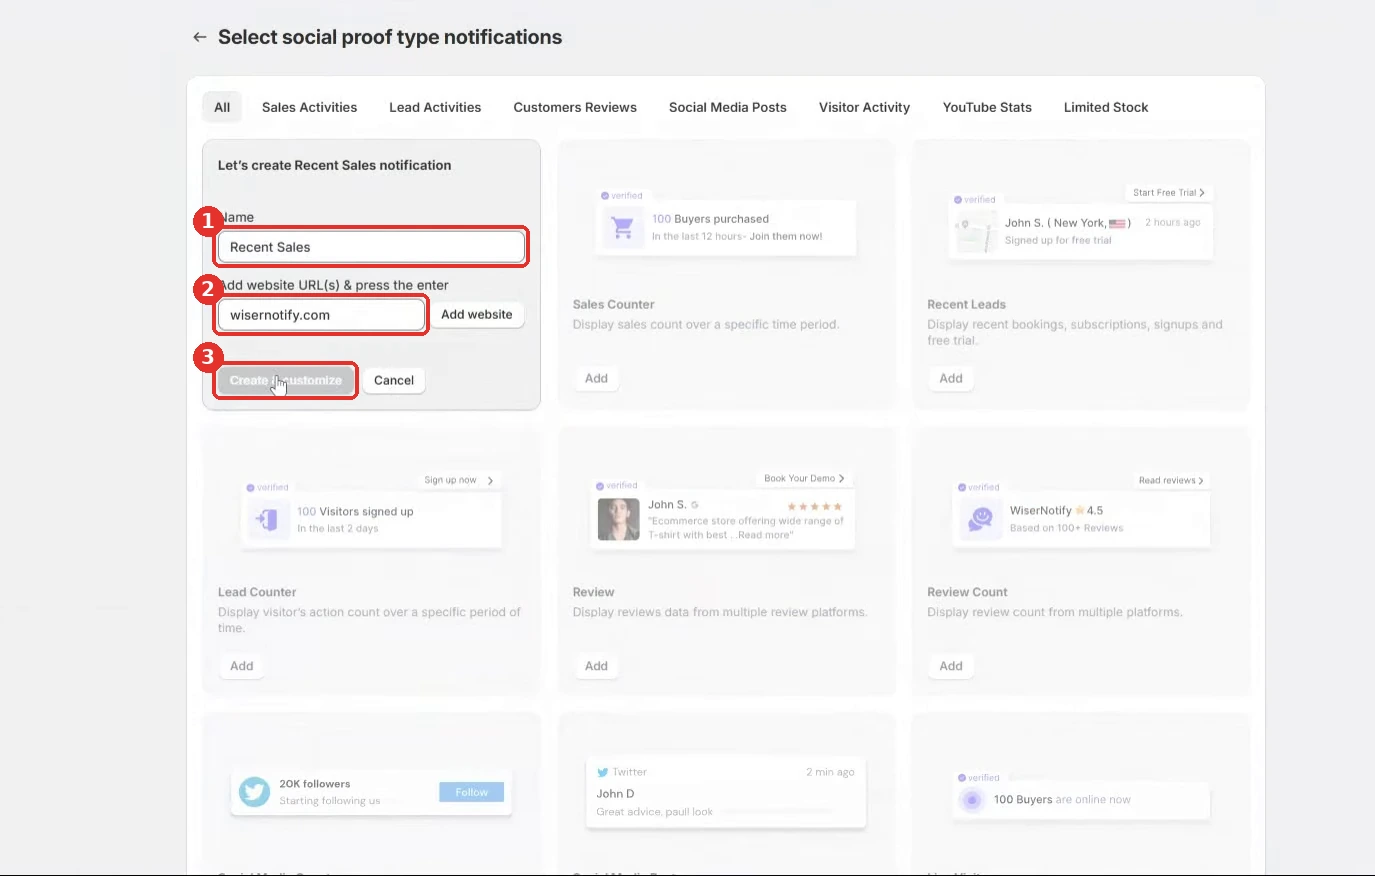
Step 5: Name It and Add Your URL
Enter a widget name and your school’s URL. Use your custom domain if students see one, since the widget’s page rules match against the address visitors load.
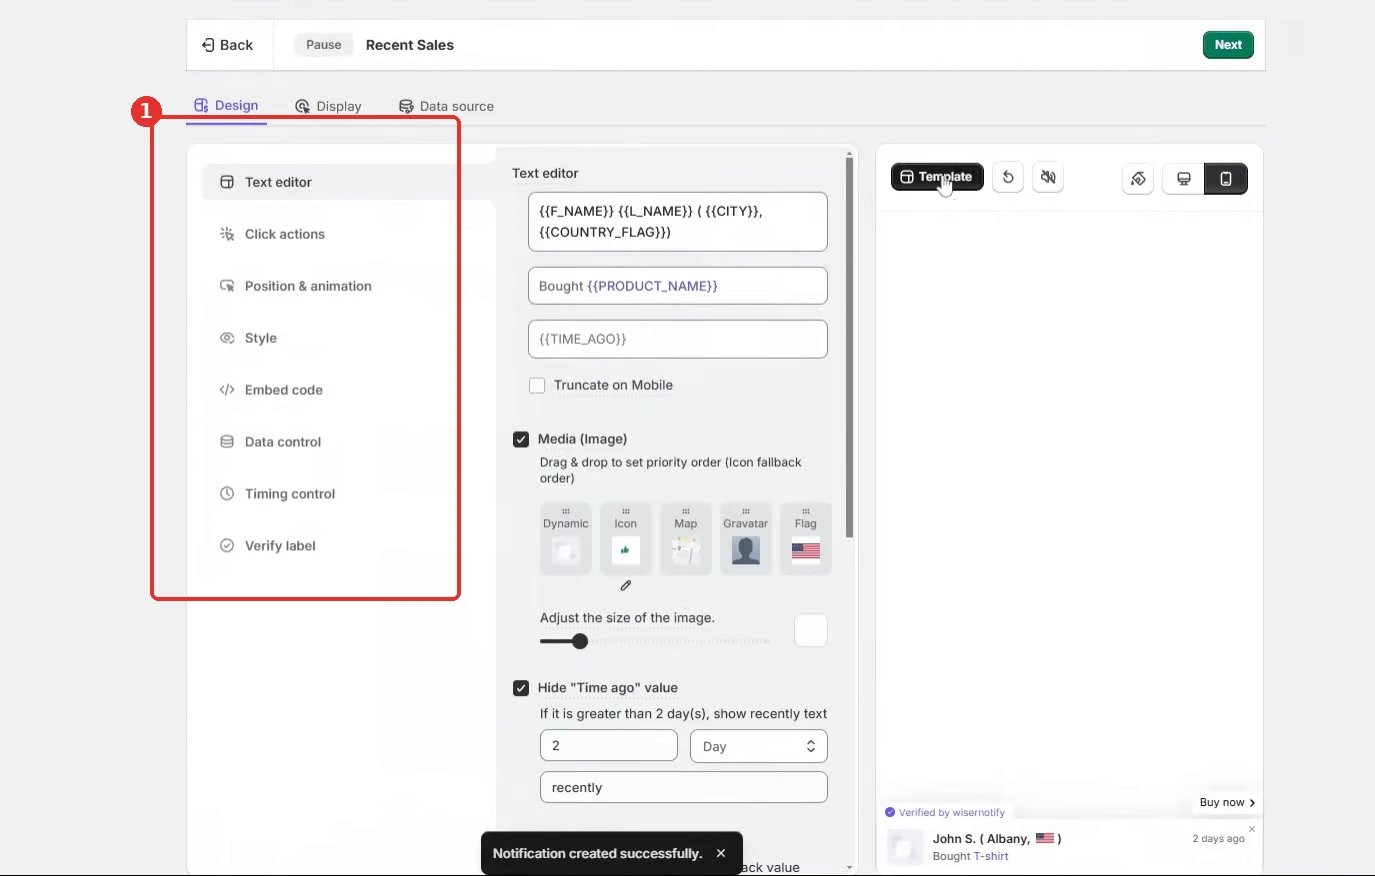
Step 6: Design the Popup
Set the message template, colors, and font in the Design tab. Write it in course language, joined, enrolled, finished, so it reads like your school and not like a shop.
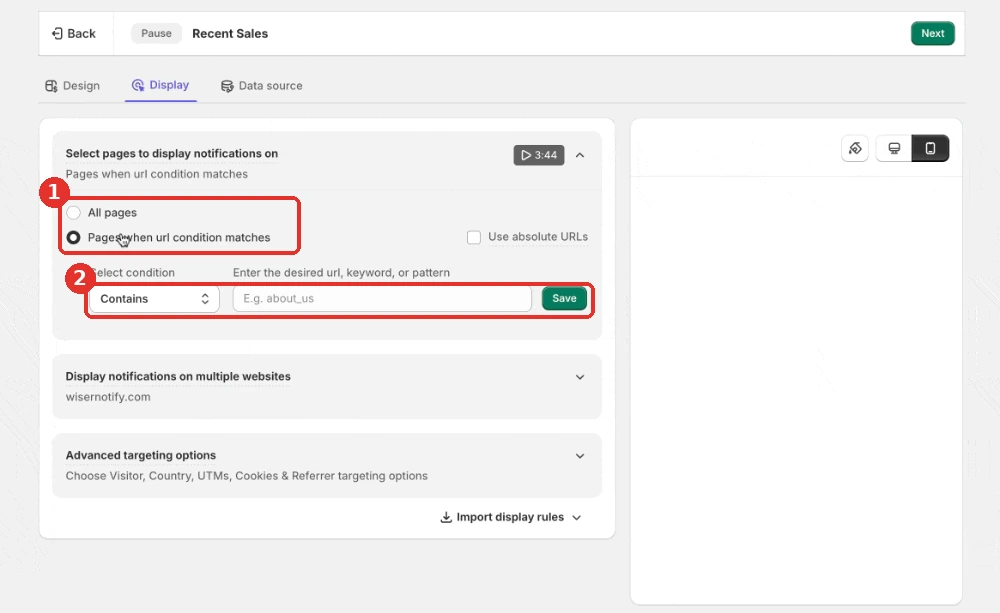
Step 7: Choose Where It Shows
Target the sales page and checkout, and add a delay of a few seconds. Leave lesson pages out, since enrolled students do not need a nudge they already took.
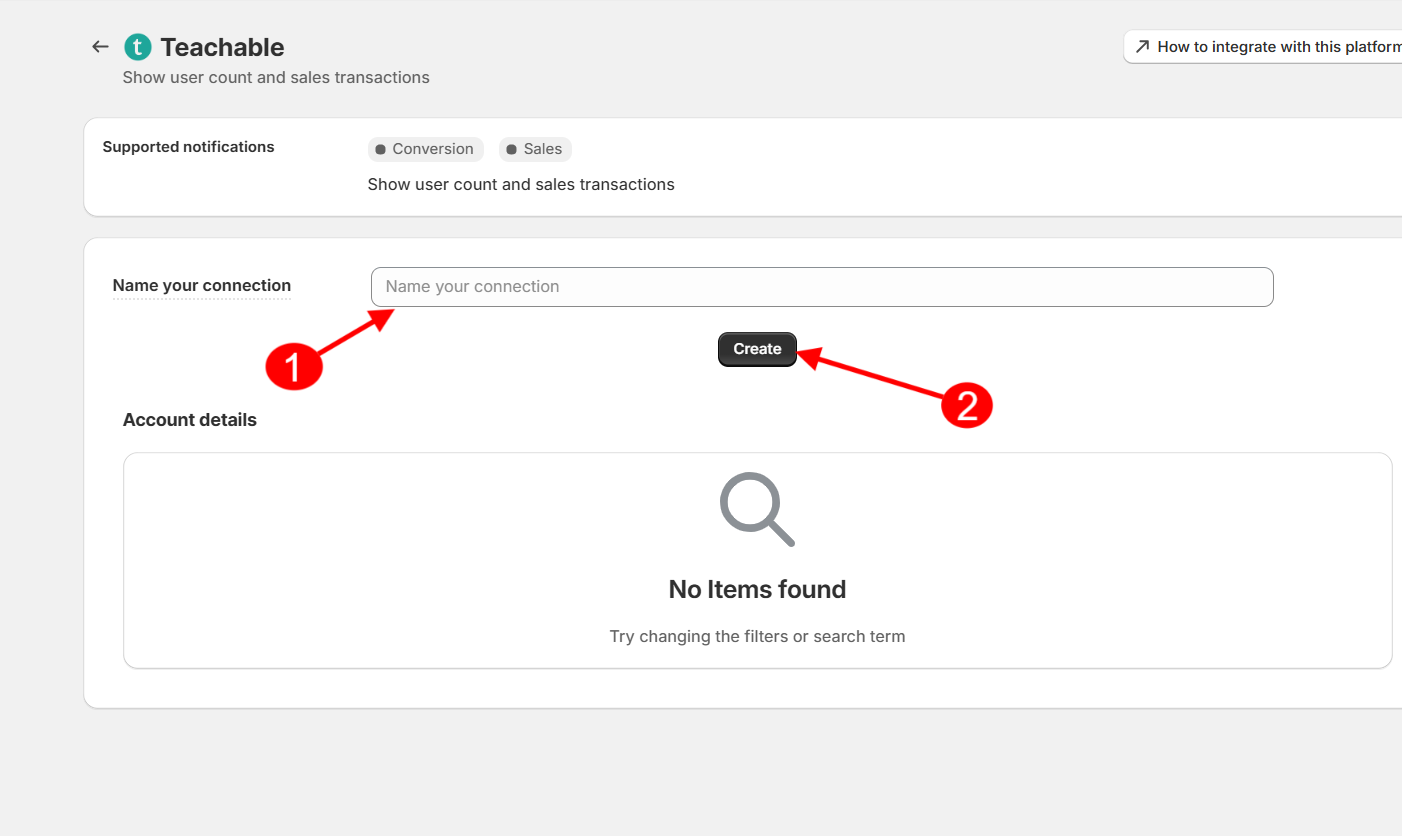
Step 8: Open the Teachable Integration
In WiserNotify, go to Integrations and open Teachable. Name the connection, click Create, and copy the webhook URL it gives you. The Teachable integration doc covers this screen in detail.
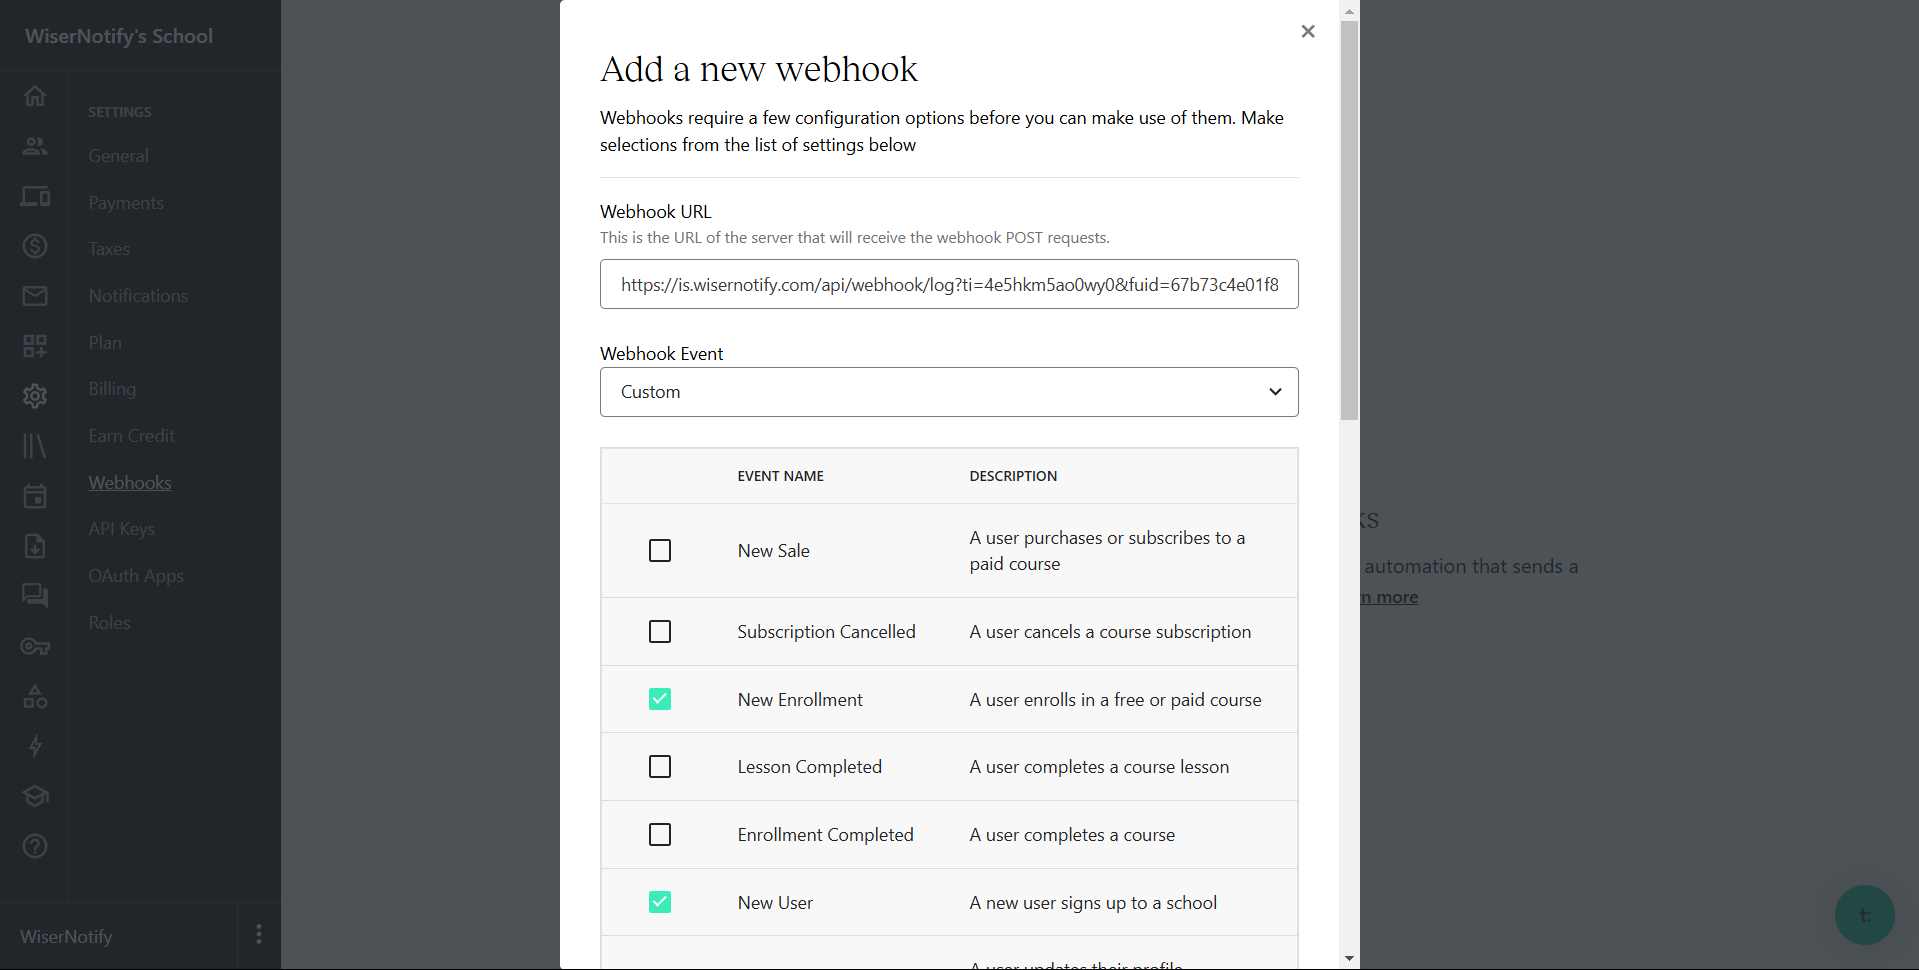
Step 9: Add the Webhook in Teachable
In Teachable, open Settings, then Webhooks, and click Add Webhook. Paste the copied URL, tick the events you want to show, New Enrollment and New User are the usual picks, switch on Send as JSON Array, and save. Every real enrollment now feeds your popups.
Step 10: Publish the Widget
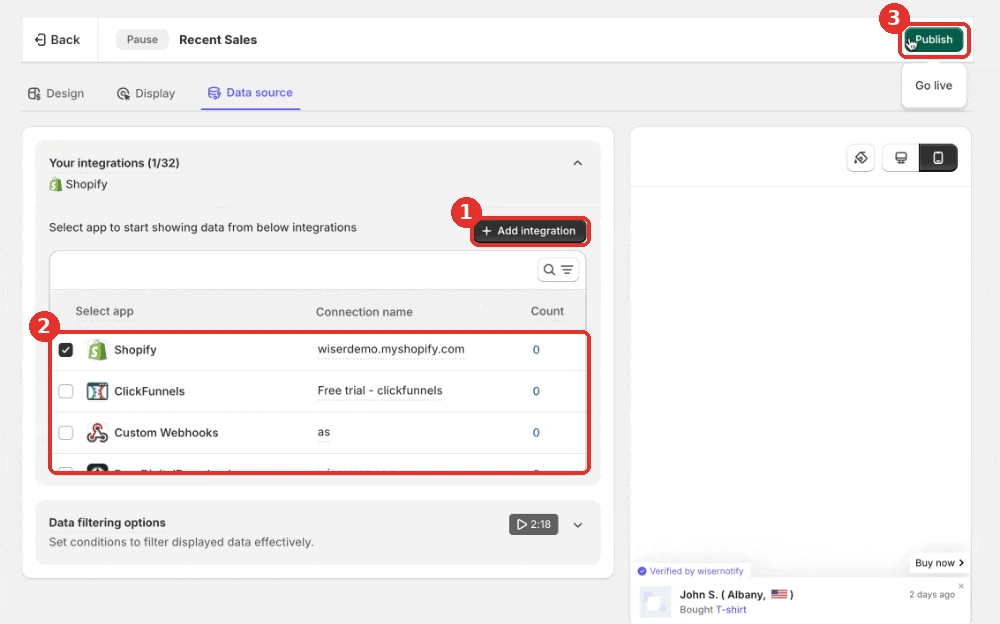
Pick the Teachable connection as your data source and hit publish. Open your sales page in a fresh tab and watch the first popup appear.
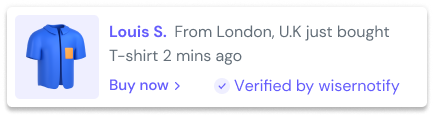
Build trust & FOMO
Highlight real-time activities like reviews, sales & sign-ups.

Sales Popup Not Showing on Teachable?
When the popup stays invisible, one of these four is almost always the cause.
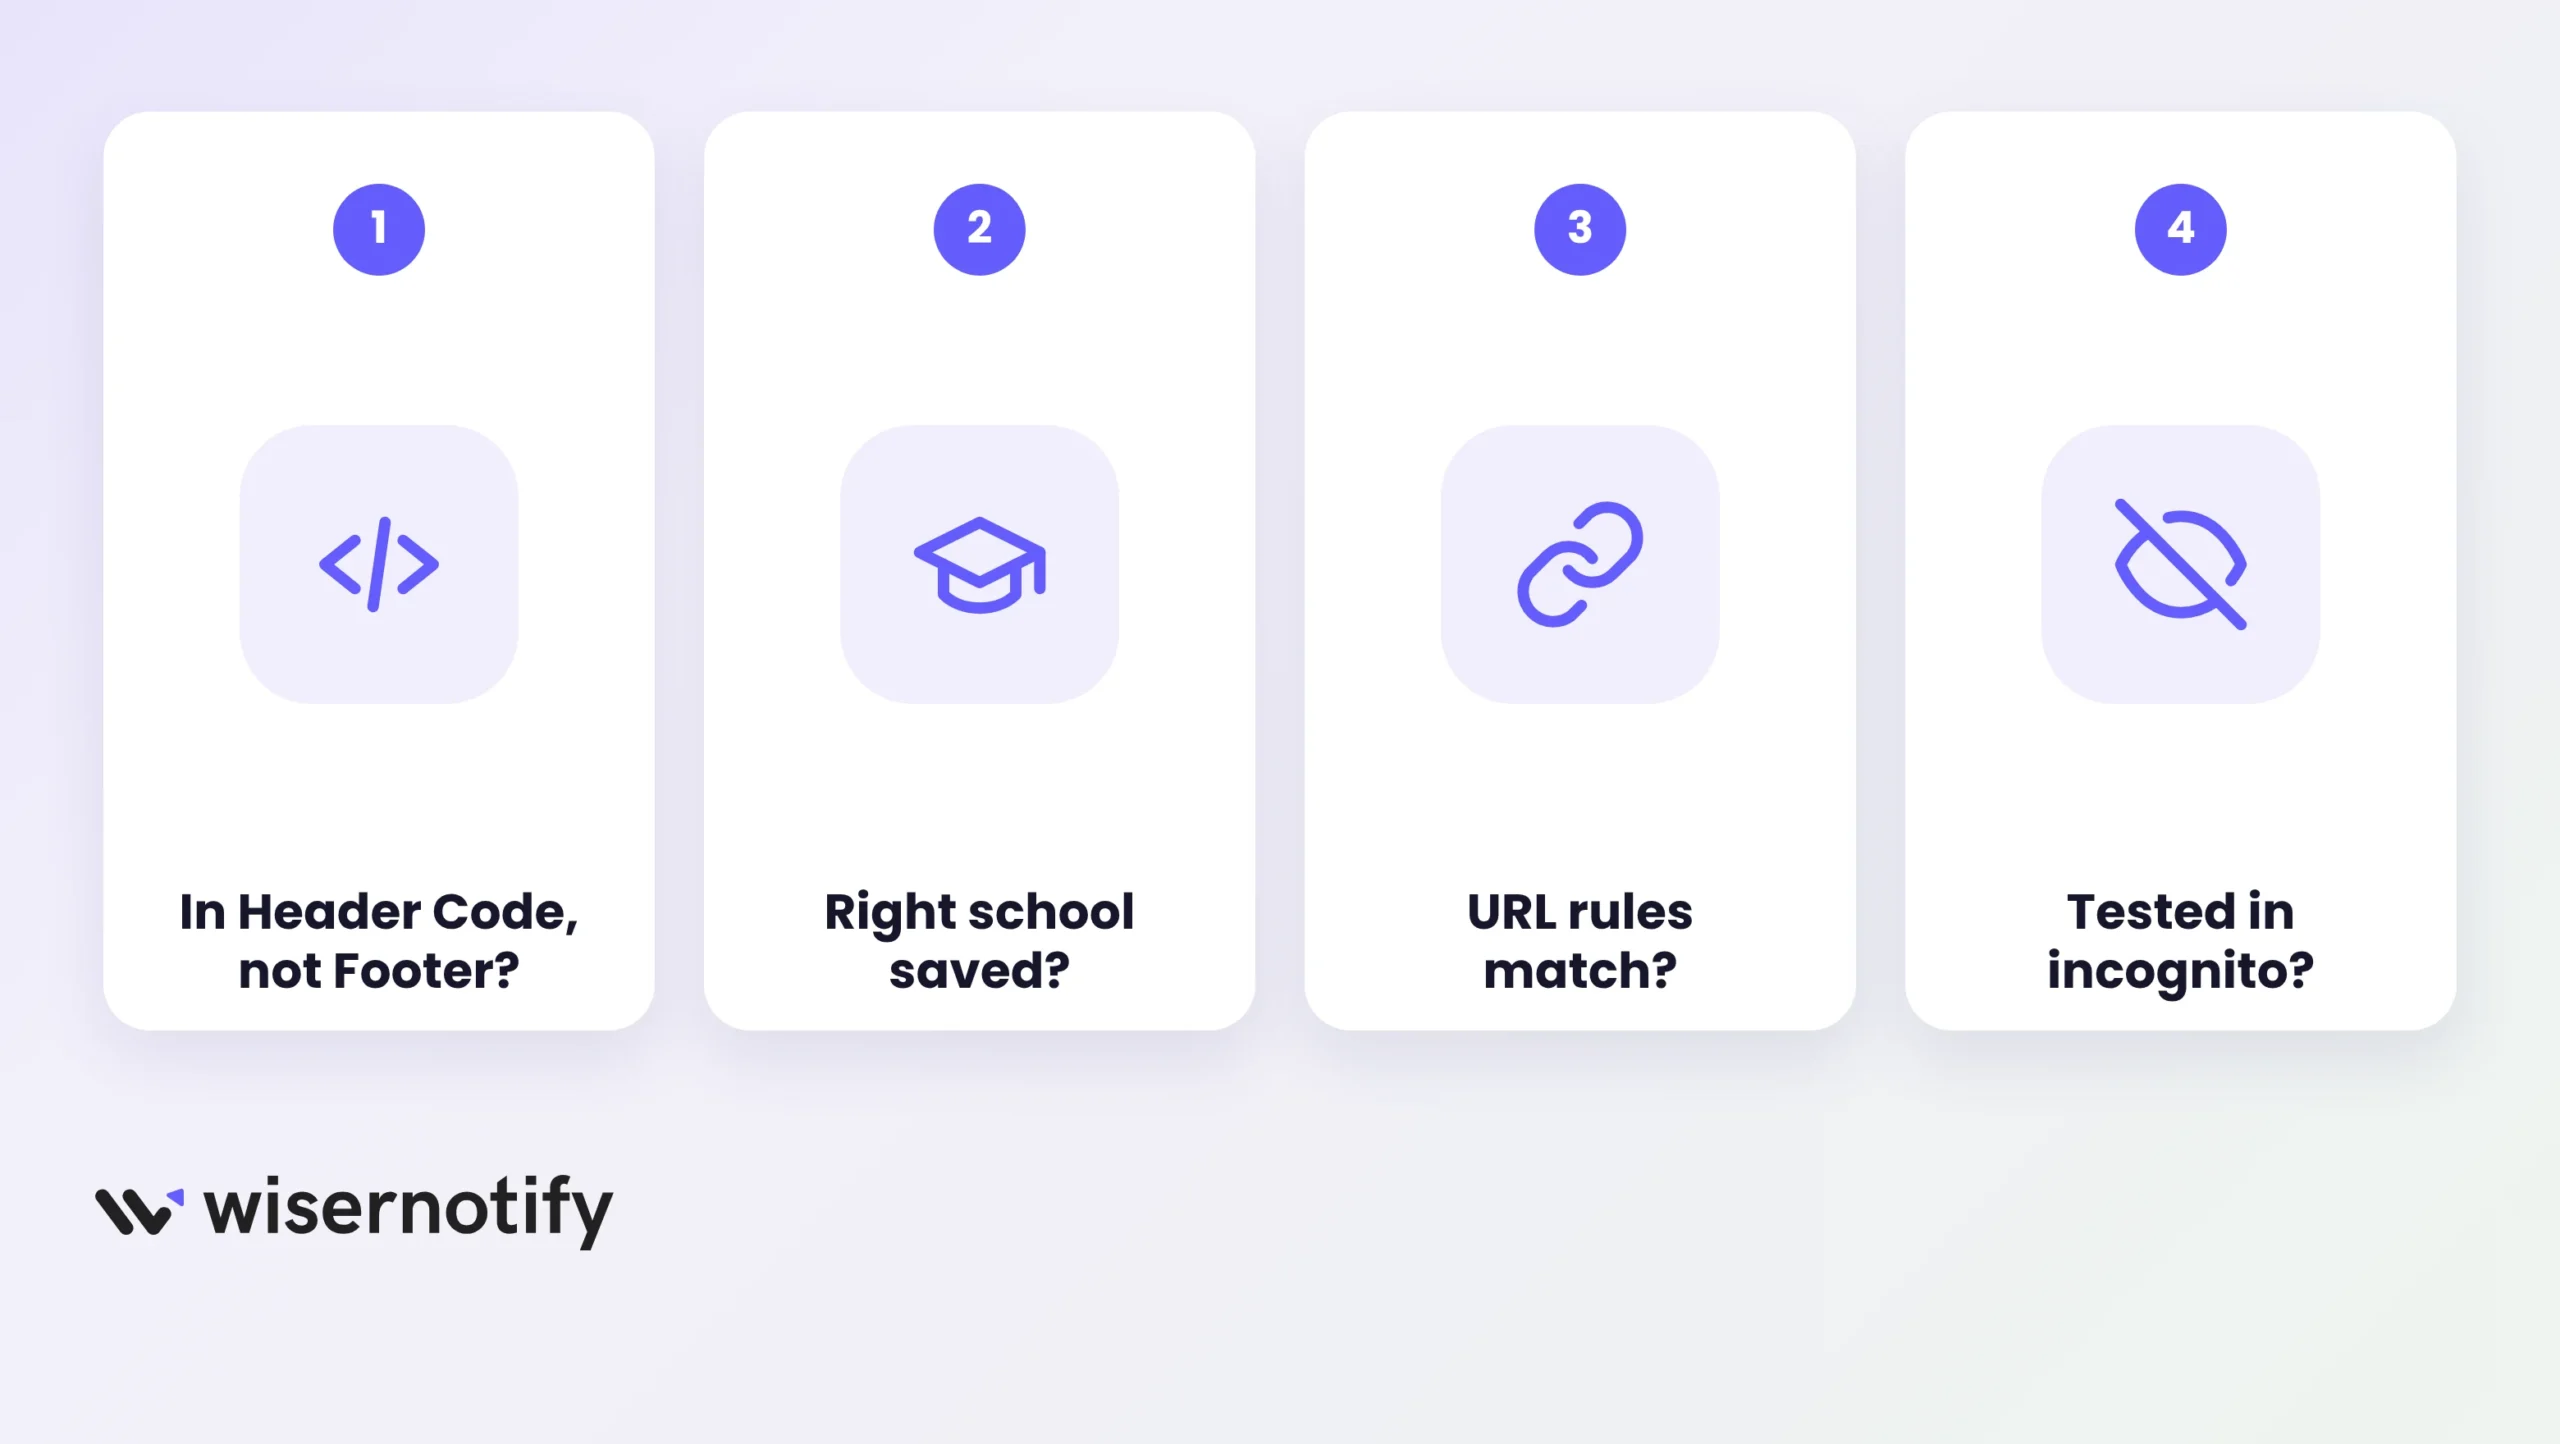
- The pixel went into the wrong box. The page has two fields. The pixel belongs in Head Code Snippets, not in Logged In Snippets.
- You pasted it into a different school. If you run more than one Teachable school, each needs the pixel in its own Code Snippets.
- The widget’s URL rules do not match. A school on a custom domain will not trigger a widget pointed at the .teachable.com address.
- You are seeing a cached page. Check in an incognito window before touching any settings.
If none of those land, run the verify button in WiserNotify. Pixel active means the fix is in the widget settings, not in Teachable.
3 Sales Popup Examples for Teachable
Course visitors respond to student activity, not store activity. These three messages map to what a Teachable page is selling.
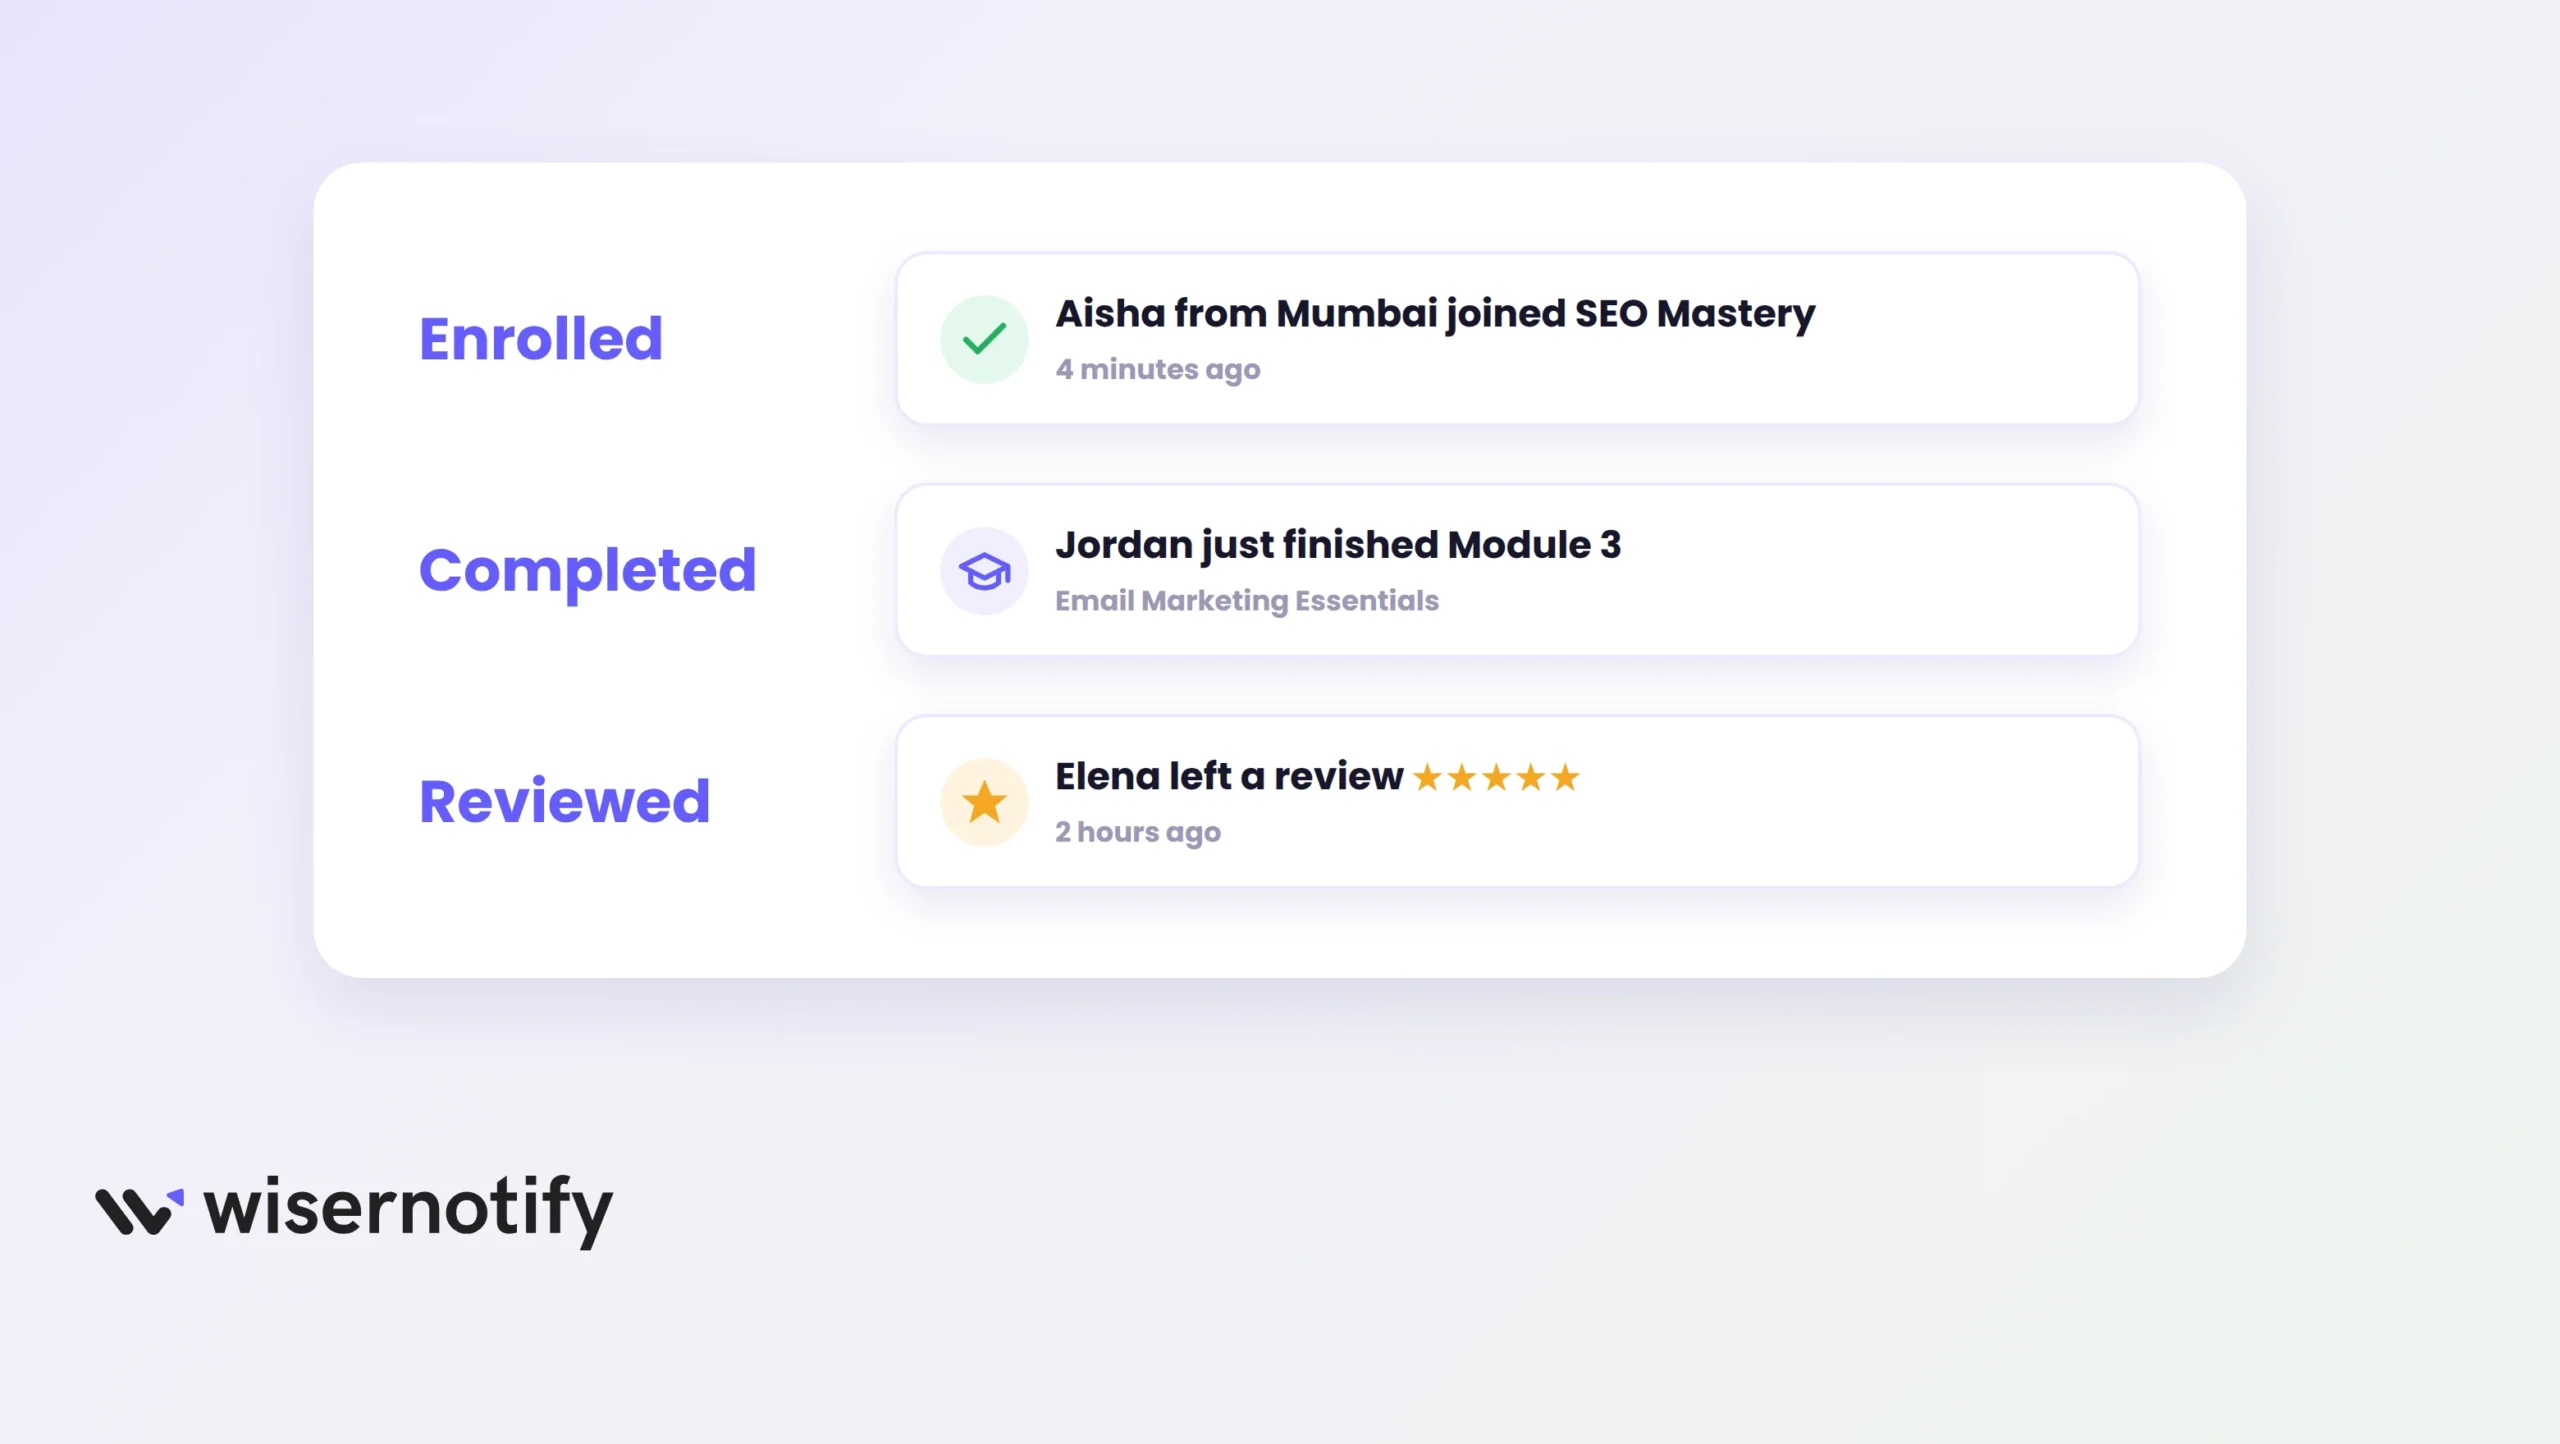
1. New Enrollments
“Aisha from Mumbai joined SEO Mastery” is the course version of a sales popup. The course name carries the weight, so pull it in dynamically rather than writing a generic joined-a-course line.
2. Module Completions
“Jordan just finished Module 3” proves something an enrollment never can. Students do not just buy this course, they stick with it. Completion popups answer the quiet fear of paying for a course and stalling at lesson one.
3. Fresh Student Reviews
A popup showing “Elena left a 5-star review” an hour ago beats a testimonial block from last year. Recency is the point, so feed it from live review data instead of pasting quotes by hand.
Is It Free to Use on Teachable?
Every WiserNotify plan starts with a 7-day free trial, long enough to run the popup on real course traffic and read the results.
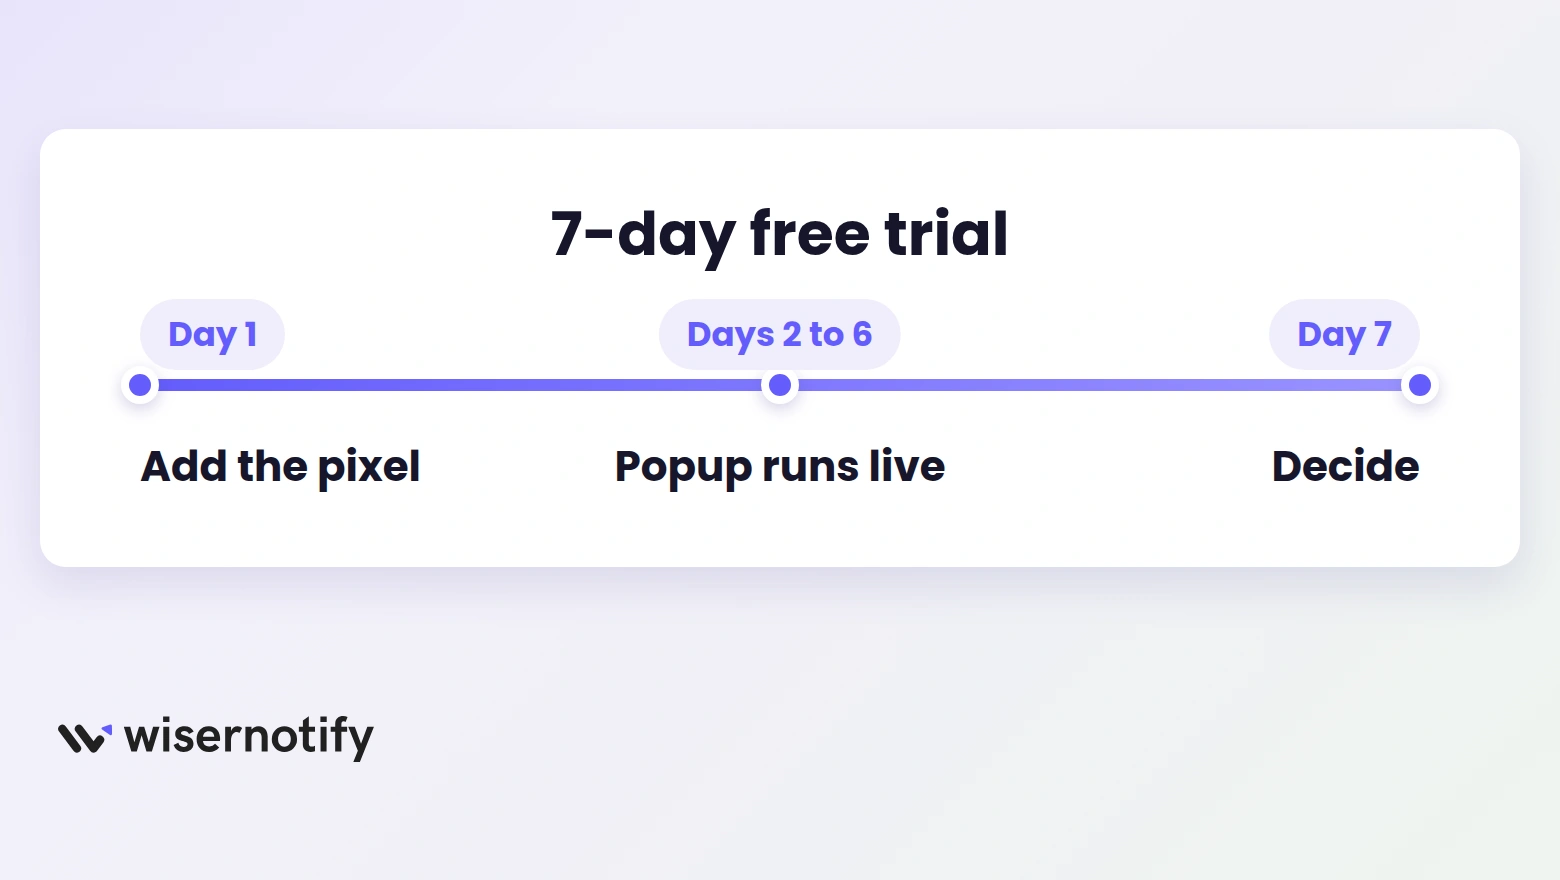
Paid plans then start at $16 per month on Pro for 10,000 monthly visitors, or $59 per year on Basic for 5,000. Every widget type is included on both.
Sales Popup Tips for Teachable
Small settings decide whether the popup sells seats or gets tuned out.
- Lead with the course name. “Joined Instagram Ads Mastery” outsells “made a purchase” on every course page.
- Mix in progress messages. Completions and streaks show the course gets finished, which is half the buying decision.
- Time popups to the scroll. Fire after the visitor reaches your curriculum section, when they are weighing the content.
- Ride your enrollment windows. During a launch or seasonal discount, a “joined with the January offer” line stacks urgency on proof.
- Show totals when they flatter. A milestone like students enrolled worldwide works once the number is one you would say out loud.
- Thin out popups for returning students. Someone already enrolled needs course content, not conversion nudges.
Mistakes That Cost Course Sales
The same handful of errors shows up on course pages over and over.
- Covering the enroll button. A popup that sits on the CTA or the video player costs more than it earns.
- Vague activity lines. “Someone enrolled” reads as filler. Name, place, and course title or nothing.
- Nonstop notifications. Cap the stream and space popups out, or the page starts feeling like a casino.
- Off-brand styling. A popup in foreign fonts and colors looks like an ad network, not your school.
- Flying blind. The analytics name your best-performing message. Ignoring them wastes the test traffic you already paid for.
How to Measure the Impact
WiserNotify logs views, hovers, and clicks per notification, which tells you whether visitors notice the popup at all.
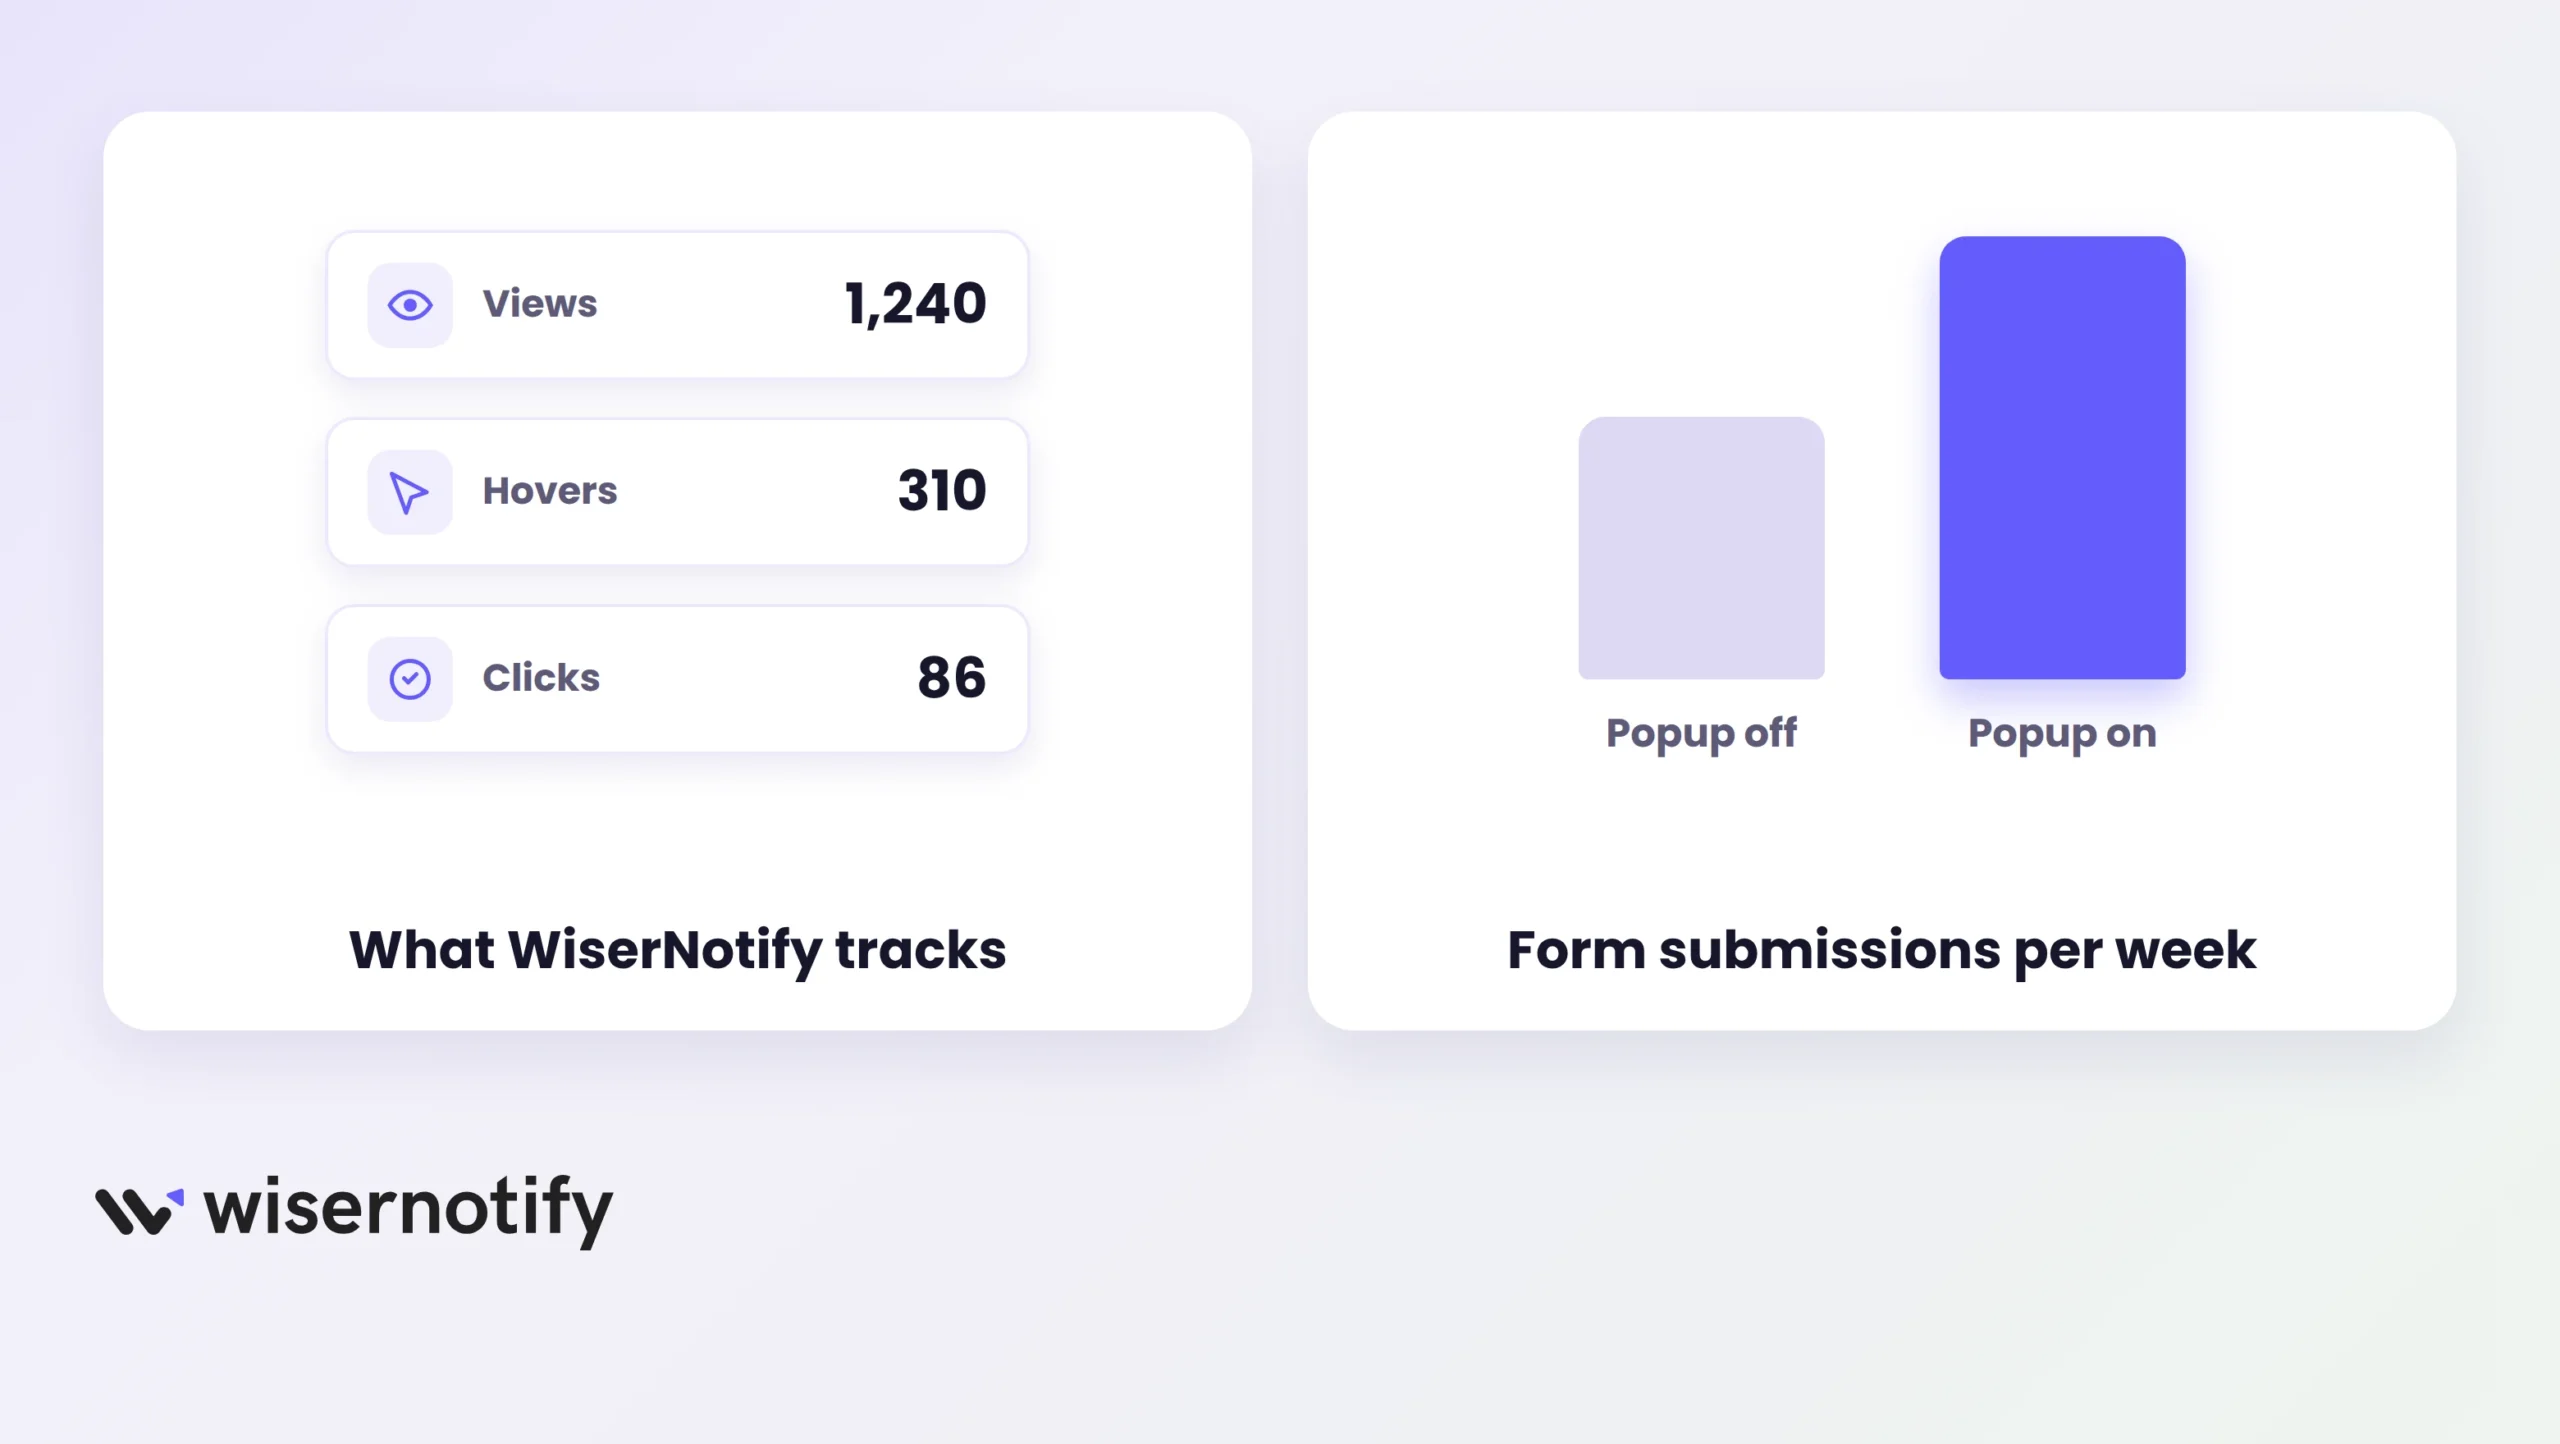
Then let enrollments decide. Run your sales page a week with the popup on and a week off, and compare checkout completions between the two. The winner keeps running, and the message templates get a refresh whenever clicks sag.

Boost Conversion Instantly
Add Social Proof & Urgency to your website
Wrap Up
Teachable handles the course, the checkout, and the content. What a visitor cannot see is the crowd, the students enrolling and finishing around them.
One pixel in Head Code Snippets and a webhook fix that. Real enrollments, module completions, and reviews start showing up right where the next student is deciding.
Set it up once, check the numbers after a week, and let the proof do the selling.
Related guides
Setting up a sales notification popup on a different platform? These related guides walk through it:
Frequently Asked Questions
Can I add sales popups directly inside Teachable without coding?
Teachable has no native popup builder. WiserNotify adds sales popups through one script pasted into your school’s Code Snippets, with no coding needed.
Where should I place the popup code in Teachable?
Go to Site > Code Snippets > Header in your Teachable dashboard and paste the popup script there. This will load the popup on all pages, including course landing pages and checkout pages.
What types of sales popups work best for Teachable courses?
Popups showing recent signups, limited-time offers, and countdown timers work well. They help build urgency and trust around your course.
Will sales popups affect my course experience or speed?
No, if you use a lightweight tool like WiserNotify. It loads asynchronously, meaning your course content won’t be slowed down.
Can I target popups only on specific course pages?
Yes. Tools like WiserNotify allow page-level targeting. You can show a popup only on selected course pages or during checkout to push more conversions.

Krunal Vaghasiya is a marketing tech expert who boosts e-commerce conversion rates with automated social proof and FOMO strategies. He loves to keep posting insightful posts on online marketing software, marketing automations, and improving conversion rates.




 Capterra