
How to Add a Sales Notification Popup on Framer (No Code)
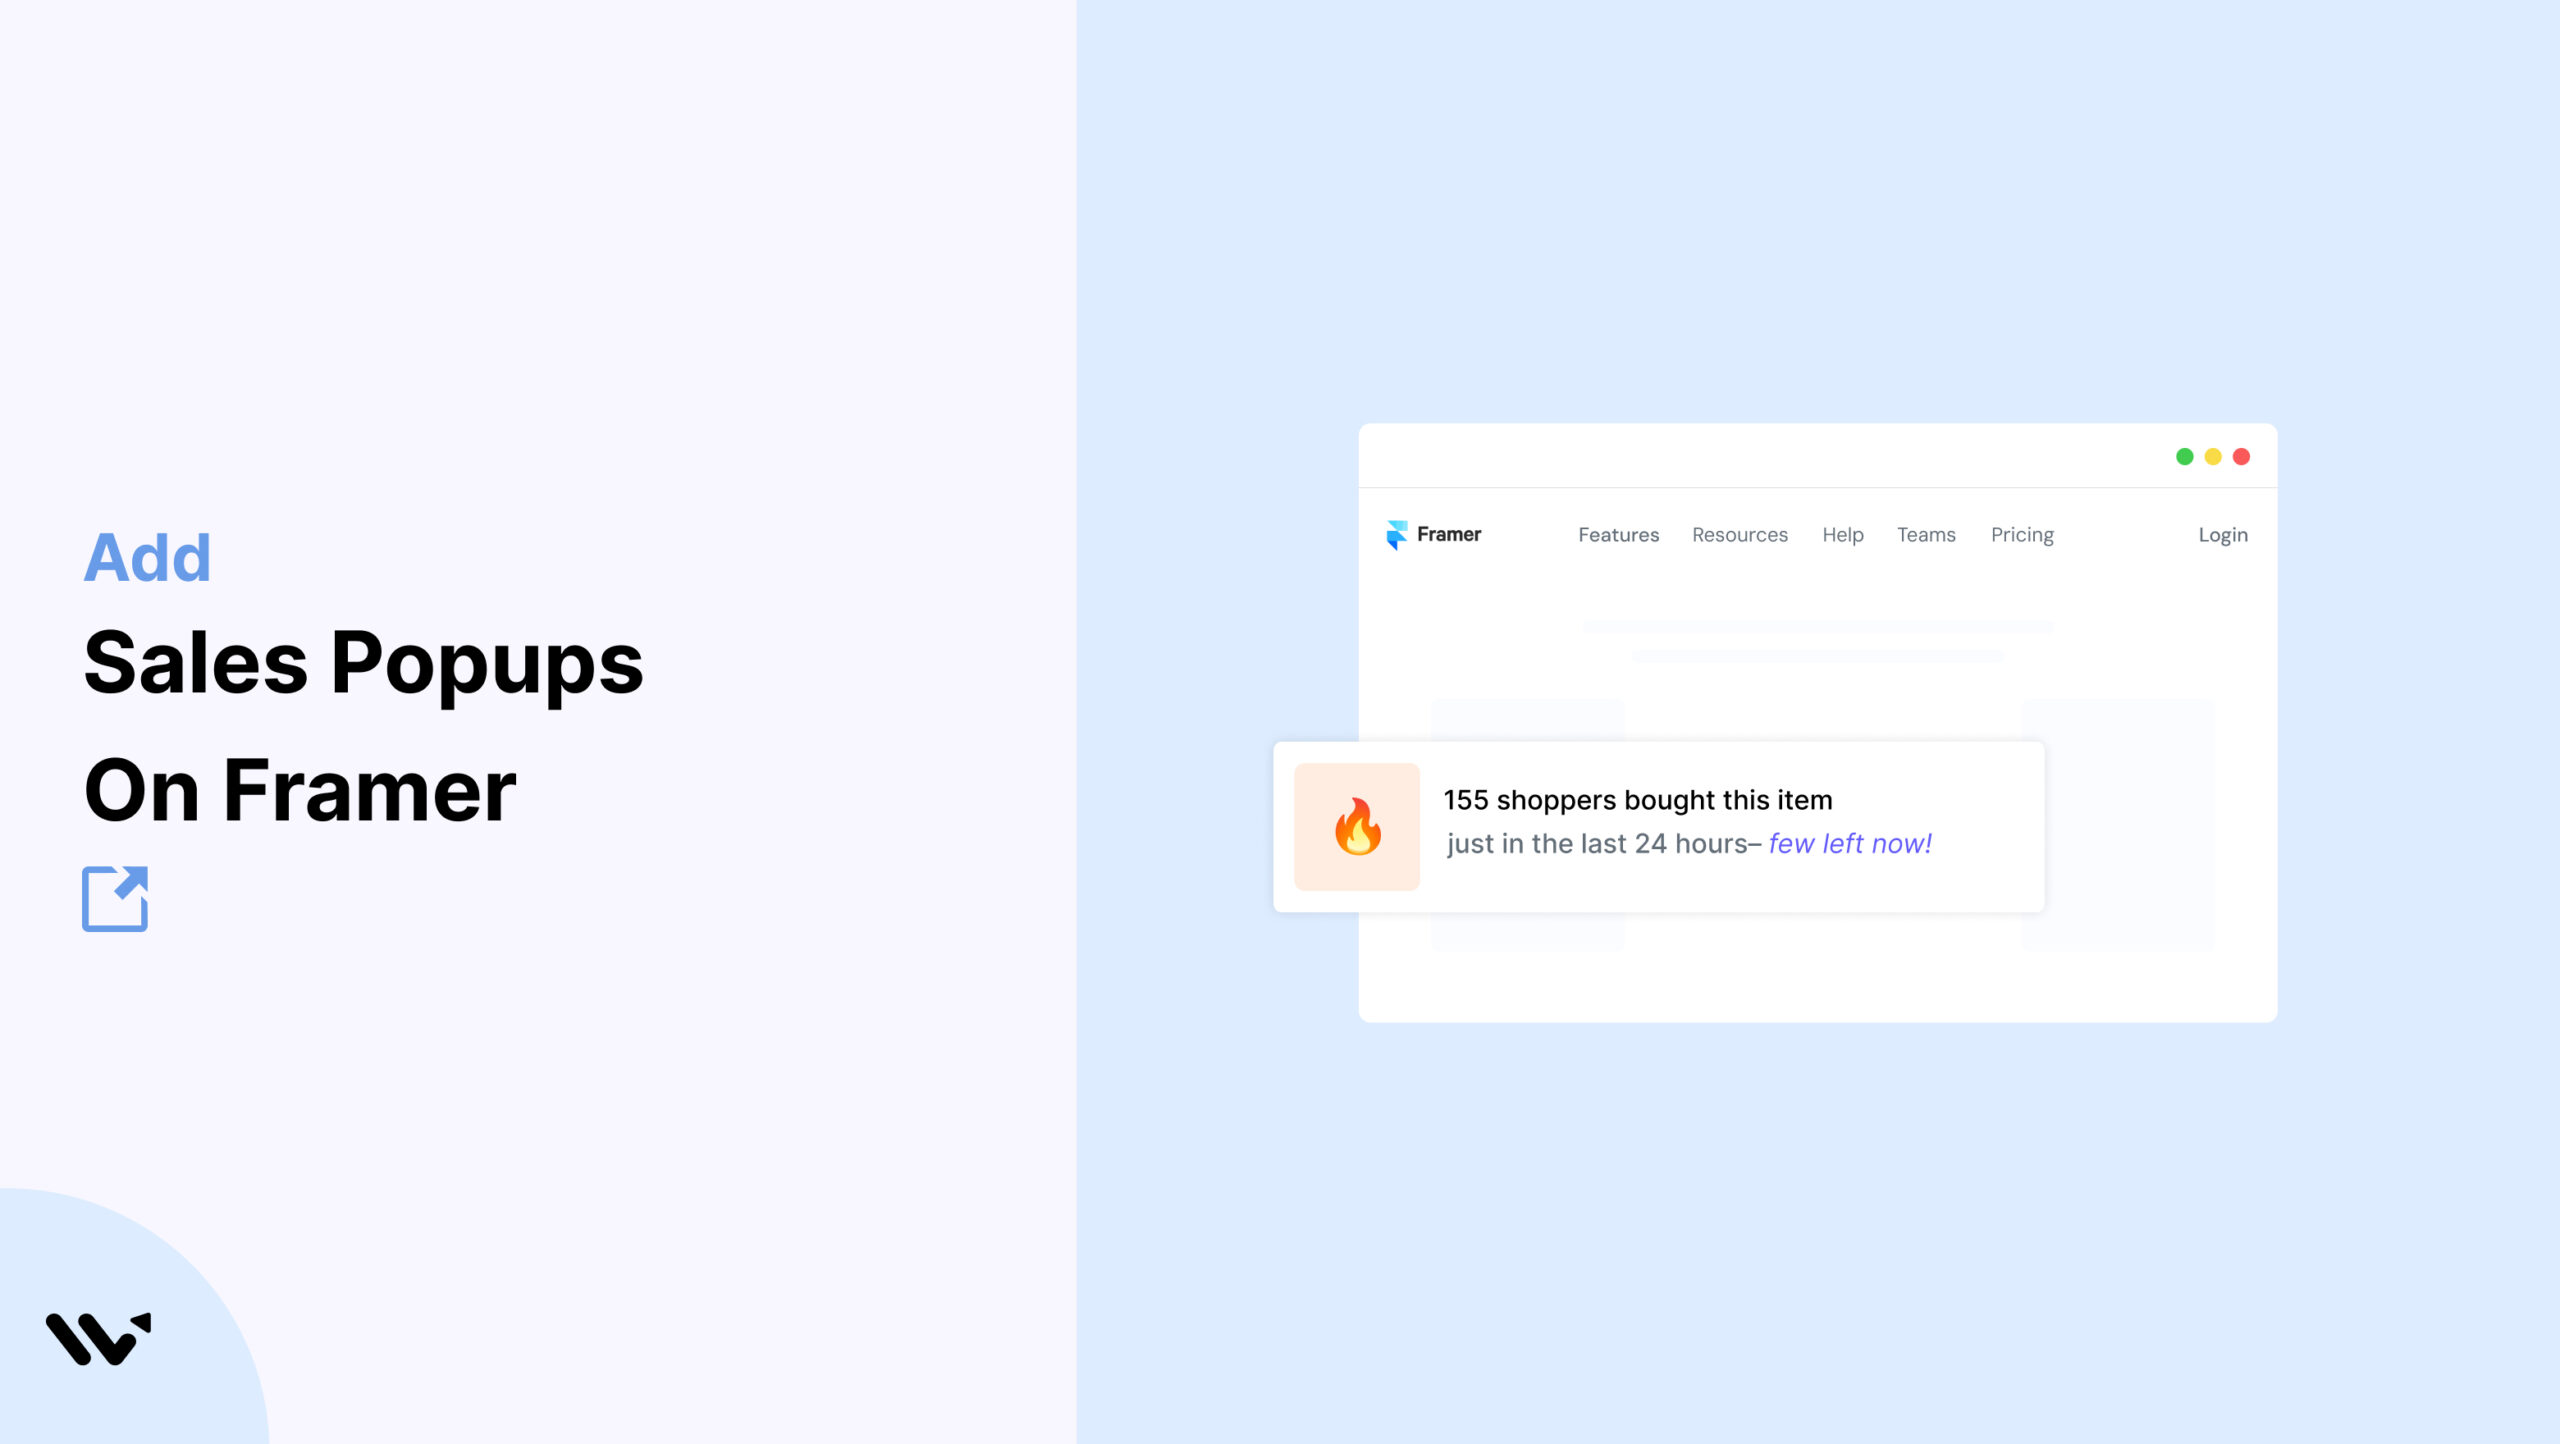
You’ve built a great-looking Framer site, with smooth motion and clean layouts. But visitors still hold off on buying, and it usually comes down to trust.
A small popup that says “Lena just bought the Design Toolkit” is a simple piece of social proof, it shows a first-time visitor that other people are already buying from you.
WiserNotify puts those live sales popups on your Framer site without messing with your design. This guide covers why they work, how to set one up step by step, and the tips and mistakes worth knowing.
Do Sales Popups Work?
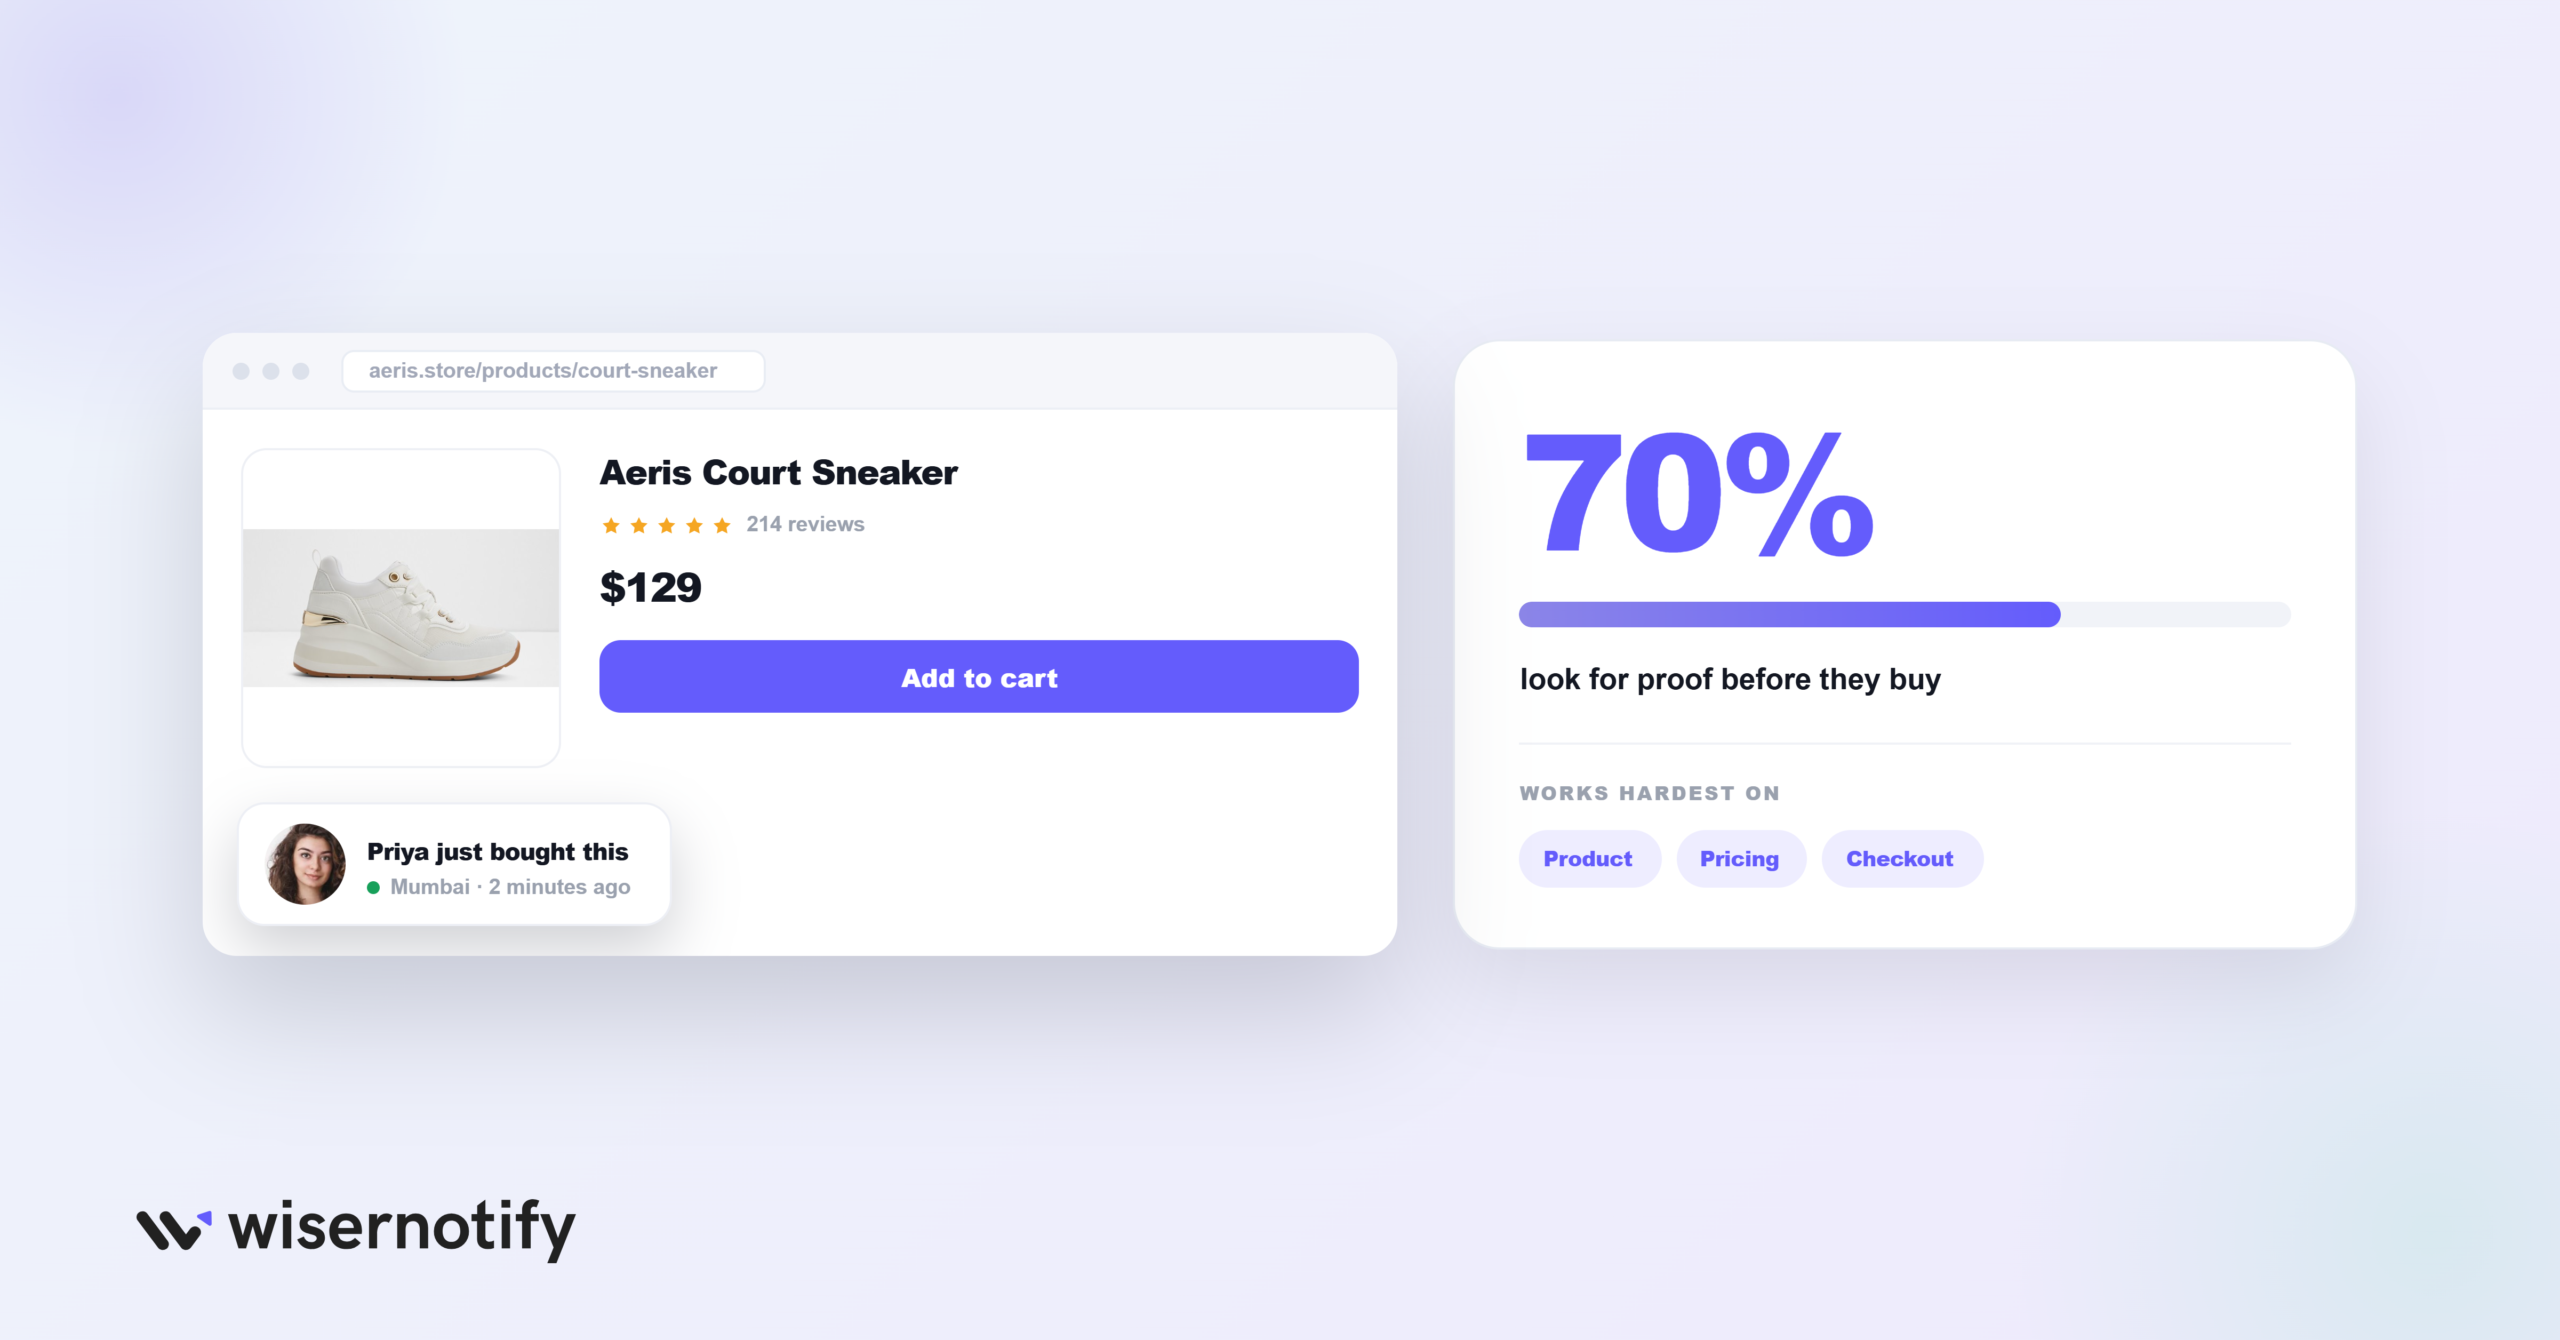
Yes, when they’re honest and relevant. People look to others before they buy, and social proof statistics show around 70% of shoppers check reviews or proof of other purchases before deciding.
A sales popup puts that proof right on the page at the moment someone is deciding. Seeing “someone just bought this” lowers doubt and pushes a hesitant visitor to act.
The effect is strongest on pages where people decide, like product, pricing, and checkout pages, so that’s where a Framer sales popup earns its keep.
Build trust & FOMO
Highlight real-time activities like reviews, sales & sign-ups.


How to Add a Sales Popup on Framer
The whole setup is no-code. You put one WiserNotify pixel on your Framer site, then build and manage the sales popup from the dashboard. The video below walks through creating the notification, and the steps are written out under it.
Step 1: Copy Your WiserNotify Pixel
Create a free WiserNotify account, or log in if you have one. Open the Install Pixel page and click Copy Code.

Step 2: Add the Pixel to Framer
Open your project in Framer and go to Settings.
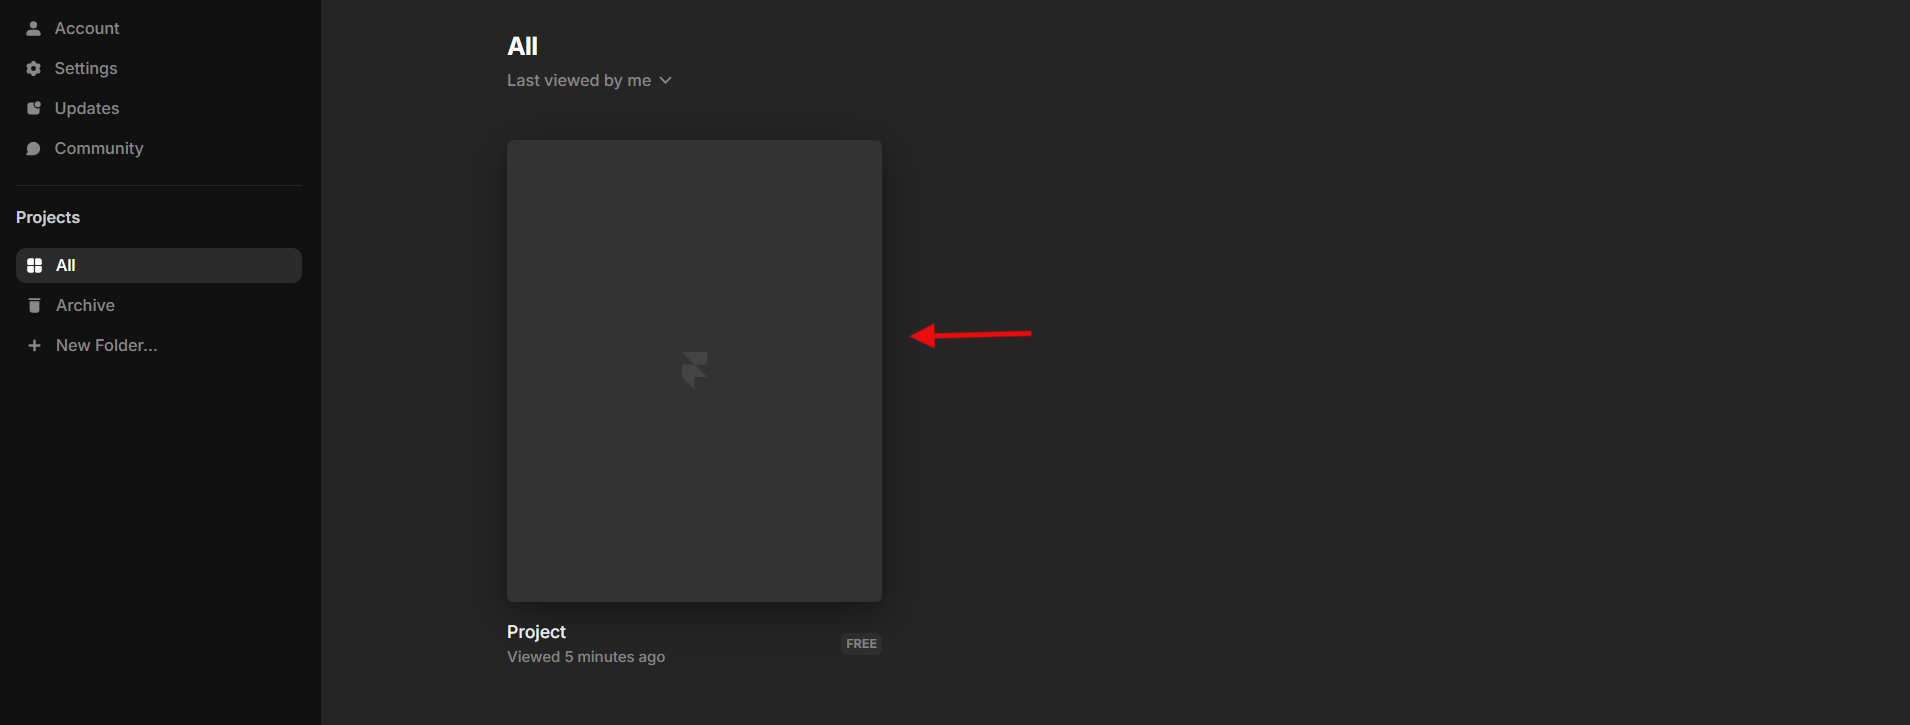
In the Code section, find the Custom Code field and paste the pixel into the End of <head> tag box, then publish your site.
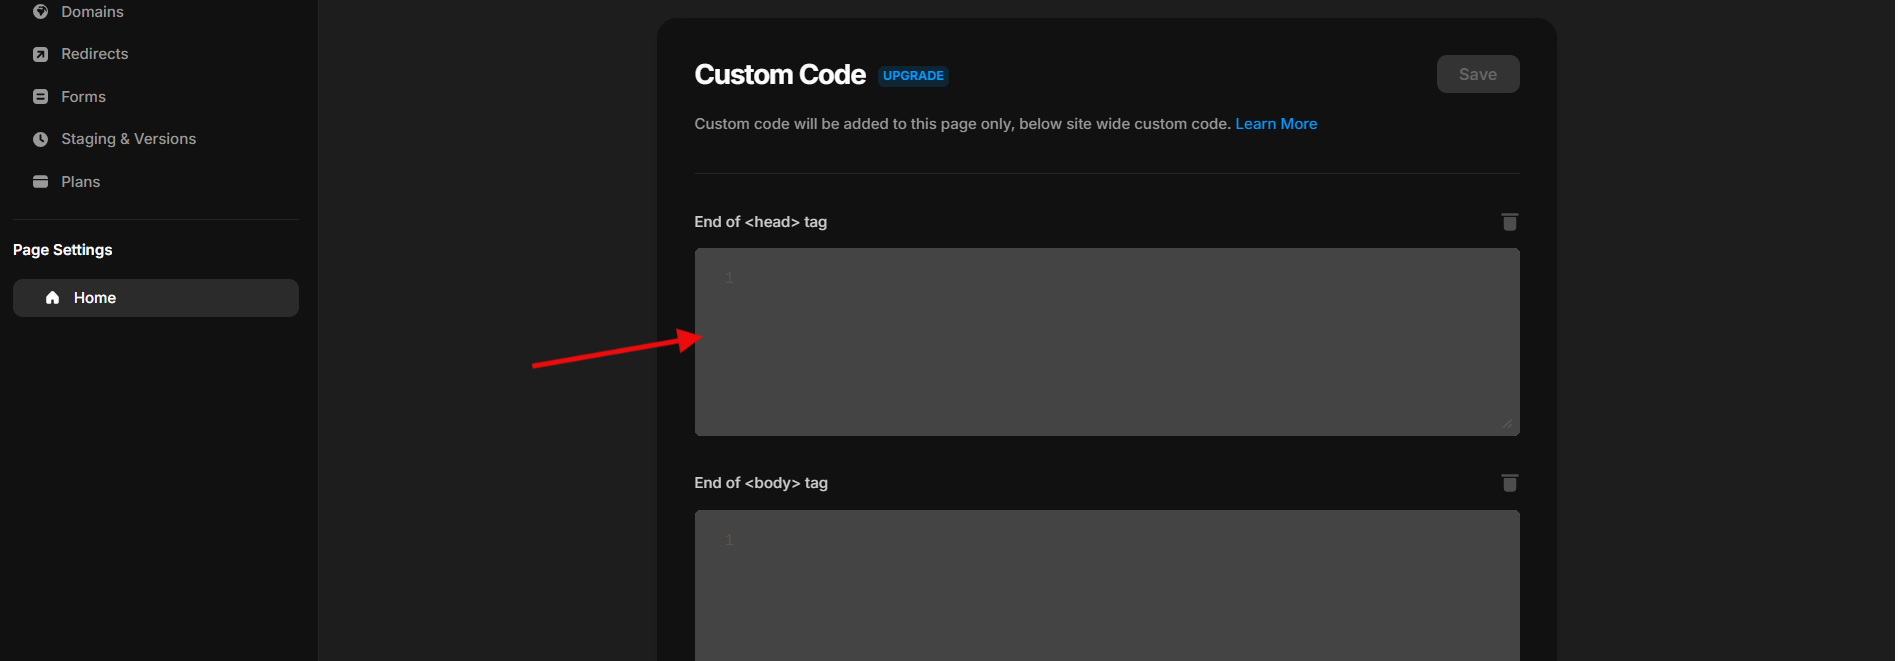
For more detail on this step, see the Framer integration guide.
Step 3: Verify the Pixel
Open your Framer site once so it loads the pixel, then go back to the WiserNotify pixel page and click Verify pixel installation. A “Pixel Active” message means you’re connected.

Step 4: Create a Sales Notification
In the WiserNotify dashboard, click Add Notification and open the Sales Activities tab. You get two options:
- Recent Sales: shows each buyer’s name, location, product, and time.
- Sales Count: shows the total number of sales over a period.
Pick Recent Sales, choose a design, then name it and enter your Framer site URL.

Step 5: Design the Notification
In the Design section, set the popup to match your site:
- Style: adjust the icon, position, animation, borders, and colors.
- Text editor: edit the wording and change the language if you need to.
- Click action: turn on a CTA button if you want the popup to link somewhere.
- Data and timing: set a display delay and how long the popup stays on screen.
Save your changes when the design looks right.

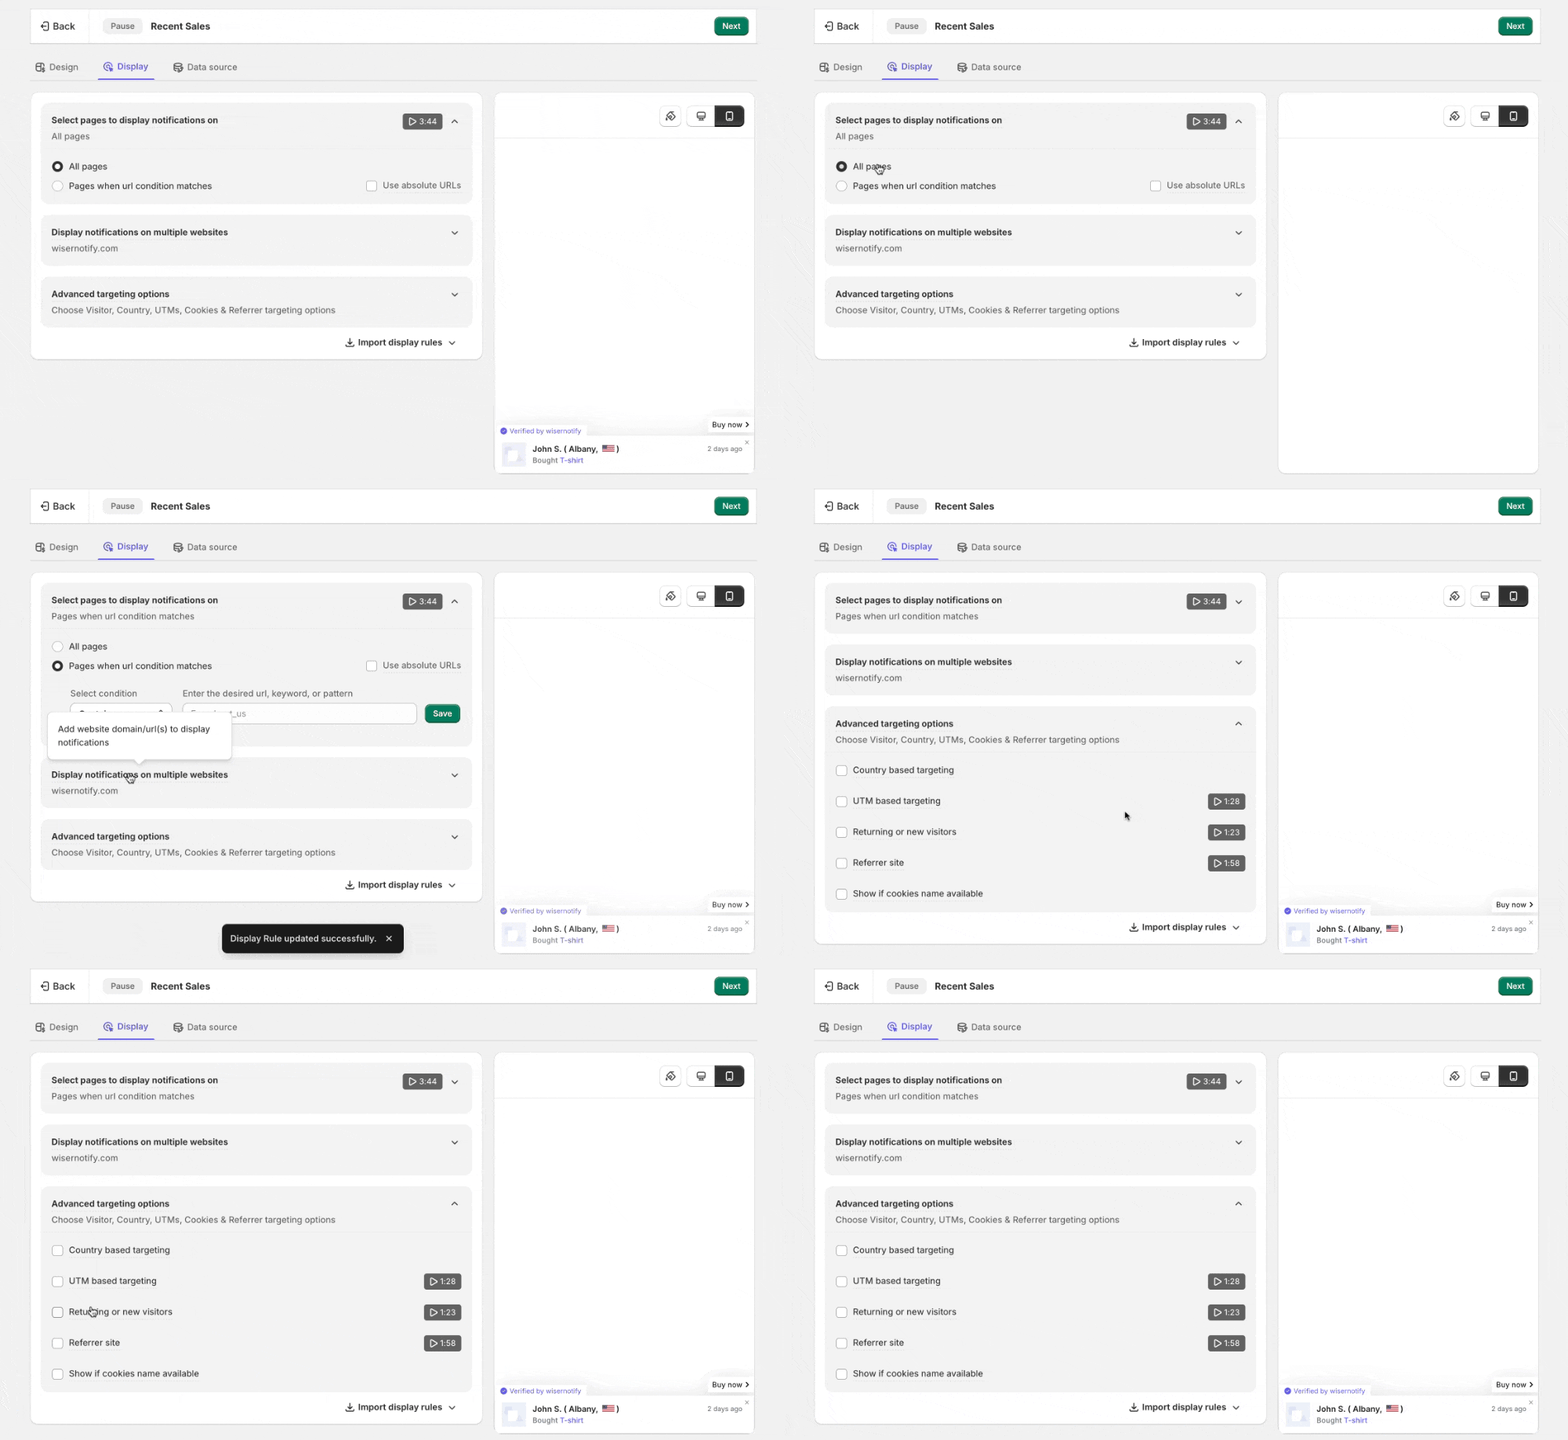
Step 6: Set the Display Rules
In the Display section, choose where the popup shows, all pages or specific ones, and add more site URLs if you run it on several.
You can target new or returning visitors and narrow the audience with UTM, cookie, or referrer rules.
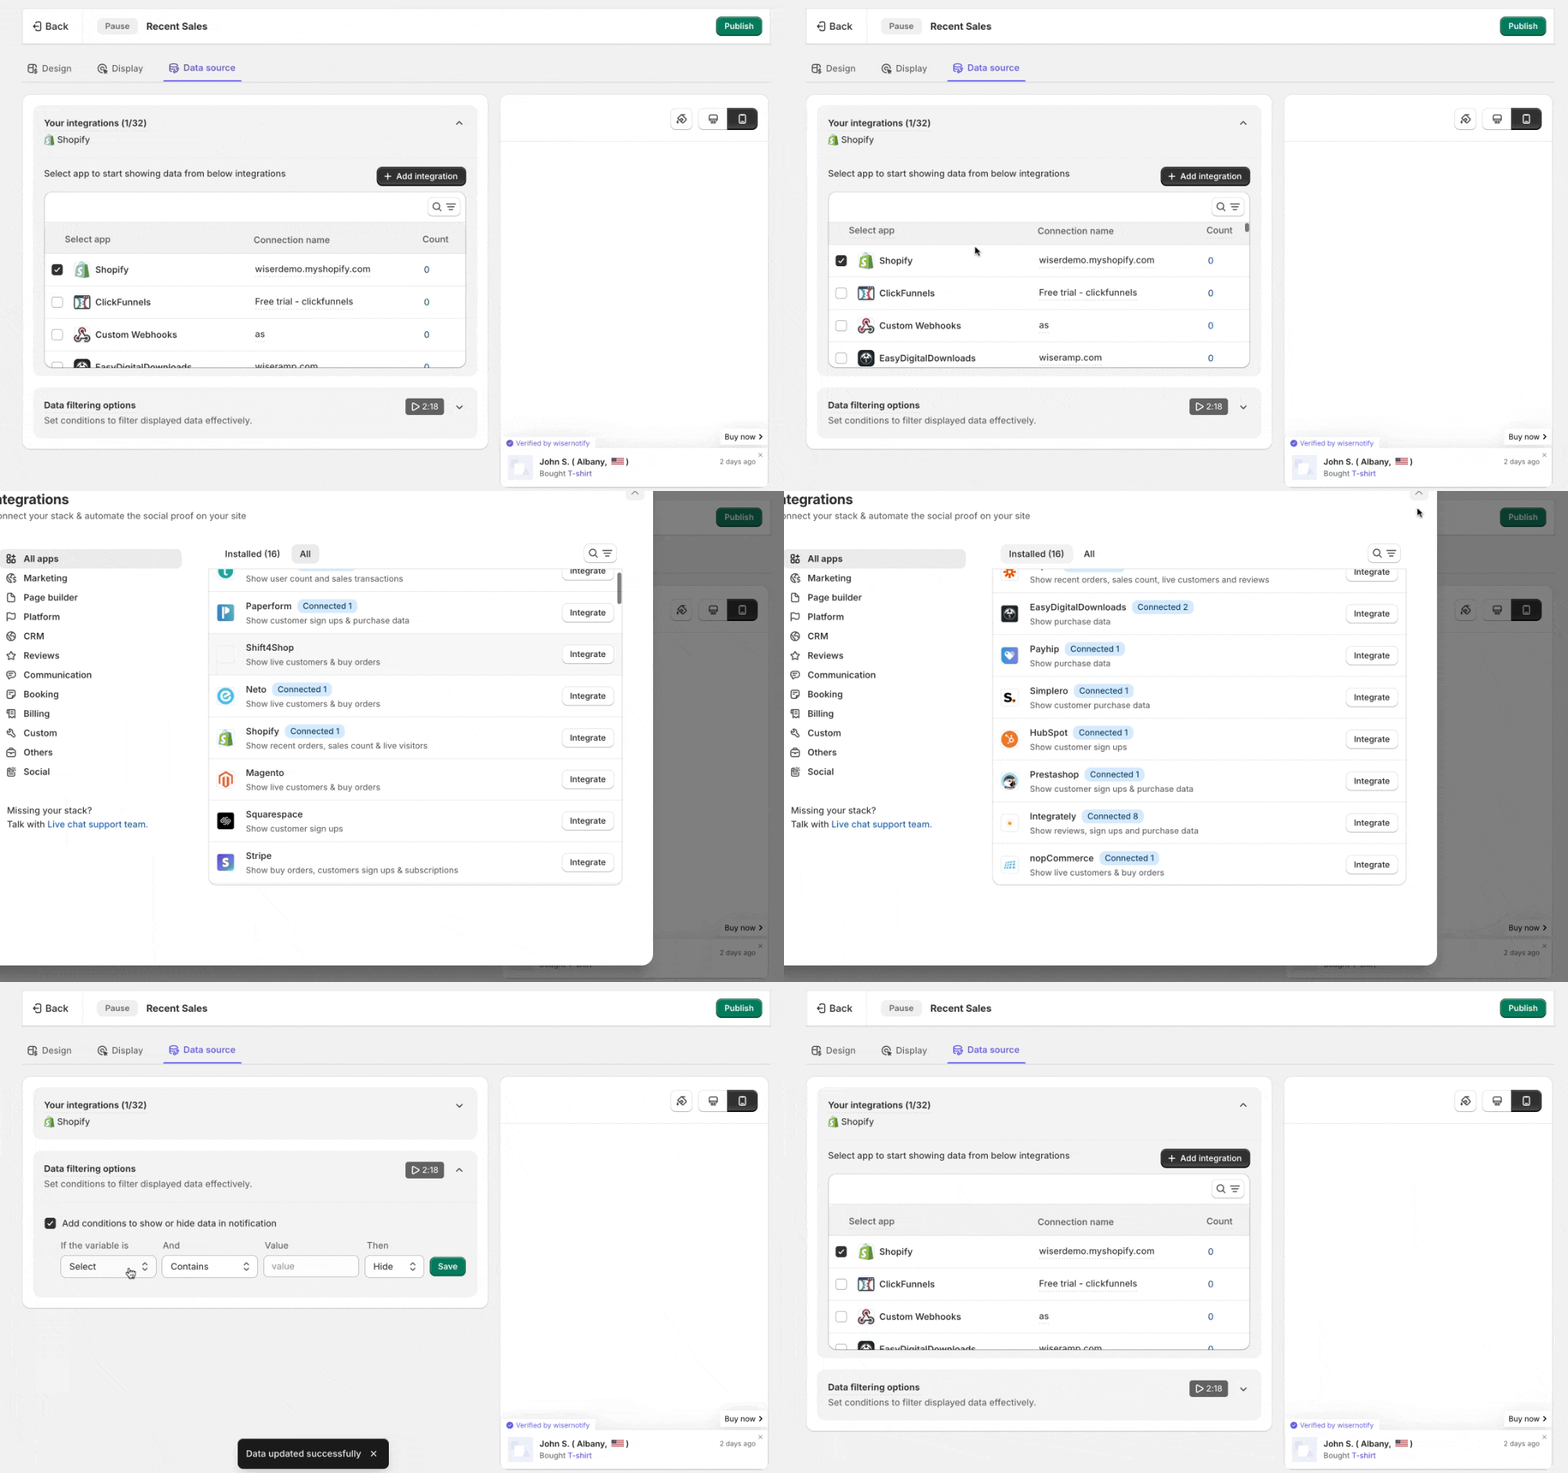
Step 7: Connect Your Data Source
In the Data Source section, click Add Integration and connect the platform you sell through. WiserNotify has direct integrations with many website builders and payment gateways, so pick yours and activate it.
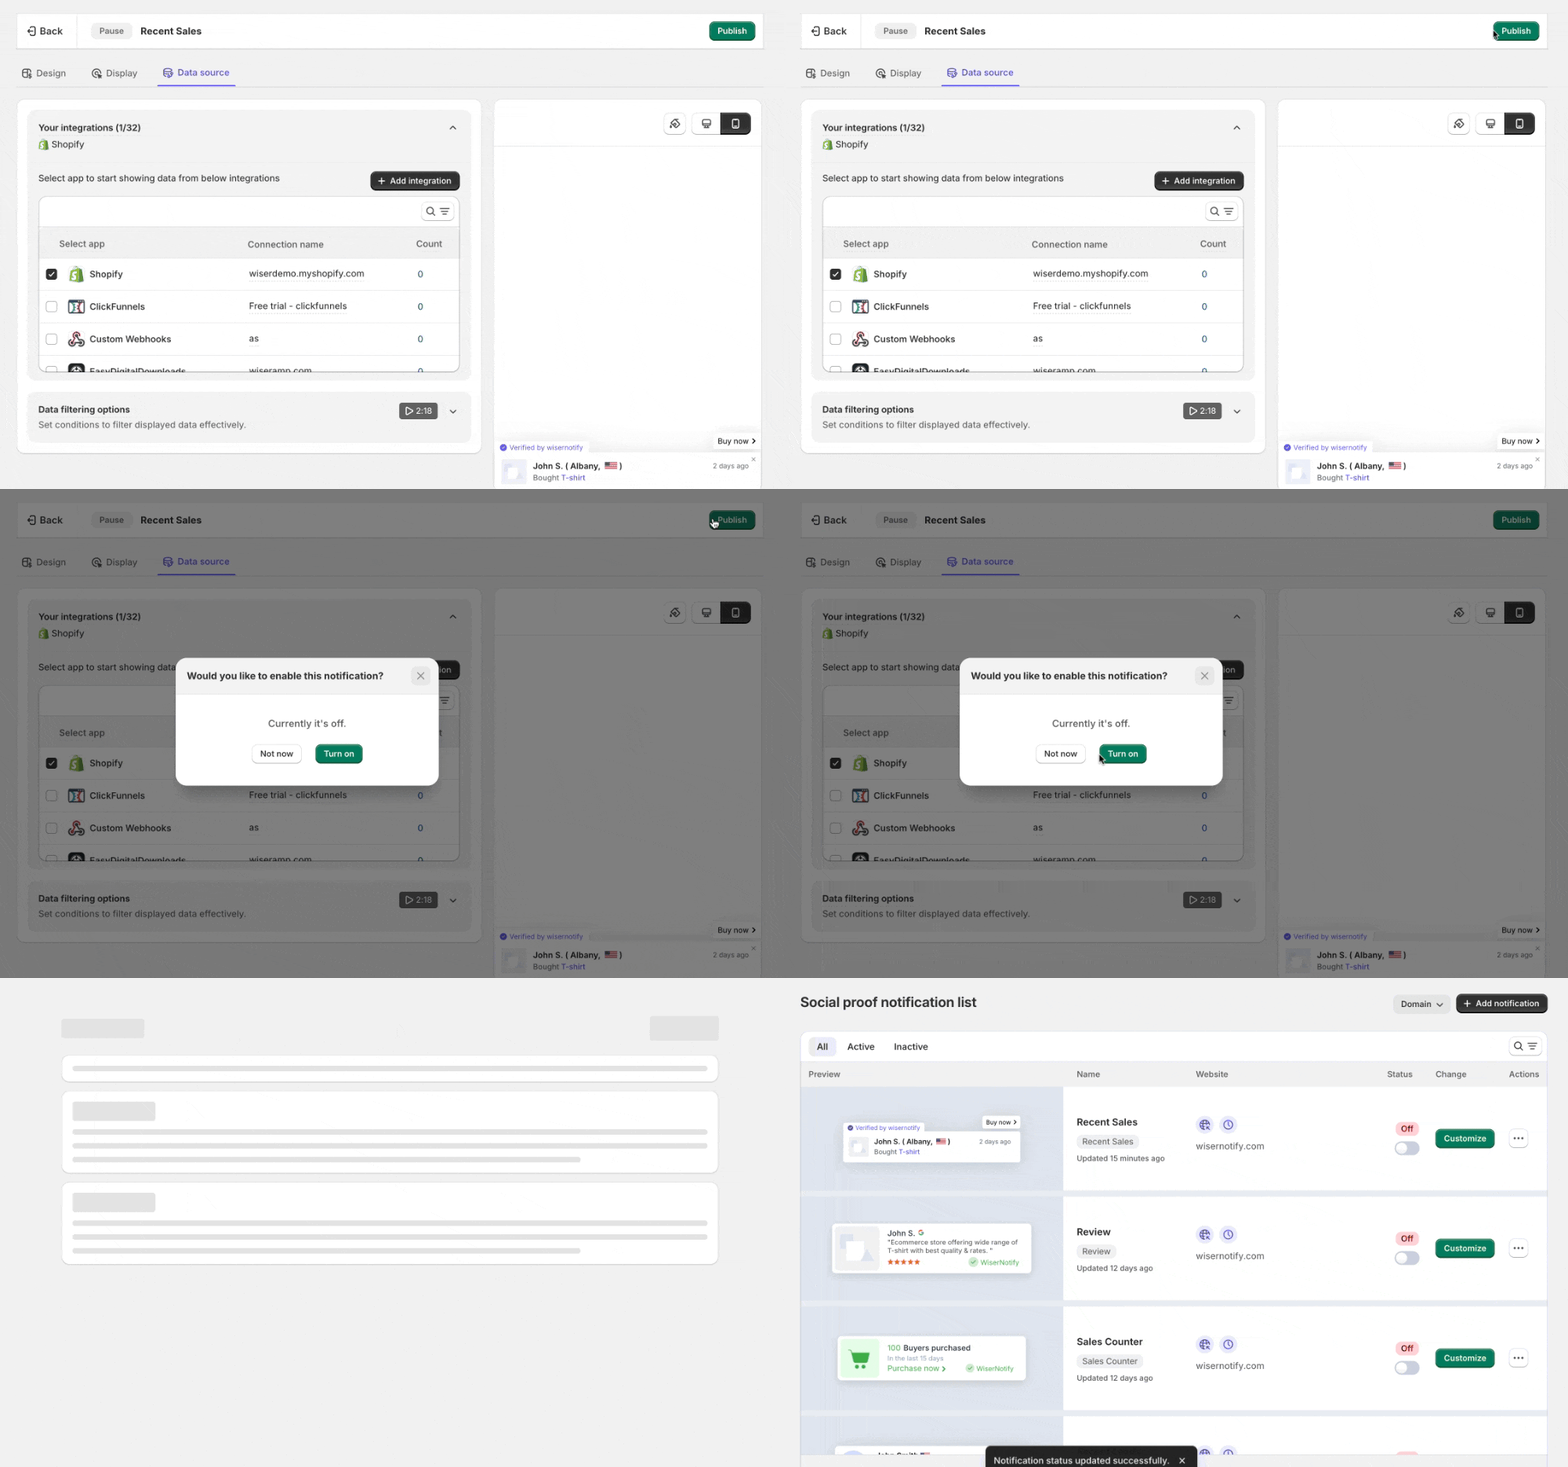
Step 8: Publish and Go Live
Once the three sections are set, click Finish and turn the notification on. Open your Framer site to see the sales popup live on the page.

Boost Conversion Instantly
Add Social Proof & Urgency to your website
Popup Not Showing Up on Framer?
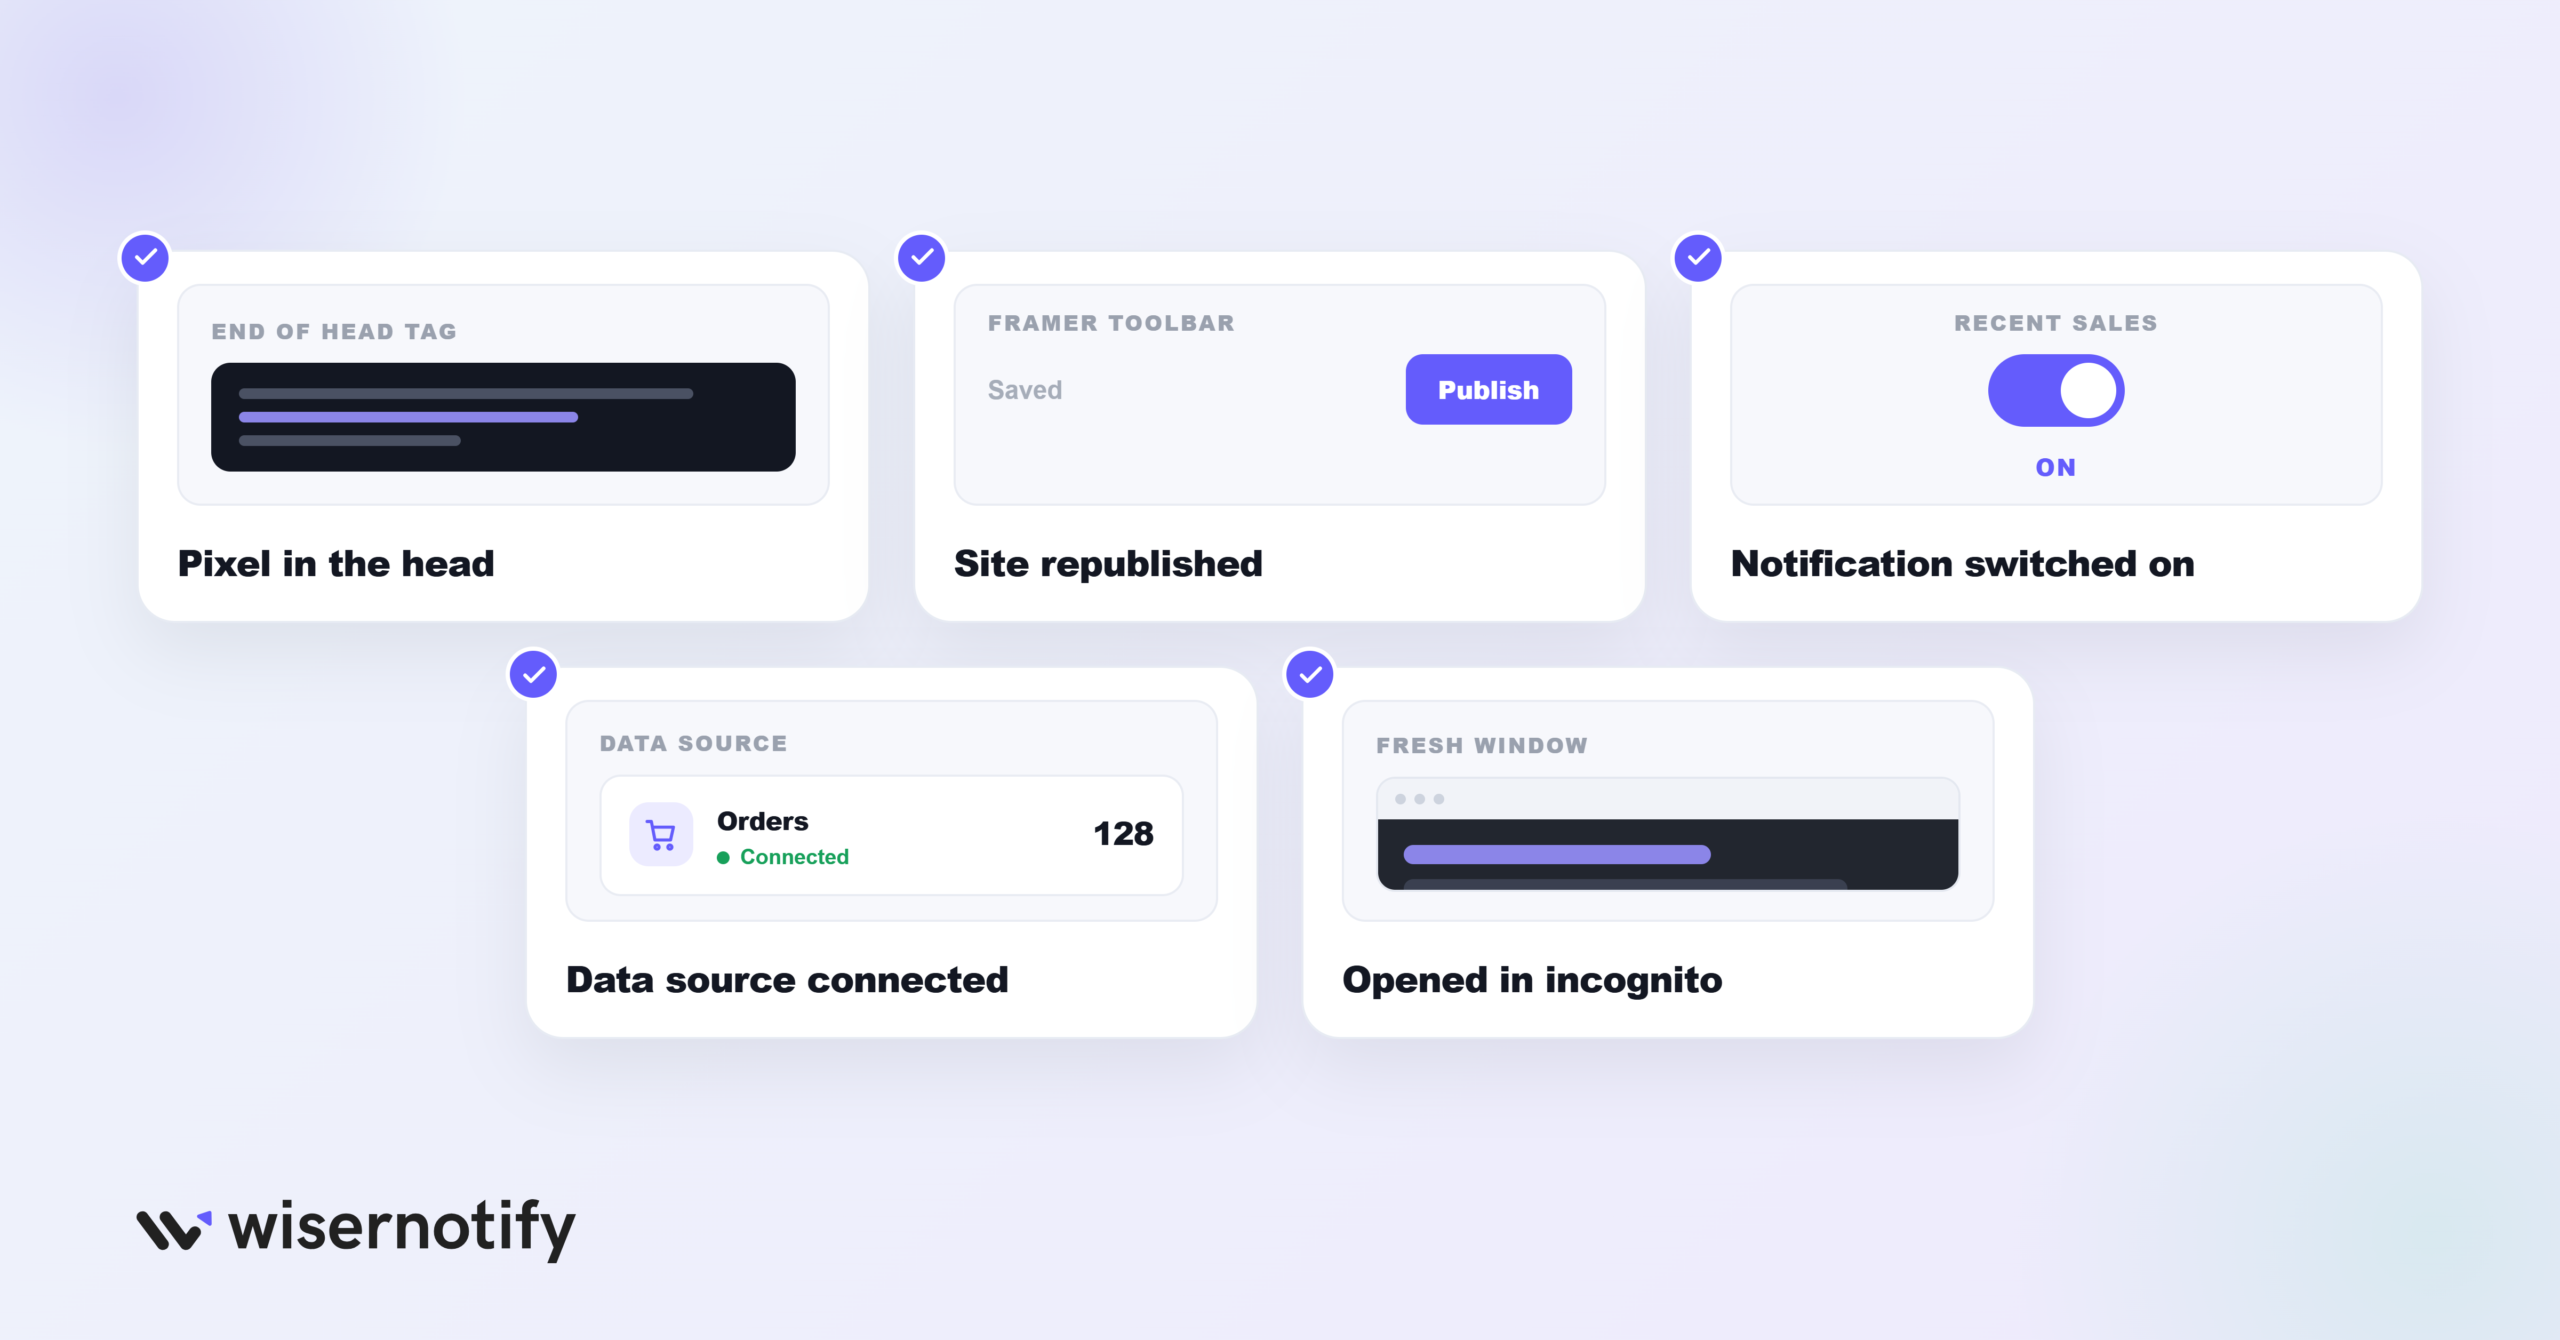
If the sales popup isn’t showing on your live Framer site, check these first:
- Pixel not in the Head: the code has to sit in Framer’s Custom Code under the End of <head> tag, and you have to publish the site after adding it.
- Site not republished: saving in Framer isn’t the same as publishing, so republish once the pixel is in.
- Notification is off: make sure the notification is turned on in the WiserNotify dashboard.
- No sales data yet: a Recent Sales popup needs real orders from a connected data source, so check the integration is active.
- Old cache: open the page in an incognito window so you’re not seeing an old version.
Still stuck? WiserNotify’s dashboard has a built-in check that shows what’s wrong, and live chat can help.
Sales Popup Tips for Framer
- Match your design: use your own fonts, colors, and animations so the popup looks like part of your site, not something stuck on top.
- Delay the timing: don’t fire it instantly. Wait 10 to 15 seconds or until the visitor scrolls about 40% down the page.
- Personalize the message: real names, products, and locations make it believable, as the best social proof examples show. “Elena from Berlin just downloaded your template” beats a generic line.
- Tie urgency to real actions: be specific. “Only 2 seats left for the May cohort” works well during launches and limited-time sales.
- Use subtle transitions: fade-ins, slide-ins, or scale effects that match your own UI keep the popup feeling native to Framer.
Sales Popup Mistakes to Avoid on Framer
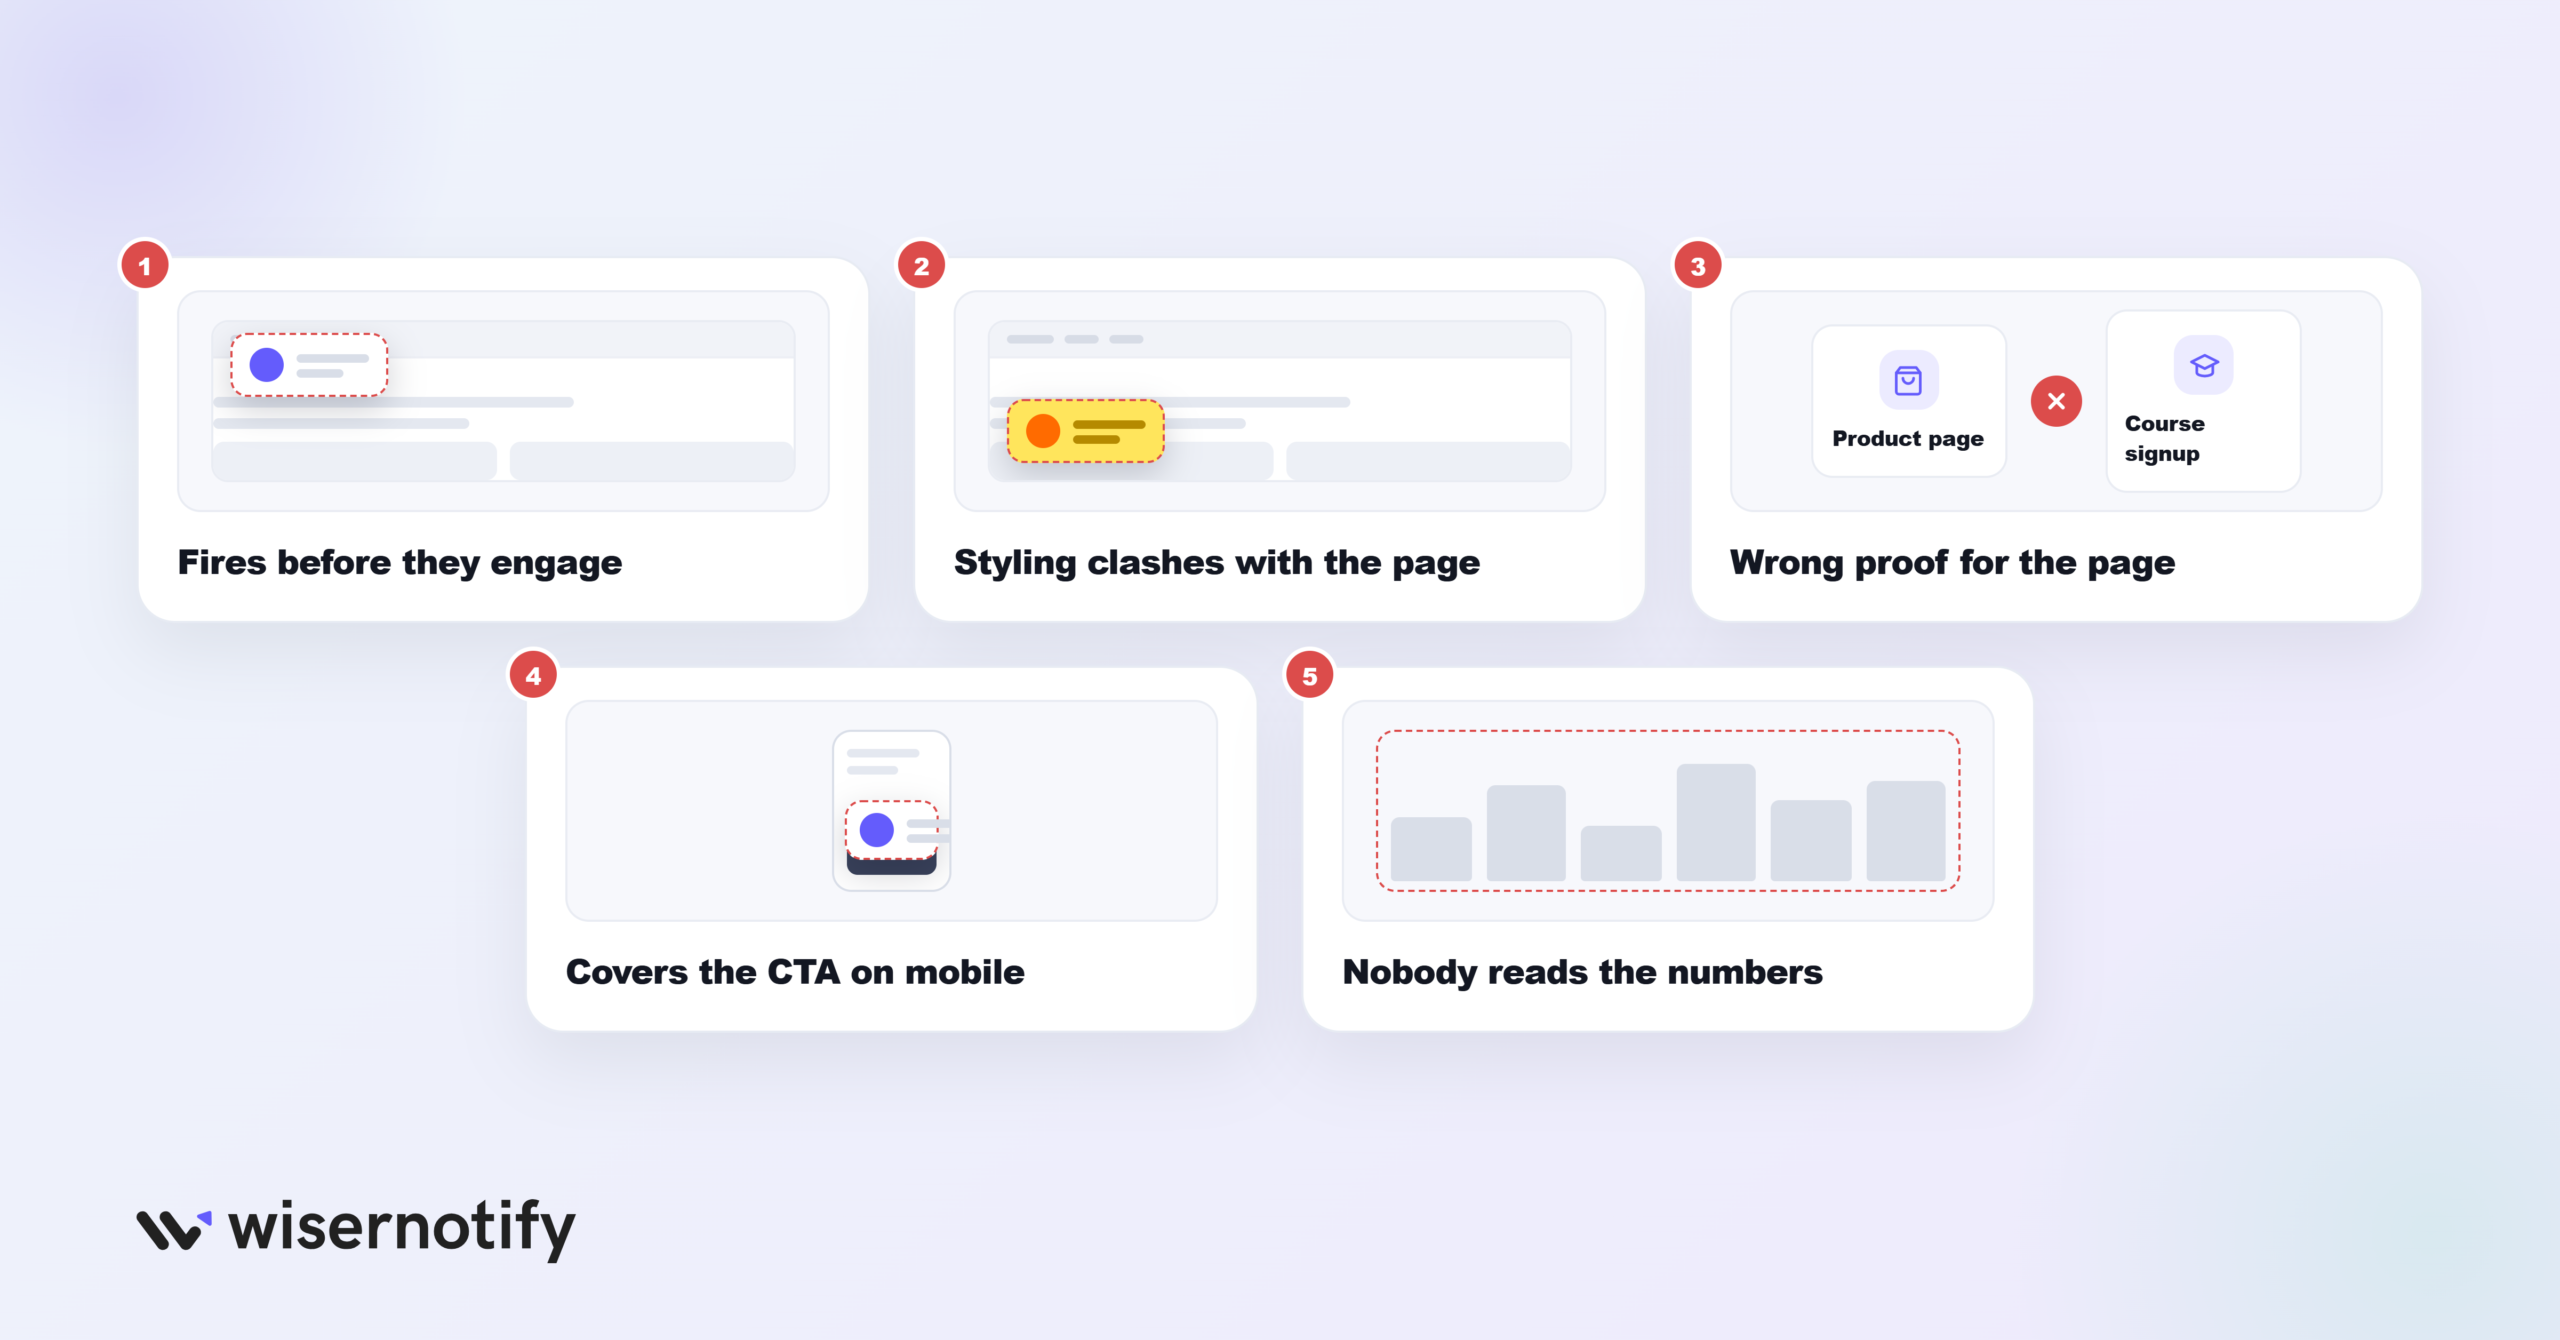
- Being too aggressive: a popup that fires the second the page loads, or covers the menu, gets dismissed on reflex. Trigger it on engagement instead, after a short delay or a partial scroll.
- Styling that breaks the design: clashing colors, the wrong font, or a jerky animation make the whole page feel less trustworthy. Match the popup to your site so it reads as part of the page.
- Low-relevance messaging: a popup unrelated to the page just reads as noise. Show signups on a course page and purchases on a product page, so the proof fits the decision.
- Ignoring mobile: most Framer traffic is on phones, and a desktop-fine popup can cover the menu or a CTA on a small screen. Preview on mobile and set its position separately.
- Skipping the data: setting a popup and forgetting it means guessing. Watch impressions, clicks, and conversions in the dashboard, then adjust from what the numbers show.
Wrap-Up
Framer is great for making a site look and feel good, but looks alone don’t close the sale. Sales popups add the trust that’s missing.
With light, customizable popups, you can show live activity without slowing your site or breaking your layout. Whether you sell a kit, a service, or collect emails, it gives people a reason to act.
Set up your WiserNotify sales popup on Framer and give your site the extra push it needs to convert.
Related guides
Setting up a sales notification popup on a different platform? These walk through it:
Frequently Asked Questions
Does Framer have a built-in sales notification popup?
No, Framer has no native sales popup. You can add one with WiserNotify in a few minutes using a single pixel, no code required.
Do I need to code to add a sales popup on Framer?
No. You paste one WiserNotify pixel into Framer’s Custom Code (Head), then build and manage the popup from the WiserNotify dashboard.
What data can the sales popup show?
Recent Sales shows each buyer’s name, location, product, and time. Sales Count shows the total number of sales over a period you choose.
Where does the sales data come from?
From the platform you sell through. In the Data Source section you connect an integration, like your store or payment gateway, and activate it.
Can I control where and when the popup appears?
Yes. Display settings let you target all pages or specific ones, set a delay and display time, and narrow the audience by location, UTM, or referrer.

Krunal Vaghasiya is a marketing tech expert who boosts e-commerce conversion rates with automated social proof and FOMO strategies. He loves to keep posting insightful posts on online marketing software, marketing automations, and improving conversion rates.




 Capterra