
Ecwid Sales Popup: Show Real Orders Live (2026)
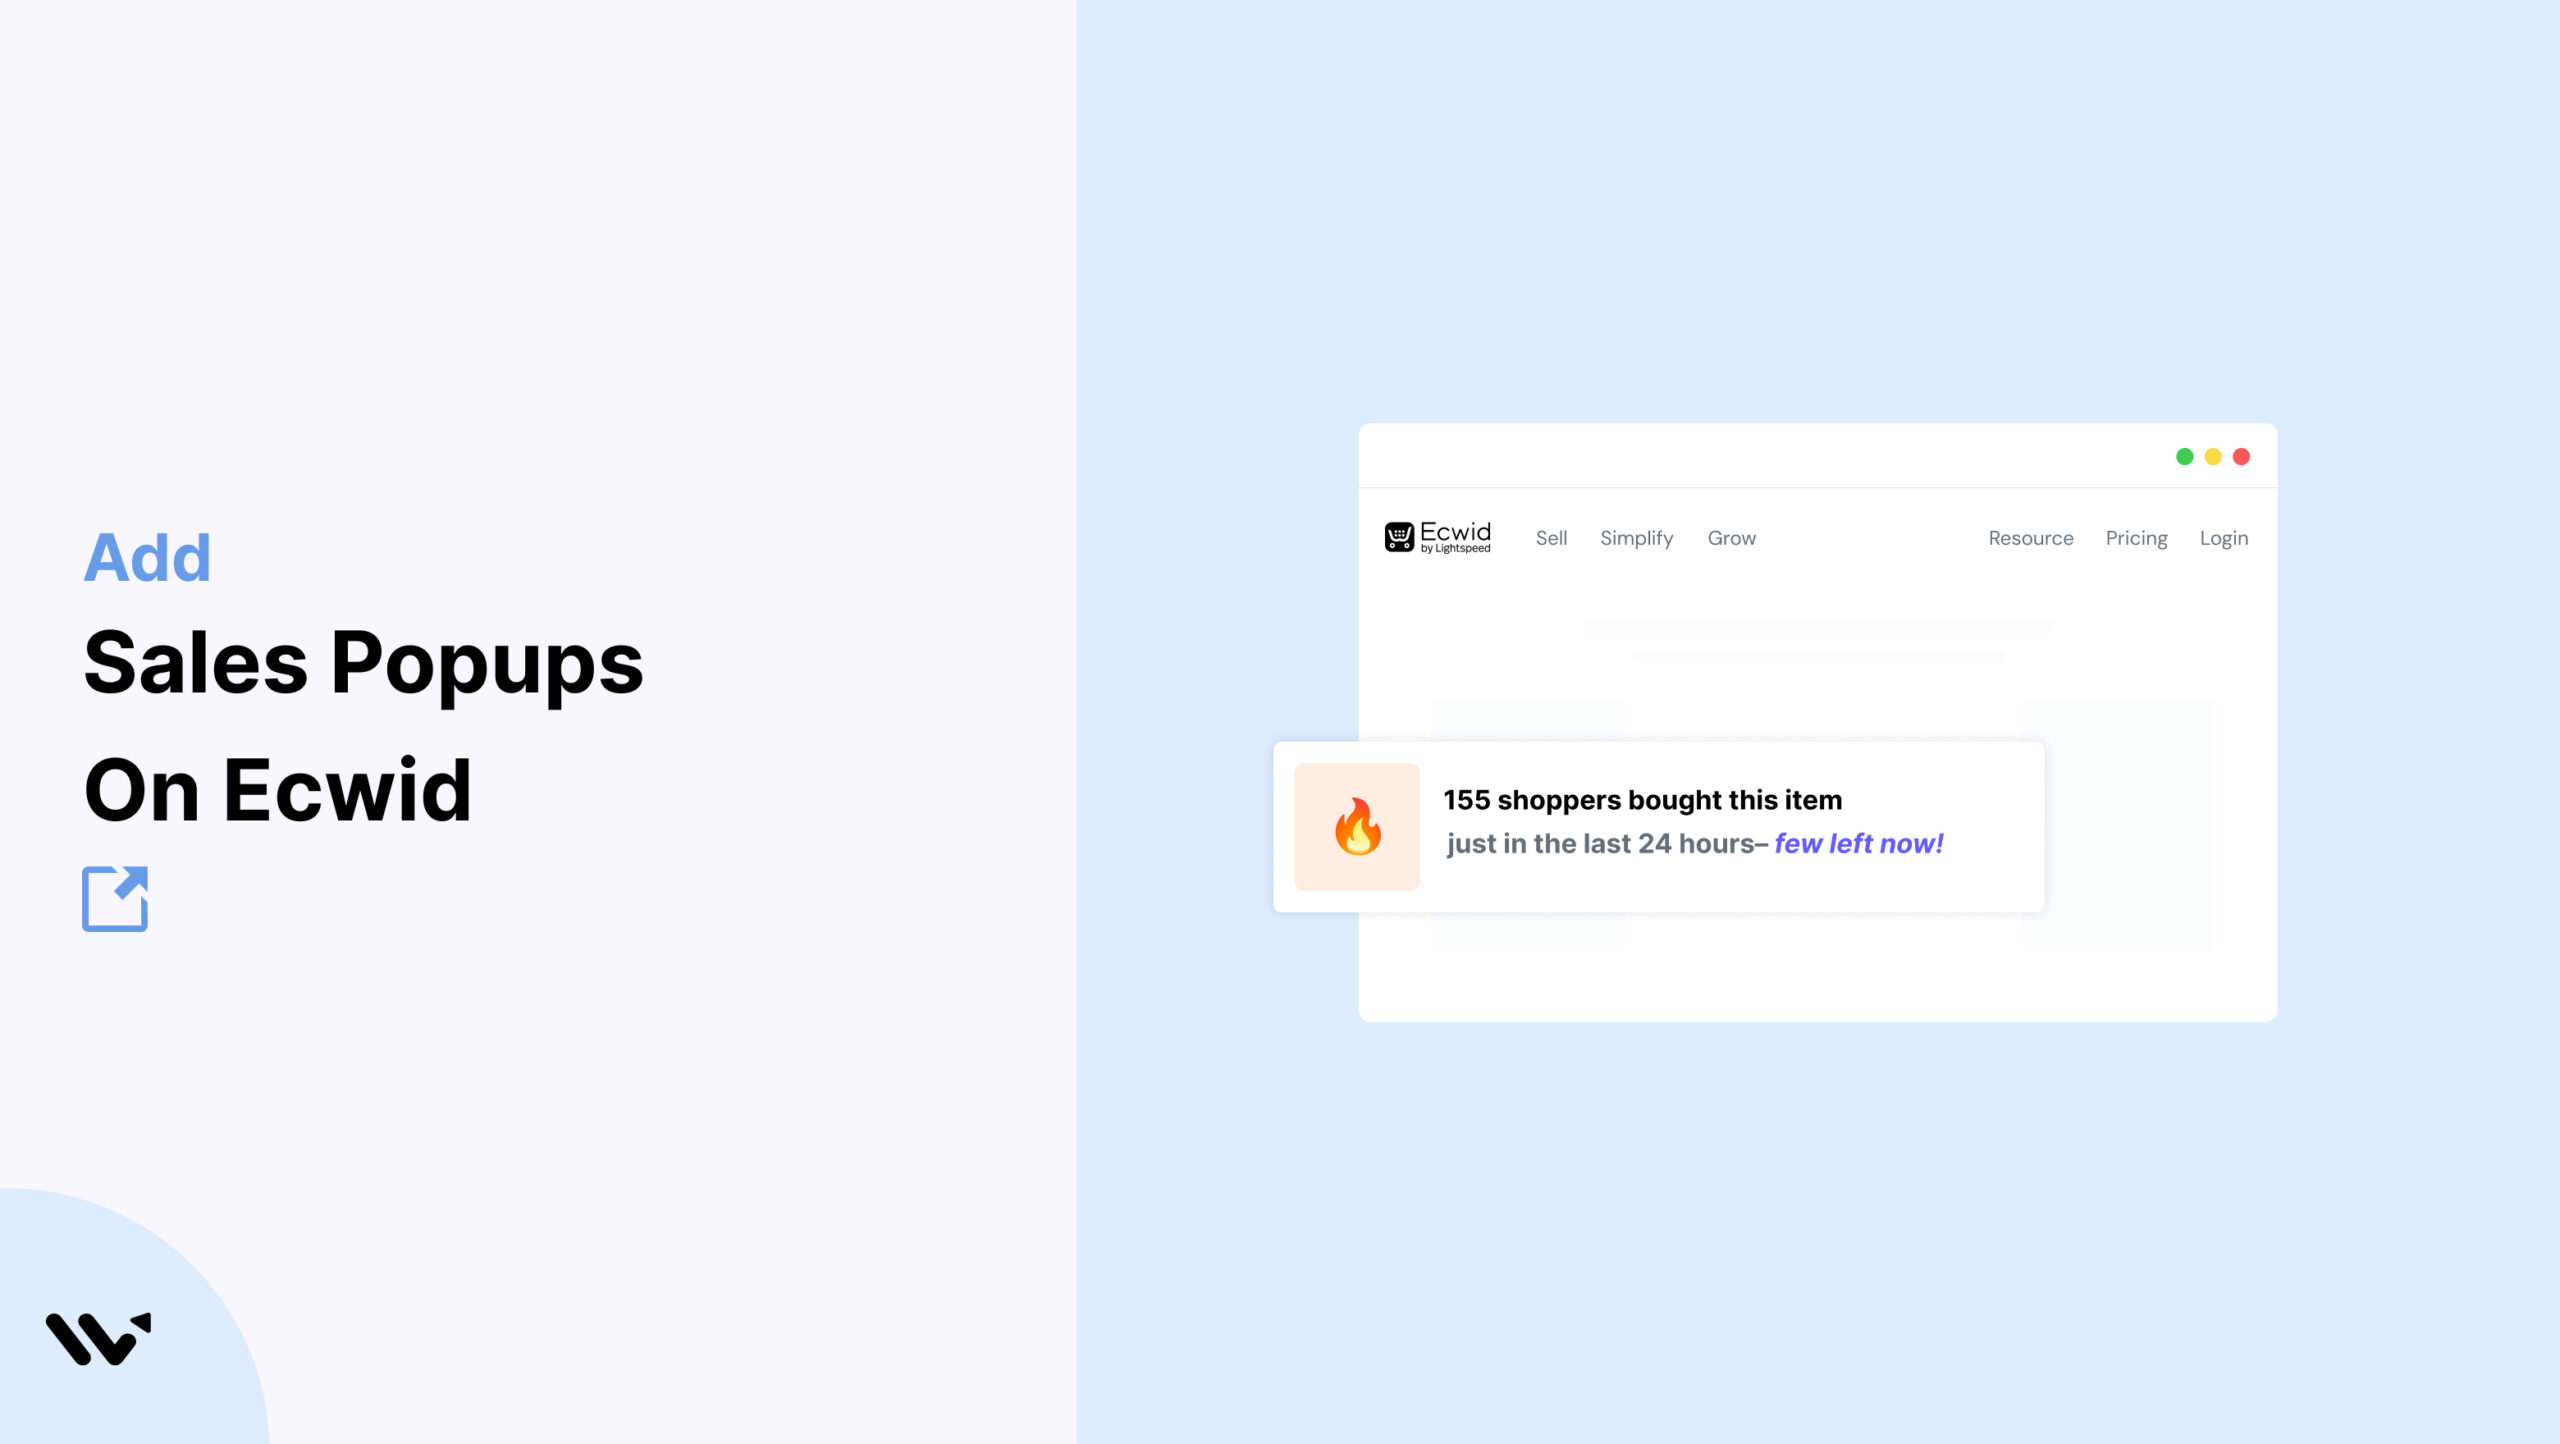
To add a sales popup to Ecwid, connect your store to WiserNotify through the Ecwid by Lightspeed integration. Then paste the WiserNotify pixel into Ecwid’s header code box and build a Recent Sales notification.
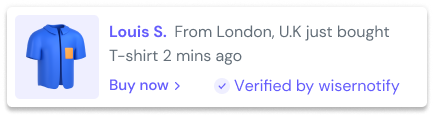
The popup reads your Ecwid orders and shows them to new visitors, like “Priya from Austin bought the Linen Tote.” Setup takes about 10 minutes, and you won’t touch any code.
In my experience, most Ecwid owners get stuck on one thing. They install the pixel, skip the integration, and wonder why the popup stays empty. You need both pieces, and the steps below cover each one with a screenshot.
Here’s the short version before the full walkthrough.
- The integration feeds orders, the pixel shows the popup. Skip either one and nothing appears.
- Embedded store? If Ecwid runs inside WordPress, Wix, or another site, the pixel goes on that site too.
- Try it before you pay. WiserNotify has a 7-day free trial, long enough to watch the popup run on your store’s traffic.
What Is an Ecwid Sales Popup?
An Ecwid sales popup is a small notification that shows a recent real order from your store, with the buyer’s first name, city, and product.
It answers the question every first-time visitor has on a small store. Is anyone else buying here? Big brands get a pass on that one. A two-person Ecwid shop usually doesn’t.
I think of the popup as a quiet nod from the last person who bought.
WiserNotify can show that order in two ways.
- Floating popup. It slides in from a corner on any page, stays a few seconds, then fades out.
- Inline notification. It sits on the product page itself, near the Add to cart button, as one short line like “John S. from Albany bought 2 days ago.”

Inline notifications live under Notifications > Inline, with ready-made lines for product and collection pages. Each one needs a short code snippet placed where the line should appear, so the floating popup is the quicker place to start.
The same floating setup works on any platform, and the guide to adding a sales notification popup on your website covers the general version.
Which Ecwid Popup Do You Need?
Pick the popup by the job it does. A sales popup builds trust, an exit popup catches visitors who are leaving, and a countdown timer pushes a deadline.
| Popup | What visitors see | Use it when |
|---|---|---|
| Recent sales popup | “Priya from Austin bought the Linen Tote” | Shoppers need proof your store is active (this guide) |
| Sales counter | “24 buyers purchased in the last 12 hours” | You get orders every day |
| Exit popup | A discount or email offer as they leave | Visitors bounce from product pages, so create an exit popup in Ecwid |
| Countdown timer | A ticking clock on a sale | You run time-limited offers and want to add a countdown timer to Ecwid |
| Announcement bar | A strip across the top with one message | You want one store-wide promo. Steps to add an announcement bar to Ecwid |
You can run several at once. Just keep them in different corners so they don’t pile on top of each other.
How to Add a Sales Popup to Ecwid
You only paste one script, and nothing else is technical. Sign up for the 7-day free trial and work through the 12 steps. The video walks through the Ecwid connection and the pixel install.
Prefer to start inside Ecwid? The same connection also opens from the WiserNotify: Social Proof App listing in the Ecwid App Market.
Step 1: Connect Ecwid in WiserNotify

- In WiserNotify, open Integrations.
- Find Ecwid by Lightspeed and click Integrate.
- Click Login with Ecwid by Lightspeed.
- Sign in to your Ecwid admin if it asks.
Step 2: Approve the Connection

- Check the permissions. WiserNotify asks to read your store profile, products, and orders.
- Click Accept.
It’s read-only access, so WiserNotify can’t change a product or an order.
Step 3: Copy Your WiserNotify Pixel

- Open the Install pixel page in WiserNotify.
- Click Copy code.
Step 4: Open Ecwid’s Header Code Box
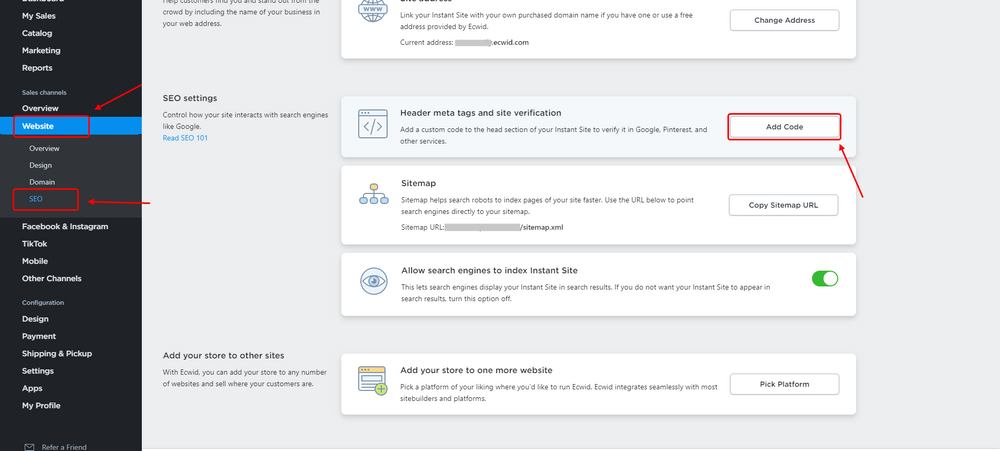
- Log in to your Ecwid admin.
- Go to Sales channels > Website > SEO.
- Under Header meta tags and site verification, click Add Code.
Step 5: Paste the Pixel and Save

- Paste the WiserNotify pixel into the code field.
- Click Save.
Step 6: Verify the Pixel

- Go back to the WiserNotify pixel page.
- Click Verify pixel installation.
- Wait for the green “Your pixel code has been detected successfully!” line.
Step 7: Pick Recent Sales
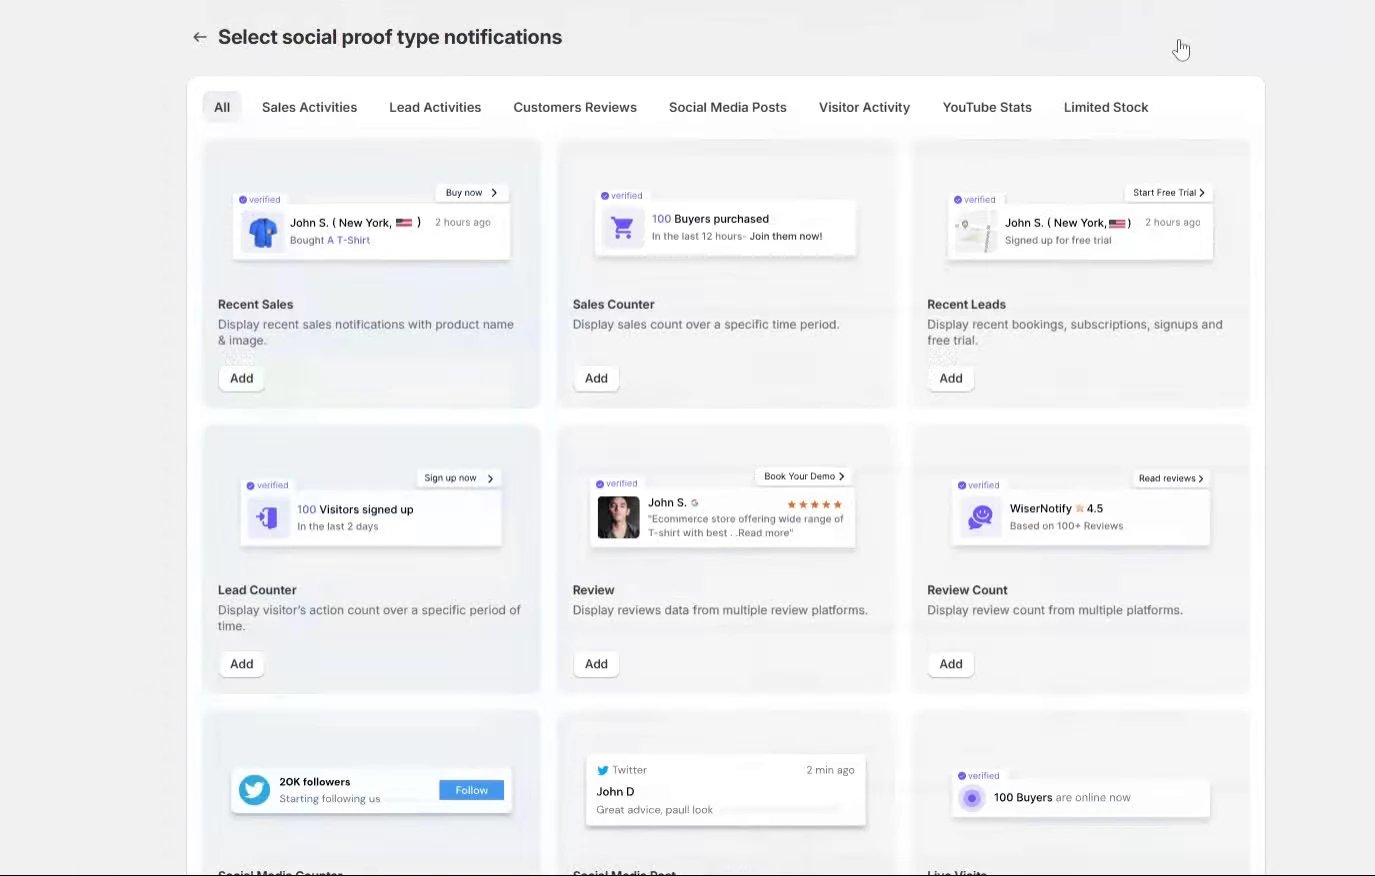
- In the left menu, open Notifications > Social proof.
- Find Recent Sales, the first card.
- Click Add.
Step 8: Name It and Add Your Store
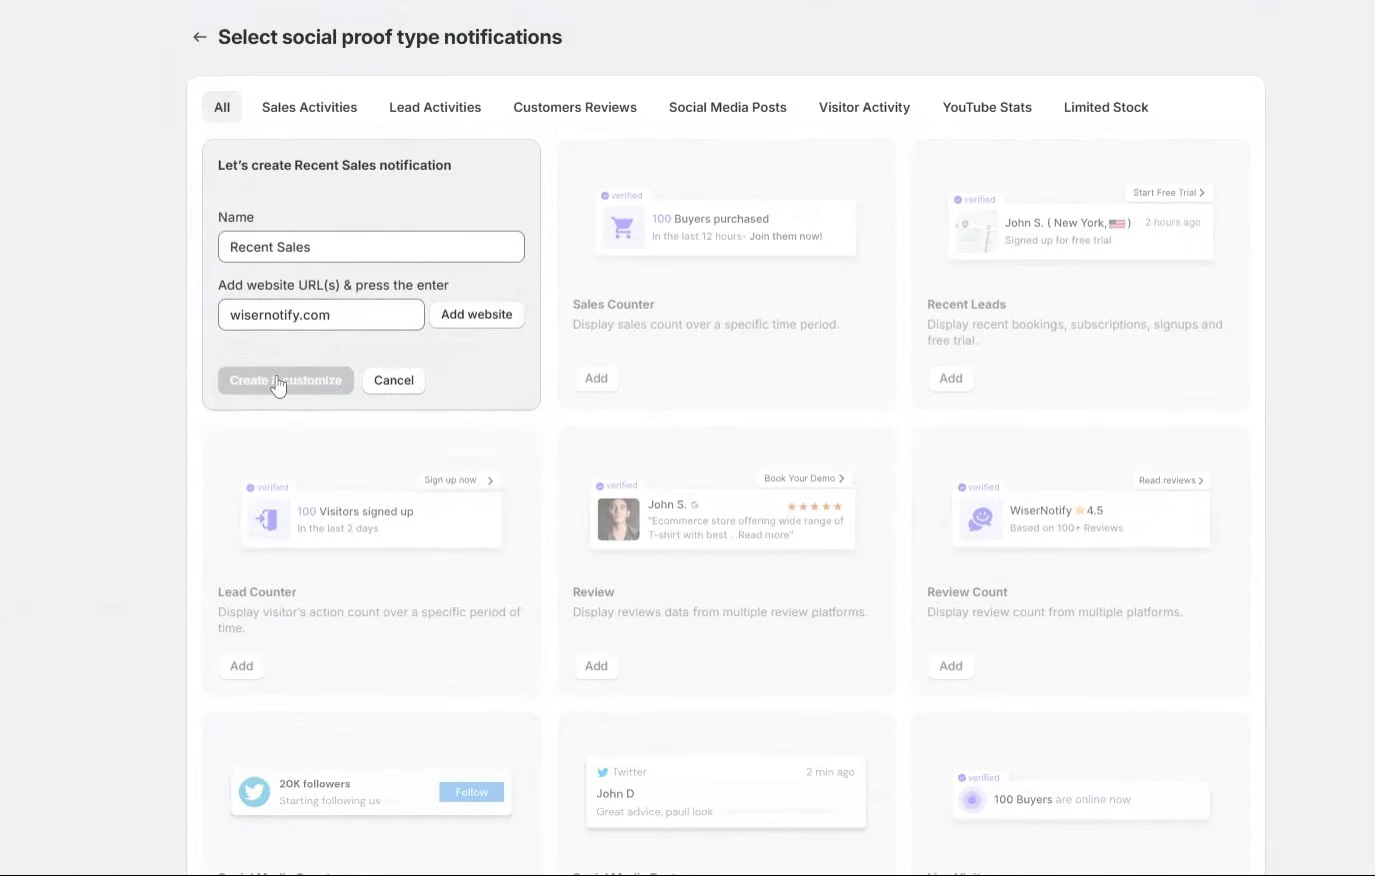
- Give the notification a name, like “Ecwid recent sales.”
- Type your store’s web address and press Enter.
- Click Create & customize.
Step 9: Design the Popup
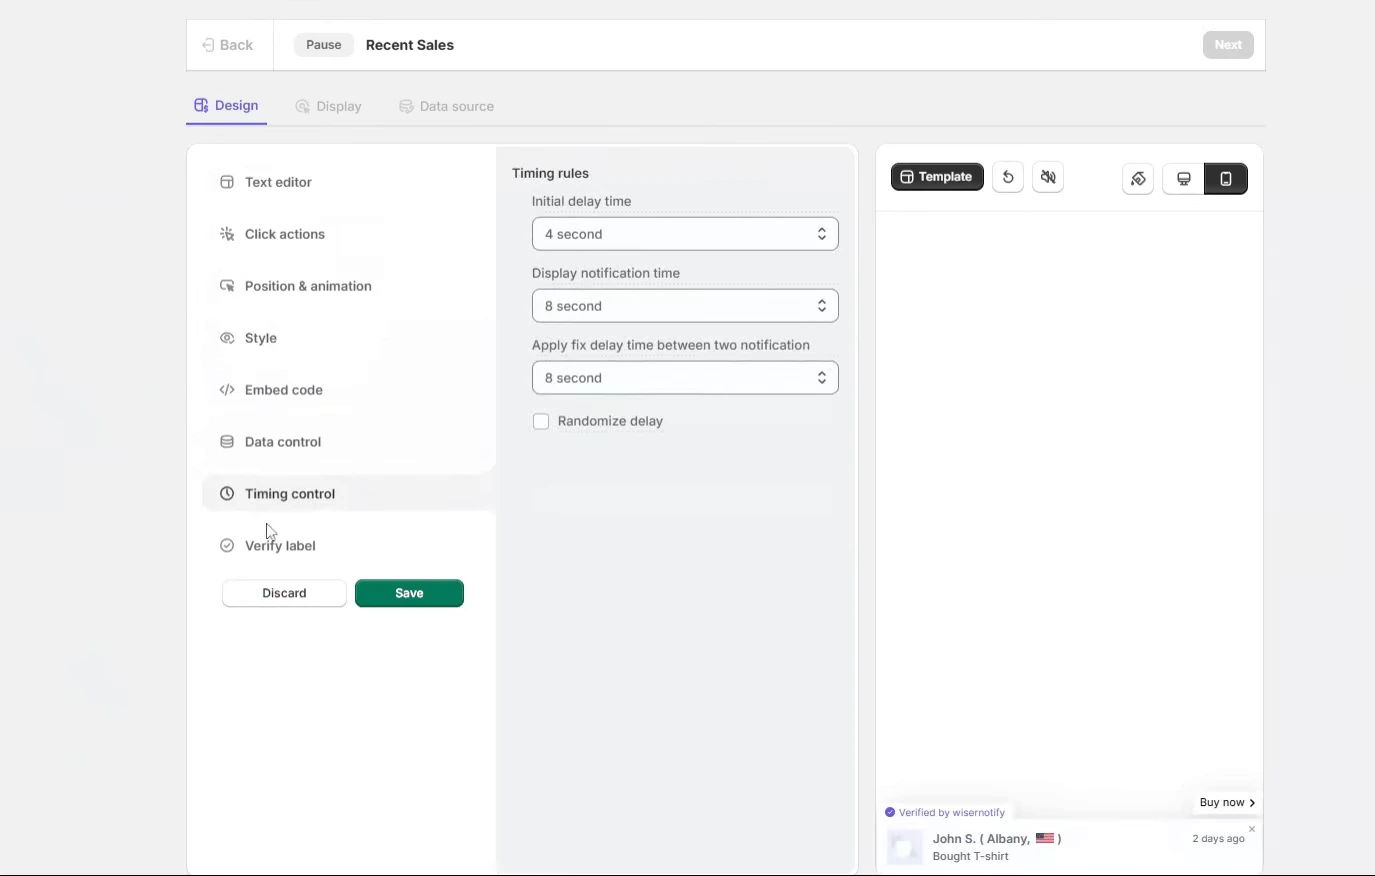
- In Text editor, keep the buyer’s first name, city, and product in the message.
- In Click actions, add a button like “Buy now” that links to the product.
- In Position & animation, pick a bottom corner for desktop and mobile.
- In Style, match your Ecwid store’s colors and font.
- In Timing control, keep the default 4-second delay and 8-second display time to start.
- Leave Verify label on so shoppers see “Verified by WiserNotify.”
- Click Save.
Step 10: Choose Where It Shows
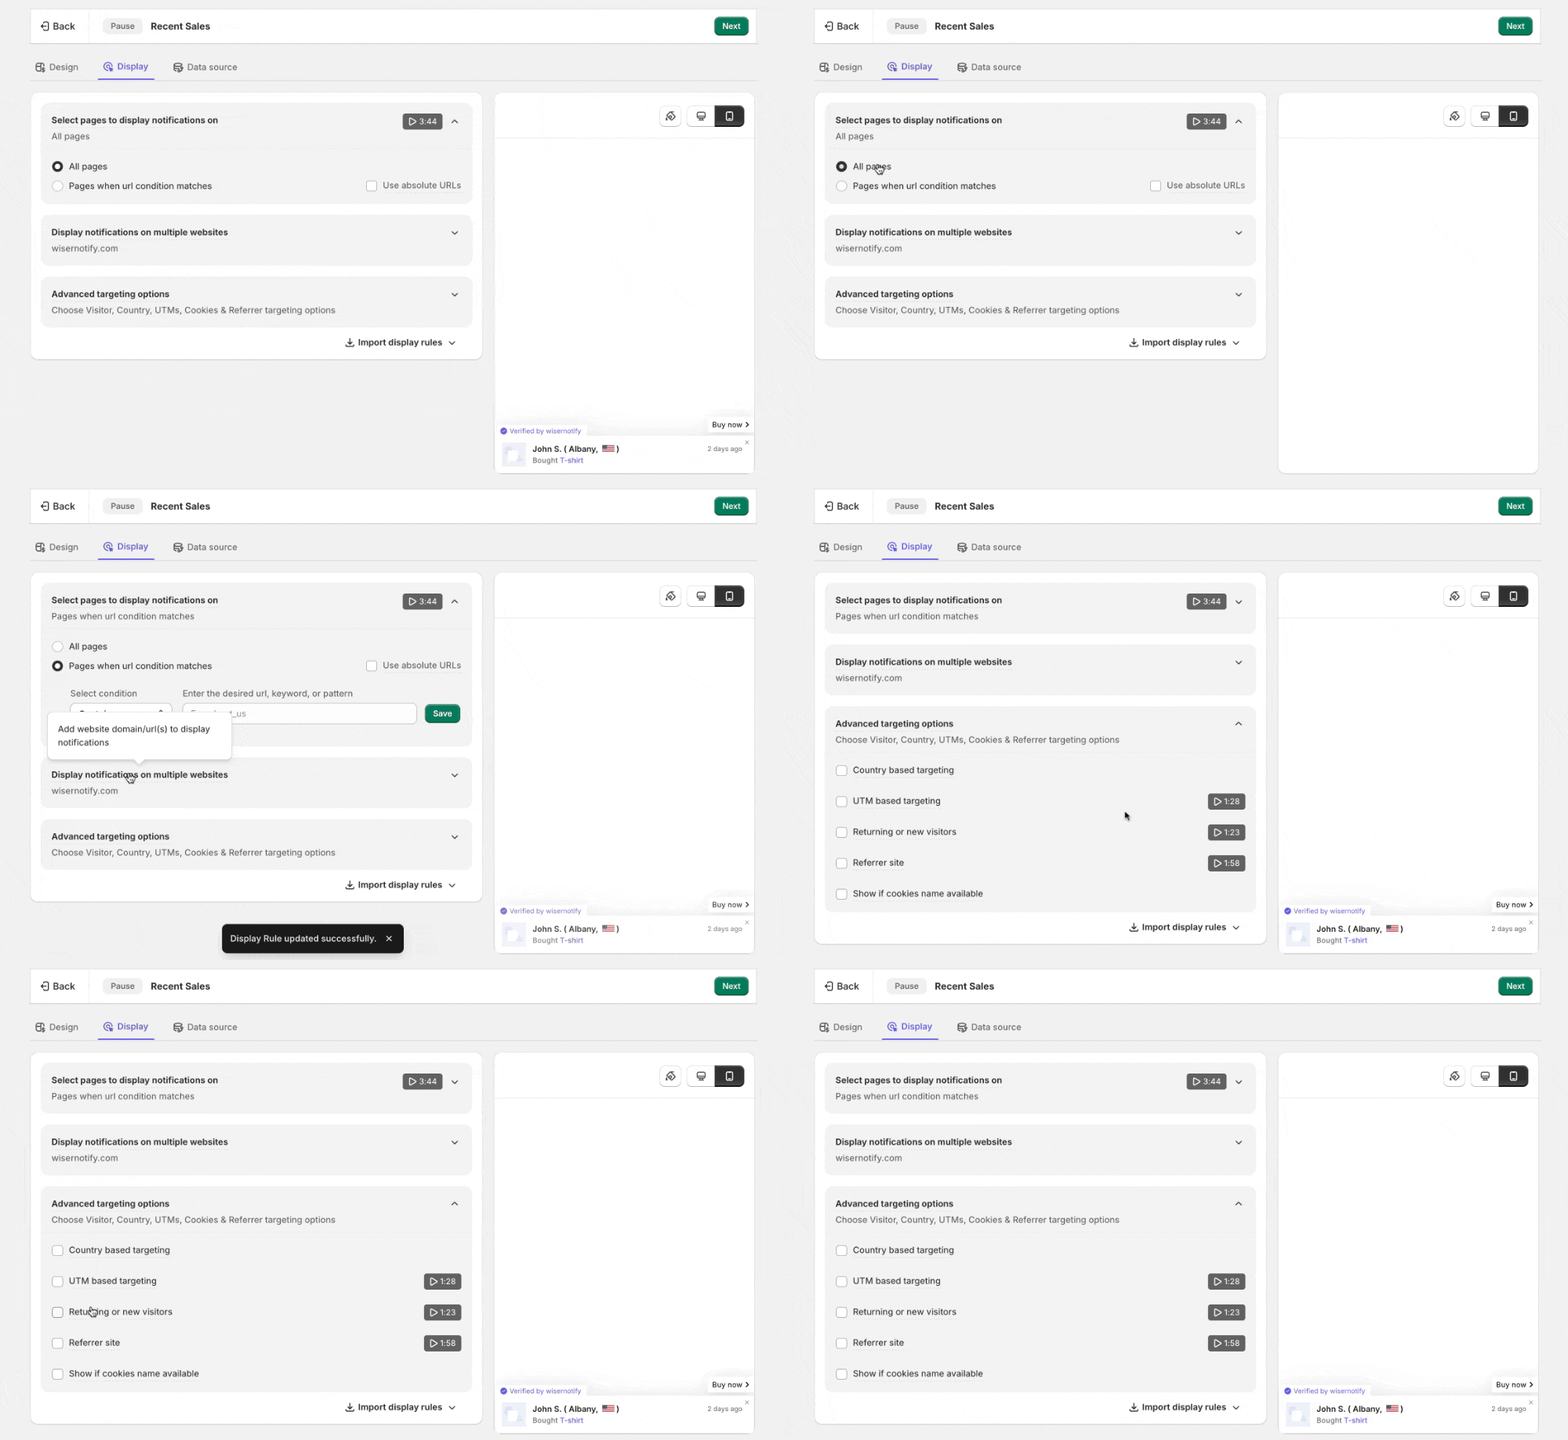
- Open the Display tab.
- Pick All pages, or choose Pages when url condition matches to limit it.
- Open Advanced targeting options to filter by country, UTM, new or returning visitors, or referrer.
Step 11: Pick Ecwid as the Data Source
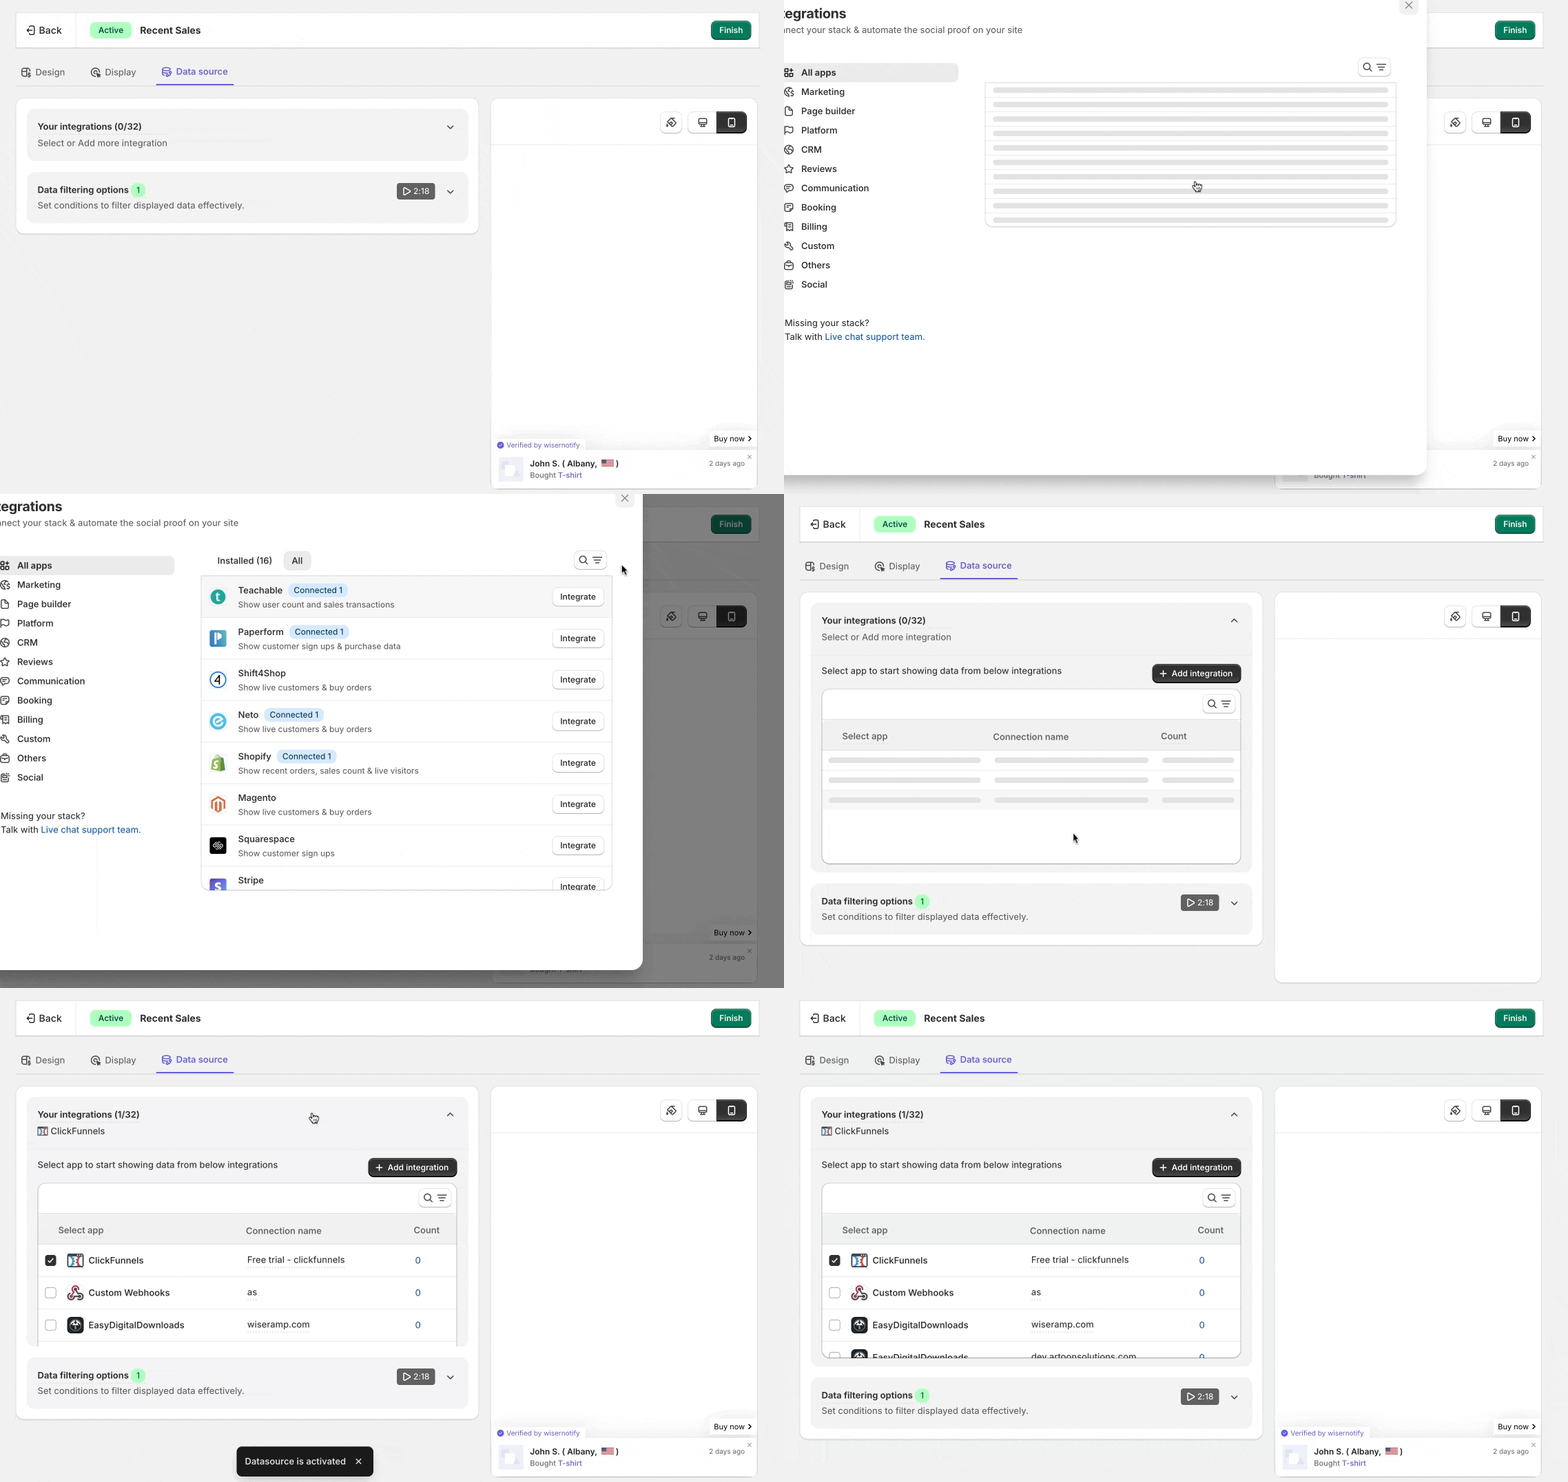
- Open the Data source tab.
- Expand Your integrations.
- Tick your Ecwid by Lightspeed connection.
- Use Data filtering options if you want to narrow which orders appear.
Step 12: Publish and Turn It On
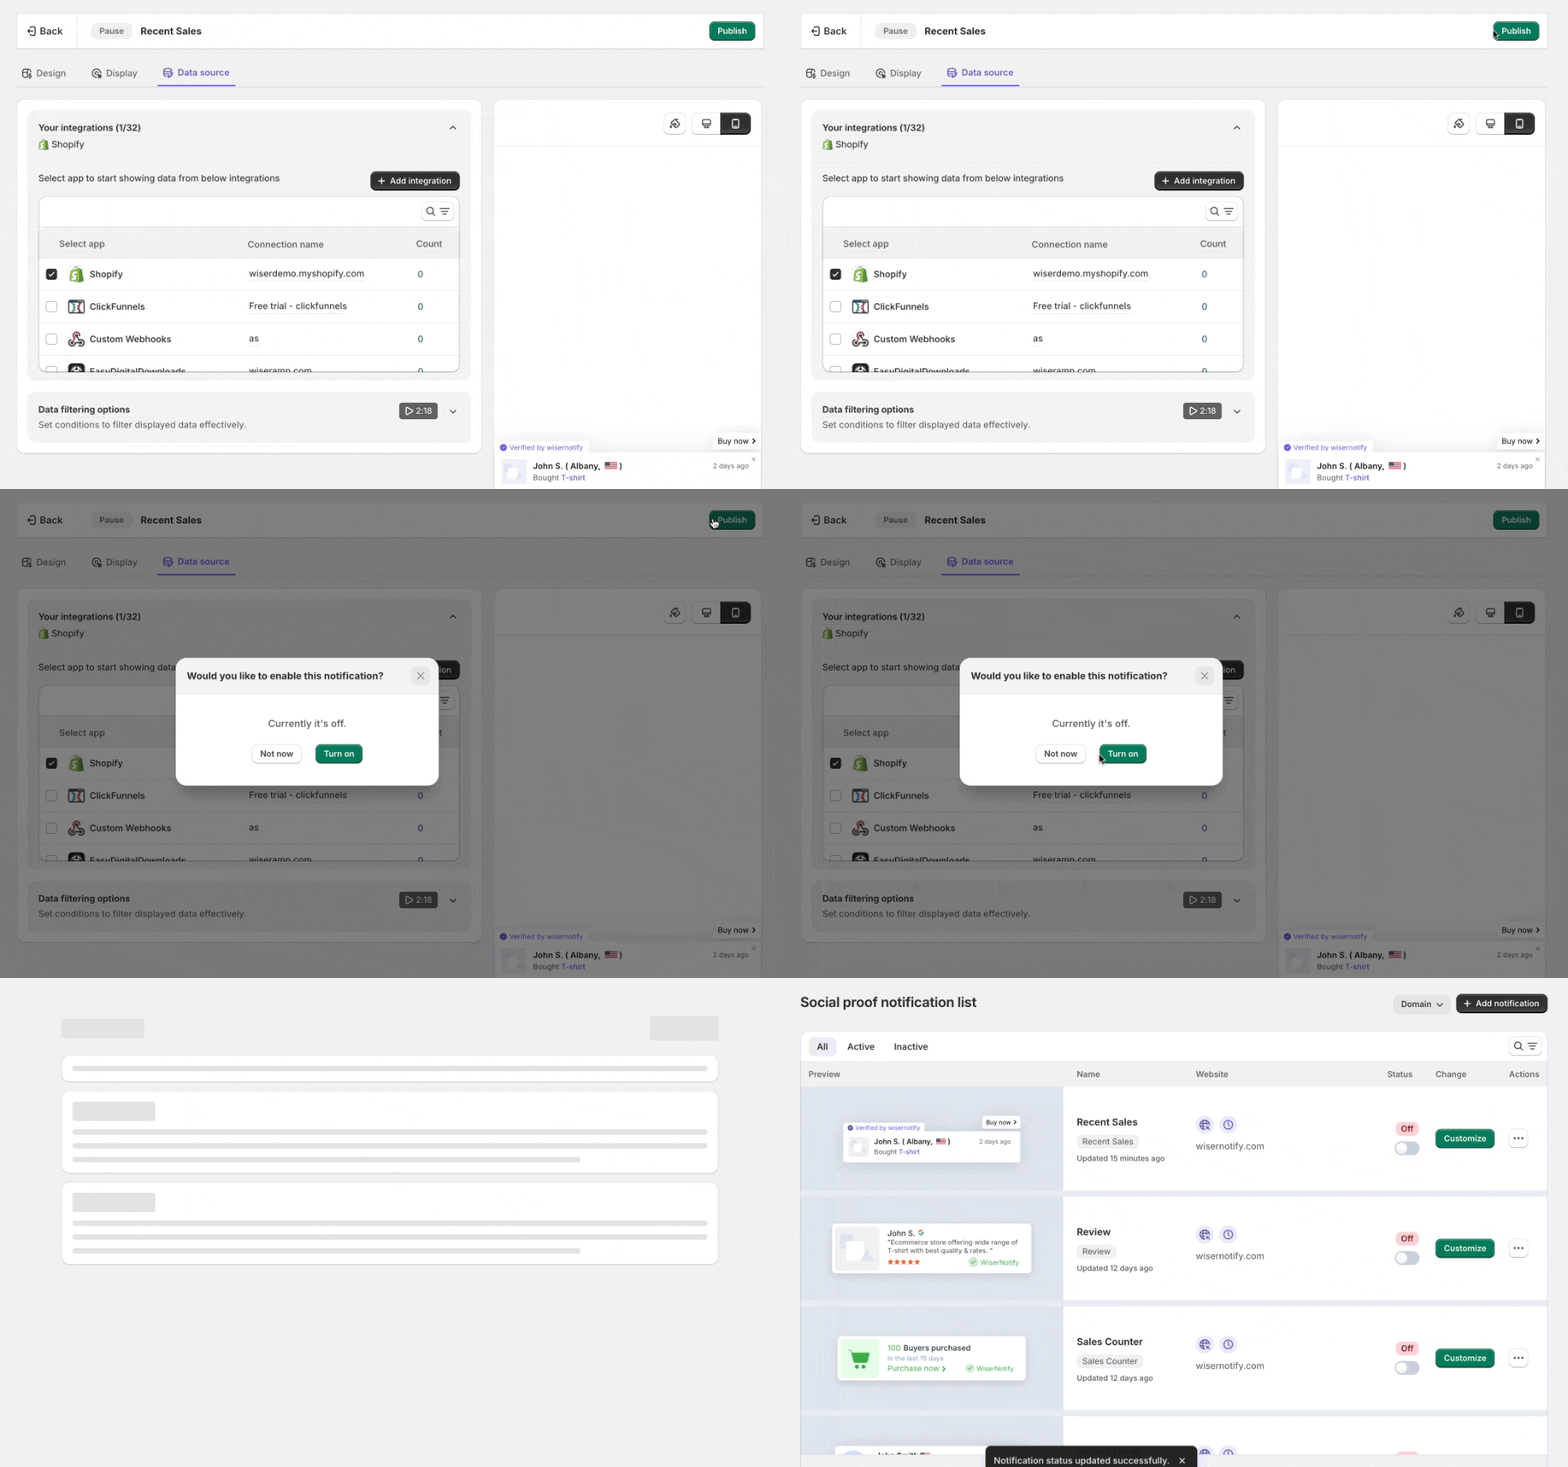
- Click Publish.
- When it asks “Would you like to enable this notification?”, click Turn on.
- Open your store in a private window and wait for the first popup.
Build trust & FOMO
Highlight real-time activities like reviews, sales & sign-ups.

Ecwid Store Embedded on Another Site?
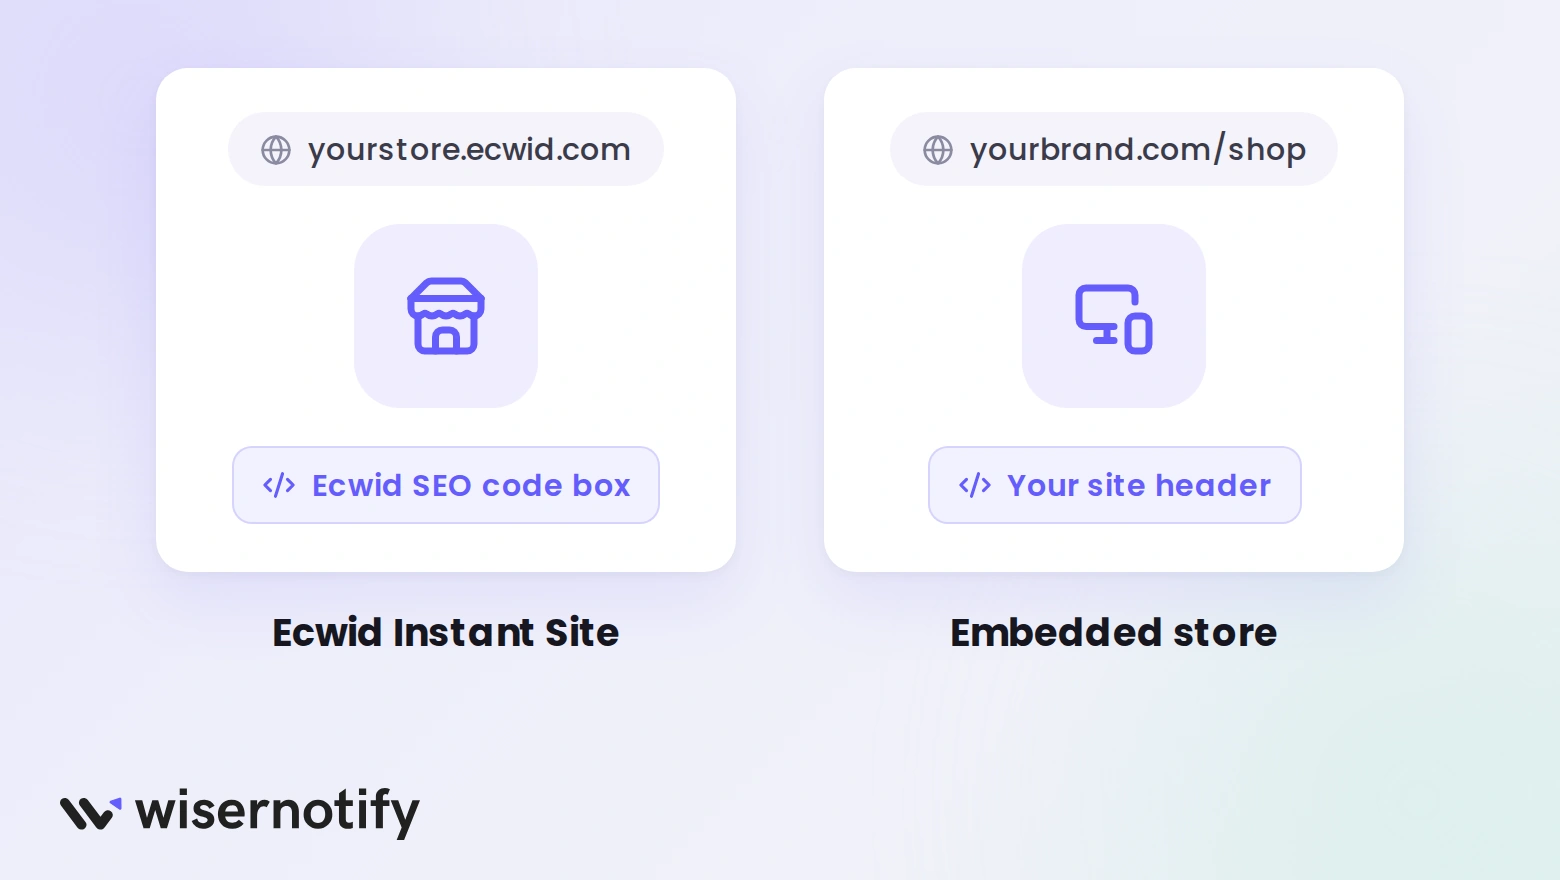
If your Ecwid store runs inside WordPress, Wix, Squarespace, or another website, add the WiserNotify pixel to that website’s header too.
I see this one trip people up a lot.
The code box from Step 4 only loads on Ecwid’s Instant Site, and Ecwid says so right on the field. When shoppers browse your store on your own domain, that box never runs.
The fix is quick.
- Paste the same WiserNotify pixel into the header of the site where your store lives. The WiserNotify pixel guides cover each major platform.
- Open your notification’s Display tab and add that domain under Display notifications on multiple websites.
- Keep Ecwid as the data source. Orders still come from Ecwid, wherever the store is shown.
Recent Sales or Sales Counter?
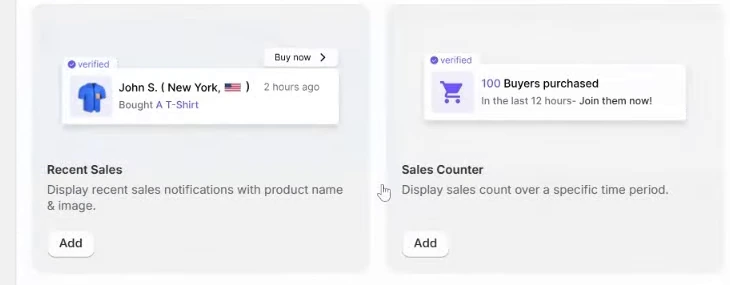
Recent Sales shows one order at a time with a name and product. Sales Counter shows a total, like how many buyers purchased in the last 12 hours.
Order volume decides it for me.
- A few orders a week? Use Recent Sales. A single order feels personal, while a counter reading “2 buyers this month” works against you.
- Orders every day? Add a Sales Counter next to it. Big totals do the convincing on their own.
- Want proof on one product? You can add a sold counter to Ecwid that shows the count for that item on its own page.
How to Set Up a Sales Counter
- Go to Notifications > Social proof.
- Click Add under Sales Counter.
- Name it, enter your store URL, and click Create & customize.
- In Text editor, edit the count line.
- In Data control, set how far back the count looks.
- In the Data source tab, tick your Ecwid by Lightspeed connection.
- Click Publish, then Turn on.
More Social Proof in the Same Menu

The Social proof menu holds more than order alerts. Recent Leads, highlighted here, shows newsletter signups or wholesale inquiries if you collect them.
Review notifications pull in your Google or Facebook reviews, and a live visitor count shows how many people are browsing right now. They all run on the pixel you added in Step 5.
For ideas on mixing them, these five types of FOMO notifications are a good place to look.
Build trust & FOMO
Highlight real-time activities like reviews, sales & sign-ups.

3 Sales Popup Examples to Learn From


Where to Show It on Your Ecwid Store
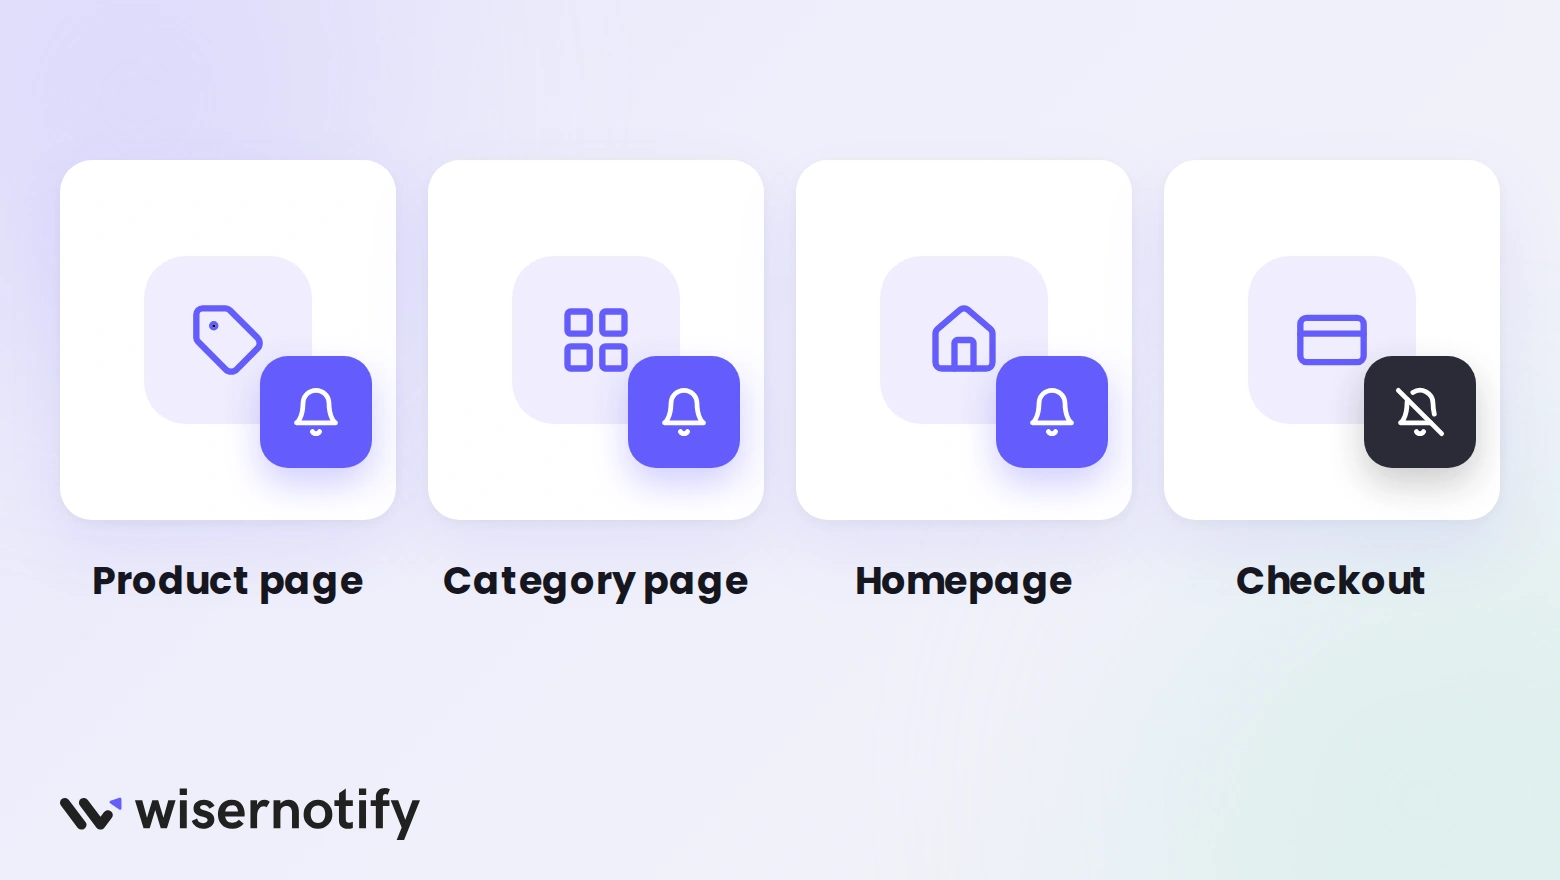
- Product pages. The shopper is deciding right there, and a recent order for that same item lands hardest.
- Category pages. A good spot for the Sales Counter, since people are still browsing.
- Homepage. Visitors from ads or social posts need the fastest proof that your store is active.
- Not checkout. I’d keep popups off the checkout page. The buyer has already decided, and anything moving on screen is a distraction.
Set these with a URL condition in the Display tab from Step 10.
Sales Popup Not Showing on Ecwid?
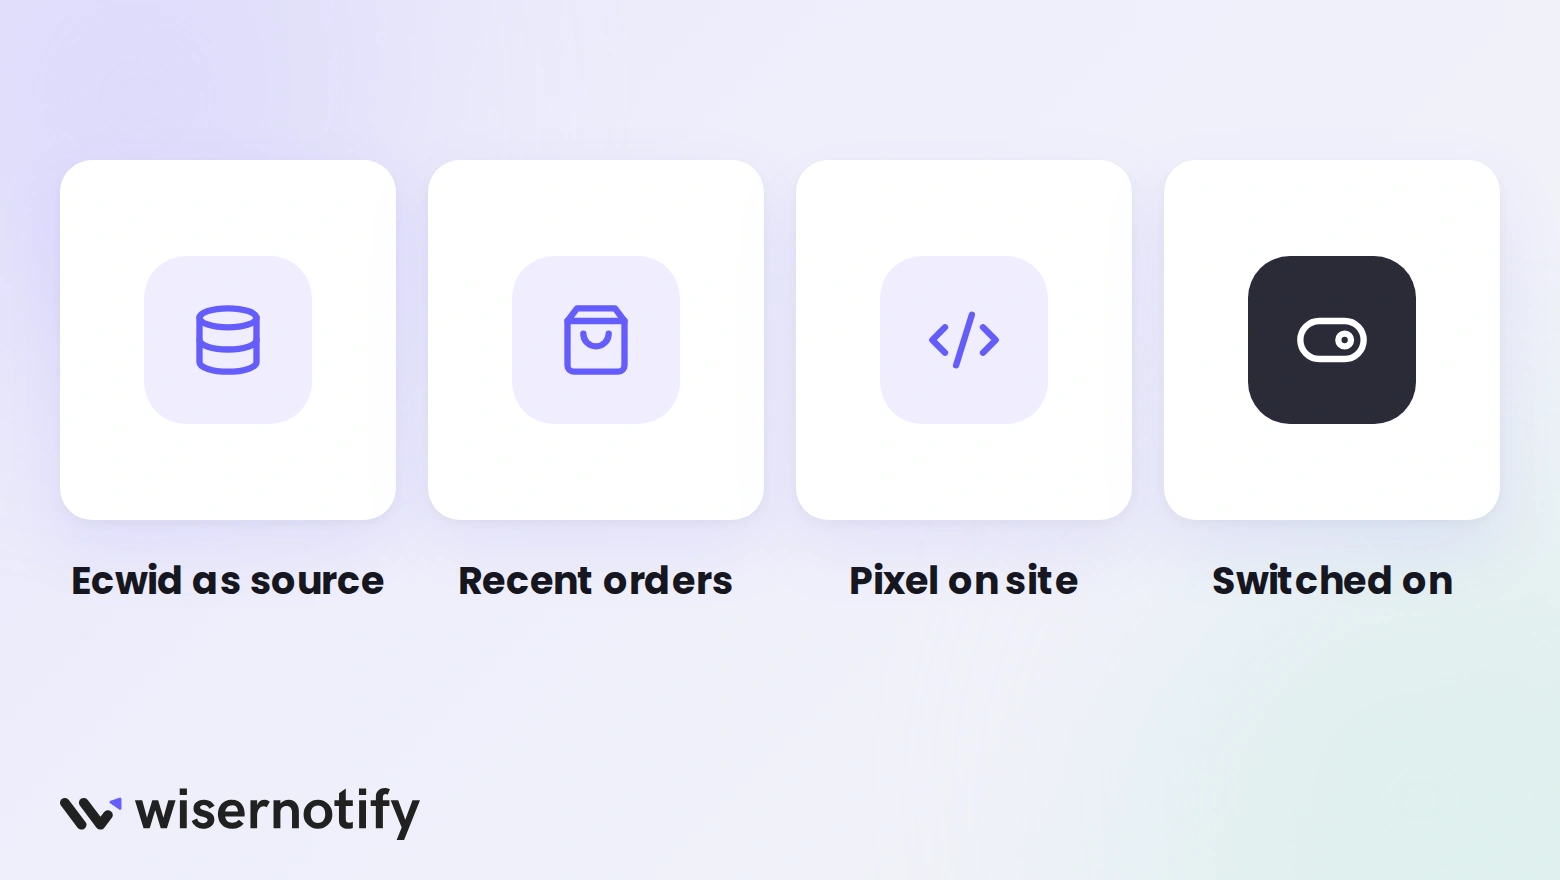
An Ecwid sales popup usually stays hidden for one of three reasons. Ecwid isn’t the data source, there are no recent orders, or the pixel sits on the wrong site.
- Ecwid isn’t the data source. Open the notification’s Data source tab and tick your Ecwid by Lightspeed connection.
- No recent orders. The popup only shows real orders. If your last sale was weeks ago, widen the time range in Data control or wait for new orders.
- Pixel on the wrong site. An embedded store needs the pixel in the header of the site that hosts it.
- Notification still off. Check its toggle in the Social proof notification list.
- Page left out. A typo in a URL condition can hide the popup. Switch to All pages to test.
- Cached page. Test in a private window after every change.
Still stuck? Message support from the chat inside your WiserNotify account, and someone will check the setup with you.
Common Ecwid Sales Popup Mistakes
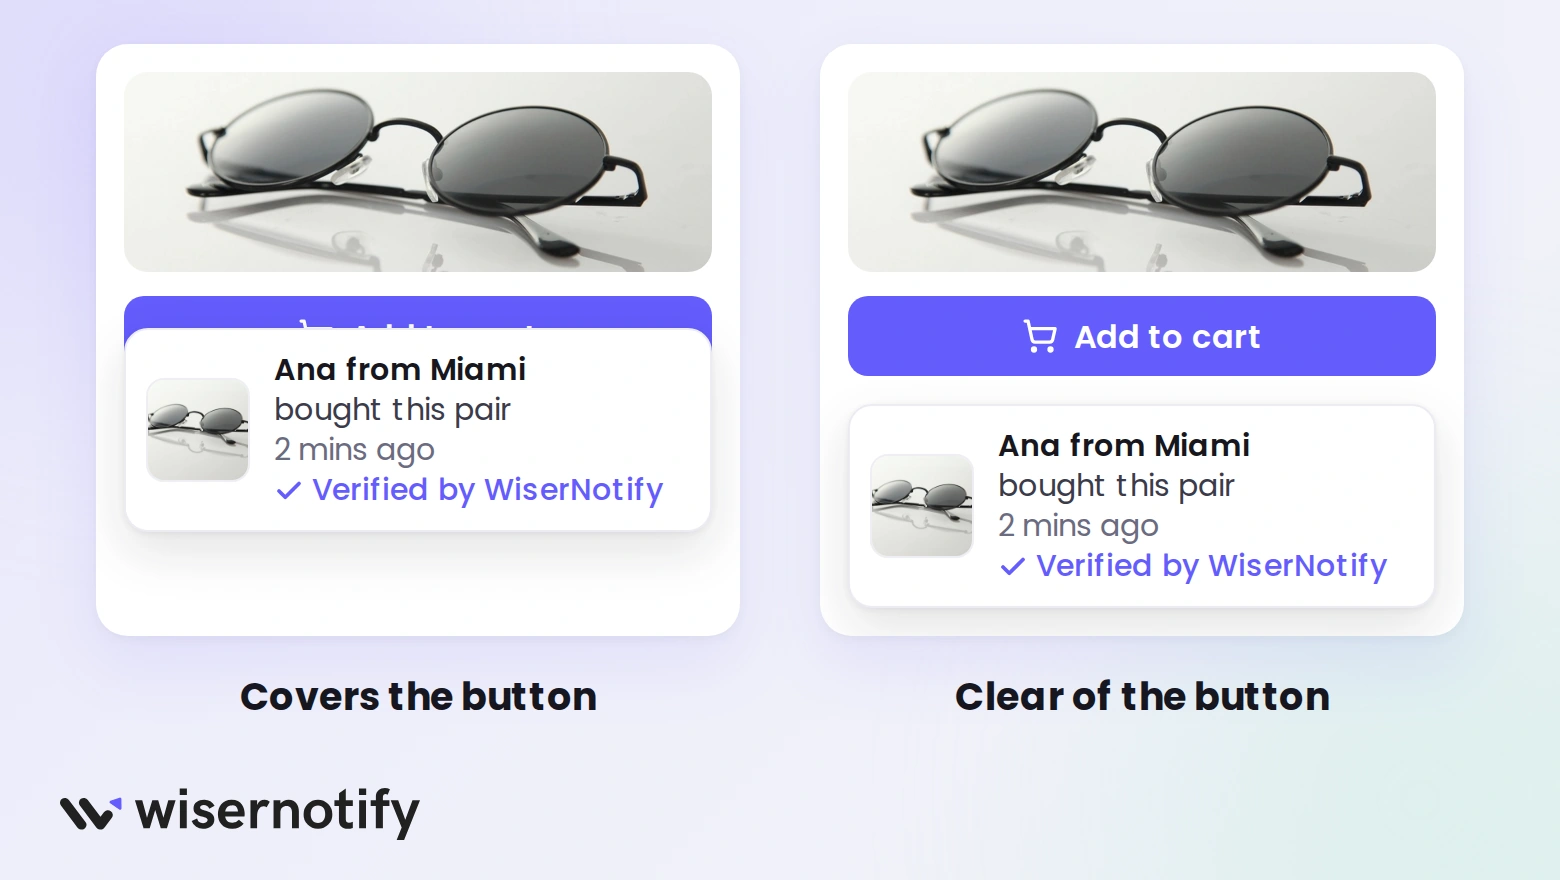
- Too many popups. One every few seconds turns proof into noise. Space them out in Timing control.
- Vague text. “Someone just bought something” reads like a bot wrote it. Keep the first name, city, and product.
- Covering the buy button. On a phone, a popup in the wrong spot can sit right over Add to cart. Check your store on mobile.
- A style that clashes. If the popup looks nothing like your store, people read it as an ad. Match your colors and font.
- Set and forget. Look at the numbers every month and try a new message now and then.
How to Measure the Impact
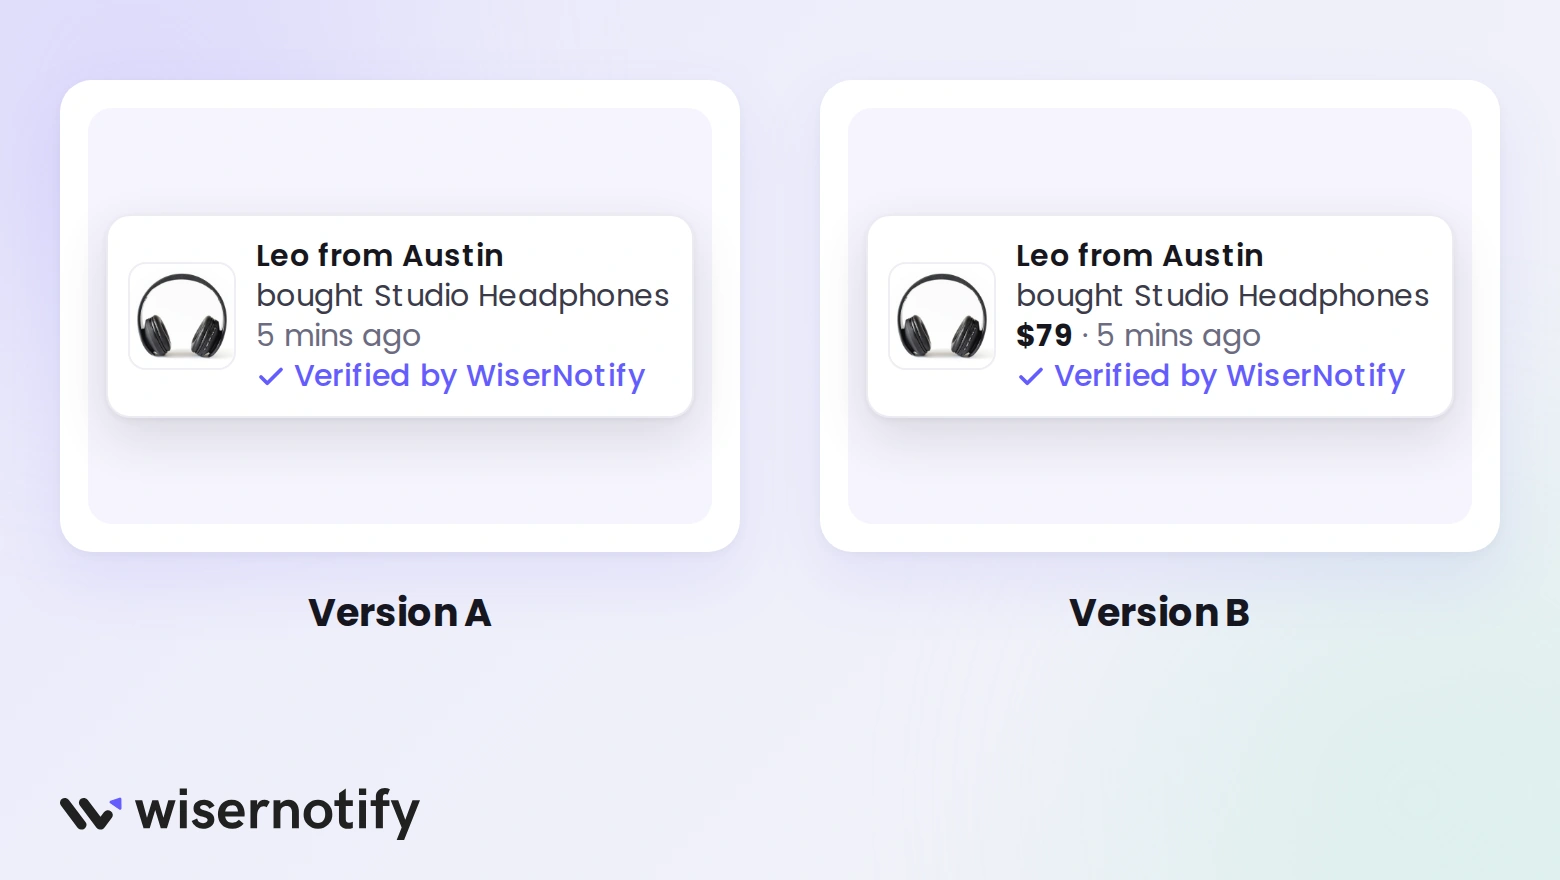
Compare your store’s conversion rate for the same number of weeks before and after the popup goes live, then test one change at a time.
- Open Performance in WiserNotify to see views and clicks for each notification.
- Set up goal tracking so WiserNotify can connect popup views to completed orders.
- A/B test the message, like product name alone versus product name plus price.
- I’d give each test 2 to 4 weeks. A smaller store needs longer to collect enough orders.
Real Orders vs Fake Sales Popups
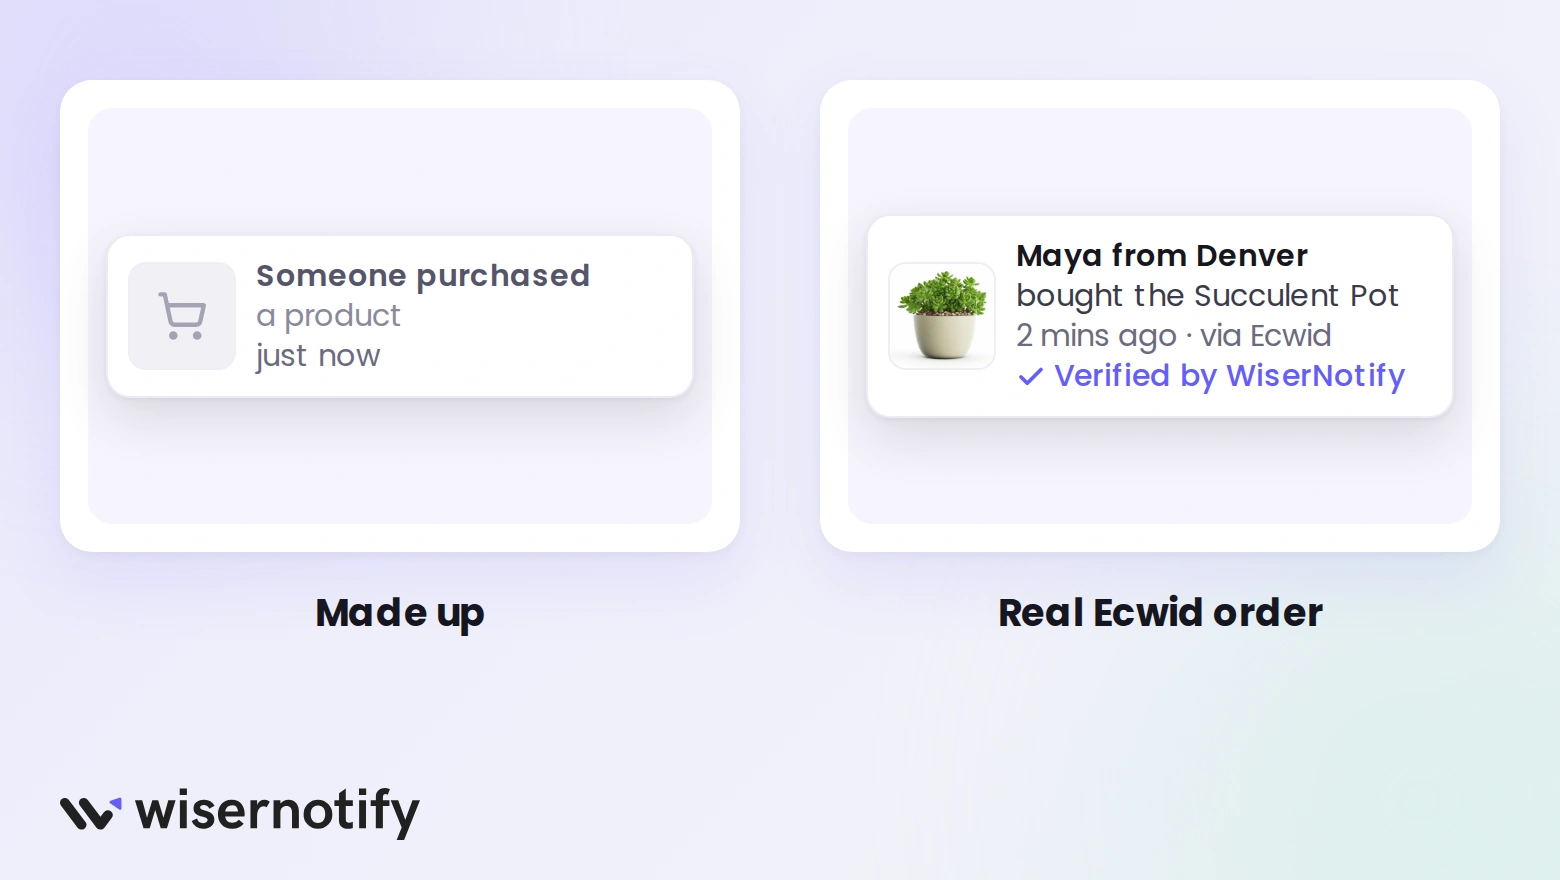
A sales popup only helps when every order in it is real, because fake purchase alerts count as a deceptive practice in the eyes of regulators.
You’ve probably seen free scripts that cycle made-up names. They’re cheap and they’re risky. The FTC’s 2022 staff report on dark patterns lists false activity messages as a deceptive design.
Shoppers notice too, especially when the same names keep cycling. That’s what the Ecwid integration fixes. Every popup comes from an order Ecwid recorded, and the Verified by WiserNotify label shows it was tracked, not typed in by hand.

Boost Conversion Instantly
Add Social Proof & Urgency to your website
Wrap Up
A sales popup earns its spot on Ecwid when it shows recent orders to shoppers who are still deciding. Connect the integration, add the pixel where your store lives, and keep the popup on product and category pages.
Start with Recent Sales, give it a few weeks, then add a counter once orders pick up.
Related guides
Setting up a sales notification popup on a different platform? These related guides walk through it:
Frequently Asked Questions
Does WiserNotify work with Ecwid?
Yes. WiserNotify connects to Ecwid by Lightspeed through a direct integration and reads your orders to show them in sales popups.
Do I need coding to add a sales popup to Ecwid?
No. You paste one pixel script into Ecwid’s header code box and build the popup inside WiserNotify.
Why is my Ecwid sales popup not showing?
Usually Ecwid isn’t selected as the data source, or the pixel is missing from the site where your store is embedded. Check both, then test in a private window.
Will a sales popup slow down my Ecwid store?
The WiserNotify pixel loads in the background after your page loads, so it doesn’t hold up your product pages.
Can I show sales popups on an Ecwid store embedded in WordPress or Wix?
Yes. Add the WiserNotify pixel to that site’s header and add its domain in the notification’s Display settings.
Is WiserNotify free for Ecwid stores?
WiserNotify has a 7-day free trial, then a paid plan billed by WiserNotify, not through Ecwid.

Krunal Vaghasiya is a marketing tech expert who boosts e-commerce conversion rates with automated social proof and FOMO strategies. He loves to keep posting insightful posts on online marketing software, marketing automations, and improving conversion rates.




 Capterra