How to add a website visitor counter to create urgency
 Krunal Vaghasiya|Apr 14, 2022
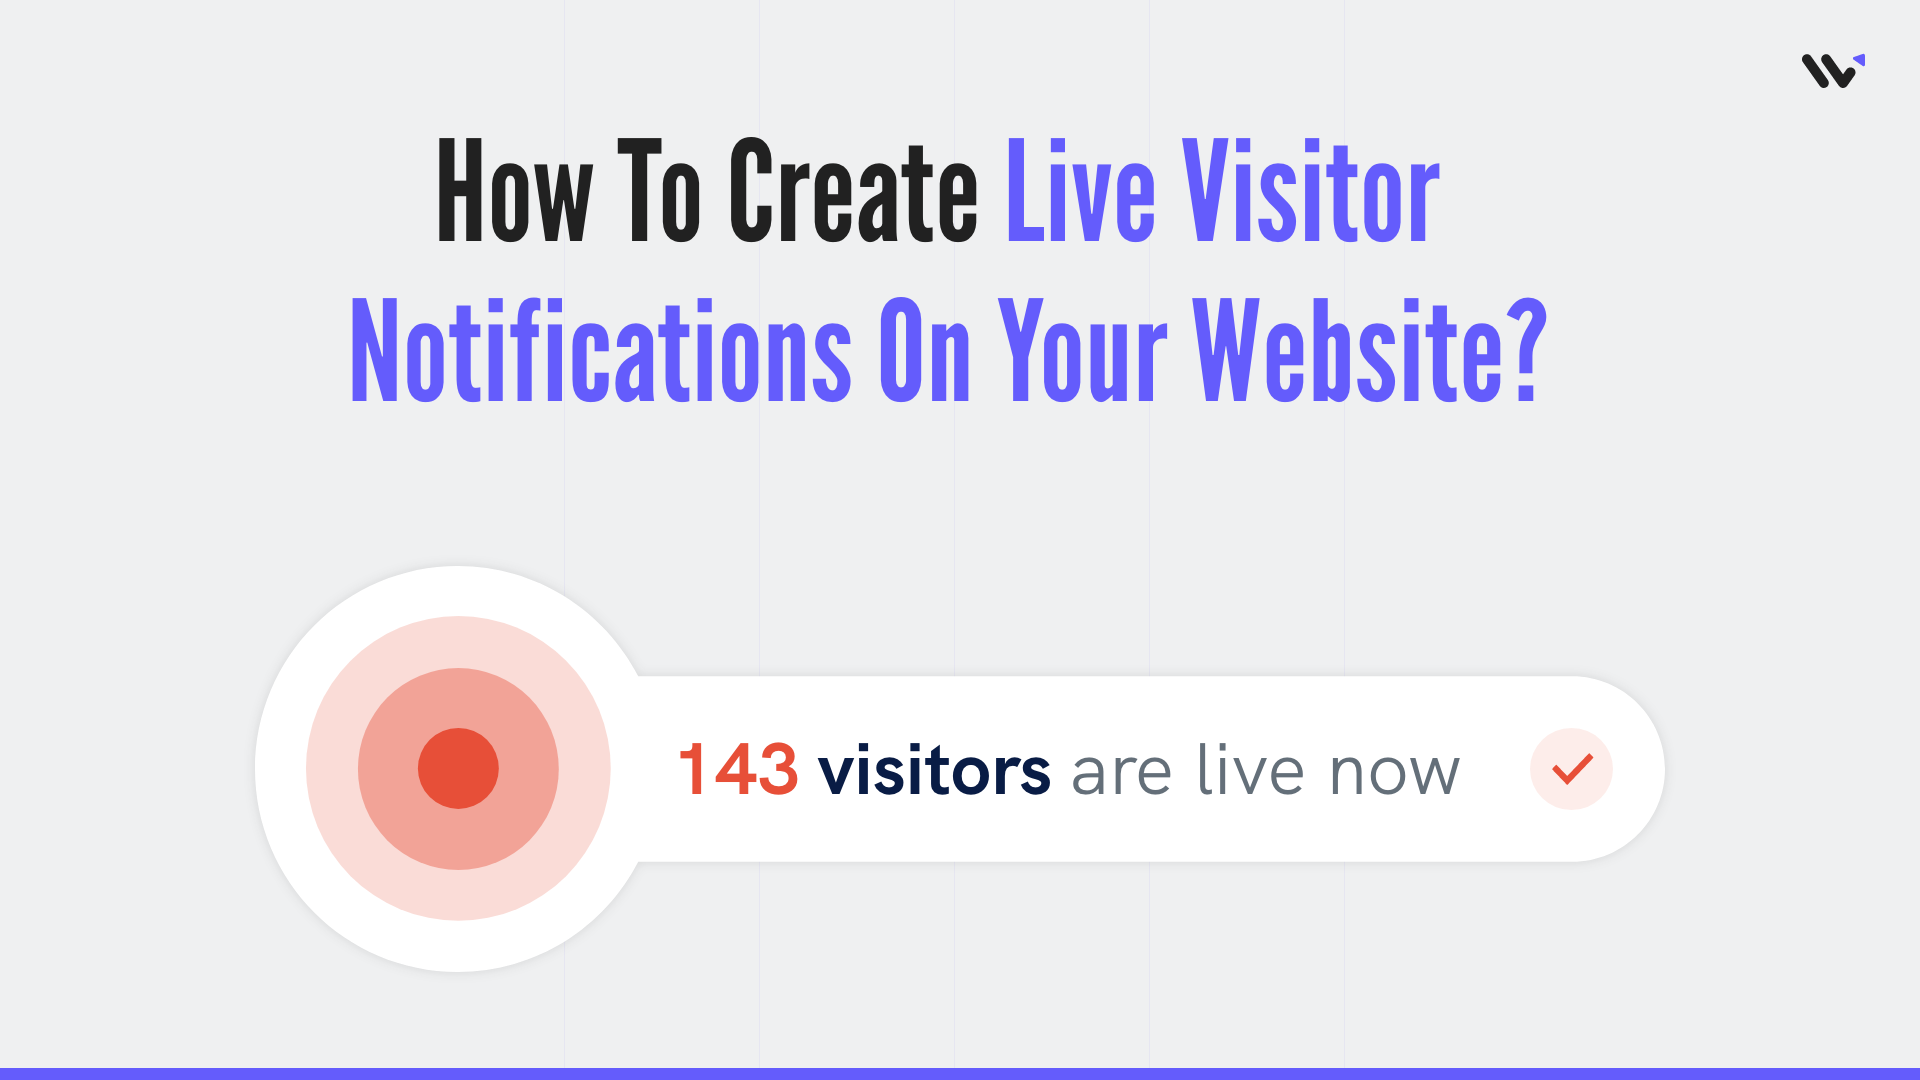
Let me guess: you want more people to take action on your site. Maybe click that “Buy Now” button, sign up, or request a demo.
Here’s one underrated, often-overlooked trick: add a website visitor counter.
And no, I’m not talking about those clunky, 90s-style counters that looked like a microwave clock.
I’m talking about a smart, modern live visitor counter that shows your users: “Hey, you’re not the only one here.”
And that’s powerful.
Let’s break it down.
What is a website visitor counter?
A website visitor counter is a tool that tracks and displays the number of users who have visited or are currently active on a website.
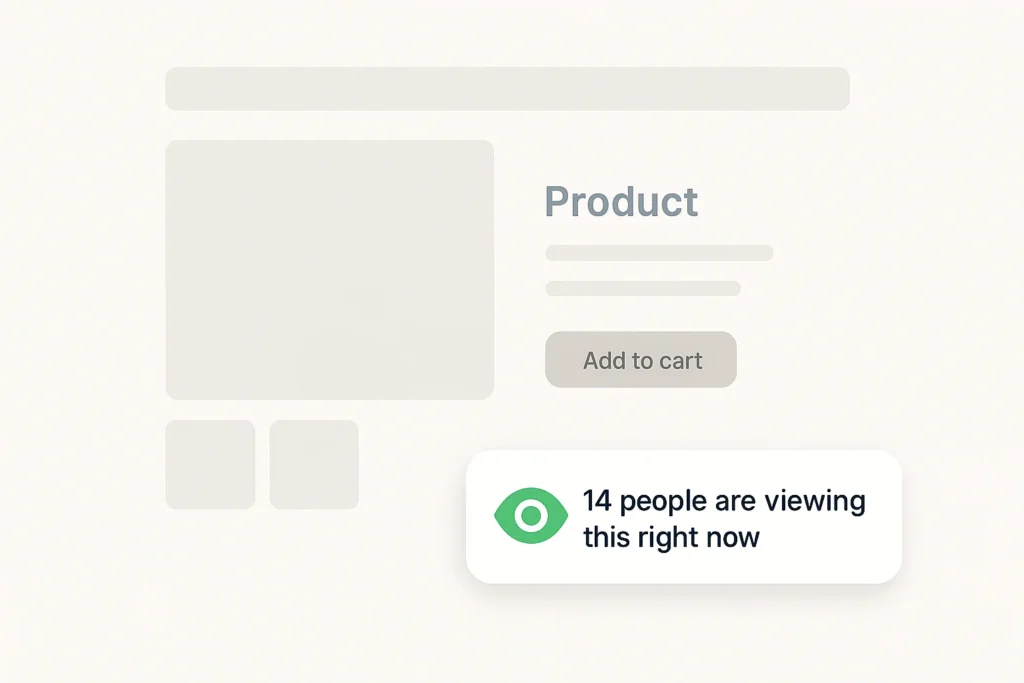
You might’ve seen these on product pages that say, “12 people are viewing this right now.” That’s a live visitor counter in action.
Definition
A small element—a counter box—shows the number of active or past visits. You can display this on landing pages, blogs, pricing pages, or a Google Sites setup.
The goal? To build credibility and push urgency with real, visible data.
Functionality
Here’s how it works:
It collects real-time or recent visitor data using analytics tools or custom code.
It displays that data on your site with a simple plugin, widget, or embed script.
It updates automatically, without you needing to do anything.
No fancy setup. No deep coding required. Just connect it once, and let it roll.
Why It’s Important

Because people don’t want to feel alone when making buying decisions.
When visitors see others exploring your site, it adds social proof. It’s subtle, but it tells users: This is legit. Others are here, too.
That’s not theory, either. One study from CXL Institute found that adding social proof elements to product pages increased conversions by 17.1%.
And let’s be honest, if you see 47 people reading the same blog or checking the same offer, you will feel a little push to stay, explore, and maybe even act. That’s the urgency effect.
So yes, it’s a small box. But it has a big impact.
If used right, it can shift how users behave on your website, which means better results for your business.
A website visitor counter is a simple tool that displays how many people are on your site or how many have visited over a set period.
But don’t let the simplicity fool you, this little counter can do a lot of work:
Build trust: Visitors see that others are also checking you out.
Create urgency: It taps into FOMO. “If others are here now, maybe I should act fast.”
Show momentum: Especially useful for new launches, sales, or product drops.
Whether running a store, blog, landing page, or even a Google Sites project, having visible traffic data boosts your website’s credibility.
How to add a visitor counter to a website
Now that you understand what a visitor counter is and why it matters, let’s walk through how to add one to your website using WiserNotify.
Start by heading over to WiserNotify and creating an account. They offer a 7-day free trial and a money-back guarantee on all plans so that you can test it out with zero risk.
Once you’re logged in, here’s how to activate the live visitor counter in just a few clicks:

Click on “Social Proof” under the notifications menu.
Hit “Add Notification.”
Select “Visitor Activity”, then click “Add” next to the counter option.
You’ll be able to customize the display, choose where it appears on your site, and make it match your website’s design without touching any code.
Want a walkthrough? Here’s a full video showing the whole process, including customization:
And this is just scratching the surface. WiserNotify isn’t just a counter plugin. It’s a conversion optimization tool that increases urgency, trust, and website engagement.
You can watch the full product intro here:
This is smart if you’re serious about turning traffic into conversions. Set it up once, and let it work in the background while you focus on the big stuff.
Other methods to implement a visitor counter
People add visitor counters in a few ways, but most are either too technical, too dated, or just plain ineffective.
Let’s quickly walk through a few:
1. Manual Google Analytics Setup

Yes, you can technically pull live data from Google Analytics, write your own code, and display that data on your site.
But here’s the catch:
- You need a decent grip on JavaScript or use a 3rd-party plugin.
- There’s a delay in real-time updates.
- Not beginner-friendly at all.
This route is for developers. They even hate wasting hours on something a tool could do in minutes.
2. Using Free Open-Source Scripts
Some people try embedding open-source visitor counter scripts from forums or GitHub.
Here’s what usually happens:
- The counter stops working randomly.
- It slows down your site.
- And it looks like it belongs on a 2001 WordPress blog.
Not great if you’re trying to keep things clean and modern.
3. Sketchy Third-Party Services

Some “free” visitor counters ask you to paste code or plugins that:
- Inject ads into your page
- Don’t let you customize the design
- Or worse, track user data in ways you didn’t agree to
That’s a no-go if you care about your site’s reputation or visitors’ trust.
So if you want a clean, easy, and human-friendly way to show a live visitor counter, you’ll want a trusted tool that’s already built to do this right.
Like the one we discussed in the tutorial above, you’ll save time, keep your site fast, and avoid looking shady.
Examples of live visitor counters on websites
Want to see how other websites use visitor counters to create urgency and build trust? Here are a few live examples that do it right.
1. Cookd – Product Page Counter

Cookd uses a visitor counter on its Hyderabadi Biryani Kit product page that reads: “Popular! 195 Sold Recently.”
Why it works:
It’s placed next to the quantity selector, a key decision point.
The “Popular” tag adds social validation instantly.
It’s subtle, branded, and fits neatly into the UI without disrupting the user experience.
This placement pushes urgency when someone asks, “Should I add this to my cart?”
2. Green Pea Press – Campaign Product Counter

On the Native Habitat Project sign page, a note says: “Popular! 38 ordered in the last 2 days.”
Why it works:
This message sits right below the price, so it supports buyer confidence.
The “last 2 days” detail gives it freshness and credibility.
It highlights momentum, showing this isn’t a static listing; people are actively buying now.
3. GrowthMarketer – Lead Magnet Signups

Instead of sales, GrowthMarketer uses its visitor counter to show that “69 marketers subscribed in the last 7 days.”
Why it works:
It adds real-time proof to a lead capture page.
Placement right under the email field helps reduce signup hesitation.
Reinforces that the content is trusted, relevant, and critical for newsletters.
In all three cases, these counters are more than just numbers. They help visitors feel reassured, interested, and confident about taking the next step.
How to display a visitor counter on a website (Best practices)
All right, so you’ve decided to use a website visitor counter. Good call.
But don’t just slap it anywhere and call it done.
Where and how you place your counter matter more than you think.
Let’s break it down with real, in-the-trenches tactics:
1. Place it where action happens

Your counter is meant to build urgency and social proof.
That only works if people see it, and see it when they’re thinking about acting.
The best spots?
- Right above the “Buy Now” or “Book a Demo” button
- On product pages, especially when inventory is limited
- On the pricing page, to nudge users who are hesitating
- In popups that show up during exit intent
Please don’t put it in your footer. Don’t stick it on your Contact page. Put it where it matters.
2. Match the design with your site

Your visitor counter needs to feel like it belongs.
Same fonts. Same spacing. Same color style.
You want users to trust what they’re seeing.
If your counter box looks like a cheap add-on, that trust gets broken fast.
And remember: trust = conversions.
3. Use real-time or rolling numbers (Not Old Data)

Nobody is impressed by your 2017 traffic stats.
The best counters show what’s happening now or recently, like “27 visitors in the last hour” or “438 people viewed this today.”
This makes your counter feel alive and makes the site feel active.
Stats that feel stale are worse than having no counter at all.
4. Keep it subtle (But Visible)

Your counter isn’t the loudest element on the page, and it shouldn’t be. You’re not trying to yell “HEY LOOK AT ME.”
Instead:
- Keep it small and compact
- Use soft colors that contrast enough to be seen
- Avoid flashy animations or blinking icons
Think of it like a background signal, steady and strong. It supports the page. It doesn’t take over.
5. Use it to support decision-making

Some users will be ready to buy but still hesitate. A live visitor counter showing active users builds confidence: “If 53 other people are checking this out right now, I’m probably making a smart call.”
That’s the silent persuasion power you’re aiming for.
According to a Baymard Institute study, 18% of cart abandonments happen because people don’t trust the website. This little counter helps tackle that head-on.
So use it well, use it wisely, and don’t let it go to waste by tossing it in the wrong place or styling it like a banner ad from 2005.
3 Common mistakes to avoid
These aren’t just minor slip-ups; these are the moves that quietly kill the impact of your live visitor counter before it can even work.
And no, these aren’t about bad placements or mismatched design; we have already covered those above. These are mistakes rooted in trust, strategy, and user perception.
1. Faking or inflating the numbers

It’s tempting. You’re trying to drive conversions and think bumping the count a little might help.
But here’s the truth: visitors are smarter than that.
If someone sees “178 people currently viewing this page” but there’s zero activity, no recent reviews, comments, or signs of life, they’ll know something’s off. Once trust is broken, it’s hard to earn it back.
Nothing damages a brand faster than fake social proof. So stick to real data. Let the counter reflect actual traffic. That honesty pays off.
2. Using it without a strategy

A website visitor counter shouldn’t exist just because it’s trendy. It needs to support a conversion goal.
Too many site owners toss it onto their homepage and call it a day.
But think: what do you want the visitor to do next after seeing the counter?
- Click the CTA?
- Scroll down to see more offers.
- Complete a form?
Ensure the counter appears where the decision happens, not just where space was available.
3. Ignoring what the numbers say
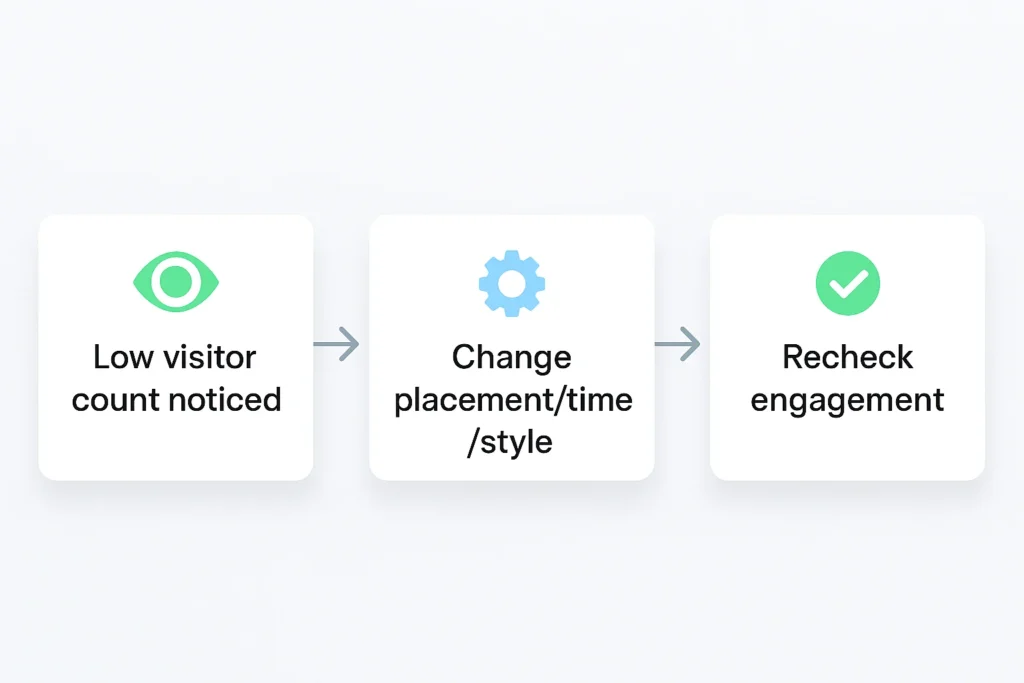
Yes, a counter is a visual tool, but it’s also a feedback tool.
If your visitor count is consistently low, don’t just hide it or ignore it. Use that insight. Ask:
- Are you getting enough traffic to justify having the counter visible?
- Are you showing it at times of day when traffic dips?
- Is it helping or hurting your credibility?
The best way to add a visitor counter isn’t just to display numbers and let those numbers guide your page optimization.
Use the data. Adapt your strategy. That’s how you stay ahead.
Platform-specific integrations
WiserNotify integrates with over 250 platforms to make setup seamless, whether you’re using Shopify, WordPress, Webflow, or anything.
You can browse the complete list on their integration page, but here are some of the most commonly used and trusted platform-specific integrations:
How to Add Wix Site Visitor Notification
Wrap up
A website visitor counter may seem small, but when used correctly, it’s a powerful tool for increasing conversions.
It’s human psychology at work. We don’t like missing out. We don’t like going first.
Seeing other visitors on the site gives your audience permission to act. It adds momentum, urgency, and credibility, without needing to write a single word of pushy sales copy.
So yes, you can try to code something from scratch, wrestle with plugins, or stitch something together from an online forum.
But if you want to get up and running fast, with a visitor counter that works out of the box, looks excellent, and gets the job done, go with a tool that was built for it.
Because once your traffic sees that your site is busy, they’ll be more interested in completing that action you care about.
And that’s the point.
Krunal Vaghasiya is a marketing tech expert who boosts e-commerce conversion rates with automated social proof and FOMO strategies. He loves to keep posting insightful posts on online marketing software, marketing automations, and improving conversion rates.