How to Create Conversion Notifications on Your Website?
 Krunal Vaghasiya|Apr 14, 2022
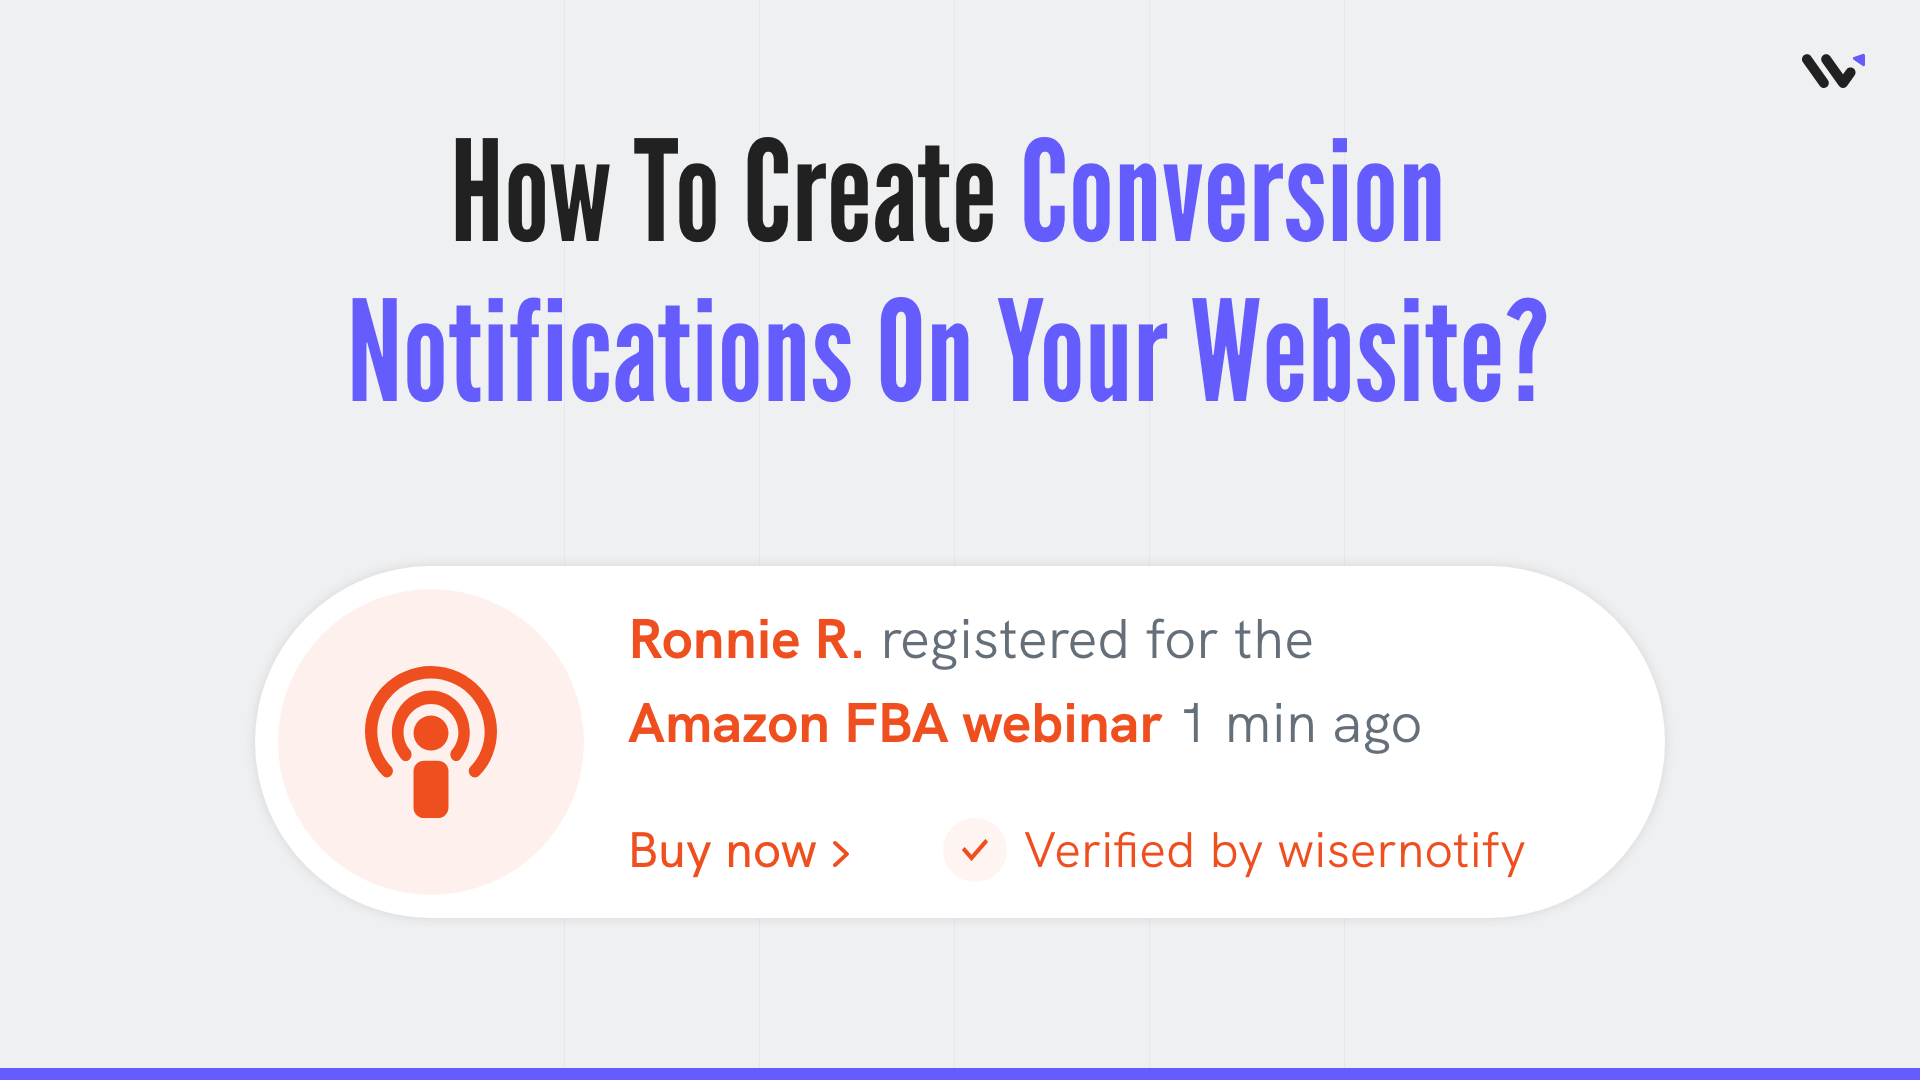
Conversion notifications are an easy way to provide social proof to your visitors. They make visitors feel more confident in their purchase decision and this leads to a higher conversion rate. The conversion notification works by reassuring the customers that they have made the right decision in purchasing something. It is used to make them feel like they are not alone and that other people have also purchased this product or service. It uses psychology to show the visitor that others have been successful in converting to your website.
The conversion notification is an effective tool for marketers because it can be used to influence visitors in making a purchase decision. These notifications are also known as social proof and they show people that other people have made a purchase before them.
Conversions notification lets visitors know when someone has completed an important step on your website, such as downloading your free ebook or signing up for your email list. You can use it to create anticipation, excitement, and urgency among your visitors which will ultimately lead to higher conversions.
This can be done through pop-ups, They are sent to customers when they are about to convert, and the notification will include information about the customer and their purchase. You can also create your own notifications in order to follow up with customers who haven’t purchased anything from your store yet.
Build trust & FOMO
Highlight real-time activities like reviews, sales & sign-ups.


The notification can be customized based on what type of message you want to send, what time, device, etc.
- Show SaaS conversions
- Show ebook downloads
- Show webinar sign-ups
- Show event registrations
And many more….
11 Easy Steps to Create Conversion Notifications for Your Website
2. Once you log in, install the pixel on your website. You can find your pixel code here.
3. Now, click on the “Add Notification” button.
4. You will have different types of social proof notifications and widgets here. Navigate to conversions and in conversions, you will see two different variants.
In the first variant, you can display recent bookings, subscriptions, signups, and free trials.
In the second variant, you can display the total number of conversions within a specific period of time.
You can choose whichever you want to display. Click on “See Designs” and you’ll see different design templates here. Each one has its unique customization options.
5. Select the design of your choice, and you’ll see a pop-up asking name and URL. Enter a name that is easy to remember, and enter the URL where you want to display notifications. You can enter multiple website URLs here. Once you fill in this information, click on “Create & Customize”.
6. You’ll be redirected to the customization page. Here we’ve three sections- Design, Display & Data-Source
7. In the design section, you can change the look and feels of the notifications.
- Change notification designs
- See Preview on mobile and desktop screen
- Change theme
- Edit text, Icon, position, animation, shapes, borders, etc.
- Add CTA and make your notification clickable under the “Click” Option.
- Choose notification delays and display time under the “Data & Timing” option.
You can also remove the design from notification by enabling the “Embed into your HTML” option.
You can remove the design and show only text by using this option.
8. Once you’ve customized the design section, save it and move to the next option by clicking the continue button.
9. The next section is the display section; here, you can set display rules.
- Choose specific pag
es you want to display notifications - Add multiple website URLs
- Choose whether you want to display notifications to new or returning visitors.
- Target audience using UTM source, referrer site, and cookies name
10. After customizing these options, move to the last section- Data-Source.
Build trust & FOMO
Highlight real-time activities like reviews, sales & sign-ups.

Our pixel is capable of capturing data from any form. You can add conditions to capture form data and our pixel will start displaying data in notifications.
Here you can add integrations from where you want to fetch data from. We have integrations with 200+ platforms, including Clickfunnels, Easy Digital Downloads, InfusionSoft, and more.
You can also apply data filters to hide and show data in notifications. You can watch the video on how to apply data filters.
11. Once you complete all these three steps, click on “Finish.”
And turn the notification ON
That’s it. Conversion notifications will be live on your website. You can check it on your website
So that’s how you can create conversion notifications on your website and increase your conversion rate.
Related: 50+ real examples of social proof
We have also created one video on how you can create conversion notifications, you can watch it here.
Boost Conversion Instantly
Add Social Proof & Urgency to your website
Krunal Vaghasiya is a marketing tech expert who boosts e-commerce conversion rates with automated social proof and FOMO strategies. He loves to keep posting insightful posts on online marketing software, marketing automations, and improving conversion rates.