Integrate Custom Webform data to infuse vitality into your website. Picture your website as a dynamic entity, thriving on the pulse of real-time data. Curious about the benefits? Let’s dive in.
Why Showcase Custom Webform Data on Your Website
Elevate user engagement by seamlessly incorporating real-time data from Custom Webforms. Imagine your website as a bustling marketplace, where visitors interact with dynamic offerings. Strategic advantages include capturing leads, understanding user behavior, and enhancing overall user experience.
Build trust & FOMO
Highlight real-time activities like reviews, sales & sign-ups.
Why WiserNotify is Best for Adding Custom Webform Data
Highlighting WiserNotify’s pivotal role as the bridge connecting your website to the dynamic world of Custom Webforms. The user-friendly interface acts as a skilled curator, arranging diverse data pieces effortlessly. Think of WiserNotify as a reliable storyteller, narrating the ever-evolving tale of your website through Custom Webform data.
Benefits of WiserNotify
- Seamless integration with Custom Webform
- User experience enhancement
- Client success stories
- Without slowing down your website speed
- Start with a free plan
- Work with any websites
- Effective ways to show Custom Webform data on the website
- Automatically pull data from Custom Webform
- Live chat supports
Finding Best Social Proof App For Your Business?
Try WiserNotify and build your website’s trust and credibility.
How to Add Custom Webform Data Using WiserNotify
Provide a step-by-step guide, using an active voice to highlight the simplicity of integrating Custom Webform data with WiserNotify. Metaphorically, the process is a choreographed dance between your website and the Custom Webform, creating a symphony of engagement. WiserNotify transforms the integration journey into an enjoyable and seamless experience.
Step 1: Install pixel code on your website. Paste it in your website’s <head></head> tag. It’s the best place to add pixel code.
![]()
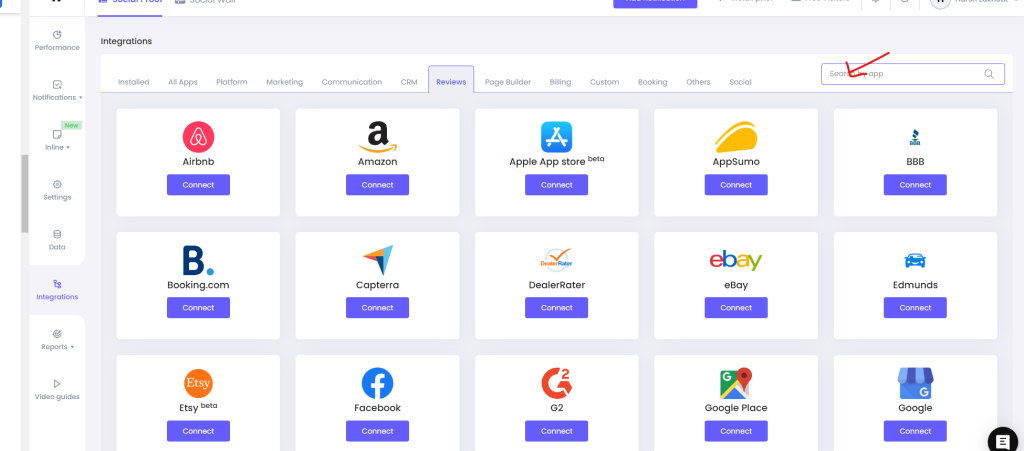
Step 2: Go to the Integration section, find Custom Webform Integration, and connect it.
Integration Section
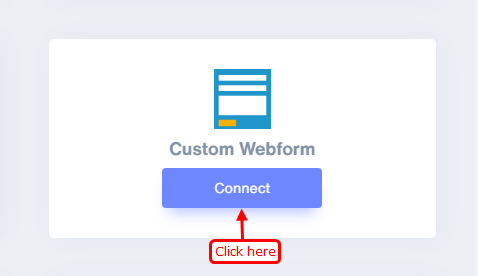
Connect Custom Webform
Step 3: Now select the “Data pick on form submit” option.
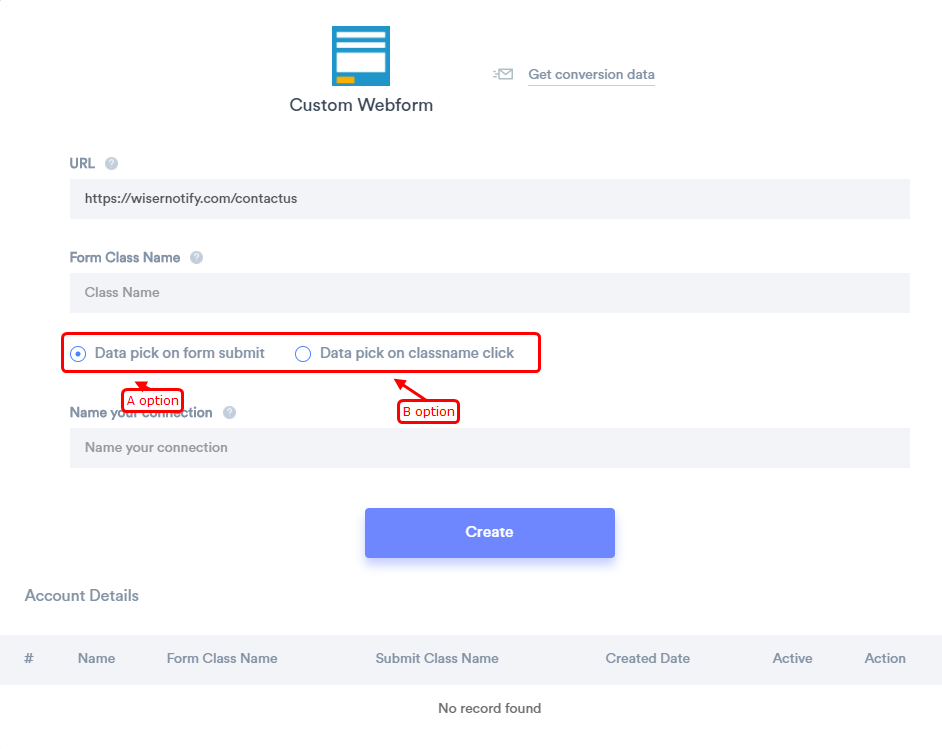
Enter the web URL you want to connect with WiserNotify.
Here are two ways to get the data, “Data pick on Form Submit” and “Data pick on class name click”.
Data pick on Form Submit – Here, you need to inform us your specific form class name
Open the form URL on the browser. Right-click and select the “Inspect or Inspect Element” menu from the menu. Find the form tag and copy the class name. Paste it in the “Form class name” field.
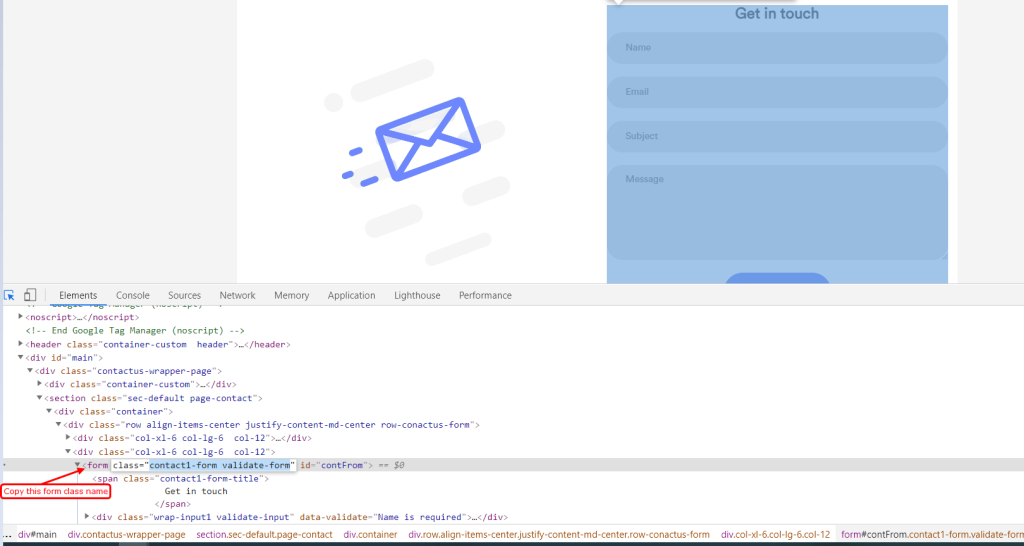
Data pick on class name clicks – Here, you need to inform us of your specific class name click.
Open the form URL on the browser. Right-click and select the “Inspect or Inspect Element” menu from the menu. Copy the link or button class name. Paste it in the “Data pick on class name click ” field.

Step 4: Click on the mapping icon, and then select Keyword and Key/Value.
Click on Mapping
![]()
Select Keyword and Key/Value
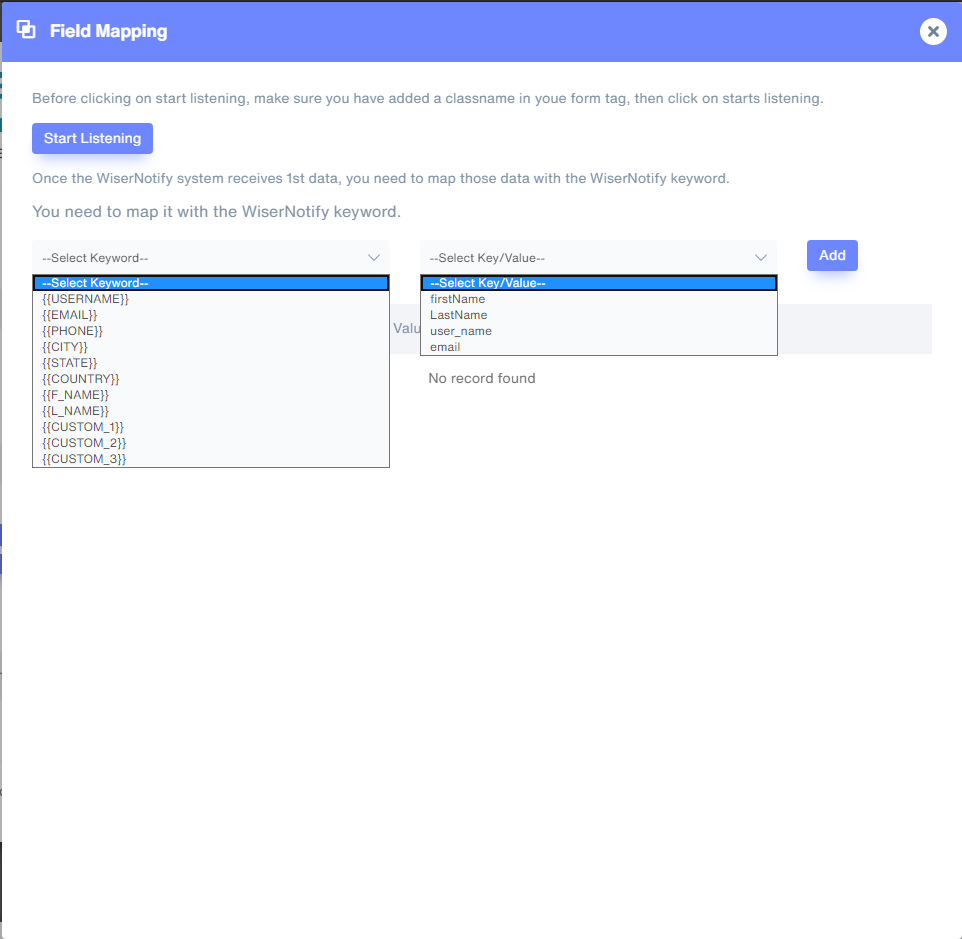
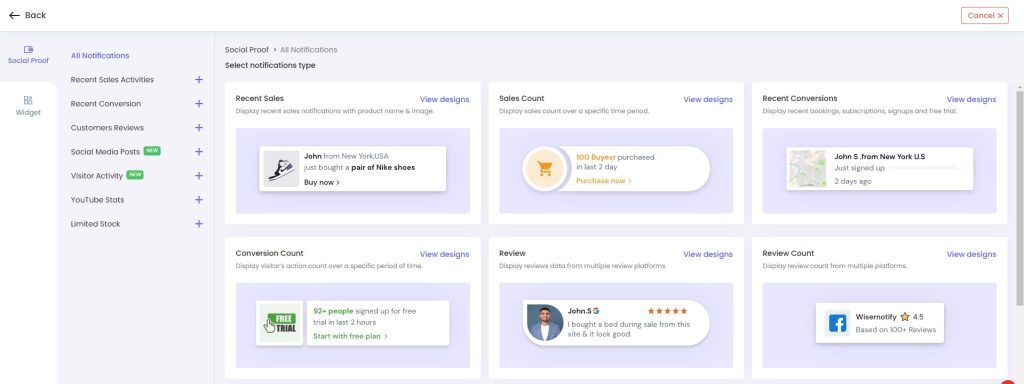
Step 5: Create a post notification of your choice.
Click on “Add Notification” and select the notification template you like the most. Add the website URL and choose Bonusly as the data source of the post notification.
Conclusion
Summarize the key benefits, emphasizing the transformative power of integrating Custom Webform data with WiserNotify. Conclude with a compelling call to action, urging readers to unlock their website’s full potential through Custom Webform integration with WiserNotify.
